Lab599 has just announced that firmware v1.10.04 has been published for the Discovery TX-500 and is available for download on their website.
New: Audio modes
The new firmware adds two switchable audio modes: 1W “Normal” mode and 3W “Outdoor” mode. Although I’ve always felt the audio gain on the TX-500 was excellent, this will give even more granular control of volume levels.
New: Antenna SWR Monitor
Lab599 has also added an SWR monitor and display. They describe it on Twitter:
“This new function will provide you a graph to determine characteristics of the antenna (SWR) in the range of the selected band.”
They shared the image above of the TX-500 display and have already added this along with details in their downloadable user manual.
Many thanks to Pete (WB9FLW) who shares the following announcement from Sunil Lakhan (VU3SUA):
We have a new stock for easy bitx kits. This kit is much improved and has no wiring. The kit is very compact and portable too.
Check out in our store .. Colors available . Black . Black with white panels . Blue with white panels . Add a note for preferred color: https://amateurradiokits.in
I have been a fan of QRP operating since I got licensed in 1983. The sticker in the picture is a joke a good friend who is not into CW or QRP, so I include it in my field pictures.
My interest in ham radio had reached a point I was getting away from the hobby. In 2020, I learned about Parks on the Air (POTA) and Summits on the Air (SOTA). I got hooked on activating parks and summits, and now I mostly do QRP CW, much like Thomas Witherspoon, K4SWL does.
Over the past year, I’ve been refining my antennas and radios in the field. I have different radios and antennas for different reasons, and to just mix it up a bit. Occasionally, I will take my IC-7100 or IC-7300 out into the field with my Bioenno 20aH battery, if I’m not planning to hike or go far from the parking lot, or if the bands are just not cooperating.
Back in November 2020 I had my left knee replaced so I had lots of down time and made an important purchase for field activities – an IC-705. It is fantastic and does everything I want it to do without a lot of wires. I’ve also owned and sold within the past 18 months a Yaesu FT-891 (which I sold when I got the IC-705) and had both the Xiegu G90 and X5105. I would expect one day to get another FT-891 as it has amazing filtering and pulls in weak CW signals better than any radio I’ve owned. The G90 and X5105 are okay, however I was not impressed with the G90 from the start for out in the field. There were just too many wires in order to set up and use with my portable laptop computer if I was taking that along.
The X5105, which I had high expectations for, disappointed me in the fact that storing and using CW memory keying is not user friendly. The nice thing about that radio is, no microphone, no problem, I had some success using the 5105 and got great audio reports.
I’ve been looking ahead to my projected retirement and hopes of through hiking the Appalachian Trail in 2026. Although the IC-705 is an excellent field radio, all mode, VHF/UHF/D-Star/HF/6 meters, I already know for a 7 month hike from Georgia to Maine, it will just be too bulky in my backpack. I have heard really good things about the QCX-mini, however I’m an appliance operator and not good with kit building and soldering.
I saw there are options to purchase an assembled QCX-mini, so I decided to check out a 40 meter radio. It took about 2-1/2 weeks before it arrived at my QTH on Saturday afternoon. I hooked it up to one of my HF antennas in my yard used for my IC-7300 that was resonant on 40 meters. I had to use my Heil headset in order to hear the audio, plugged into the 3.5 mm jack. I used my CWMorse paddle and tuned around the band. I called CQ several times before finally I heard WA0USA in Palm Beach, FL calling CQ. I called him and got a 579 report and he was a solid 599. We chatted for about 10 minutes, and he was running a kW while I was using 5 watts. It felt good to know that I was being heard.
Sunday morning I had time to go activate a local park (K-1418) before some afternoon commitments. I had also recently purchased a link dipole for 20/30/40 meters off eBay from N9SAB. I had tested this antenna out a couple of times last week, so I wanted to pair it with the QCX-mini. I went with little expectations about the little mini, so I also packed my IC 705 just in case I needed it to complete my 10 contacts to have a successful activation. To my surprise, I spotted myself on the POTA page, and in 45 minutes I had a total of 26 QSOs in my HAMRS log! It was amazing and I think I found the perfect combination for true lightweight, portable operations.
I was so impressed with this activation that last night I ordered the 20 meter QCX-mini! These can be ordered from qrp-labs.com and they have a lot of other kits available as well. The kit itself is $55, and I opted to have it assembled ($45) and purchased the enclosure ($20).
This little radio is very user-friendly. I was able to easily access the menus, customize it to my liking, including the paddle, preset frequencies, several stored CW memories, and was on the air calling CQ Saturday evening without seeking out the instructions.
I had mentioned previously about my disappointment with the Xiegu X5105 and not being able to easily store and recall memories. Not a problem at all with this little radio. I enabled the decoder feature just to test it out, and it decodes better than the G90 or X5105, including very weak signals. The size is a fraction of the size of the X5105 and total weight for everything, including the Bioenno 12v 3aH battery is less than 2 pounds and it all stores very nice.
These quick videos were taken this evening before storms hit; that’s why you will hear lawnmowers in the background. I wanted to first show a demo of the receive decoder and how well it decodes even weaker signals:
My biggest complaint about the X5105 was how the memory was next to impossible to use. I do a quick demo how to access a stored message and send it over the air. I also have it set to repeat every 6 seconds:
I did make a couple of changes to the radio setup. I did not like having to use the headset, so I went on Amazon and purchased a mini portable 3 watt mobile phone speaker line-in speaker with 3.5mm audio interface (affiliate link). That cost under $15 and works extremely well. It has a built in charger that plugs into a micro-USB to charge the battery when not in use. I also have a cell phone holder that fits perfectly on my Neewer stand I purchased several months ago for my IC 705, and it sits nice and firm on the table. I may not take that to the field if I’m doing a lot of hiking.
Here are some other details about the QCX-mini from their website:
The Optional enclosure is black anodized extruded aluminium, very sturdy and elegant. The enclosure size is 95 x 63 x 25mm without protrusions. The top and side panels are drilled and cut to match the QCX-mini with laser-etched lettering. The enclosure includes four self-adhesive feet.
Special portable-friendly features:
Small size: 95 x 63 x 25mm enclosure (plus protusions)
Low current consumption (for example 58mA receive current, with 12V supply and display backlight off)
Low weight, 202 grams
Sturdy extruded aluminium enclousre
All-metal BNC short connector, bolted to enclosure
List of features:
Easy to build, two-board design, board with main circuit and connectors, display panel board with LCD; all-controls board-mounted on a press-out sub-board. No wiring, all controls and connectors are board-mounted
Professional quality double-sided, through-hole plated, silk-screen printed PCBs
Choice of single band, 80, 60, 40, 30, 20 or 17m
Approximately 3-5W CW output (depending on supply voltage)
High performance receiver with at least 50dB of unwanted sideband cancellation
200Hz CW filter with no ringing
Si5351A Synthesized VFO with rotary encoder tuning
16 x 2 yellow/green LCD screen
Iambic keyer or straight key option included in the firmware
Simple Digital Signal Processing assisted CW decoder, displayed real-time on-screen
On-screen S-meter
On-screen real time clock (not battery backed up)
Full or semi QSK operation using fast solid-state transmit/receive switching
Frequency presets, VFO A/B Split operation, RIT, configurable CW Offset
Configurable sidetone frequency and volume
Connectors: 2.1mm power barrel connector, 3.5mm keyer jack, 3.5mm stereo earphone jack, 3.5mm stereo jack for PTT, 3.5mm stereo jack for CAT control, BNC RF output
Built-in test signal generator and alignment tools to complete simple set-up adjustments
Built-in test equipment: voltmeter, RF power meter, frequency counter, signal generator
Beacon mode, supporting automatic CW, FSKCW or WSPR operation
GPS interface for reference frequency calibration and time-keeping (for WSPR beacon)
CAT control interface
Optional 50W PA kit
Optional aluminium extruded cut/drilled/laser-etched black anodized enclosure
Just a quick note on the link dipole. It is well made and I had a 1:1 SWR on the CW part of the band, which is perfect. I did put the IC 705 to work when I attempted to work a couple of SSB stations on POTA, and at 7.235 the SWR was only about 1.3:1, so minimal loss. Check out the N9SAB antennas on his eBay site. His shipping is very quick. I took a picture of the balun with the included choke in the package I purchased, and the second picture is the link between the 20 and 40 meters. It works great.
I mentioned my goal about hiking the Appalachian Trail in 2026. I’m sure there will be other multi band mini size radios available by then and I’m hopeful QCX will have one in 5 years for me to use. My goal is to activate summits along the way while taking breaks from the hiking, or at night before calling it an evening. Since I’ll be on the A.T. I’ll also have lots of opportunity to activate POTA as well. Most thru hikers are not hams and they are always concerned about no cell phone coverage. I won’t have that issue and I’m confident I’ll be able to be in touch with other hams throughout the journey.
Thank you once again Tom for allowing me to post on QRPer. I think I finally have a QRP radio that you have not tested or purchased yet. I hope your readers find this short article useful.
73
Scott – KN3A
Scott Lithgow (KN3A) is a regular contributor on QRPer.com. Click here to check out his previous posts.
FYI: I just received this announcement from Chameleon Antennas. They will be sending some samples of these antennas for me to test in the field.
(Source: Chameleon Antenna)
INTRODUCING THE CHA POCKET ANTENNA SERIES – PRE ORDER
The CHA Pocket Series are a series of single and multi-band HF antennas that can literally fit in your pocket when not in use. There are THREE models available: a 40-6 Meter Off- Center Fed Dipole (OCFD), 40 Meter Dipole, and a 20 Meter Dipole.
This series of antennas are designed for ultra-light (all are 7 oz. or less) low power (QRP) portable operation. When running low power, an effective antenna is essential to actually making contacts – these are full-size antennas with full-size performance, but built with lightweight materials and miniaturized components. They were designed to complement the exciting new lineup of lightweight, battery operated, HF portable transceivers.
STARTING TO SHIP AT THE BEGINNING OF SEPTEMBER 2021
If you’ve been following QRPer or the SWLing Post for long, you’ve no doubt noticed that I am a certified pack geek.
I tend to buy high-quality packs from companies that both design and manufacture their products in the USA (i.e. Red Oxx, Tom Bihn, Spec Ops Brand, GoRuck, etc.).
In other words? The packs I evaluate are pricey, rugged, and backed by a lifetime warranty. Their quality is uncompromising and at the top of the market.
In addition, I’ve even helped some of these pack manufacturers during product design and development stages, much like I do for radio manufacturers.
Radioddity contacted me a few weeks ago and asked if I’d be interested in testing a backpack they’ve started selling that’s designed with field radio operators in mind. I checked out the info they sent me and the backpack design did, indeed, look bespoke–or custom–for field radio operators. In other words, it wasn’t a laptop bag merely labeled as a radio bag.
But the inner pack geek/snob in me worried that a $45 mass-produced backpack would only lead to disappointment. This is an area where I have tremendously high standards and feel like I get my money’s worth when I happily fork out $200-450 US for a pack.
Still, it’s difficult to find field backpacks that are designed to accommodate radio gear. So I told Radioddity to send me one–which they did for free (meaning, at absolutely no cost to me).
First impressions
The Raddy backpack arrived in two days (basically, everything from Radioddity seems to arrive within two days with tracking and updates).
My first impression was that the Raddy pack was very lightweight, but then again, I tend to buy backpacks made with Ballistic Nylon or 1000 weight Cordura–i.e. materials that are on the heavier side.
Radioddity mentions that this pack is “dust and rainproof” but then go on to say that it’s ” [m]ade of durable water-resistant polyester fabric with metal zippers[…]. [N]ote it’s not totally waterproof.”
Thus I believe I would classify this pack as water resistant only. I have had the Raddy pack out in light rain and the water seemed to bead up on it. The zipper openings–while covered–have no proper weather seals, but I see where it would be more than adequate for most rains or showers you would encounter on a day hike. I’m not sure I’d feel comfortable leaving it out in the rain for an extended period of time, though. Part of its ability to keep rain out relies on wearing the pack in an upright position.
The outer polyester fabric feels durable and is pleasant to the touch–it’s not abrasive like some heavier grade materials.
Opening up
First thing I wanted to do was open the main compartment to look inside. But first, I had to find the main zippered compartment.
The main zipper is recessed and protected by a rain flap.
Seriously! Turns out, unlike most backpacks, the main compartment opens from the back or shoulder harness side of the pack rather than the front. They obviously used this design to give the Raddy backpack a better operating surface for the rig inside.
Since the zipper wraps around the outside of the top of the straps, but on the inside of the straps where they attach to the bottom, I feel like the straps are always in the way.
Unzipping the main panel is a little awkward when compared with other packs mainly because the shoulder straps feel like they’re a bit in the way. Still, once I got used to this unconventional design, it became second nature to open.
The zippers are metal, but not YYK–zipper pulls are included.
Main compartment
The main compartment opens to 180 degrees if you wish, but sits comfortably at a right angle so that your radio (which will likely live in the pocket mounted on the interior side of the shoulder harness panel) will rest on a padded surface.
There are Velcro flaps on the hinge points of the interior of the pack that you can detach to have the pack open fully.
Rig Pocket
There is one large padded interior pocket that is the obvious choice for most portable transceivers–especially those with a front faceplate like the IC-703 Plus, Yaesu FT-891, Xiegu G90, etc.
This main pocket has openings at the back corners so that the rig’s power cord, coax line, and accessory cords can all be managed within the pack if you’d actually like to operate from the pack. Admittedly, I’m not certain I’d leave cables and cords attached to the back of my transceiver during transport, though, as it could cause some stress at the connection points on the back of the radio; stand-offs and/or right angle connectors might help with this, however. The back of the pocket is padded and so is he floor of the backpack, so your rig should be otherwise very protected when the backpack is placed on the ground.
The main internal pocket also has two elastic straps designed to hold the radio in the pocket during transport. I think this is a great idea, however, I’ve found in practice they quite easily slip off all but the largest field radios. Speaking of which, the largest field radio I own is the Mission RGO One which is ever-so-slightly too large for this pocket. I assume similarily-sized radios like the Ten-Tec Eagle and Elecraft K2 would not fit.
I wish the pack had a frame sheet and the main pocket had at least one compression strap attached to it to hold a radio in more firmly. The pocket is large enough that even my IC-703 Plus slides around inside.
Of course, this main pocket could also hold a laptop or tablet.
The main interior pocket is not well suited for “blocky” transceivers like the Elecraft KX3, Icom IC-705, or Xeigu X5105 for example. Although the pocket can hold most of these, they would simply fall to the bottom and could not benefit from the full dimension.
Battery pocket
The second large padded pocket inside the Raddy backpack is ideal for holding a battery, ATU, or even the “blocky” transceivers mentioned above. I’m calling it a “battery pocket” but in truth it’s obviously designed to also hold transceivers.
This pocket is shorter and has one elastic strap (I’d prefer a compression strap) with a Velcro attachment to hold the contents inside. It’s attached to the front panel of the backpack and when the backpack is zipped closed, this pocket and the rig pocket fit side-by-side.
When I’m carrying the Icom IC-703 Plus in the Rig compartment, I place my 15 Ah LiFePo4 battery in this compartment.
My Elecraft KX3
If I’m carrying the Elecraft KX3, I place it in this battery compartment and my tablet and clipboard in the main pocket.
My Icom IC-705
Like the main rig compartment, there are openings at the bottom corners to allow cable management and routing. I’m not so sure how convenient or practical it would be, however, to operate a radio from this particular internal pocket.
The LDG Z-100 Plus ATU tucked in the battery pocket
Mesh pockets
There are also two internal mesh pockets: one attached to the front panel and the other attached to the large rig compartment pocket.
There pockets would be ideally-suited to hold small cords, a key/paddle, and possibly a small hand mike.
While the top of each pocket has an elastic band, I would not trust these open pockets to hold small items like adapters. They could easily fall out if the backpack were turned upside down.
In addition, if you have heavier items inside, the pocket may sag a bit and look more like an accessories “hammock.”
Exterior front pocket
There’s also one large, flat exterior pocket on the front panel of the Raddy backpack. This pocket might be easy to overlook if the zipper is tucked inside.
The zipper is centered and oriented vertically. When opened, there’s a surprising amount of room inside, and all sides of the pocket are padded.
The opening isn’t large enough to fit my main clipboard (which is fine, because I would store it inside the main compartment), but it is large enough to allow one to store a tablet, notepads, pens, cables, etc. inside.
While the zipper opening has nearly overlapping seams which should help shed water, the vertical orientation of the zipper would potentially allow for heavy rains to penetrate the zipper opening, especially if that front pocket was bulging with gear. This is why conventional packs tend to have a horizontally-oriented front pocket zipper and rain flap over the zipper.
USB access
There’s also an USB access port on the pack that allows for a USB device to be plugged in on the outside and tethered to a device or battery on the inside. I assume this would mainly be used as a battery pack connection.
Interior USB extension cord
This would be handy during travels, but I doubt I would ever use it in the field.
Comfort
I’ve used the Raddy backpack on two short hikes and find it, overall, a very comfortable backpack. I do find the harness a little on the small side, but I have broad shoulders. For those with slightly smaller frames, I think this would work well.
The carry handle is attached across the top of the backpack/shoulder straps.
I also find this a bit odd, because if the pack is fully-loaded and heavy, it puts a lot of strain on the attachment points of the handles and at an angle–meaning, the double stitching isn’t providing the strength it otherwise could if the pack weight was distributed evenly on the top of the backpack body instead of the shoulder harness.
The back of the pack is padded with a mesh that allows for your back to relatively cool as you hike.
Nice touch! A strap you can use to secure the pack around the handle of rolling luggage.
Overall, it’s a very comfortable pack, although I wish the shoulder straps felt more robust and I wish the main handle wasn’t attached to the shoulder straps.
Low profile
One real bonus with the Raddy pack is that it’s low profile, has an “urban” look–in other words, fairly nondescript. This pack does not look like a radio manpack, nor is it tactical in design. If I were to take this through a large city, no one would assume this pack was full of radio gear. It looks like a normal, modern backpack.
There’s real security in a low profile, stealthy design.
In addition, other than the front vertical pocket, this would be an incredibly difficult pack for a pickpocket to steal from..
Quality
The Raddy backpack is designed to hold up to 44lb/20kg of weight. I’m not sure I’d ever need or want exceed 20-30 lbs with it myself.
Radioddity also backs this pack with an 18 month warranty. Exceptional. Radioddity told me they would offer a replacement if any stress points on the pack fail during that warranty period. They also told me they’d handle any warranty replacements within 1 business day. Having worked with Radioddity now for a year, I do believe they’ll stick by this quick response/handling time.
Summary
Is the Raddy Multi-function Backpack for you?
Keeping in mind (again) that I normally review packs at the high end of the market, I’m not familiar with with what would be expected at this $45 price point.
What I can say is that if you’re looking for a compact pack that’s designed to hold and protect radio gear, this is a good option and certainly one of the most affordable I’ve seen on the market.
This pack would best suit the casual park activator that doesn’t need to pack in a lot of extra supplies like field safety gear. It’s designed to only hold a radio, battery, ATU, cables, and a few other accessories–I’ve configured it with a number of radios and found that I can easily pack an entire QRP station inside.
I would use this pack for drive-up parks and summits, and especially for urban outings-. This would be a great pack to wear into a park in or near a city where I wouldn’t want to appear as if I’m a radio operator preparing for field combat scenarios. You could wear this pack into a historic POTA site and politely ask staff if you could activate the park with the low-profile gear you have inside. It would be much less intimidating and conspicuous than a tactical or large hiking pack.
This would also be a great pack if you plan to fly and wish to keep all of your radio gear in a carry-on. Being a compact backpack, the size should easily fit the description of a “personal” carry-on for most airlines (always check before departing, though, as these dimensions will vary by airline). With your gear loaded, it’ll might appear “intentional” and more normal as you go through Airport security as opposed to your gear being simply tossed in a suitcase.
The Raddy pack is not perfect: I would like something more rugged, with a better suspension system and even better weather-proofing around the zippers. I’d also like more rigid padded pockets inside with adjustable straps. I assume all of these things, though, would substantially add to the cost of the pack and might be overkill for most casual operators. While I wouldn’t choose this pack for a 10 mile round-trip hike to a SOTA summit, I would choose it for some casual picnic table operations and, again, for travel.
I love the fact it can be configured so that you can operate directly from the backpack. You could simply open up your pack in the field, connect the antenna, and operate from the open backpack.
I do like Radioddity and find that they stand behind their products. I’m happy to see that they’re offering a competitively-priced radio pack to supplement their product line. I hope other retailers and manufacturers will do the same.
PS: It’s my policy that if I receive a free review product from a retailer or manufacture–and they don’t want it returned–I either use it or give it away. Over the years I’ve had the pleasure of giving away review gear to readers and subscribers who I knew would appreciate it. In this case, I know exactly who I’ll be giving this pack to because she’ll give it a thorough workout and is need of a compact radio pack! Maybe I can even convince her to write her own review in a year or so–? We’ll see!
Many thanks to a number of QRPer readers who note that WA3RNC has recently introduced the TR-25 CW Transceiver Kit and announced the upcoming TR-45L QRP Transceiver Kit.
Here is a compact but powerful 2-band CW transceiver kit that uses no tiny pushbuttons, and without those seemingly endless and hard-to-remember back menus. There is a knob or a switch for every function!
Size 5 ½ X 3 ¼ X 1 ½ less protrusions, weight 10.6 Oz
Full band coverage of 40 and 20 meters
About 10 watts output with a 14 volt power supply
5 Watts minimum output with a 10 volt supply
4 Watts output with an 9 volt supply
Optimized for operation from 3 series-connected 18650 Lithium cells
RIT tunes + and – 5KHz
Blue OLED display reads frequency to 10 Hz and RIT offset
Built in Iambic keyer is adjustable 5 to 35 WPM with front panel control
Separate jacks for straight key and paddles; Always ready for SKCC contacts
Operates on 9 to 14 volts, < 90ma receive, about 1 Amp Xmitt at 10 volts
Selectable tuning resolution steps of 10, 100, and 1000Hz
Low battery indicator with internal adjustment 9 to 12 volts
Front panel adjustable RF gain control
Front panel TX power control; Adjustable from 0 to 10 watts (@14V)
Rugged TO-220 FET RF amp can deliver 5 Watts key down for 5 minutes
Signal quality blue LED, RIT warning orange LED, Low battery red LED
More than enough audio to fill any room with an external speaker
Excellent receiver sensitivity with MDS of -132dBm (0.06 microvolt)
Very effective receive AGC prevents ear damage with strong signals
Transmitter harmonics and spurs -58dB, meets FCC specs
CW sidetone is the actual transmitter signal as heard by receiver
Match the received signal tone to the sidetone for perfect zero beating
Sharp IF filter; Better than 300 Hz at the -6dB point, plus 700 Hz audio filter
Over 200 machine placed SMT parts, and about 55 user installed parts
All critical circuits are factory pre-aligned and calibrated
No endless “back menus”; There is a control or switch for every function
Options include pre-wound toroid coils, precision optical tuning encoder, and complete factory assembly
Price is $250 or you can add pre-wound toroids for $18, a precision optical encoder for $30, or for $310 you can purchase this kit fully assembled and tested. Click here to check it out.
TR-45L is a 4-band 5-watt CW transceiver covering the 80-75, 40, 30, and 20 meter bands.
Full band coverage is provided, with the transmitter optimized for the CW band portions.
The receiver is provided with both narrow and wide band IF filters, and CW and SSB detectors.
An illuminated front panel meter shows “S” units on receive, and power output (forward or reverse) while transmitting. The meter also will display the battery state of charge.
A “High SWR” warning indicator will illuminate if the antenna SWR exceeds about 2:1.
The transmitter power output is adjustable from less than ½ watt to 5 watts with a front panel control.
RIT is provided to adjust the receive frequency up to + or – 5 KHz from the transmit frequency.
Two VFOs for each band are provided with recallable memories.
A built-in keyer is adjustable from about 5 wpm to 35 wpm with a front panel speed control.
Separate straight key and keyer paddle inputs are provided on the front panel.
A front panel adjustable sharp notch filter is provided to null out interference.
A front panel receiver RF gain control is provided.
Operates from a 12 volt nominal power source requiring up to 1.3 amperes on transmit, and about 130 ma on receive. A front panel power on – off switch is provided.
Tuning speed is easily settable from 1 Hz to 1 KHz per step.
A selectable dial lock is available to prevent inadvertent frequency changes.
There is a knob or switch for every function – no confusing back menus!
Size 8-1/2” wide, 5” high, 3” deep Weight about 2.8 lb with Internal Batteries
Beta testing is continuing…73 de WA3RNC
No pricing or availability has been noted yet.
I life the look of both of these kits. I love the fact that you can buy pre-wound toroids as this is often one of the more complicated parts when building radios. Also, I’m pleased to see that all SMD components are pre-installed and that all critical circuits are factory pre-aligned and calibrated. That will make this kit accessible to a much larger kit building audience.
Looks like our Prayers have been answer! 160 – 10, 5 Watts, single side band using a new transmitting technique , no more DSB!
All for 80 bucks (includes 3 band modules)
The v. III version debuts a novel firmware scheme for our Si5351A/MS5351M VFO which allows a move away from DSB transmission to SSB, by a new process we are calling AFP-FSK (Audio Frequency Processed-FSK).
Many thanks to Don (W7SSB) who notes that the TX-500 has now received CE certification. Lab599’s European distributor, PileUpDX has posted the following message on their website:
We are happy to announce that the long process with CE certification of the TX-500 transceiver from Lab599 has finally been completed. This week the notified body contracted to do testing and evaluation issued their certificate proving that the TX-500 meets the requirements to be sold on the EU market.
Now the next step is to complete the necessary documentation and marking including CE labelling of the radio itself and its packaging. Meanwhile the production of the first batch of transceivers for the EU market is ongoing and estimated to be completed in middle of June. If everything goes according to plan we should be able to start fill first batch preorders sometime during the end of June or beginning of July.
If you are in the first batch of deliveries and have not prepaid your TX-500 we will shortly contact you with payment information.
I’ve gotten so many messages from readers and viewers in the EU and UK who have been eagerly awaiting TX-500 availability.
While this doesn’t mean immediate availability–obviously with an estimated first batch shipping end of June or early July 2021–it’s my understanding that CE certification has been a frustratingly slow process due to C-19 and a complete bottleneck for the manufacturer and distributor.
I’ve also been asked which radio is “better” and which one I’d purchase if I could only buy one.
To address these questions, I decided to make a YouTube video where I outline some of the pros and cons of both radios, and compare them in terms of features especially with regard to field use.
Many thanks to Frank Lagaet (ON6UU) for sharing the following guest post:
The EGV+ Three Band Transceiver Kit
by Frank Lagaet (ON6UU)
Another EA3GCY kit has seen daylight. The EGV+ is ready for you all.
It was beginning 2021 I got word a new kit from EA3GCY was ready and distribution could start. After a successful build of the DB4020 I did not need much time to decide to buy this kit, a week later the kit arrived at my QTH. As weather was good I did not start immediately building but then winter kicked in, with snowfall and frost, perfect time for some quality time and building the kit.
What do you get ?
The kit has a general coverage receiver from 6 to 16MHz, it has a keyer built in, has RIT without limit, requires only 0.25A on RX and smaller than 2A on TX. Dimensions are 18x14cm and weight is 0.3Kg. It is CW only, able to produce 8W on 40 and some 5-6 on 30 and 20. The kit has an AB class amplifier. Spurious is below -50DBc. The receiver is a heterodyne type balanced mixer, sensitivity is 0.2µV minimum and the CW filter is some 700Hz wide, the AGC is on audio. Furthermore the transceiver is equipped with both output for loudspeaker as for a headset or earbuds.
The kit arrived in a brown envelope and in that envelope I found a well-packed packet of plastic bags and the printed board well packed in bubble wrap. Around that another layer of bubblewrap. Safe!!
All plastic bags were checked, all needed stuff was there, super, well done Javier.
All components were installed in about 10 hours “relax max style”, if you have built some kits already you can easily do this one, all elements are far enough out of each other, the board is not overcrowded at all. Some attention is needed when soldering the IC’s and display but even that is a piece of cake. Be careful when installing the SI5351 module.
Winding the toroids, just follow what is in the manual, it is not that hard to do, I don’t understand what many find so difficult. Just take your time and don’t rush into it.
I got the transceiver up and running quite quick. I didn’t install a speaker in the cabinet but decided to go for a transceiver where no speaker is in. If I want to use it on SOTA or GMA I don’t need the extra weight and can take earbuds with me. So I installed the speaker connector on the board.
I made connections towards the CW key and CMD push button with jumper cables which fit exactly on the headers Javier supplies, a little glue to keep them in place is also added afterward. For easy operation I mounted the CW key connector and CMD pushbutton on the front of the transceiver.
Do to be able to withstand high power nearby stations, I mounted the EGV+ in a homemade box which is made of printboard. The box should be a Faraday cage to keep all QRM out. If you buy a box, buy one in metal. I added a laminated front and back which make the transceiver look kinda cool. Now you can also buy a box from qrphamradiokits.
Alignment
The alignment is done on 40 meters: crank up the volume and start turning the 2 coils (L1 and L2)to maximum volume. Be careful to handle these with caution and don’t use metallic screwdrivers. Connect an antenna after you’ve done that and do the alignment of the coils again for maximum volume. Find a station on 40 and redo the alignment once more. You should already have good results now.
P1 Set sidetone level to your liking.
P2 Set the hangtime of the relay after you’ve been on air–fast fingers will need a quick release. Set this to your liking.
P3 Connect a power meter between a dummy load and the transceiver, set power on 40 to some 8 Watts. Measure on 30 and 20 meters, you should find some 6-7W there. Don’t set the power to full if you want a long life for the final in the transceiver. Mine is set for 6W on 20, resulting in some 7.5W on 30 and some 8.4W on 40. I think I will reduce even more.
P4 Set to max, it is the RX-attenuator.
P5 Don’t pay too much attention to the signal meter, mine is set at 6/8 of the potmeter’s range. It is only an indication. If you don’t want the S-meter then you can do a start-up sequence with the tuning knob.
These are in fact the alignments you need to do inside the transceiver. You should also check Xtal calibration and BFO, these are settings which you need to do in the set-up. Don’t forget to write all down when you have maximised these settings. If you do a reset, all these values are erased too so be carefull.
The complete CW 3 bander
Well, you get a 3 band transceiver which you build yourself, it has RIT and XIT, has 4 memories on the KB-2 keyer, speed of CW can be set between 0 and 50WPM and you can set the KB-2 as a beacon which can be handy too. The EGV+ provides you with 3 bands which are almost for certain insurance for QSOs when going on SOTA, GMA or POTA.
You may have noticed some resemblance with the DB4020. You are right as some parts are the same on the board. The designer worked on the same platform to make two completely different transceivers. The result is twice the fun for kit builders.
I made a box myself since, at the time of ordering, there were no boxes available, here’s the result.
The naked printboard transceiver.
After adding a laminated front to the trx, it looks now like this. You can see it is not made professionally but I like it.
The paper which is between the plastic was first cut out for the display before placing it in the plastics so giving an extra protection to the display.
I have also made a retractable stand for it, when folded back it is next to the bottom of the transceiver, when folded out the stand is under the front of the transceiver, the retractable stand is also made out of printboard.
It’s an easy-to-make stand–take some old printboard and solder it together. The pictures explain it all, I think.
Meanwhile, I already made a lot of QSOs with this small (16 X 20 X 6 cm) QRP transceiver. The power out is better than expected and even reduced so all bands are within QRP regulations.
Finally, I’d like to say that I’m not sponsored to make this kit, I don’t have any ties with the kit producer, nor do I gain money with building it. If people would like to have this QRP kit built for them I’m willing to help out in populating the board and aligning it. A ready made box is available with qrphamradiokits. This also stands for the DB4020 which I made earlier.
The kit comes for 125€ without shipping costs. Many European countries will have no shipping costs at all. The enclosure comes for 50€ all included. This means you have a complete 3 band radio for about 200€. In my eyes, this is a pretty good deal.
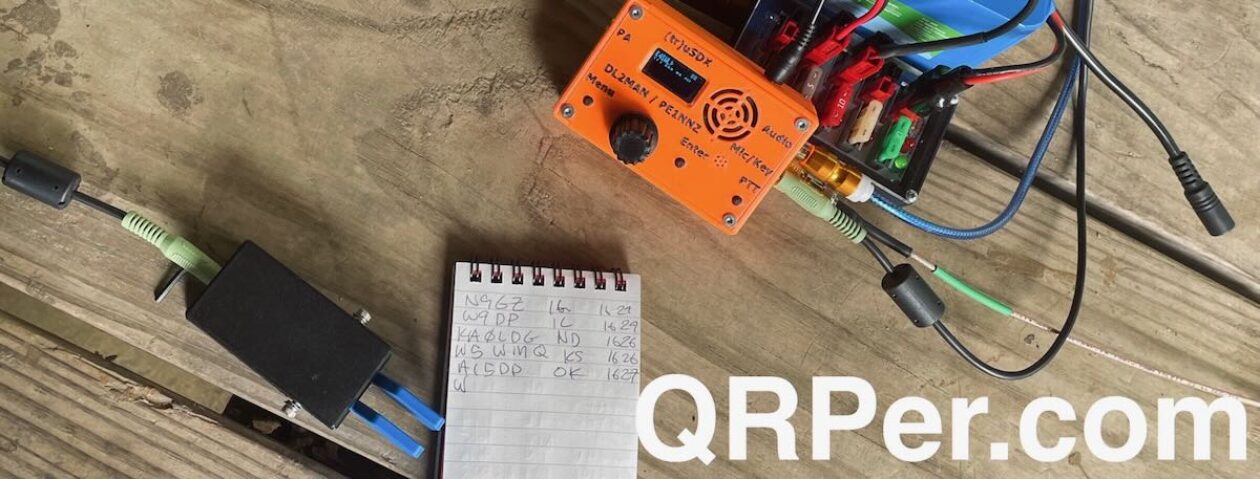
Connecting an international community through low-power field radio adventures.
Please support QRPer by adding us to your whitelist in your ad blocker. Ads are what helps us stay online. All of our ads are ham radio related--no junk, we promise! Thank you!