Category Archives: Guest Posts

Field Radio Kit Gallery: KD7DUG’s mcHF Field Kit

Many thanks to Dugbo (KD7DUG) who shares the following article about his portable field radio kit which will be featured on our Field Kit Gallery page.

If you would like to share your field kit with the QRPer community, read this post. Check out Dugbo’s field kit below:


Heli Pro Backcountry pack with portable field kit

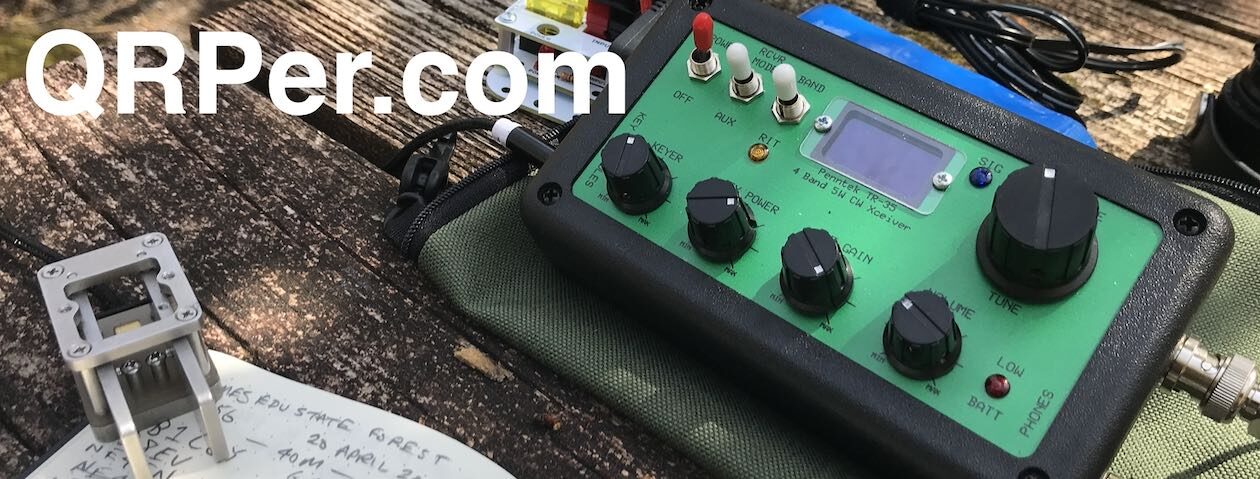
Dugbo’s MCHF compact field kit

by Dugbo (KD7DUG)

Intro

My field radio kit is not so different or unique that it stands out from the many other experienced ham radio operators that have assembled and shared their field kits with the ham radio community. I am new in this game and by no means an expert. However, my field radio kit was designed as a fit for purpose and tailored to my CW operating needs and especially the bank account. I wanted my portable field kit to be nimble and easy to deploy at a minute’s notice. With many of the popular QRP radios backordered and even not available at this time, I chose a different route with my choice of radio.

Radio

Currently my preferred radio is the very capable SDR mcHF-QRP HF transceiver created by Chris, M0NKA. The mcHF is a smaller designed portable radio that simultaneously packs a left hook, upper hook punch, it’s a real contender. The radio is standalone, and its compact design is in comparison to other transceiver competitors with transmit and receive on 60-10 meter amateur bands with 5W output power on CW and SSB.

Currently the mcHF by M0NKA is very difficult to obtain and currently the kits are not available to purchase. However, there are multiple clones of the radio being offered by Chinese manufacturers.

Radio Equipment

Radio Equipment Kit

Priority was to protect the radio while traveling in the field. Securing the radio in a case to prevent damage from the motions of backpacking up a summit while also protecting the rig from environmental factors, dreaded dust, dirt, and water.

The Evergreen 57 waterproof dry box was a perfect match with the mcHF and additional operating equipment. The radio slides perfectly into the rubber molding of the evergreen case and prevents the radio from moving around in the case during transport.

To power the radio, I need an efficient battery for my needs. Batteries are heavy and weight was one of my concerns. Also on my mind was which battery would provide enough amp hours for an activation? To minimize the weight and provide enough power for one to two POTA|SOTA activations, I finalized my decision on a 3Ah BioEnno LIPO4 battery to supply power the mcHF. To link the battery to the radio, I am using a 5.5 x 2.1mm with an Anderson Pole connectors.

For audio I am using an Anker IPX5 speaker for GoPro sound recording along with 3.5mm Ugreen Headphone splitter for an old pair of Iphone headphones. I prefer headphones for copying incoming callsigns, RST and QTH from hunters and chasers. The headphone splitter, headphones and two additional 3.5mm connectors for speaker connection and key are packed into the rubber mesh located in the upper lid of the Evergreen case.

I am using two highly regarded and engineered portable keys. The CW morse N0SA and the BaMaKeY TP-III, are very rugged and ultra-compact twin paddle keys for CW operations.  For the BaMaKeY TP-III protection against the elements, it resides in a small waterproof case lined with foam. The N0SA paddle fits snuggly into the Evergreen case.  I use a Sea to Summit bag to carry a smaller travel case that contains the Rite in the Rain pad with pens for logging, the Anker speaker, NY4G EFHW antenna, ABR316 coaxial cable and two 10’ pieces of paracord with two tent stakes for antenna deployment.

Radio setup on Summit W6/CS-445

Once on the summit, I set up my radio equipment onto the Sea to Summit bag for additional protection from the ground. For a backup HF radio, I carry the very reliable Venus SW-3B 5W CW radio in small fly fishing Yonah Pack attached to my backpack. A perfect fit and well protected.

Antenna

I am using a NY4G 64:1 balun EFHW QRP 40,20 and 15m with additional 17 and 30m bands with a maximum of 15W on CW.

To deploy the antenna in the field in an inverted V configuration, I am using a modified 4.5m light weight expandable carbon fiber fishing pole (99g).

25-inch Valkyrie archery carbon shaft

To keep the antenna and mast vertical, I modified a 25-inch Valkyrie archery carbon shaft at one end with a 200g target tip and the other end with a center pin sleeve. No need to carry a small hammer to pound in the arrow shaft into the ground, mother nature has me covered with plenty of small size rocks in the field. I am using 15ft of ABR316 coaxial cable.

25-inch Valkyrie archery carbon shaft supporting the 4.5m expandable fishing pole

SOTA Activation W6/CS-323 EFHW antenna in an inverted V configuration
SOTA Activation W6/CS-445 EFHW antenna in an inverted V configuration

Navigation

I am using onX Off-Road GPS app on my mobile phone to download maps of selected activations. I also carry an inReach Mini Messenger satellite tracker and communicator for safe insurance. Unexpected situations can occur without warning, so I always like to be prepared than not to be.

Wrap Up

Heli Pro Backcountry pack with portable field kit

I am using a 20-year-old Dakine Heli Pro Backcountry pack to carry my compact field kit.

I used this pack for backcountry snowboarding in my early years. This pack is fantastic because of the extra compartments for carrying gear. It is also fitted with an ice axe strap that is perfect for carrying the expandable carbon fiber pole. The total weight of my portable field kit is 2.2 Kg or 4.9lbs. It might not be the lightest portable field kit setup, but it is definitely not the heaviest.

Yonahs Pack and the SW-3B

Overall, I am very satisfied with how my portable field kit came together as well as its performance in the field.

72 – DUGBO KD7DUG

Field Kit Gear

Field Radio Kit Gallery: W2AEW’s Comprehensive Elecraft KX2 Field Kit

Many thanks to Alan (W2AEW) who shares the following article about his portable field radio kit which will be featured on our Field Kit Gallery page. If you would like to share your field kit with the QRPer community, read this post. Check out Alan’s field kit:


W2AEW Field Radio Kit

I’ve only been active with POTA for a little over a year, but have put together a kit that gives me lots of options for antenna deployments.

The main kit is in an old camera bag that I picked up at a hamfest for $5:

One of the outside side pockets houses a small tripod and some little ground stakes for securing support ropes, etc.

The other outside side pocket houses a small digital recorder and a cellular hot spot:

The front outside pocket houses some rubber coated twist ties that I use for securing a portable lightweight pole, as well as a few POTA brochures, QSL cards and eyeball cards:

The pouch on the inside of the lid contains a 25’ length of coax, a few extra pens and other accessories:

The main chamber houses the KX2 Shack a Box bag, a Maxpedition accessory bag, the AX1 antenna kit and my iPad:

The KX2 bag is the main bit of the kit.  Sometimes, this is the only thing I carry with me (and will often put the AX1 kit inside also):

The rightmost pouch contains the 40m EFHW antenna, which is one of my two workhorses for my activations.

The middle section holds the logging pad, writing utensils, spare wire bits for antenna and counterpoise use, lightweight clips, etc.

The main section of the bag holds the KX2 which includes the internal battery and tuner. Continue reading Field Radio Kit Gallery: W2AEW’s Comprehensive Elecraft KX2 Field Kit

Matt’s “Crackadawn POTA” Field Report

Many thanks to Matt (W6CSN) who shares the following post  from his blog at W6CSN.Blog:


Crackadawn POTA

by Matt (W6CSN)

This is the weekend in October that features the U.S. Navy’s Blue Angels taking to the skies over the Bay Area. The air show takes place over the Bay waters, which means the beaches and shorelines around San Francisco will be packed with people and traffic. Since my usual POTA operating location is right by East Beach, I had pretty much given up on the idea of activating K-7889 this weekend.

Lights of the Golden Gate Bridge reflecting off the still Bay waters.

The airshow is on Saturday and Sunday, but the Blue Angles practice on Thursday and Friday, weather permitting. So here I was on Friday morning, awake at 5AM watching K4SWL on YouTube doing POTA when the idea of getting out for an early activation got into my head.

It was still dark when I tossed my backpack, which was already loaded for POTA from the previous activation, into the car and headed down to the East Beach in the Presidio of San Francisco National Historic Site (K-7889).

The sky getting lighter in the East before sunrise.

Given the early hour and low light conditions I didn’t relish the idea of doing my usual picnic table and tripod antenna setup. Not long ago I had acquired one of those “mirror” antenna mounts with the jaw clamp arrangement, and this was a great opportunity to try it out. Between the parking lot and the beachfront promenade there is low fence constructed of short steel posts and strands of stainless cable. The fence post was a perfect place to attach the clamp and the MFJ-1979 17 foot telescopic whip, which is a quarter wave on 14 MHz.

Close up of the MFJ-1979 whip antenna clamped to steel fencing.

I was ready to string some radials out to give the antenna a ground plane to work against, but wondered if the post, being sunk into the ground by the Bay and the steel fencing cables might provide enough of a counterpoise. A quick check of the SWR on the meter built into the MTR-4B showed a 1.2 to 1 – no need to even bother with radials with an SWR like that right out of the box.

Low SWR on the quarter wave vertical as the Bay wakes up.

The other advantage of this antenna setup was that it is right next to the car. However, I don’t really like operating from my vehicle as it’s not very sporting nor is it comfortable. Instead, I simply set the station on the trunk lid and completed the activation from a standing position. The other advantage of this arrangement was that I could closely guard the RG-316 coax going from the radio to the antenna to keep any humans or canines from getting entangled. Continue reading Matt’s “Crackadawn POTA” Field Report

Field Kit Gallery: K2EJT’s Self-Sufficient Elecraft KX1 Field kit

Many thanks to Evan (K2EJT) who shares the following article about his portable field radio kit which will be featured on our Field Kit Gallery page. If you would like to share your field kit with the QRPer community, read this post. Check out Evan’s field kit:


KX1 Field Activation Kit

by Evan (K2EJT)

I take a minimalist approach to most of my gear.  I don’t like to carry anything I don’t need.  Whether it’s what I pack in my daypack, an overnight pack, or my radio kit…..If I don’t need it, it’s probably not coming along.

That’s where this kit comes in.

This is the absolute minimum radio kit to do a field activation.  While it’s not the lightest kit I have, it still comes in at only 1008 grams (2.25lbs), and that’s including the Pelican case which makes this kit rugged and waterproof (I have an SW-3B kit that weighs 700g, but it’s in an ultralight stuff sack).

This kit contains EVERYTHING (and I mean everything) to do an activation.  The radio is an Elecraft KX1.  It’s a four band radio with the internal ATU.  Powering it are six AA Lithium Ion batteries.  I love this radio, and I wish it was still in production, but these days they’re unobtanium unless you’re willing to spend a ton of money and get lucky and find one for sale.

The CW key is a cwmorse.us N0SA paddle.  The headphones are a pair of old SkullCandy earbuds I’ve had forever, but sound great.

For an antenna I’m running a 41’ random wire antenna, with a 17’ counterpoise, constructed of 24ga silicone jacketed wire.  That’s attached to the radio via a BNC binding post.  While this setup isn’t the most efficient, it’s definitely the most compact and agile.  Normally I run resonant antennas, but having the tuner allows me to run the absolute minimum antenna, and swap bands quickly, and that was the idea behind this kit.

The throw bag is rip-stop nylon with a paracord loop sewn in the top and a velcro closure across the opening.  I fill that bag with rocks, seal it shut with the velcro, and it’s ready to go. The throw line is 65’ of 1.8mm high vis reflective cord.  The throw bag doubles as a stuff sack for the cordage, so it’s all contained in one neat little unit that rolls up tiny.

Also included in the kit are a pencil and a logging sheet, as well as the KX1 cheat sheet.

I have lots of other field kits, but I wanted to showcase just how little you can actually get away with and still get the job done. Yes, I know you could build a Pixie kit and a tiny home made key and stuff and make the kit smaller and lighter, but I wanted a kit with no major compromises or downsides.  This fits the bill.   There’s nothing like a 100% complete kit that contains literally everything you need to do an activation that fits in the palm of your hand!  Thanks for reading and 73!

Evan

K2EJT

Equipment:

Everything else is either generic, home made, or ancient.

Readers: Check out Evan’s YouTube channel for more field radio goodness.

Field Kit Gallery: NL5E’s Lightweight KX2 SOTA/POTA Alaska Backpacking Radio Kit

Many thanks to Eric (NL5E) who shares the following article about his portable field radio kit which will be featured on our Field Kit Gallery page. If you would like to share your field kit with the QRPer community, read this post. Check out Eric’s field kit:


NL5E SOTA/POTA Backpacking Kit

Description

Hello! NL5E here.

I’m one of the rare SOTA activators in Alaska (I also use this same kit for POTA). Anyone that has looked at a map of this state will know that we have some interesting difficult topography. Many of our summit hikes start out near sea level, but are 3000-6000 vertical feet of climbing to get to the summit. So I built my kit with compactness, versatility, and weight in mind. Everything weighs approximately 2lbs (not including the battery, I don’t always take it).

My primary operating modes are CW, FT8, and SSB.

To facilitate those modes I tried to keep everything as small as possible while still being usable. For example, I debated using N6ARA’s tiny paddle, but I found I made too many sending errors. The N0SA paddle is a perfect medium between portability and sending ability. For FT8 the FT8CN app has been a good alternative to carrying a Raspberry Pi or small laptop and the well loved Digirig is probably the best audio/cat interface on the market today. I don’t do a lot of SSB (especially at QRP levels), but the K6ARK mini microphone is a wonderful improvement over Elecraft’s comically massive microphone for the KX2. I added headphones so I don’t disturb anyone on popular summits and so I can hear CW a bit better.

My antennas of choice tend to be random wires and End Fed Halfwaves.

With the KX2 I chose to use K6ARK’s 20w antenna kits and built both a 9:1 and 49:1 version. I usually carry the 9:1 just to have the band flexibility as it will work from 40m-10m. If the ground is wet enough I’ve had it tune up to 80m.

For the 49:1 I chose 20m because bands lower than that have mediocre performance from the latitude. Because of how short both these antennas are, they pair very well with the SOTAbeams Carbon 6 mast. From a summit a 19’ mast is usually tall enough to work most of the US and lots of Asia from here. The only modification I made is gluing the top 2 sections together for durability. To attach the antenna wire I use a small Niteize carabiner and a prussik loop.

I also wanted to ensure that I could power many different devices while out hiking. I settled on an Anker battery because it is easy to power phones and the radio without having to bring a bunch of different adapters like I would with a dedicated 12V battery.

I know someone will mention protection and the bag I chose. Yep, a silnylon stuff sack offers zero protection from bumps and impacts. I firmly believe that hams “over baby” their equipment and think that their radios will hilariously explode if sneezed on wrong. I settled on the Gems Products cover and rails as a good solution to keep the radio from getting destroyed in a backpack. So far so good. I added the dry bag to my list for rainy days.

I didn’t include one in the images, but I also usually have an HT with me, but most summits don’t have good line of sight to our population centers. I usually run a Yaesu VX-6R with Diamond RH77CA or MFJ Longranger. I will usually run 2m FM when I am close to Anchorage or Palmer. I also didn’t include my logging solution, but that is usually HAMRS on my iPhone or a Rite in the Rain book and pencil. I find CW is easier to log on paper for some reason.

Thanks for looking and perhaps I’ll hear some of you on the air.

Component List

Radio: Elecraft KX2 with Side KX Heatsink and Cover

Antenna: K6ARK Random Wire with 29’ of polystealth wire and antenna winder

Note: I also run a 49:1 EFHW cut for 20m (not pictured, looks the same).

Dog: Luna. Standard issue Alaska Husky. Smol in size. Adds 5 dB gain to all antennas. Adds 45 lbs, but is self transporting.

Support: SOTAbeams Carbon 6

CW Paddles: CW Morse N0SA SP4 Paddle

Microphone: K6ARK mini microphone with printed case. Built from Digikey Parts.

Headphones: Sony Earbuds – could be any old ear buds. These work fine.

Digirig Mobile with Cables: Lets face it. Sometimes FT8 is all that works. I’m in Alaska.

Android Phone: Galaxy S10. Dealers choice for a phone. It exists only to run FT8CN instead of carrying a laptop for FT8.

Power: 

JacobsParts 15V 5A USB C PD cable 5.5×2.5mm DC (Ferrite Added)

Note: Outputs approx. 14.5V when measured using my multimeter. Radio shows the same/

Anker 747 25600mAh battery

Miscellaneous Items:

5.5×2.5mm to 4.0×1.7mm DC Adapter: Allows charging of various HT radios using the Anker battery with JacobsParts USB C cable

-Shower Cap: The all important rain cover for the KX2. Just in case. Just make sure it is transparent.

Storage: Sea to Summit 3L UltraSil Stuff Sack or Sea to Summit 3L Dry Bag

Field Kit Gallery: W4EMB’s Penntek TR-45L Portable Kit

Many thanks to Ed (W4EMB) who shares the following article about his portable field radio kit which will be featured on our Field Kit Gallery page. If you would like to share your field kit with the QRPer community, check out this post. Ed writes:


My QRP Portable Set up

by Ed (W4EMB)

Radio: I have one priority rig I use 99% of my time. It is the TR45L Penntek. I have both versions. The fullsize one with built-in tuner and battery, I also have the “Skinny” version. The skinny does not have the tuner nor battery. My second Rig is the Yaesu 817 with the Windcamp Battery upgrade. I also have a 40m only QSX and the 5 band TruSdx.

Penntek TR45L Skinny with external batter and external tuner.

Antenna:  I use the Chelegance MC-750 most of the time, but also use a Homebrew EFHW with 49:1 balun and 67’ of wire.

I have the QRP guys Tri-Band vertical kit, and two pieces of 16ga Speaker wire cut to 33’ that I carry as well. To support the EFHW and Speaker wire antenna, I use the SOTABEAMS 10m (32 ft) “Travel Mast”.

For the QRP Guys Tri-band vertical, I use the SOTABEAMS Carbon-6 ultra light 6m (19.6 ft) mast. To support the 32’ mast I usually just lean it into the trees and slope my EFHW up from the feed point.

For the speaker wire antenna, I run the “red wire” straight up the mast while it is strapped to the picnic table. The “black wire” is simply thrown out across the ground. I might even elevate the black wire with sticks.

My carbon-6 fits right into a piece of 1 ¼ inch PVC pipe I have clamped to my brush guard on my van. Or, I use a Tiki-Torch stake to hold my carbon-6 in open ground.

carbon-6 with Tiki-Torch stake supporting and using the Tri-band Vertical.
carbon-6 inside of PVC pipe with the QRP Guys Tri-band vertical.

I find for me, that my QRP Guys antenna works great on 20m without a tuner. But when I try to use it on 30m or 40m, I require a tuner. For this reason, I lean on my MC-750 to be the main antenna.

I have modified my MC-750 slightly. I made my own set of radials to match the factory ones. I chose to make them out of silicone wire. I find it to be more flexible and does not kink or tangle as easy as the standard factory radials. I used 3mm banana plugs and 24ga yellow wire. I also crimped small ring connectors onto the ends of the radials. I did NOT strip the insulation and place them on the wire. I simply crimped them on the silicone. I use them to stake down the wire. I use four nails as “stakes” to pin the wire down. I find I only stake the radials out when I am on un-even ground.

The second modification, I made a set of “double” radials out of 26ga green silicone wire. Colors do not matter. It is what I had. I spread them evenly around the base of the MC-750.

MC-750 with “double radials” and RG316 for coax.

My key is a Czech military straight key from the 1950s. It was new old stock when I bought it. I also carry a small mini set of paddles. For the TR45L radio, I can not play my recoded CQ or 73 with out a paddle. The “play” button is dit or dah trough the paddle jack.

For coax, I use RG316 and the appropriate adapter for the MC-750.

I have two pencils from Kuru Toga. One pencil is .5mm the other is .7mm. I make my own POTA log sheets and I paper log, and then type them later. I am a not talented enough yet to play with a tablet or PC while operating. I have only done CW for the last 12 months.

On my table: I have a really thin yoga mat. I find the concrete picnic tables a bit rough on my equipment. The yoga mat can get a bit sticky when it is warm, so I drape a small hand towel over the edge where my arms lay. I also have a Write in the Rain tablet in full size paper. I have been out early in the mornings in this summer and humidity and steamy fog makes normal paper hard to write on. The .7mm pencil matches up well with the Write in the Rain paper.

Chelegance antenna pictured in the background. K-2965 Paris Landing State Park

I have found CW and POTA have re-energized my ham radio hobby and resurrected it from a dusty shack, to a fun out door activity.

My first challenge was how to get from the car to the table in one trip. Downsize to the necessities. Next was figuring out the antenna and radio combo that could work in different conditions. By conditions I mean space.

Location, location….. I had a dog run between me and my antenna. It pulled my radio right off the table and tumble behind the dog. So now I choose my locations like Bill Hickock… always face the door. Hihi. Food for thought.

Thank you to Thomas for inspiring me to get out there and do it. His you tube videos were great copy practice to give me the confidence to get out there. Finally, my Elmer. John, KM6NN. Without him I would have never started my CW journey. He is a true Elmer in every definition of the word. I am proud to know him and lucky he is in my life. Thank you John.

Gear:

Note: Check out W4EMB on YouTube as he makes his 1st POTA “Kilo” 

Chameleon MPAS Lite: Using the coax shield as a counterpoise and how this might affect directionality

Many thanks to Dale (N3HXZ) who shares the following guest post:


Portable Operation Using a Vertical Antenna Without a Counterpoise Wire!

by Dale (N3HXZ)

In a previous article that Thomas was kind enough to post, I ran experiments to determine if the counterpoise wire orientation of the Chameleon MPAS LITE antenna system in the vertical configuration in any way shaped the antenna pattern.  The configuration of the antenna is shown below.

The system consists of a 17’ telescoping whip antenna, a matching transformer, a 50’ coax cable with an in-line RF choke, and a counterpoise wire (60’ long, but unwound to only 25’ for use in the vertical configuration).

Subsequent studies I performed have reinforced my earlier conclusions that the positioning of the counterpoise wire in this setup does not appreciably shape the antenna pattern. One of the comments from my post came from Stephan (HB9EA). He commented on the fact that the coax cable is indeed a counterpoise via the coax shield and that in fact my system set-up had two counterpoises.

It was Stephan’s comment which led me to contact Chameleon Antenna to discuss counterpoises with the MPAS LITE antenna in the vertical configuration. I communicated with the Director of Research and Development group at Chameleon and found out some interesting information that I wanted to pass on.

He mentioned that the system can be used with the coax cable acting as the lone counterpoise as long as the coax cable is at least 25’ long, and preferably 50’ long.  The coax should be spread out and not coiled along any portion of its length. It was stated that the counterpoise wire provided with the product should be used with short-length coax cables.

With regards to a counterpoise orientation shaping the propagation direction, he stated that it is generally accepted that using only the coax as a counterpoise tends to have the antenna pattern slightly favor the direction in which the coax is laid out. Adding the counterpoise wire in a direction opposite to the coax would tend to balance out that pattern. Having the coax and counterpoise wire at some angle to each other introduces variables that make it difficult to determine the antenna pattern.

My initial study had the counterpoise wire oriented at an angle to the coax cable.  I mentioned that my initial study showed that orientation of the counterpoise wire did not seem to appreciably shape the antenna pattern, and he agreed. What is unknown is the overall degree to which the coax cable shapes the antenna pattern with or without use of the counterpoise wire.  This is an area I am currently investigating.

Operating the MPAS-LITE vertical configuration with only the coax cable as a counterpoise was an intriguing thought.

To test it out I teamed up with Jim (KJ3D) for a SOTA activation on W3/PT-003 (Seven Springs). We both deployed the MPAS-Lite with only the supplied 50’ coax cable attached. Coax cables were laid out in a straight line. One cable was oriented southeast, the other one oriented east. We operated on 10 Watts in CW mode. The activation successfully worked all bands from 40M to 10M. I operated an Elecraft KX2 and Jim operated a KX3. The internal tuner of both rigs easily obtained a 1:1 match across all bands.

A map of the QSO’s is shown below. Note that despite the coax cables facing to the southeast and east, we easily worked stations in the opposite directions. Hence any minor shaping of the antenna pattern by the coax orientation does not appear to impede successful communication in all directions.

In summary, the MPAS-LITE antenna system in the vertical configuration utilizing the 50’ coax cable with an in-line RF choke as the single counterpoise has been demonstrated to perform well in the field.

For portable operation where fast deployment and simplicity is paramount, using the furnished coax as a counterpoise is a quick and dirty way to get the antenna erected and on the air with reliable communication capability. Eliminating the counterpoise wire allows for quicker set-up and tear-down, and one less thing to put in the backpack!

Field Kit Gallery: N8PEM’s MTR-3 Portable Field Radio Kit

Many thanks to Chris (N8PEM) who shares the following article about his portable field radio kit which will be featured on our Field Kit Gallery page. If you would like to share your field kit with the QRPer community, check out this post.


MTR-3 Field Kit Build by N8PEM

Ham radio is a hobby best enjoyed in community with others.

Ever since I began operating QRP portable a few years back I had admired the Mountain Toppers.  Granted my Elecraft KX2 is a perfect daily driver.  I’ve been lucky to have that as my sole portable QRP rig for some time.  That didn’t stop me from dreaming of an ultralight QRP portable kit centered on an MTR3.  High resale prices and scarcity made it a purchase I had long put on the back burner.  But then one day I saw my good friend Julia, KF8JBB, while walking my dog in the park.  So I stopped to chat.

Figure 1:  Antenna Design

Like many of us, Julia is an avid QRP and CW enthusiast.  She has numerous QRP and SWL radios.  Life is also pretty busy for her.  She doesn’t get out to operate as much as she would like.  As we chatted on that warm August evening, she offered to gift me her MTR3.  For her, it was time to move that rig on to a good home so it would get it’s proper use.  But the shrewd negotiator in me knew to never accept a first offer.  I countered.  I’d take the MTR3 off her hands if she let me build her a QRP portable antenna in return (later I also threw in a built N6ARA TinySWR kit for good measure).  She accepted.  The next day she dropped off the rig.  The fun of outfitting an ultralight (UL) QRP kit began.

I quickly determined that I wanted to build a trapped 20/30/40 meter EFHW antenna to match the three bands on the Mountain Topper.  I prefer end feds, and I wanted the challenge of building traps for the first time.  Keeping in mind I wanted an UL kit, I could also leave the coax at home with an end fed.  I had read that a trapped EFHW can be shorter than a standard EFHW due to the inductance of the traps.  This appealed to me as I knew from experience that getting a 40-ish foot antenna up in the air is much easier than a 60-ish foot antenna.  It took nearly six weeks to research, procure parts and build out this antenna, partly due to the fact I had to build this antenna twice.

My first attempt at this antenna build wasn’t good.  I couldn’t get SWR better than about 1.8:1 on any band.  I hadn’t tested every component at every step of the build.  Thus, I had a hard time determining what went wrong.  I used 100 and 150 pF capacitors for the traps which proved to have marginal shortening effects.  I needed more turns on the toroids!  I decided to do more research and start over.

Thanks to advice and blogs from folks like Dan AI6XG and Fred KT5X, I settled on a different, better design of the trapped EFHW.  I ordered more parts.  Switched out to 15 and 33 pF capacitors.  I took my time to build and test this antenna in a step by step manner.  The results were much better the second time around.  Overall 45 feet 8 inches long and weighing two ounces.  SWR better than 1.5 to 1 on all three bands.

I had the idea to place a TinySWR kit in line between the RCA plug and the end fed matching unit.  I know there are SWR kits which can be installed within the radio, but I didn’t want to modify the MTR3 in any way.  The stock design is sublime.  I also built a back-up emergency antenna into the design.  If for some reason I have a trap fail, I installed a bullet connector right before the first trap.  Thus, I can disconnect the 30 and 40 meter portions of the antenna and  have a basic resonant 20M EFHW.  These thoughtful touches seemed to perfect the antenna.

Photo 1:  Completed miniSWR, matching unit, 30m trap, and 20m quick disconnect

I tried to be thoughtful with the other choices in my kit as well.  At 3.5 ounces and the size of a bag of coffee, the LowePro CS40 padded case proved to be ideal.  I found it cheapest from a UK-based eBay seller.  I made my flight deck out of the steel housing from an old external CD Drive.  I measured, cut and filed the edges.  It’s perfectly sized for loose Rite in the Rain paper, lightweight and thin.  A metal flight deck also can hold the magnetic base of my CW paddles.  When it came to the battery, I decided to go with a RC airplane LiPo battery.  Fuzzy math told me that the 650 mAh would give me more than enough operating time.  Once complete, I was happy to find the entire kit weighed in at just 18 ounces, not counting a throw weight or collapsable mast.

Photo 2:  The completed MTR3 kit

My first activation with this kit was September 21st.  I wasn’t sure how well I would do.  Band conditions weren’t the best the previous two days.  I went to my favorite spot, Bunker Hill (W8O/SE-009) located within Great Seal State Park (K-1954) in south central Ohio.  It’s a short 20 minute hike to the high point on what was a partly cloudy 70 degree Thursday morning.  I set the antenna up in a sloper configuration, gave my dog Togo some treats, ate half my sandwich, took a sip of coffee, and pulled up the POTA and SOTA spotting pages.

In just over an hour I had made 54 QSOs covering all 3 bands.  The MTR3 combined with the trapped 20/30/40 EFHW worked flawlessly.  It was an absolute joy to operate.

Photo 3:  First activation complete

That joy came from the sublime kit for sure.  But enjoyment also came from the community carried within the kit itself.  The MTR3 from Julia KF8JBB.  The paddle and wire winder designs from Adam K6ARK. The MiniSWR Kit from Ara N6ARA.  The Trap PCB boards from Tim N7KOM.  The toroids, capacitors, and antenna advice from Dan AI6XG.  The blog post from Fred KT5X.  The 3D printing from my nephew Colin.  Even the RigExpert I bought from Glen W1ND this Spring was integral.  This kit is an homage to that community.

Figure 2:  First Activation QSO Map

If you made it to the end, thanks for reading!  I hope it was interesting and helpful.

TU 73 EE,

Chris N8PEM

Radio Kit

Antenna Build

Bob’s POTA weekend in eastern North Carolina

Many thanks to Bob Conder (K4RLC) who shares the following guest post:


North Carolina Parks On The Air Activation weekend

Bob (K4RLC)

The first North Carolina Parks On The Air Activation weekend occurred September 9 & 10. Between a limited amount of time available and weather, I only was able to activate three parks, including an over-night camp out. The primary goal was to return to the Dismal Swamp State Park (K-2727) in Camden County. While the Dismal Swamp in Camden County is a rare and sought after County on CW for those wanting to work all 100 North Carolina counties and all 3000+ US counties,  it also is a place comforting to my tortured soul.

As there is no camping at Dismal Swamp State Park, one camps at the nearby Merchant Mill Pond State Park (K-2745)  in Gates County. This is a pleasant small State Park with canoeing and fishing in a 190 year old millpond, with old-growth Cypress trees. It is near the lower extension of the larger Dismal Swamp National Wildlife Refuge, which begins in Virginia.

As an older park, Merchants Mill Pond SP does not have any hook-ups for water or electricity. Fortunately, I was camping in our Solis campervan, which is self-contained by solar power and good for boondocking.

The oppressive heat gave way to rain, so I set up inside the van at my campsite. This gave me an opportunity to use my new favorite portable radio, the Penntek TR – 45 Lite, a QRP CW only radio. An outstanding feature of this rig is that it has no menus, only knobs and toggle switches, and reminds me very much of my radios from the early 1960s, but with modern specs.

The internal keyer performed well with the Putikeeg magnetic paddle from Amazon. Even though there was distant thunder, I felt it was safe to set up an inverted V on a fiberglass mast, bungee-corded  to a trailer mount hitch on the camper van. I ran the RG-174 coax through a rear window by sliding the window screen open a bit.

Not wanting to invite an onslaught of mosquitoes, I only used red lights inside the Solis, reminiscent of military operations. The TR -45 Lite did well on 40 CW with 5 W and the inverted V in the rain, and no mosquitoes invaded the van.

The overall goal was to return to the Dismal Swamp. I started early in the morning, setting up on a picnic table in the park between the Canal and the walkway, along the canal. Even though it was midmorning, the weather became interesting, at  90° F and 90% humidity.

For this activation, I used the old IC 706 MKIIG and a modified Wolf River coil set up. I used the Chameleon 17 foot telescopic whip. This whip is Mil-Spec and has a great feel and quality of workmanship. However it is 11 inches too short for the Wolf River “Sporty 40” coil. To address this, I made an 11 inch jumper from solid copper wire left over from my Dad’s days with Southern Bell telephone, and fitted it on an alligator clip, clipped to the top of the whip. The other modification was not to use the three 31 foot radials. For this activation, I tried the KB9VBR “Magic Carpet” ground plane.

This is a 32 x 84 piece of aluminum window screen, laid on the ground, under the antenna tripod. It may be a dB  or so less than the radials, but it sure takes up a lot less space, especially in a crowded parking lot. The key is the Whiterook MK-49 made by ElectronicsUSA. It is my favorite backpacking key, lightweight and withstands being thrown into a backpack with no protection. This set-up worked well both on 20 and 40 CW, juggling CW keying with eating leftovers for breakfast until the rain came.

I then decided to wander on some back roads in Eastern North Carolina and wound up in historic Edenton, originally built in the early 1700s and the first capital of the Colony of North Carolina. Their diverse history is reflected in the town square, where there is a 13 Colony US flag, a monument to the Confederate War dead, and the British Union Jack!

The radio setup was very pleasant at the Historic Site (K-6842) near the Albemarle Sound, which begins at the Eastern North Carolina coast, and runs to the leeward side of the North Carolina Outer Banks on the Atlantic Ocean.

I decided to try the TR-45 Lite again, but this time with a Buddipole on 20 meter CW. Propagation was variable with early contacts in Utah and Idaho, but the band became difficult. It was very pleasant operating with the ocean breeze and looking at the 1886 Roanoke River lighthouse,  until the rain started again.

So it was time to pack up, but a return trip to spend a weekend in Edenton would be a very pleasant activity. On the way out of town, I passed a puzzling POTA  site, the National Fish Hatchery (K-8007), established in 1898, and home of an Annual Fishing Rodeo. Activating there was tempting, but the rain was prohibitive.

All in all, it was a very pleasant activation for the first NC POTA weekend. I got to test different radio and antenna configurations. I would say for the TR -45 Lite, the inverted-V worked best. For the ICOM IC-706 , the “Magic Carpet” aluminum screen worked very well and was very easy to set up.

I did not have time to do a head to head comparison of the antennas; that is a Fall project.  Please note I originally got a stainless steel screen from Amazon, but testing with the Rig Expert showed that it really did not conduct as well as aluminum and had higher SWR, so make sure to purchase the aluminum screen.

For a first NC POTA Weekend, the results were modest and certainly can be improved upon next year. Down east on the Outer Banks, Jockey’s Ridge and the Wright Brother Memorial  is on my future list, but an annual pilgrimage to the Dismal Swamp (especially in non-summer months) is a must.

KA4KOE takes a look at the FX-4CR by BG2FX

Many thanks to Philip (KA4KOE) for the following guest post:


The FX-4CR (Manufacturer’s image)

Review of the FX-4CR Mini-Transceiver: What’s Old is New Again.

by Philip (KA4KOE)

Introduction

My start in Amateur Radio began in 1979 as a newly-minted, 16 year-old Novice. At the time, my resources were slim. I worked in a country store; pushing a broom, putting up stock, bagging groceries, etc. I was paid $23.46 every two weeks. At this time, Heathkit was selling kits to the ham radio community that ran the gamut from simple to elaborate. Looking over the catalog, my young eyes were drawn to the HW-8. What drew my attention was not the radio’s features, but the price.

The Heathkit HW-8 was listed for $129.95, plus shipping. I did not even notice that the power output was specified at 3.5 watts on 80 meters. The green gem was a bonafide ham radio transceiver!

In due course, the kit was acquired, assembled, tested, and put on the air with an Elmer’s aid. I made a bunch of contacts with that CW-only transceiver. The term “QRP” never entered my mind. I don’t have any photographs from my early days on the air: the only photograph of the HW-8 dates from 1981 during my freshman year of college. By that time, I had acquired an HW-100 from a fellow ham. See Photograph No. 1: note the chrome Vibroplex Lightning Bug, homebrew “T” network transmatch, and of the course the ‘8 on far right (see red arrow).

Photograph No. 1: KA4KOE in 1981.
Photograph No. 2: Heathkit HW-8. (Image Source: WD8RIF)

Rationale and the radio

Without getting into my entire life’s story, I will start this paragraph by stating that my ham “career” has now come full circle as I’m back to using compact, lightweight, low power gear; this time by choice.

I had the bad habit of deploying too much gear during POTA activations. I came across internet chatter with regards to a relatively new product; the FX-4CR SDR mini-transceiver. The base specifications are as follows:

  • Dimensions: 107mm (4.2”) L x 65mm (2.6”) W x 43mm (1.7”) H.
    Weight: 0.46 KG (1 LB).
  • Bands/Power:  80 meters thru 10 meters, inclusive: 20 watts. 6 Meters: 5 watts.
  • Display and Panadapter Span: 50mm (2.0”) TFT, Approximately 24 KHz +/- (48 KHz total) and waterfall. See Photograph No. 3.
  • Modes: LSB, USB, CW, FM, AM, Digital.
  • Receive Current Draw: 210 mA.
  • Transmit Current Draw: 3.0A to 4.0A at full rated 20W output.
  • Input Voltage Range: 9 VDC thru 16 VDC (do not exceed). The optimal supply voltage is 14 VDC.
  • Connectivity: Bluetooth for CAT/Audio. USB Port for CAT/Audio and Firmware Updates. Integral audio soundcard input/output.
  • Output Power: Continuously variable from 0.1 thru 20W. Recommended maximum wattages are SSB – 20W, CW and Digital – 10W.
  • No internal battery or antenna matching unit.
Photograph No. 2: My FX-4CR, 6 AH Bioenno LFP, Genasun GV-5.

Expectations

The prospective buyer should realize what this radio “brings to the table”. As others have previously stated on the various internet chat groups and social media, do not expect Elecraft performance at the $550 (including shipping) price point for this radio. All radios have flaws and this one is no exception. Issues of which I am aware are as follows: Continue reading KA4KOE takes a look at the FX-4CR by BG2FX