All posts by Thomas Witherspoon

A memorable Bakers Mountain SOTA activation with the Elecraft KX2 & PackTenna 9:1

Besides Lane Pinnacle, there’s been one SOTA summit, in particular, I was eager to activate this year: Bakers Mountain (W4C/WP-007).

I practically grew up in the shadow of this little outlier mountain in Catawba County, North Carolina–my home was only a couple miles away as the crow flies and it has always been a bit of a landmark in my childhood stomping grounds.

Growing up, the land in/around Bakers Mountain was basically off-limits and privately owned. In the late 1980s, one of the land owners gave a large tract of land to the county to protect it from development (which started booming in the area around that time).

In June, 2002, while I was living in the UK, Catawba County open up the 189 acre park and its 6 miles of trails to the public.

I love Bakers Mountain park. Even though the mountain isn’t terribly tall (1780 feet/543 meters ASL) parts of the trail system are fairly strenuous. When I want to escape and clear my head, the Bakers Mountain trails are the perfect medicine.

Bakers Mountain: What’s in a name?

An interesting tidbit about Bakers Mountain that I learned from one of the park rangers: it was originally called “McBride Mountain in the late 1700s, but as more German settlers moved into the area, German family names became predominant.

The Baker family had large tracts of land in/around the mountain and, locally, people started referring to it as “Baker’s Mountain” sometime in the 1800s and the name stuck.

Officially, the name of the mountain is “Bakers Mountain” although, I suppose, it should have been called “Baker’s Mountain” or maybe “Bakers’ Mountain.” An apostrophe was never added, though.

It’s a source of confusion for those who make maps and refer to the mountain. In the SOTA database, it’s referred to as “Baker Mountain.” That is incorrect, of course, but the SOTA database is likely built upon one of the topographic map databases where it’s incorrectly labeled.

So there you go. Tuck away this bit of trivia and sound like a local next time you’re in Catawba County!

Now where was I? Oh yes…

So on Wednesday, May 19, 2021, I packed my Elecraft KX2 and PackTenna 9:1 UNUN antenna in the GoRuck GR1, and hit the Bakers Mountain trail system.

The weather was perfect, although the humidity was incredibly thick that day.

Mountain Laurels were in bloom and flanked portions of the trail.

I took the main red-blazed loop trail.

The trail is very well-marked and maintained with maps posted throughout.

At one point, you’ll happen upon the old home site.

The trail has a few steep sections, but overall is pretty moderate.

There’s no missing the summit trail.

Following the orange mountain top trail will take you to a gazebo and observation deck near the summit.

Keep in mind, though, that this is not the true summit of Bakers Mountain and isn’t close to the 25M SOTA activation zone. Still, the views are fantastic here, so take a breather and soak up the Catawba valley.

Click the pano image below to enlarge in a new window.

To find the trail to the real summit, you must follow the path crossing under the power lines near the observation area–you can’t miss it. While the public isn’t encouraged to take this path–and it is not a part of the Bakers Mountain trail network–a park ranger told me that the current owners don’t mind the odd SOTA activator following the trail to the summit.

The path–since it’s not a part of the public trail–is a bit overgrown. Follow this path until you intersect an overgrown narrow access road. At the intersection take a left and this will lead you to the true summit. The ring road around the summit is well within the AZ.

I found a little spot to set up among the trees on the summit. No views, but it was the perfect space to deploy the PackTenna 9:1 UNUN!

Gear:

On The Air

This being my first time activating Bakers Mountain, of course I made a real-time, real-life, no-edit video (see link below). Sorting out a way to set up the camera position took me longer than deploying the antenna and unpacking the radio! It can be a real challenge on a stony mountain summit.

The KX2 paired beautifully with the PackTenna 9:1 UNUN. I got a great match on 20 meters.

I started calling “CQ SOTA” and spotted myself on the SOTA network using the SOTA Goat app.

My first contact was SA4BLM in Sweden–I almost fell off of my rock!

Next, I worked KR7RK in Arizona, AE0XI in South Dakota, and HA9RE in Hungary! All in eight minutes.

Wow!

Next, I moved up to the 17 meter band where I logged AC1Z in New Hampshire, F4WBN in France, and KT5X in New Mexico.

Finally, I moved down to 40 meters where I worked K3TCU in Pennsylvania, K8RAT in Ohio, W4KRN in Virginia, and K4MF in Florida.

My total activation time was about 25 minutes.

QSO Map

Here’s the QSO Map plotting out my QRP contacts. I must say, that modest PackTenna did a lot with my 5 watts! That and some good Bakers Mountain mojo! šŸ™‚

Video

Here’s my real-time, real-life, unedited video of the entire activation from start to finish:

Click here to view on YouTube.

That was fun!

When I hike at Bakers Mountain, I add spur trails and connectors to make it as long as can in the time frame I have. The trip back to the car was actually a longer hike than it was to the summit.

But I had a spring in my step.

I was absolutely chuffed that my first activation of this particular summit was so exciting and fun. It still blows my mind what can be accomplished with 5 watts and a modest wire. I can’t wait to go back again.


Do you enjoy QRPer?

Please consider supporting us viaĀ PatreonĀ or ourĀ CoffeeĀ Fund!

Your support makes articles like this one possible. Thank you!
How to use Xiegu X5105 CW Memory Keying

As a follow-up to my query yesterday, and so that others can find this on the web, I’ve posted the procedure below for using Xiegu X5105 CW memory keying.

Many thanks to Gary (KE2YK) and many others for sharing the following method:

To configure the 10 CW memory messages:

    1. Go to Menu 3 by pressing the MENU button until 3 appears beneath the power meter on the display.
    2. Hit MSG
    3. Select MSG number with VFO (Tuning Knob)
    4. Press the EDIT button
    5. Scroll through letters / numbers with the VFO and hit INS for each selection
    6. When letter/number selections are complete,Ā  press SAVE
    7. Repeat for each custom message and when done, hit QUIT

To play the 10 CW preset messages:

    1. Go to Menu 5 by pressing the MENU button until 5 appears beneath the power meter on the display.
    2. Select DIGI
    3. Select CWDEM from mode choices (leftmost button in menu 5) by pressing the button until CWDEM appears
    4. Repeatedly hit MSG to select specific message number
    5. Press PTT on body of rig or perhaps press PTT on mic. This will send the selected message one time.

To exit, hit MENU for other menu selections

No doubt, for CW memory playback, this is cumbersome. In fact, if Xiegu doesn’t update the firmware with an easier way to initiate playback (as they had in the original firmware version), I see that I’ll only use memory position 1 for calling CQ. I wouldn’t want to go through the trouble of selecting a different message for playback in the field and in the middle of an exchange. That’s just a little too clunky to be practical.

I’ve sent a note to Xiegu about this. With any luck, perhaps they’ll improve the firmware for easier operation.

Thank you again, readers for sorting out the mystery!

Xiegu X5105 CW Memory Keying: I could really use some guidance…

X5105 owners, I could really use your help!

[UPDATE: Thank you for the assistance! See procedure below.]

You may recall that I’m evaluating the X5105 on loan from Radioddity. Overall, I’ve been pretty impressed with this budget transceiver when I’ve taken it to the field.

I need a mystery solved though: How in the heck does one set up and use CW memory keying–?

The owner’s manual has been no help and I actually feel like it’s referencing an earlier firmware version.

In fact, from what I gather reading the earliest manual, it used to be super simple to both record and play back CW memory keyer messages. There were three memories labeled RE1, RE2, and RE3 that you could activate with three of the four quick menu buttons under the display. I would love that sort of accessibility, but I gather it’s no longer an option.

I’ve yet to find an explanation for using CW memory keying in the current version of the X5105 firmware.

Please comment if you could describe the procedure or point me to documentation that explains it. I could really use your guidance! Thank you in advance!


Update: How to use X5105 CW Memory Keying

Many thanks to Gary (KE2YK) and many others for the following procedure:

To configure the 10 CW memory messages:

    1. Go to Menu 3 by pressing the MENU button until 3 appears beneath the power meter on the display.
    2. Hit MSG
    3. Select MSG number with VFO (Tuning Knob)
    4. Press the EDIT button
    5. Scroll through letters / numbers with the VFO and hit INS for each selection
    6. When letter/number selections are complete,Ā  press SAVE
    7. Repeat for each custom message and when done, hit QUIT

To play the preset messages:

    1. Go to Menu 5 by pressing the MENU button until 5 appears beneath the power meter on the display.
    2. Select DIGI
    3. Select CWDEM from mode choices (leftmost button in menu 5) by pressing the button until CWDEM appears
    4. Repeatedly hit MSG to select specific message number
    5. Press PTT on body of rig or perhaps press PTT on mic. This will send the selected message one time.

To exit, hit MENU for other menu selections

No doubt, for CW memory playback, this is cumbersome. In fact, if Xiegu doesn’t update the firmware with an easier way to initiate playback (as they had in the original firmware version), I see that I’ll only use memory position 1 for calling CQ. I wouldn’t want to go through the trouble of selecting a different message for playback in the field and in the middle of an exchange. That’s just too clunky to be practical.

I’ve sent a note to Xiegu about this. With any luck, perhaps they’ll improve the firmware for easier operation.

Thank you again, readers for sorting out the mystery!

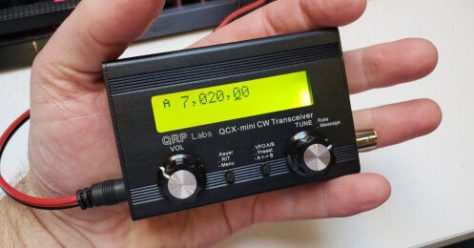
Video: QRP Labs QCX-mini 5W CW transceiver–now available to order

Hans at QRP Labs has just posted a video of the new QCX-Mini 5 watt transceiver kit. It looks like another thoughtful design:

Even though I’ve yet to build my QCX+ (!!!), I just ordered the QCX-Mini. This little kit will be a challenge for me–even though all of the SMD components are pre-populated, it’s still a tight board and requires some fancy toroid work!

Still, I’m buying it to support QRP Labs’ work and because I love the challenge of building kits. This one is awfully cute and I’m pretty sure I’ll use it to claim a summit!

My entire QCX-Mini kit with enclosure set me back $86.99 US with shipping and tax included. How could I resist? (Don’t answer that, please.)

Click here to check out the QCX-Mini product page.Ā 

Eric’s DIY Cootie: “Levon”

Many thanks to Eric (WD8RIF) who writes:

Well, if K8RAT is going to tout Hermione, I guess I need to tout Levon.

My cootie/sideswiper was inspired by an article (http://sideswipernet.org/articles/w9ok-modernization.php) by W9LA about how hams in the 1930s might have constructed a cootie/sideswiper using a ceramic DPST knife switch. I didn’t have a ceramic DPST knife switch, but I did have a nice Leviton ceramic DPDT knife switch which I used as the basis for my cootie/sideswiper. Instead of using tape for the fingerpieces as described in the article, I used Fender guitar picks.

This cootie is the key I use most often for home-based operations.

While operating in the field, I usually use an inexpensive and lightweight Whiterook MK-33 single-lever paddle as a cootie key.

Levon is a handsome sideswiper, Eric! Thanks for sharing his story and your photo!

Thanks to both of you, I feel inspired to make my own “cootie” this winter. Perhaps I’ll try to find some historic context/inspiration as well!

Any other homebrew sideswipers, straight keys, or paddles you’d like to share? Please contact me and we’ll feature your creations!

I’ve got a very special one that’ll be featured later this week. Stay tuned!

Mike’s DIY cootie: “Hermione Hackberry”

Many thanks to Mike (K8RAT) who shares a little info about his homebrew sideswiper, “Hermione Hackberry”:

Saw W3AVP’s nifty homebrew sideswiper on QRPer.

This (see photo above) is the one I built a few years ago from a hacksaw blade, cabinet fixtures and a crafter’s block of wood. The felt pad finger pieces allow me send more smoothly than with the bare metal lever.

I also used 4 pads under the base for gripping.

Since I had most of this stuff on hand the cost of the project was less than $4 dollars.

Fantastic, Mike! And I understand Hermione sends like a dream!

Thanks for sharing, Mike! Anyone else care to share a photo of their homebrew key? Please comment or contact me!

Begali is making an Adventure Key stand and mounting bracket for the Icom IC-705

Many thanks to Ray Novak (N9JA) at Icom America who shares photos of the Begali-05 bracket prototype that is being developed for the Icom IC-705 transceiver.

Those who already own a Begali Adventure key will soon be able to mount it on the IC-705 with the Begali-05 bracket.

Ray notes that this is still an early prototype, so the finished product might look quite a bit different.

He also noted, “The plan is for the Begali-05 to be available at Authorized Icom Amateur Dealers.”

I’m a massive fan of Begali keys. Not only do they make some of the best, highest precision keys in the world, but the Begali family are proper ham radio ambassadors. I love supporting them!

Pietro Begali (I2RTF) winner of the 2019 Hamvention Technical Achievement Award.

I’ll attempt to acquire a Belagi-05 bracket and Adventure Key for review with my IC-705. In truth, though, I’m sure it’ll work beautifully. It’ll be a Begali!

Have you ever regretted selling a radio? I have. More than once.

The Elecraft KX1

Iā€™ve been a ham radio operator since 1997. In the first decade of my amateur radio life, I only owned three HF radios (Icom IC-735, Yaesu FT-817, and a Ten-Tec OMNI VI+).

As I got into writing, blogging, and evaluating/testing radios, that number increased. Quite often, radios are only in my shack for a short period of time as I alpha/beta test and/or review production run units.

I try not to get attached to radios because I know theyā€™re often only temporarily in the shack.

Over the years, there have been a few radios Iā€™ve sold forā€¦letā€™s say ā€œpragmaticā€ reasons. Itā€™s very rare that I purchase a radio with the intention of keeping it only to find that I want to sell it shortly thereafter. More likely than not, I sell because the radio is redundant (how many field radios does one need–?) or because Iā€™m raising money to make a larger purchase.

Hereā€™s a short list of transceivers I regret selling/trading:

Elecraft KX1

I sold my Elecraft KX1 in 2016 in order to help purchase my Elecraft KX2. It was a solid decision. The KX2 has become my favorite field radio (here’s my review) and was SO much more versatile than the KX1. Still: I really miss the KX1. I loved how bare-bones it was, I loved the top-mounted controls and the fact I often operated it while simply holding it in my hands. The controls were super easy to use even with gloves on in the winter. Plus, it was ā€œcuteā€ in a boxy Elecraft sort of way. If I ever find a deal on another one, I might grab it!

Elecraft K2

Iā€™ve owned both the Elecraft K2/10 and K2/100. Funny story: I acquired a K2/10 in 2008 or so and absolutely loved the radio. After I purchased my KX3 in 2013, however, it was rarely used and sat on my shelf as a ā€œback-upā€ radio. Eventually, I decided to sell it and did so with ease. Within a week of selling it, a local ham posted on our club email list that he was selling a K2/100 in an SK sale. He wasnā€™t sure of all of the upgrades, but knew it was a K2/100. The price was very low, but there were no takers after a few days, so I bought it. I used the K2/100 for a few years and it served as a back-up 100 watt radio. I eventually sold it, though, to purchase a KXPA100 used. Now, of course, I do miss that radio. In truth, Iā€™ll likely never purchase one again, because I own so many other transceivers–and the KXPA100 is truly a genius compliment to the KX2 and KX3–but I do have an affinity for that fine rig.

Index Labs QRP++

QRP+ ad from the Dec 1995 issue of QST. Source: WD8RIF

My buddy Eric (WD8RIF) is to blame for this radio. He owned an Index Labs QRP+ for years. He loved operating it in the field and at home. It was the first QRP radio I ever saw in action (at this particular field event). More than 10 years ago, I happened upon a great deal on a QRP++ and instantly bought it. It was SO much fun to operateā€”super simple, yet had pretty much every feature youā€™d want in a basic transceiver. I sold it because, frankly, performance was sub-par especially if you ever planned to use it in an RF-dense environment. The receiver front end would simply fall apart, for example, during contests or events like Field Day. Otherwise, it was a pretty sensitive radio. It was incredibly portable and had that awfully ā€œcuteā€ cube form factor. Another fear I had was availability of replacement parts. Index Labs was no longer in business and there were quite a few obsolete parts in the radio. Perhaps itā€™s a stretch to say I ā€œregretā€ selling it because, in truth I donā€™t. But when I see them at hamfests, Iā€™m still tempted to grab one if for no other reasons than nostalgia.

Yaesu FT-817

I purchased an ā€˜817 shortly after they were introduced inā€¦whatā€¦2000? At the time, there wasnā€™t a radio like it on the market: it was the most compact full-featured HF/VHF/UHF radio in the amateur radio world. Back then, I was living in the UK and travelling all over Europe. I purchased the FT-817 with the idea that I could play radio while, say, working in Hagen, Munich, Chartres, Berlin, Torino, Pescara, or any of the other fabulous sites I regularly visited. I did pack the FT-817 on a number of occasions but since Iā€™m a one-bag traveller, it was scrutinized to some degree at most airportsā€”especially post-9/11. Also, my first production run model blew its finals within the first two years of ownership (a common problem that was addressed by Yaesu shortly after that production run).

I had the finals replaced by Burghardt Amateur Center but rarely used the FT-817 after that. Truth was, I found the radioā€™s front panel to be too compact and the embedded menus really frustrated me. But back then, I wasnā€™t as much of a field op as I am now and I could really appreciate a compact, affordable radio that also sports VHF/UHF operationā€”especially for SOTA activations. Plus, few transceivers have enjoyed a product life like the FT-817/818 which is now pushing 20 years on the market. While the 817/818 lacks a number of features Iā€™ve grown to love (like memory keying) I do believe I may purchase an FT-818 next time they go on sale. In the end, I miss the rig.

How about you? Any regrets?

Please feel free to comment with any radios you regret selling, trading, or giving away over the years and tell us why you miss it! Inquiring minds want to know!

CHA MPAS Lite: Chameleon designs a new QRP compact portable antenna system

Many thanks to, Don (W7SSB), who notes that Chameleon Antenna has just introduced the CHA MPAS Lite: a modular portable antennas system covering from 6M – 160 meters.

I know a number of participants in the Parks On The Air program who use the CHA MPAS antenna system–the MPAS Lite is the “little brother” of that antenna, according to Chameleon.

Although designed with the new Icom IC-705 and other QRP transceivers in mind, the CHA MPAS Lite can handle up to 100 watts in SSB or 50 watts in CW.

They plan to start shipping the antenna in early November 2020 and the price for the system is $340.00. That may sound like a lot of money for an antenna (it is, let’s face it!) but if you speak with pretty much anyone who owns a Chameleon antenna they’ll tell you it’s worth it. The quality is second to none. I’ve been testing their Emcomm III wire antenna recently and it must be one of the most robust portable wire antenna systems I’ve ever evaluated.

Also, all of their products are designed and manufactured in the USA.

Click here to check out the CHA MPAS Lite product page.

We recently added Chameleon Antenna to our list of sponsors here at QRPer.com. I’m very proud to include them because one of my personal missions is to promote mom-and-pop companies that push innovation here in our radio world! It’s humbling that they support us too.

The new Inkits Easy Bitx SSB TCVR kit

Many thanks to Robert Gulley (K4PKM) who shares the following news from Inkits:

This is to inform all our valued subscribers that we have launched the much awaited easy bitx kit and few customers have already bought the kit.

The easy bitx kit works on a single band and can be built
for 20mt 40mt or 80mt bands.

This is an enhanced bitx design from the previous versions.
There is a complete manual available with link below.

Easy Bitx Version 1

Complete details are provided in the construction manual to build the kit in 15 Steps.

There are 15 individual kits packets provided to assemble the kit step by step.

The si5351 BFO VFO is provided with the kit in working condition. Only The IF frequency has to be set as described in the manual.

The easy bitx kit is an excellent educational kit for new Hams
who are wish to learn how to build a single band transceiver.
And later use it on the air.

The bitx in various kits and individual mods has been build by thousands of hams world wide, so this way easy bitx is a perfect kit for newbies.

The complete kit can be purchased from our website.

Presently we are shipping world wide with DHL Express.