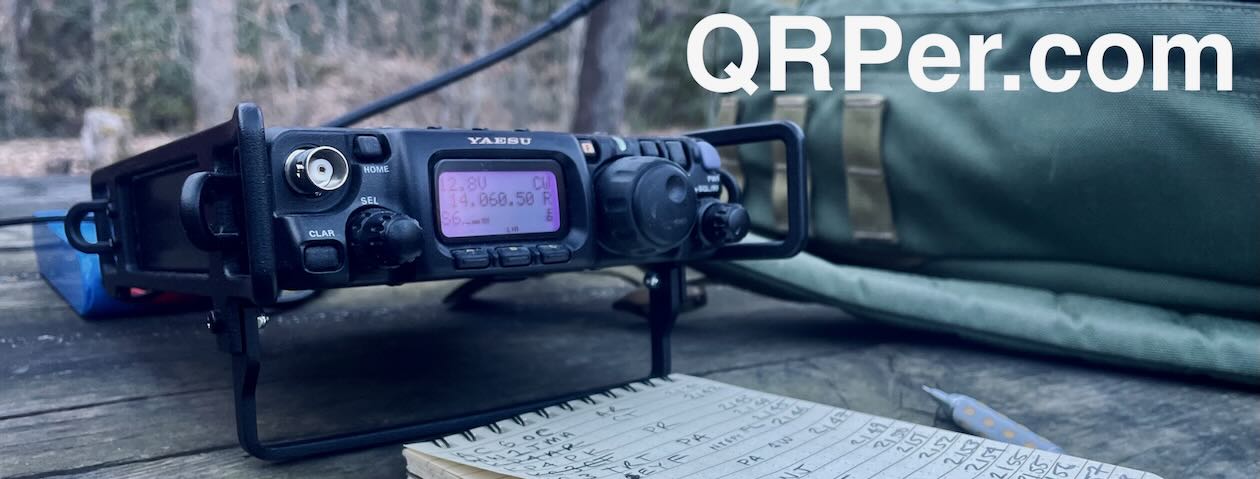
Tag Archives: QRP

Fitting in some QRP SOTA & POTA on Mount Jefferson!

Looking back at last year (2021), if I had to pick out one of the easiest SOTA activations I made, Mount Jefferson would be near the top of the list. It’s a very accessible summit although not technically a “drive-up” summit because you will need to walk a short distance up a service road to the activation zone (AZ).

Mount Jefferson (W4C/EM-021) is located on and protected by the Mount Jefferson State Natural Area (K-3846), so when you activate Mount Jefferson for Summits On The Air, you can also claim the activation for Parks On The Air and World-Wide Flora and Fauna as long as you work at least 10 contacts.

What I love about POTA and SOTA “2-fer” sites like this is that you can set things up to be spotted in both systems (and often the WWFF system, too!) which increases your audience of hunters and chasers, thus increasing your odds of achieving a valid activation in all programs. It’s especially desirable if you’re a CW op and know you may potentially be in a spot with no mobile phone service for self-spotting; if, for some reason, RBN auto-spotting functionality is down with one program, the other serves as a backup.

Mount Jefferson is at least a two hour drive from my QTH, but it was easy pickings on April 29, 2022 because it happened to be within spitting distance of New River State Park where I was camping with my family.

Mount Jefferson (W4C/EM-021)

The drive to Mount Jefferson took all of 20 minutes which was a good thing because our family had other activities in store that day including some extended hikes!

Hazel (above) was so excited to to check out the sights and smells at this new-to-her park! Continue reading Fitting in some QRP SOTA & POTA on Mount Jefferson!

Scott runs some QRO v QRP numbers!

Many thanks to Scott (KK4Z) who shares the following post from his blog KK4Z.com:


QRO SCHMURO

There is always a lot of talk about QRP vs QRO, 5 watts vs 10, ad nauseam. So today I thought I would run the numbers and see what the real deal is. First we need a few definitions. An S-unit in general terms is the minimum change in signal strength to be just noticeable (k3wwp.com). In more technical terms it equates to approximately 6 db in change. The decibel (dB) is a logarithmic number. Each 10 dB represents a factor of 10 difference. This may be a little out there for some so we will cut right to the shortcut. There are two types of logarithms. For calculating dB, use the common logarithm which is base 10. To see if your calculator uses the right one. Punch in 100 and then log. The answer should be 2 which equates to 10 to the second power which equals 100. This is not a technical paper but an entry way to see how changing the power levels affect the signal level of your transmitting signal. As you guessed, it is not linear.

Let me introduce an equation:

Where Power P1 is the power you wish to evaluate and reference power P2 is your starting power. Let’s take going from 5 watts to 10 watts. The equation would look like this:

We take 10 and divide it by 5 which give us 2. Then we hit the log function on our calculator which gives us 0.301. Multiply that by 10 and you have about 3 dB in gain or about one half of an S-unit (remember 1 S-unit is equal to 6 dB). Let’s do one more by hand and tackle the QRP/QRO debate. How many S-units will increasing power from 5 watts to 100 watts give you? The equation looks like this:

Take the 100 and divide by 5 to give you 20 and then hit the log function to give you 1.301. Multiply by 10 for 13.01 dB. Divide 13.01 by 6 dB and you have 2.17 S-units. Going back to our definition that one S-unit is the minimum change in signal strength to be just noticeable shows that going from 5 watts to 100 watts is not that great of a change.

Let’s let the other shoe drop. What about going from 5 watts to 1500 watt? That will give you 4.13 S-units of gain vs 1.96 S-units going from 100 watts to 1500 watts?

This gives you a fairly easy equation to help you evaluate your needs based upon empirical data. Running 20 watts over 5 gives you 1 S-Unit. Using less power means less drain on the battery for longer operation. This is only part of the equation. Propagation, antenna, mode used, and station efficiency all play a part. Have fun and maybe don’t toss the QRP radio yet. 🙂

Click here to read this post and more at KK4Z.com.

Pairing my new Xiegu X6100 with a 31 foot speaker wire antenna (and avoiding RX overload)

Regular readers of QRPer.com might question the wording in my title since I’ve already posted several field reports and even a full review of the Xiegu X6100. So why would this X6100 be considered a “new” radio–?

Since I go over this in more detail in the activation video (linked and embedded below), I’ll give you the nutshell version here:

My activations with the X6100 early this year (2022) were all performed using a loaner unit sent to me by Radioddity. I kept that unit for a few weeks, shipped it on, and purchased one of my own.

In February, when I received the X6100 I purchased, I immediately noticed a small mechanical issue with the encoder.

This is the X6100 open. You can see the back of the encoder to the right of the ribbon cable.

I tried fixing it (with instructions received from Xiegu) but in the end had to return the transceiver for replacement.

The X6100 unit in this field report is my replacement–technically, the third X6100 I’ve had in my hands, and this was my first activation using it.

Many of you have asked why I haven’t taken the X6100 to the field more often this year and this is why. I basically didn’t have a functioning unit for most of February, March, and April. Radioddity was quite responsive to my issues with the X6100, but frankly I had a lot going on during that time frame so it took longer than normal to troubleshoot, modify, test, and send back the faulty unit.

Fortunately, the replacement X6100 has no encoder issues other than the brake is very tight. I’m not willing to break the warranty seal on this unit to adjust it, so I’ll just live with a much-tighter-than-I’d-like encoder.

[Update: Bob (W0BNC) points out that the tight brake is due to friction caused by a felt pad under the X6100 encoder knob. The remedy is to pull off the rubber ring around the encoder knob, loosen the set screw, lift the knob slightly off the body, and retighten. I’ll do this when I’m back with the X6100 after summer travels. Thanks, Bob!]

X6100 field kit test

This activation was also the perfect opportunity to test all of the components of a dedicated field kit I’m building around the X6100.

The kit consists of:

  • The Xiegu X6100 QRP transceiver,
  • a BNC binding post adapter,
  • paddles,
  • the X6100 battery charger,
  • a 31′ speaker wire antenna
  • 25 meters of 2mm throw line,
  • a weaver 8oz weight, and a
  • logging pad and pencil.

Everything, save the antenna, fits in my Red Oxx Hound EDC pack.

Eventually, I’ll replace the speaker wire with some thinner Wireman stuff and it should all fit in the Hound pack, albeit snuggly!

I’ve decided that the X6100 will live at my parents’ home in the NC foothills, so I’ll always have a field radio kit available while staying there overnight.

Lake Norman State Park (K-2740)

On May 9, 2002, an opportunity opened up in the afternoon to finally take my new X6100 to the field! Continue reading Pairing my new Xiegu X6100 with a 31 foot speaker wire antenna (and avoiding RX overload)

Rough conditions but serious QRP POTA fun at New River State Park

The New River (Photo by K4TLI)

You might recall from my previous field report that I took the family on a camping trip at New River State Park in April 2022.  During that trip, I made an activation of New River each day and also fit in a very fun SOTA activation (click here to read an overview).

Note that anytime you’re performing an activation over multiple days at any one park, you can only have one activation per UTC day.

The following brief field report is essentially my “Part 2” from April 28, 2022. Since I’d already worked well over my ten contacts in the previous activation session that UTC day, all of these contacts were simply icing on the cake!

Keeping this one brief(er)

I’ve an insanely busy day today, what with exam study, errands, splitting firewood, and prep for our summer travels.

That said, I wanted to squeeze in an activation video and field report because the rest of the week is even crazier. Continue reading Rough conditions but serious QRP POTA fun at New River State Park

A comprehensive review of the Penntek TR-35 four band QRP transceiver

The following article originally appeared in the April 2022 issue of The Spectrum Monitor magazine:


“Look at this, Tom! Only the stuff I need and nothing more,” cheerfully noted my good friend and Elmer, Mike (K8RAT).  It was Field Day two decades ago, and Mike was gazing at his TEN-TEC Scout. I glanced over, and agreed. “So simple and so effective,” Mike added.

I’ve never forgotten Mike’s sage words. That Scout (Model 555) was about as simple as a then-modern HF transceiver could be:  it had a total of three knobs––one for AF gain and IF bandwidth, one for RIT and Mic gain, and an encoder. It also had three mechanical switches on the front: one for power, one for TUNE and NB, and one for CW speed and RIT. It also had an analog SWR/power meter. The Scout used plug-in band modules for each HF band and featured a large segmented bright green LED frequency display that was characteristic of so many TEN-TEC rigs of the day.

And Mike was right. For those of us who appreciate radios with a simple, uncluttered, and an almost utilitarian interface, the Scout was, in vintage parlance, “the bee’s knees.”  And that the Scout also performed beautifully was just icing on that cake.

When the Scout first appeared in 1994, embedded menu options and spectrum displays were not yet commonplace among amateur transceivers. Embedded menu items can open the door to near granular level control of your radio’s functionality and features. Then again, if those embedded menus aren’t well thought out, it can lead to awkward operation practices in the field, during a contest, or even during casual operation.

As a radio reviewer, I spend a great deal of time sorting out embedded menu functionality and design. Perhaps it’s for this reason that I so enjoyed reviewing a radio that bucks this trend and reminds me of a time that was simpler, not to mention, easier.

Enter the Penntek TR-35

The new Penntek TR-35 is a four-band CW-only QRP transceiver that is available both as a kit ($279) and as a factory assembled and tested unit ($379). Penntek transceivers are designed and manufactured by John Dillon (WA3RNC).

All of his transceiver kits are available at his website WA3RNC.com.

I was first drawn to the TR-35 after reading the opening paragraph of the product description:

“Compact but powerful 4-band, 5-watt CW transceiver kit that uses no tiny push buttons, and without those seemingly endless and hard-to-remember back menus. There is a knob or a switch for every function!”

Sold!

I considered buying and building the TR-35 kit, but I wanted my eventual review––this one!––to focus on the radio’s functionality and performance. So a factory-assembled and tested unit was right for this purpose, just so that any performance issues wouldn’t be a result of any shortcomings in my kit building skills.

I decided to reach out to WA3RNC and ask for a loaner. John very kindly sent a factory built TR-35 to me along with return postage and a very flexible loan period (thank you, John!). Continue reading A comprehensive review of the Penntek TR-35 four band QRP transceiver

John’s trip and POTA field reports from Nova Scotia

Many thanks to John (VE3IPS) who shares the following guest post:


Nova Scotia POTA After-Action Report

by John VE3IPS

We had planned a vacation trip out to Nova Scotia to get our lobster fix. As I always do, I prep my radio with local repeaters, look up local radio clubs, museums and check the POTA and SOTA map for locations to operate from.

I noticed that several park locations had not been activated. Thus I had an opportunity to be first activator and to get some much needed Nova Scotia parks in the Hunters logs. I printed the map and noted the park identifiers. I decided to just activate the parks that were never activated. I could have worked more parks but you have sights to see and can’t be behind the mic all the time. My antenna was prepped to be rapidly deployed in a few minutes and torn down accordingly.

I also was able to attend the Halifax ARC Hamfest on June 4, 2022.

So a vacation with ham radio elements to keep me excited with some objectives in mind.

We did visit Peggy’s Cove, Burnt Coat Head to watch the tides in the Bay of Fundy, local wineries, Lunenburg (a movie shoot was underway), the Halifax Citadel and of course eat lobster every day. I spent over $200 in gas as we did a lot of driving around (gas is just over $8 a gallon CAD), retail tax at 15% and prices for food and restaurants up by 30%. Nova Scotia is a bit more expensive than other cities.

I decided to bring my Icom 705 with a LifePO4 battery to offer 10 watts instead of the FT-891 or FT-818. Why? Because it offered a voice memory for calling CQ Parks, built in SWR meter and better IF filters over the FT-818. I wanted to cover the Marine and VHF/UHF repeaters as well and that ruled out the FT-891.

Due to the Kleenex box form factor I ended up using a Lowe Pro Omni Trekker camera bag to use as a carry on. This included a Nikon V1 camera and Binoculars.

Continue reading John’s trip and POTA field reports from Nova Scotia

Solar POTA: Pairing the Buddipole PowerMini 2 with folding panels and the FT-817ND at New River State Park

Photo by K4TLI

I’m often asked if I ever charge my LiFePo4 batteries in the field via solar energy.

Truth is, I’m a big fan of solar, but I’m rarely in the field long enough to need to recharge my batteries via solar when performing SOTA and POTA field activations. It’s easier to charge them at home in advance (often via the solar system at our QTH).

In fact, one of my 3 Ah LiFePo4 Bioenno batteries can easily take me though 3-5 activations or possibly more, depending on the length of the activation and the rig I’m using.

Photo by K4TLI

For longer forays into the field, however, I love going solar.

Indeed, every few years, my family will stay in an off-grid cabin on Prince Edward Island (Canada) for up to 6 weeks at a time. Solar is the only practical way to stay on the air that length of time.

Of course, I also like having a solar option, when doing proper primitive/off-grid tent camping.

In the past, I’ve used a very simple portable solar charging system based on a variety of rigid and folding panels, a Micro M+ charge controller, and sealed lead acid batteries. The batteries are of course heavy, but they work brilliantly for fixed operations.

These days, I’m fully invested in LiFePo4 batteries and my Micro M+ charge controller is not really designed to pair with the BMS (battery management system) in my Bioenno packs.

Bioenno sells a number of affordable solar charge controllers, but most resemble units that are used in permanent installations.  I wanted something more portable and, ideally, something with Anderson PowerPole connections.

Late last year, I discovered the Buddipole PowerMini 2:

Photo by Buddipole

I contacted Buddipole with a few questions about the unit and to find out when they would be in stock again (at the time, they were on back-order and indeed they are at time posting this report).

Turns out, they were to be restocked the next day, so as soon as inventory was showing on the site, I ordered one. Continue reading Solar POTA: Pairing the Buddipole PowerMini 2 with folding panels and the FT-817ND at New River State Park

Moody weather and a trailside activation with the amazing Discovery TX-500 and PackTenna EFHW

As I mentioned in a previous post, I’m starting to sort out the gear I’ll take on a long road trip this summer. I still haven’t quite decided which radio will accompany my Elecraft KX2, but the lab599 Discovery TX-500 is on my very short list.

I pulled the TX-500 yesterday to do a firmware update and found my logbook for an activation I made on February 16, 2022. For the life of me, I couldn’t remember writing the field report for that activation.

I checked my YouTube channel and, sure enough, buried at the bottom of my video list was the activation video marked as “unlisted.”

That bit of time between mid-February and mid-March was crazy for me. I was in isolation for a week (thanks Covid) and had a very hectic family schedule. I accumulated a small backlog of videos then and this one was lost simply lost in the shuffle.

Here’s the report and video from that activation:

Clear Creek Trail

It was Wednesday, February 16, 2022, and I was driving to my parents’ house to help them with a few projects. I had enough time to make a little detour to the Clear Creek Access of South Mountains State Park (K02753) and had two things in mind: a good hike and trailside activation.

The weather? Man oh man was it was fickle.

On the interstate, I got caught in a proper downpour and traffic slowed to a crawl.

I thought about throwing in the towel then, but I made a promise to myself that I would continue driving to the park if it wasn’t raining when I approached the park exit on the interstate.

You know what? The rain stopped maybe 3 miles before the exit. So I continued my drive. Continue reading Moody weather and a trailside activation with the amazing Discovery TX-500 and PackTenna EFHW

Choosing the right QRP radios for an extended road trip

As I mentioned in a previous post, if all goes according to plan (and we never take that for granted anymore) our family is plotting an extended road trip into Canada this summer. We’ve got most things lined up: a brilliant house sitter, an  home base in Québec, a doggy “summer camp” for Hazel (my kind father-in-law), and, oh yes, a list of parks and summits I hope to activate.

What I’m still sorting out is the radio gear.

Let me be the first to admit that I’m blessed with a number of field radios (so be warned: this is going to sound very much like a first world problem) and there are aspects of each one that I appreciate. On a road trip like this, though, space will be at a premium.  I can really only justify two compact HF radios and their associated accessories. I plan to bring at least one of my Bioenno 3Ah 12V batteries and charger as well.

Fortunately, I can take a few antennas. We have a roof top Thule cargo box that is actually perfect for my CHA MPAS 2.0, MPAS Lite, and TDL–they’ll fit on the floor of the box and essentially take up no room in it. Otherwise, the cargo box will be dedicated to all of our bulky camping gear.

My HF radios will have to fit in the car trunk/boot along with food, clothes and other supplies.

I already made a decision about one of the radios that will come with me. In fact, it was a bit of a no-brainer:

The Elecraft KX2

I’ve taken the KX2 on all of my major road trips since 2016. It’s incredibly compact, feature-rich, and can handle any situation I throw at it.

In fact, as with two previous years in Québec, I’ll use it to do a little shortwave radio listening (always an important aspect of my travels) and record the BBC Midwinter Broadcast to Antarctica.

Indeed, recording this particular broadcast has become an annual event over at the SWLing Post. It’s one of the highlights of my summer and always falls on my birthday.

The other thing about the KX2 is since it has an internal ATU, I can pair it with any antenna: resonant or not. If the need arises, I can also build an antenna from speaker wire, computer/phone cable, or pretty much anything that conducts.

And, of course, if I pair the KX2 with my low-profile AX1 antenna, I can operate anywhere. I do have a number of urban parks in Ottawa and Québec City that I plan to operate super low-profile and on foot.

The KX2 batteries require that I bring the rapid battery charger and that does take up a little more space (almost the same amount of space as the radio itself!).

As for a second radio…

I think I can get away with packing one more radio. That way, in the unlikely even I have an issue with the KX2, I would have a backup. Plus…hey…variety, right?

I don’t have the room to take my Mission RGO One, Icom IC-703 Plus, or Ten-Tec Argonaut.

I’ve even excluded the KX3 from the list because it wouldn’t offer me much more than the KX2 (just 160 & 6 meters, plus a little extra power output if needed it). The radio I choose needs to be one of my more compact, lightweight, and efficient models.

I’ve also left out the QCX-Mini because I want more than a mono band radio.

Hmmm…then again, the QCX-Mini is so extremely small, I could throw it in my glove compartment and no one would be the wiser [shhhh…let’s keep this between us, shall we?].

Here’s a quick run-down of some of the radios I’m considering and why: Continue reading Choosing the right QRP radios for an extended road trip

SOTA in the Clouds: Pairing the Elecraft KX2 and MPAS Lite for brilliant QRP fun on Craggy Dome!

Although I live in the mountains of North Carolina and am surrounded by SOTA summits, it’s much easier for me to activate a park rather than a summit.

Parks can be quite easy: find the park on a map, drive through their main entrance, find a good picnic table to set up, and next thing you know you’re on the air! Of course, wildlife management areas and game lands can be more tricky, but typically you can drive to the activation site.

Summits–speaking as someone who activates in North Carolina–take much more planning. If it’s a new-to-me summit, I typically need to:

  1. find the GPS coordinates of the true summit
  2. map out the drive to the trail head
  3. read through previous activation notes (if they exist) to find out
    • what type of antenna/gear I might pack
    • and any notes I might need to find the trail or bushwhack to the true summit (quite often published, well-worn trails don’t lead to the actual summit)
  4. look up the trail map and make sure I have a paper and/or electronic copy
  5. pack all needed gear for the hike, activation, and emergencies
  6. sort out the time it will take to travel to the site, hike the full trail to the summit, activate, and return home

If you ask most any SOTA activator, they’ll tell you that the planning is part of the fun.

It really is.

One summit I’ve had on my activation list for ages is Craggy Dome (W4C/CM-007). Out of the higher summits in this region, it’s one of the easier ones for me to reach from the QTH. In fact, as with Lane Pinnacle, I could simply hike from my house directly to the summit (although one way to Craggy might take the better part of a day). The trailhead is about a 50 minute drive, and the hike about 30 minutes.

SOTA notes and All Trails indicated that Craggy Dome’s trail isn’t always easy to follow and that it’s steep and slippery.

Craggy has been activated loads of times, though, so I wasn’t concerned at all.

Living here and knowing how much brush there was on the manway to the summit, I knew that Craggy would be a pretty easy summit if I could activate it after the parkway re-opened for the spring and before the mountain “greened-up”; about a five week window.

Meeting Bruce

My schedule opened up for an activation of Craggy Dome on the morning of April 21, 2022 and I was very much looking forward to it.

I wouldn’t be alone on this hike either. Bruce (KO4ZRN), a newly-minted ham, contacted me and asked if he could join me on a hike and simply be an observer during a SOTA activation.

Fortunately, timing worked for him to join me on this particular SOTA activation. Continue reading SOTA in the Clouds: Pairing the Elecraft KX2 and MPAS Lite for brilliant QRP fun on Craggy Dome!