Tag Archives: Guest Posts

Matt’s “Crackadawn POTA” Field Report

Many thanks to Matt (W6CSN) who shares the following post  from his blog at W6CSN.Blog:


Crackadawn POTA

by Matt (W6CSN)

This is the weekend in October that features the U.S. Navy’s Blue Angels taking to the skies over the Bay Area. The air show takes place over the Bay waters, which means the beaches and shorelines around San Francisco will be packed with people and traffic. Since my usual POTA operating location is right by East Beach, I had pretty much given up on the idea of activating K-7889 this weekend.

Lights of the Golden Gate Bridge reflecting off the still Bay waters.

The airshow is on Saturday and Sunday, but the Blue Angles practice on Thursday and Friday, weather permitting. So here I was on Friday morning, awake at 5AM watching K4SWL on YouTube doing POTA when the idea of getting out for an early activation got into my head.

It was still dark when I tossed my backpack, which was already loaded for POTA from the previous activation, into the car and headed down to the East Beach in the Presidio of San Francisco National Historic Site (K-7889).
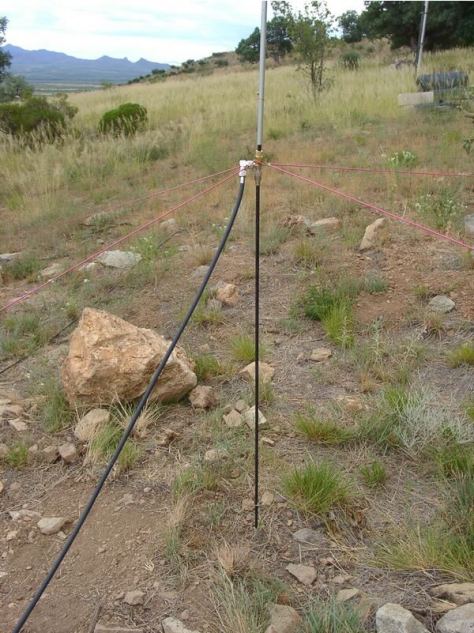
The sky getting lighter in the East before sunrise.

Given the early hour and low light conditions I didn’t relish the idea of doing my usual picnic table and tripod antenna setup. Not long ago I had acquired one of those “mirror” antenna mounts with the jaw clamp arrangement, and this was a great opportunity to try it out. Between the parking lot and the beachfront promenade there is low fence constructed of short steel posts and strands of stainless cable. The fence post was a perfect place to attach the clamp and the MFJ-1979 17 foot telescopic whip, which is a quarter wave on 14 MHz.

Close up of the MFJ-1979 whip antenna clamped to steel fencing.

I was ready to string some radials out to give the antenna a ground plane to work against, but wondered if the post, being sunk into the ground by the Bay and the steel fencing cables might provide enough of a counterpoise. A quick check of the SWR on the meter built into the MTR-4B showed a 1.2 to 1 – no need to even bother with radials with an SWR like that right out of the box.

Low SWR on the quarter wave vertical as the Bay wakes up.

The other advantage of this antenna setup was that it is right next to the car. However, I don’t really like operating from my vehicle as it’s not very sporting nor is it comfortable. Instead, I simply set the station on the trunk lid and completed the activation from a standing position. The other advantage of this arrangement was that I could closely guard the RG-316 coax going from the radio to the antenna to keep any humans or canines from getting entangled. Continue reading Matt’s “Crackadawn POTA” Field Report

Chameleon MPAS Lite: Using the coax shield as a counterpoise and how this might affect directionality

Many thanks to Dale (N3HXZ) who shares the following guest post:


Portable Operation Using a Vertical Antenna Without a Counterpoise Wire!

by Dale (N3HXZ)

In a previous article that Thomas was kind enough to post, I ran experiments to determine if the counterpoise wire orientation of the Chameleon MPAS LITE antenna system in the vertical configuration in any way shaped the antenna pattern.  The configuration of the antenna is shown below.

The system consists of a 17’ telescoping whip antenna, a matching transformer, a 50’ coax cable with an in-line RF choke, and a counterpoise wire (60’ long, but unwound to only 25’ for use in the vertical configuration).

Subsequent studies I performed have reinforced my earlier conclusions that the positioning of the counterpoise wire in this setup does not appreciably shape the antenna pattern. One of the comments from my post came from Stephan (HB9EA). He commented on the fact that the coax cable is indeed a counterpoise via the coax shield and that in fact my system set-up had two counterpoises.

It was Stephan’s comment which led me to contact Chameleon Antenna to discuss counterpoises with the MPAS LITE antenna in the vertical configuration. I communicated with the Director of Research and Development group at Chameleon and found out some interesting information that I wanted to pass on.

He mentioned that the system can be used with the coax cable acting as the lone counterpoise as long as the coax cable is at least 25’ long, and preferably 50’ long.  The coax should be spread out and not coiled along any portion of its length. It was stated that the counterpoise wire provided with the product should be used with short-length coax cables.

With regards to a counterpoise orientation shaping the propagation direction, he stated that it is generally accepted that using only the coax as a counterpoise tends to have the antenna pattern slightly favor the direction in which the coax is laid out. Adding the counterpoise wire in a direction opposite to the coax would tend to balance out that pattern. Having the coax and counterpoise wire at some angle to each other introduces variables that make it difficult to determine the antenna pattern.

My initial study had the counterpoise wire oriented at an angle to the coax cable.  I mentioned that my initial study showed that orientation of the counterpoise wire did not seem to appreciably shape the antenna pattern, and he agreed. What is unknown is the overall degree to which the coax cable shapes the antenna pattern with or without use of the counterpoise wire.  This is an area I am currently investigating.

Operating the MPAS-LITE vertical configuration with only the coax cable as a counterpoise was an intriguing thought.

To test it out I teamed up with Jim (KJ3D) for a SOTA activation on W3/PT-003 (Seven Springs). We both deployed the MPAS-Lite with only the supplied 50’ coax cable attached. Coax cables were laid out in a straight line. One cable was oriented southeast, the other one oriented east. We operated on 10 Watts in CW mode. The activation successfully worked all bands from 40M to 10M. I operated an Elecraft KX2 and Jim operated a KX3. The internal tuner of both rigs easily obtained a 1:1 match across all bands.

A map of the QSO’s is shown below. Note that despite the coax cables facing to the southeast and east, we easily worked stations in the opposite directions. Hence any minor shaping of the antenna pattern by the coax orientation does not appear to impede successful communication in all directions.

In summary, the MPAS-LITE antenna system in the vertical configuration utilizing the 50’ coax cable with an in-line RF choke as the single counterpoise has been demonstrated to perform well in the field.

For portable operation where fast deployment and simplicity is paramount, using the furnished coax as a counterpoise is a quick and dirty way to get the antenna erected and on the air with reliable communication capability. Eliminating the counterpoise wire allows for quicker set-up and tear-down, and one less thing to put in the backpack!

Bob’s POTA weekend in eastern North Carolina

Many thanks to Bob Conder (K4RLC) who shares the following guest post:


North Carolina Parks On The Air Activation weekend

Bob (K4RLC)

The first North Carolina Parks On The Air Activation weekend occurred September 9 & 10. Between a limited amount of time available and weather, I only was able to activate three parks, including an over-night camp out. The primary goal was to return to the Dismal Swamp State Park (K-2727) in Camden County. While the Dismal Swamp in Camden County is a rare and sought after County on CW for those wanting to work all 100 North Carolina counties and all 3000+ US counties,  it also is a place comforting to my tortured soul.

As there is no camping at Dismal Swamp State Park, one camps at the nearby Merchant Mill Pond State Park (K-2745)  in Gates County. This is a pleasant small State Park with canoeing and fishing in a 190 year old millpond, with old-growth Cypress trees. It is near the lower extension of the larger Dismal Swamp National Wildlife Refuge, which begins in Virginia.

As an older park, Merchants Mill Pond SP does not have any hook-ups for water or electricity. Fortunately, I was camping in our Solis campervan, which is self-contained by solar power and good for boondocking.

The oppressive heat gave way to rain, so I set up inside the van at my campsite. This gave me an opportunity to use my new favorite portable radio, the Penntek TR – 45 Lite, a QRP CW only radio. An outstanding feature of this rig is that it has no menus, only knobs and toggle switches, and reminds me very much of my radios from the early 1960s, but with modern specs.

The internal keyer performed well with the Putikeeg magnetic paddle from Amazon. Even though there was distant thunder, I felt it was safe to set up an inverted V on a fiberglass mast, bungee-corded  to a trailer mount hitch on the camper van. I ran the RG-174 coax through a rear window by sliding the window screen open a bit.

Not wanting to invite an onslaught of mosquitoes, I only used red lights inside the Solis, reminiscent of military operations. The TR -45 Lite did well on 40 CW with 5 W and the inverted V in the rain, and no mosquitoes invaded the van.

The overall goal was to return to the Dismal Swamp. I started early in the morning, setting up on a picnic table in the park between the Canal and the walkway, along the canal. Even though it was midmorning, the weather became interesting, at  90° F and 90% humidity.

For this activation, I used the old IC 706 MKIIG and a modified Wolf River coil set up. I used the Chameleon 17 foot telescopic whip. This whip is Mil-Spec and has a great feel and quality of workmanship. However it is 11 inches too short for the Wolf River “Sporty 40” coil. To address this, I made an 11 inch jumper from solid copper wire left over from my Dad’s days with Southern Bell telephone, and fitted it on an alligator clip, clipped to the top of the whip. The other modification was not to use the three 31 foot radials. For this activation, I tried the KB9VBR “Magic Carpet” ground plane.

This is a 32 x 84 piece of aluminum window screen, laid on the ground, under the antenna tripod. It may be a dB  or so less than the radials, but it sure takes up a lot less space, especially in a crowded parking lot. The key is the Whiterook MK-49 made by ElectronicsUSA. It is my favorite backpacking key, lightweight and withstands being thrown into a backpack with no protection. This set-up worked well both on 20 and 40 CW, juggling CW keying with eating leftovers for breakfast until the rain came.

I then decided to wander on some back roads in Eastern North Carolina and wound up in historic Edenton, originally built in the early 1700s and the first capital of the Colony of North Carolina. Their diverse history is reflected in the town square, where there is a 13 Colony US flag, a monument to the Confederate War dead, and the British Union Jack!

The radio setup was very pleasant at the Historic Site (K-6842) near the Albemarle Sound, which begins at the Eastern North Carolina coast, and runs to the leeward side of the North Carolina Outer Banks on the Atlantic Ocean.

I decided to try the TR-45 Lite again, but this time with a Buddipole on 20 meter CW. Propagation was variable with early contacts in Utah and Idaho, but the band became difficult. It was very pleasant operating with the ocean breeze and looking at the 1886 Roanoke River lighthouse,  until the rain started again.

So it was time to pack up, but a return trip to spend a weekend in Edenton would be a very pleasant activity. On the way out of town, I passed a puzzling POTA  site, the National Fish Hatchery (K-8007), established in 1898, and home of an Annual Fishing Rodeo. Activating there was tempting, but the rain was prohibitive.

All in all, it was a very pleasant activation for the first NC POTA weekend. I got to test different radio and antenna configurations. I would say for the TR -45 Lite, the inverted-V worked best. For the ICOM IC-706 , the “Magic Carpet” aluminum screen worked very well and was very easy to set up.

I did not have time to do a head to head comparison of the antennas; that is a Fall project.  Please note I originally got a stainless steel screen from Amazon, but testing with the Rig Expert showed that it really did not conduct as well as aluminum and had higher SWR, so make sure to purchase the aluminum screen.

For a first NC POTA Weekend, the results were modest and certainly can be improved upon next year. Down east on the Outer Banks, Jockey’s Ridge and the Wright Brother Memorial  is on my future list, but an annual pilgrimage to the Dismal Swamp (especially in non-summer months) is a must.

KA4KOE takes a look at the FX-4CR by BG2FX

Many thanks to Philip (KA4KOE) for the following guest post:


The FX-4CR (Manufacturer’s image)

Review of the FX-4CR Mini-Transceiver: What’s Old is New Again.

by Philip (KA4KOE)

Introduction

My start in Amateur Radio began in 1979 as a newly-minted, 16 year-old Novice. At the time, my resources were slim. I worked in a country store; pushing a broom, putting up stock, bagging groceries, etc. I was paid $23.46 every two weeks. At this time, Heathkit was selling kits to the ham radio community that ran the gamut from simple to elaborate. Looking over the catalog, my young eyes were drawn to the HW-8. What drew my attention was not the radio’s features, but the price.

The Heathkit HW-8 was listed for $129.95, plus shipping. I did not even notice that the power output was specified at 3.5 watts on 80 meters. The green gem was a bonafide ham radio transceiver!

In due course, the kit was acquired, assembled, tested, and put on the air with an Elmer’s aid. I made a bunch of contacts with that CW-only transceiver. The term “QRP” never entered my mind. I don’t have any photographs from my early days on the air: the only photograph of the HW-8 dates from 1981 during my freshman year of college. By that time, I had acquired an HW-100 from a fellow ham. See Photograph No. 1: note the chrome Vibroplex Lightning Bug, homebrew “T” network transmatch, and of the course the ‘8 on far right (see red arrow).

Photograph No. 1: KA4KOE in 1981.
Photograph No. 2: Heathkit HW-8. (Image Source: WD8RIF)

Rationale and the radio

Without getting into my entire life’s story, I will start this paragraph by stating that my ham “career” has now come full circle as I’m back to using compact, lightweight, low power gear; this time by choice.

I had the bad habit of deploying too much gear during POTA activations. I came across internet chatter with regards to a relatively new product; the FX-4CR SDR mini-transceiver. The base specifications are as follows:

  • Dimensions: 107mm (4.2”) L x 65mm (2.6”) W x 43mm (1.7”) H.
    Weight: 0.46 KG (1 LB).
  • Bands/Power:  80 meters thru 10 meters, inclusive: 20 watts. 6 Meters: 5 watts.
  • Display and Panadapter Span: 50mm (2.0”) TFT, Approximately 24 KHz +/- (48 KHz total) and waterfall. See Photograph No. 3.
  • Modes: LSB, USB, CW, FM, AM, Digital.
  • Receive Current Draw: 210 mA.
  • Transmit Current Draw: 3.0A to 4.0A at full rated 20W output.
  • Input Voltage Range: 9 VDC thru 16 VDC (do not exceed). The optimal supply voltage is 14 VDC.
  • Connectivity: Bluetooth for CAT/Audio. USB Port for CAT/Audio and Firmware Updates. Integral audio soundcard input/output.
  • Output Power: Continuously variable from 0.1 thru 20W. Recommended maximum wattages are SSB – 20W, CW and Digital – 10W.
  • No internal battery or antenna matching unit.
Photograph No. 2: My FX-4CR, 6 AH Bioenno LFP, Genasun GV-5.

Expectations

The prospective buyer should realize what this radio “brings to the table”. As others have previously stated on the various internet chat groups and social media, do not expect Elecraft performance at the $550 (including shipping) price point for this radio. All radios have flaws and this one is no exception. Issues of which I am aware are as follows: Continue reading KA4KOE takes a look at the FX-4CR by BG2FX

Conrad’s Kayak POTA Activation on Minnie Island

Minnie Island K-1698 Kayak Activation

by Conrad (N2YCH)

9/1/2023

As many readers know, I am on a Parks on the Air (POTA) quest to activate all references in the state of Connecticut. There are 136 parks, and four of them are only accessible by boat. You may have seen my recent field report here on QRPer.com about activating three islands located in the Connecticut River. For those islands, I enlisted professional help from a boat captain with the navigation experience and proper tools (like radar and maps) to access those islands.

The final boat-only accessible island is Minnie Island, located in the middle of Gardner Lake in the town of Salem, Connecticut. I DO have experience kayaking on a Lake, thanks to my uncle, who has two kayaks and has taken me out on Tillson Lake in New York’s Hudson Valley a number of times. Unlike the challenges the river posed, I felt like I could manage the lake on my own. I did need a kayak, though, which I didn’t own.

I had to do some kayak research then. In case you didn’t know this, different kayaks have different specifications on how much weight they can hold. I’m a big guy, six foot five inches tall. Add me, plus a backpack of radio equipment, and I needed to be sure I didn’t sink.

I started on eBay, looking for people selling used kayaks. There are all different kinds of kayaks. Some made for the ocean and dealing with waves and others for casual lake paddler. Some have rudders, some have small, sealed cockpits and some even have motors. I had no idea how serious you could get with all of the accessories and options. I was really looking for something simple.

After striking out on eBay, I found a fishing supply store at the end of the Connecticut River that also had kayaks you could rent. I visited their web site and was happy to see that they were having an end of season clearance sale, where they were selling their rentals. I visited their shop and after looking at my options, I ended up buying an Old Town Vapor 10 kayak. It came with a paddle and life jacket and it was 50% of the price new. A great bargain. The added benefit is now I own my own kayak…a friend suggested that now that I do, there might be IOTA activations in my future.

What sold me on the Vapor 10 was the open cockpit. No trying to squeeze myself in and plenty of room to bring a backpack with the radio equipment in-between my legs. Also, I was able to fit it into my Jeep Wrangler.

Next stop, the Gardner Lake Boat Launch, which was about a 30 minute drive North. Continue reading Conrad’s Kayak POTA Activation on Minnie Island

KM4CFT: A Relaxing Labor Day SOTA Activation

Many thanks to Jonathan (KM4CFT) who shares the following guest field report:


A Relaxing Labor Day SOTA Activation

by Jonathan Kayne (KM4CFT)

September 4, 2023

Days off from work can be a really great thing. And for someone who spends most of his time indoors at a computer, I try to find plenty of excuses to go outside and get some fresh air. Labor Day is one of those days I get off from work, so I decided I would do a SOTA activation, but I wasn’t entirely sure where.

Luckily, there are plenty of tools out there to help with planning a SOTA activation, namely sotl.as, which shows all the summits on a map along with additional information about the summit.

I wasn’t entirely sure which one to pick, so I just searched around and came across Evergreen Mountain, which has the reference designator W0C/FR-076. Doing some research showed that it was about a 2-3 mile hike to the summit from the parking lot, which was perfect. The air around Denver, CO can be somewhat thin and these hikes can be strenuous if you aren’t used to it. I have been living in the Denver area for 2 years and I still am not used to it!

After a small amount of planning, I pack my radio and antenna into a bag along with the usual hiking gear and drive to the base of the mountain. There were a lot of cars already parked there, so I had to park on the side of the road. It seems other people had the same idea that I did!

The trail to the summit of Evergreen mountain was comparatively easy due to the trail being designed for mountain biking. Mountains in Colorado tend to be incredibly steep, which can make them quite the workout, even if the hike is short. This trail consisted of plenty of switchbacks, which made the hike incredibly easy, trading steepness for distance. This was a massive bonus from my perspective!

As you might have guessed, Evergreen Mountain (and the town) get their name from the impressive number of evergreen trees in the area. As you drive towards the town, it almost becomes exclusively pine trees everywhere!

As I walked, I couldn’t help but notice all the fallen pine trees, which concerned me, but I quickly came across a sign explaining the reason.

I really got to enjoy walking through these trees, and listening to the wind howl through the mountains. It also had the benefit of keeping me nice and cool in the reasonable 83° temperature outside.

The trees also blocked the views of the mountains to some extent, but my research showed me that we get plenty of gorgeous views closer to the summit!

Right before the summit loop, I was rewarded with a small glimpse of the views that were to come!

I made it to the summit loop trail, and advanced to the last little bit before the summit. Right before the true summit there is a tenth-mile little trail that leads to a scenic overlook. I, of course, had to go and take a look.

I went back and made it to the summit. The top of the mountain was pretty flat so I just went to what I thought was the summit and set up my station there. Searching around showed that I was well within the activation zone. The area had some nice rocks to sit on as well as trees for me to lash my crappie pole to with para-cord.

I unpacked my gear and started to set up. The gear I brought was as follows:

With SOTA, I have the opportunity to use my VHF/UHF equipment to make some QSOs. I find it quite rare for me to do simplex communication on VHF or UHF these days as I almost exclusively operate on HF. Also, I like to try to operate in the parts of the bands with the lowest license requirement so that the less experienced hams have an opportunity to work me. With this, I can give our technicians a chance to chase SOTA! Continue reading KM4CFT: A Relaxing Labor Day SOTA Activation

POTA Quest: Conrad Activates Three Connecticut River Islands!

Connecticut River Island Activations

by Conrad (N2YCH)

August 22, 2023

I’m on a POTA quest – activate all references in the state of Connecticut. There are 136 parks in the state and four of them are islands, only accessible by boat. Three of which are in the Connecticut River: Dart Island (K-1659), Haddam Island (K-1673) and Selden Neck State Park (K-1714).

I don’t own a boat. Plus, even if I did, I’m not sure I’d be brave enough to tackle the Connecticut River on my own. I have no experience navigating these waters, and it’s a real river, more than you’d want to try with a kayak with the currents and all. Even the POTA web pages for these islands warns “Boating experience and channel knowledge recommended.”

This created a dilemma –  how do I get to and activate these islands?

I strategized for a while and decided on chartering a “river cruise” boat who actually listed visiting Dart and Haddam islands as part of their services on their web site. The boat captain hadn’t visited Selden Neck, so that was new, even to him. However, he had a radar, and depth finder on his boat that mapped the channel and gave us the depths of the waters near each island. His boat drew 3 feet, so we had to have at least that much depth in each place we stopped. He also had a small “Achilles” boat that connected to the back of the cabin cruiser that we used to get ashore.

We left from a marina that was directly across the river from Dart Island but decided first to head South to Selden Neck and then work our way back North to Haddam and Dart.

Putting aside the island access for a moment, I also had to strategize on what gear to bring along to do these activations. I am primarily a digital mode activator and have used the Elecraft KX3 and AX1 antenna in many of my travels where I needed a light kit.

However, I thought, I can use the KX3 but take along a more efficient antenna. I used my Buddipole tripod and mast with a versa-T and a 17’ 9” Alpha whip antenna and a 15’ counterpoise elevated off the ground with a Home Depot electric fence post.

Because the mast elevates the versa T to 11’ high, and the telescoping whip at another 17’ 9”, I was able to get the antenna nearly 30’ off the ground to the top. It was easy to pack and carry and provided better coverage than the AX1 would have. You’ll see just how good QRP on FT8 can be in my Dart Island coverage map.

Equipment List:

Once I decided on the KX3 and the Alpha telescoping whip, I packed my backpack with the computer, cables, the radio, batteries and extra antennas. I always have the AX1 and a Packtenna EFHW as backups and they fit easily into the backpack. Two bags would need to make it from the boat to each island, the radio gear with computer and the antenna bag with the tripod and telescoping antenna. To be safe, since it would not be easy to do this again if something didn’t work, I brought along an entire backup system, packed in a second backpack with an Icom 705 and my spare laptop.

One of my goals with POTA is local discovery, and my boat captain was very knowledgeable about the river and the various sites along the shores. I learned that a manufacturing plant owned by Pratt and Whitney still uses water from the river as part of their manufacturing processes and also that there was a sea plane airport along one bank. I saw an automobile ferry along the way that I had no idea existed and saw the site of the former Connecticut Yankee nuclear plant that was decommissioned in 2004. Continue reading POTA Quest: Conrad Activates Three Connecticut River Islands!

Steve tests a compact, carry-on QRP field radio kit while on holiday in Croatia!

Many thanks to Steve (MW0SAW) who shares the following field report:


Portable Ops in 9A Land

by Steve (MW0SAW)

Just back from a family holiday to Croatia and I was lucky enough to be able to take a QRP station with me on my travels. It’s always good to stop and review what you took and how it worked out, else you won’t be able to iterate and improve next time.

My wife and I have always been efficient minimalist travellers and even now with our daughter the traditional continues. And let’s face it, who doesn’t love to get their inner pack geek on when it comes to QRP ham radio and travel!

I’m very lucky to own several QRP radios, Elecraft KX2, FT-818, IC-705, but for minimalist ops they are all a/ too expensive and/or b/ too heavy & bulky. The choice naturally brought me to a CW rig and after some deliberating I chose my Venus SW-3B over my newly constructed QCX mini. The Venus is just more versatile having 3 bands and SSB RX.

So the item I spent weeks torturing myself about prior to the holiday was the antenna. You have to try to imagine from where you will operate. I don’t think you can beat a wire antenna like the K6ARK EFHW however you need trees or a mast, I thought I was most likely to operate from the hotel room balcony. I came to the conclusion, despite the extra bulk, that the Gabil 7350T and Tripod would be my companions.

And how did I get on? Well the first time I setup the station on the balcony the electrical interference was terrible, and I could not hear any signals. So I had to adapt and go for plan B. Which actually turned out to be a stunning spot.

Operating on a small jetty next to the salt water on the island of Sveti Nikola near the town of Porec in the early mornings, I deployed my station and called CQ. You can see from the RBN that my 5 watt signal was making a good impact, however only had a couple of European stations come back to me from my calls.

I decided to switch to hunt and pounce mode, and I was amazed to work several USA, VK and ZL stations over a few days. It’s such a great feeling to work DX with such a modest setup. The icing on the cake for an already special family holiday. I think you will agree such a beautiful place.

So overall I was very happy with my station choices.

Kit list:

(Note: Note that Amazon links are affiliate and support QRPer.com)

Until my next QRP adventure.
Best 73
Steve
9A/M0SAW (MW0SAW)

UPDATE:

I didn’t mention it in my report (above) as he hadn’t replied to my email, but I did work Peter Parker VK3YE (he has a good YouTube channel). I’m in his video about 10mins 45seconds in:

Guest Post: A wildly successful POTA activation…on a whim!

Many thanks to Mike (KE8PTX) who shares the following field report:


One of my best POTA activations on a whim.

by Mike (KE8PTX)

Monday 8/15/2023

Doing some late afternoon POTA chasing from the back deck home QTH,  contacts on 5 watts seemed to be coming fairly easy so I started to think I should have a go at it and activate a park.

One in one hundred times I activate QRO, so I decided to take the FT-891 and blow the dust off the finals.

When filling my pack, I had a last minute change of heart and decided to stick with QRP.  Bagged up the never fail KX2 field kit and hit the road.

The park was Port Huron State Game Land (K-6762) a nearby game land with many activation spots.  As I never do look at the solar reports, this time was no different.  I feel the solar reports more times than not would keep me home. With a QRP mind set we all feel we have something to prove by just doing it.

So off to the park we go!

After a short 20 minute dive through the countryside of the Michigan thumb, I arrived at my location only to be welcomed by a flock of Michigan state birds: the mighty Mosquitoes.  I came prepared with my trusty Thermacell.  Fired it up 5 minutes before exiting the car to give it a head start.

My deployment of gear is simple and quick.  My go-to antenna is a 40m EFHW inverted V configuration running North to South.

My mid support is a modified Carbon 6 mast.

Setup time was less than two minutes and I was on the air. Continue reading Guest Post: A wildly successful POTA activation…on a whim!

Matt’s Low-Profile POTA Activation at the San Francisco Maritime National Historic Park

Many thanks to Matt (W6CSN) who shares the following post  from his blog at W6CSN.Blog:


SF Maritime NHP POTA Activation

by Matt (W6CSN)

There are several Parks On The Air eligible parks in San Francisco and the northern tip of the peninsula of the same name. One would expect that a POTA activator that calls this city home, would have logged activations from all of these parks, but so far this one has eluded me.

Muni Pier (closed) across Aquatic Cove

The San Francisco Maritime National Historic Park (K-0757) sits at the northern edge of the city, right next to the Fisherman’s Wharf area that is so popular with tourists visiting San Francisco.

NPS Map of SF Maritime NHP

The National Park encompasses an area that includes the municipal pier, aquatic cove with its small public beach, the art deco style Maritime Museum, and Hyde Street Pier with its floating collection of historic ships.

The historic ships alongside Hyde Street Pier

For various schedule and logistical reasons, K-0757 was the one park in the city that I had not yet activated. So today, when my daughter wanted to visit the ships, I made sure to have my lightweight POTA “go” pack with me in case I found an opportunity to attempt an activation.

I’d say the main attraction at Hyde Street Pier is the Balclutha, a steel hulled, square rigged, cargo ship built near Glasgow, Scotland and launched in 1886.

Balclutha – a survivor from the Age of Sail

Balclutha is continually undergoing restoration and maintenance by the Park Service and skilled volunteers. Her many careers on the world’s oceans are documented with numerous interpretive stations and exhibits, both topside and below decks.

We wrapped up our tour of the vessels on the pier by exploring C.A. Thayer, a 219 foot long sailing schooner built in 1895 near Eureka, California to serve the coastal timber trade.

Eureka is a steam powered ferry that served on SF bay.

I was thinking about where to activate and not really looking forward to setting up on or around the public beach. Between the Aquatic Cove swimmers, people enjoying the beach, and tourists going to and fro, there wasn’t really an “out of the way” location to setup even a small station.

Hyde Street Pier itself was actually pretty quiet, but I wasn’t about to set up my station there without prior approval of park staff. Just as we were about disembark from Thayer I noticed an NPS employee near the gangway, and so I took the opportunity to inquire about setting up my low impact, leave no trace, POTA station.

It turns out the person I talked to on the deck of C.A. Thayer was the supervisor of the SF Maritime National Historic Park! He is keenly interested in radio and was even aware of recent solar activities that have given us amateurs a mixed bag of propagation conditions. He agreed to my request to set up at the end of the pier, past Balclutha’s gangway.

Is Balclutha’s steel hull a reflector of radio waves?

I used the Gabil GRA-3750T antenna with its stock telescopic whip tuned for 20 meters. This is the most low profile antenna I can field for HF. Yes, it’s a compromised antenna system but as you’ll see it works good enough. Continue reading Matt’s Low-Profile POTA Activation at the San Francisco Maritime National Historic Park