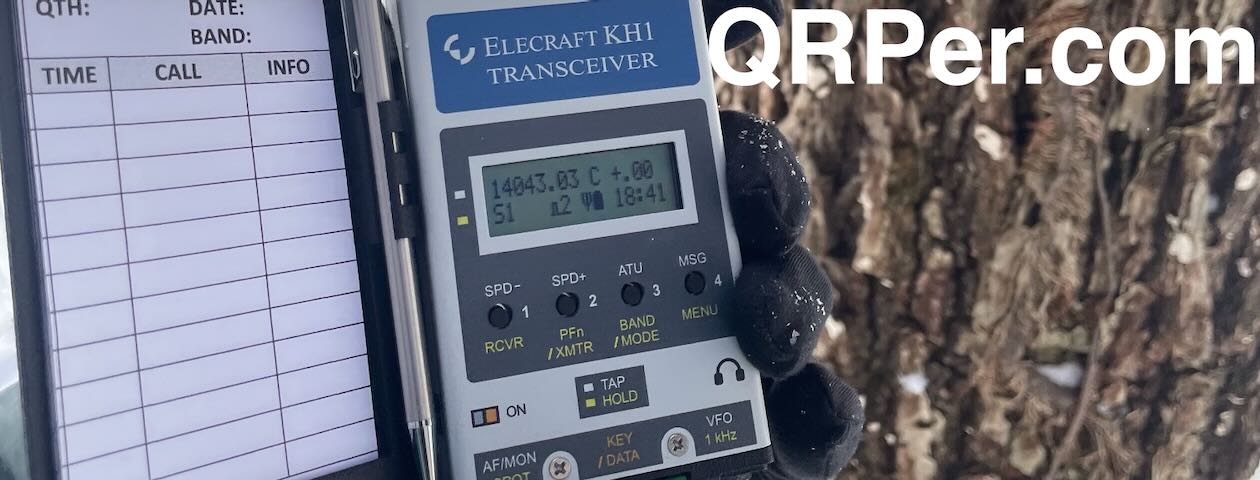
Last week, on Tuesday, January 7, 2025, I finally broke a three-week no-POTA activation streak with a short trip to the Blue Ridge Parkway Folk Art Center.
Catching Up on POTA
Over the holidays, I’ve been doing plenty of POTA hunting from the QTH (you’ll see some reports and videos surface over time), but I hadn’t ventured out to a park for an activation. The holiday season kept me busy with family visits, birthdays, and home projects—most of which are ongoing, thanks to Hurricane Helene. Despite all of that, I found a lot of joy in portable POTA hunting from home.
Still, activating is in my blood. So when I found an opening on Tuesday, I seized the opportunity!
Back to the Folk Art Center
Now that the bridge on Highway 70 has been repaired, the Folk Art Center is once again my go-to spot for quick POTA activations. What was a frustrating 15–20-minute detour is now a simple two-minute hop—an improvement I deeply appreciate.
I pulled into the Folk Art Center parking lot around 1:00 PM. Unsurprisingly, the lot was empty—it was a brisk 28°F (-2°C), hardly picnic weather. Then again, POTA always warms me up!
Audrey
For this activation, I brought along my trusty Elecraft KX1 (affectionately named Audrey) and paired her with my Tufteln 9:1 End-Fed Random-Wire antenna.
It had been a while since Audrey had been out in the field, and I was excited to put her back on the air.
Frankly, post-hurricane projects have disrupted my POTA activation routine, and I’ve missed all outings like these.
Gear
Note: All Amazon, CW Morse, ABR, Chelegance, eBay, and Radioddity links are affiliate links that support QRPer.com at no cost to you.
You might recall that my friends Eric (WD8RIF), Miles (KD8KNC), Brian (K3ES), Kyle (AA0Z), Charlie (NJ7V), and Joshua (N5FY) all played hooky on the final day of the 2024 Hamvention (Sunday, May 19) and instead activated a couple of POTA sites.
Our next stop was Whitewater Canal State Historic Site in Metamora, Indiana, about an hour’s drive from the first park.
Only four of us continued to the next park; Kyle and Charlie needed to head to the airport, and Joshua needed to start his drive back to Georgia.
Whitewater Canal State Historic Site (US-6977)
I was excited about visiting Whitewater Canal because it would be my first official POTA activation in Indiana.
We arrived around 1:00 PM and opted to grab lunch at a nearby pizzeria before activating.
Around 2:00 PM, we grabbed our gear from the car and walked across the road to the park grounds.
The Whitewater Canal State Historic Site offers a glimpse into the 19th-century canal era.
Built between 1836 and 1847, the Whitewater Canal was a 76-mile waterway that connected the Ohio River to Hagerstown, facilitating the transport of goods and agricultural products.
This engineering feat played a vital role in the economic development of the region, contributing to the growth of towns and industries along its path.
Today, the preserved section of the canal, along with the historic grist mill and other structures, stands as a testament to Indiana’s rich industrial and transportation heritage.
I’ve always been fond of railroads and canals, so this site was brilliant as it featured both running parallel to each other!
Eric, Brian, and I (Miles didn’t activate) were careful to set up within the actual park boundaries.
In this case, it was a little difficult to determine the exact boundaries because the town and park blend together.
I used the Parceled app on my phone to confirm our location.
Eric set up his Elecraft KH1 station at a picnic table under a large tree.
Brian set up his KX2 on a covered bench next to Eric, using his Elecraft AX1 antenna mounted on a clamp secured to the bench.
Brian’s site was super stealthy behind the sign–since he operated with earphones, you couldn’t hear him and barely could see him!
I wanted to put some space between my station and theirs, so I set up under the shade of a tree (it was blazing hot that Sunday) and deployed my Helinox camping chair.
I then deployed my Chelegance MC-750 vertical for 20-meter operation since Brian and Eric were on other bands.
I woke up a little too early on the morning of Saturday, February 3, 2024.
The previous evening, we recorded a Ham Radio Workbench podcast episode with my dear friend Ara (N6ARA) as a guest. It was a load of fun, and we ran over time (no surprise there). Since we started recording at 18:00 Pacific Time, it means that it was 21:00 here in the Eastern time zone. By the time the episode ended, it was well after midnight my time.
For some reason, my body clock only allowed me to sleep for five hours, but I planned to sneak in a nap at some point during the day. Our plans were modest that Saturday (only to visit my father-in-law in the hospital), and I had no intention to fit in a POTA activation.
Around noon, my daughters asked if I’d drive them to watch one of their friends in a Shakespeare performance at 2:00 PM. We quickly sorted out plans, and I grabbed my GoRuck GR1 pack, which (due to a crazy January) had hardly been touched since my activation with Hazel nearly a month prior.
Pisgah National Forest (K-4510) and Game Land (K-6937)
As you’ll hear me mention in a number of my field reports, the venue where my daughters rehearse Shakespeare and perform is a short drive to Pisgah National Forest/Game Lands. In the past couple of months, I’ve enjoyed numerous activations in Pisgah.
The weather was perfect for playing radio outdoors. It was chilly, yes, but not so cold that I needed to wear gloves.
I was looking forward to putting the Elecraft KX1 on the air again. As I state near the end of my video below, it’s one of my all-time favorite QRP rigs.
I decided to pair the KX1 with my KM4CFT end-fed half-wave that I built for 30 meters, with a linked 40-meter extension.
On this particular afternoon, I wanted to focus on 30 meters, so as I deployed the antenna, I unhooked the 40M link.
Gear:
Note: All Amazon, CW Morse, ABR, Chelegance, eBay, and Radioddity links are affiliate links that support QRPer.com at no cost to you.
On Friday, January 5, 2024, I looked at Hazel and could tell that, despite the chilly temps, she wanted to go on a late afternoon hike. I did, too, for that matter and why not combine the hike with a POTA activation?
In addition, we were expecting a winter storm to move in that night, so hitting the trail in advance of the snow and ice seemed to make sense.
Before I could get my boots on, Hazel was waiting by the car door to jump in.
At 1175 miles long, the MST stretches from the Outer Banks of North Carolina to the Great Smoky Mountains (see map above).
I can actually hike to the MST from my QTH, but it takes a good hour and half to do so. It’s much easier to drive to one of the numerous nearby trailheads, and that’s exactly what Hazel and I did. I drove to one of my favorite Blue Ridge Parkway POTA spots where a short manway connects to the MST.
Hazel was so excited to hit the trail. (I was, too.)
At the end of the day (because, it was nearing the end of the day) we couldn’t hike for long if I planned to also complete a POTA activation. Sunset was at 5:29 PM local and I didn’t want to pack up and hike back in the dark.
I started my action camera and captured the last bit of hike before Hazel and I found a great spot to set up. There were enough trees around to deploy a 40 meter EFHW and a relatively flat spot to set up my Helinox chair and KX1 station.
Since much of this section of the MST is on the Blue Ridge Parkway grounds, I checked quickly to make sure my operating site would qualify as a two-fer with K-3378.
I opened the Parceled App on my iPhone to confirm that my site was indeed on Blue Ridge Parkway property..
So busy, in fact, I completely overlooked an activation video I filmed two months ago (on Monday, October 23, 2023)!
That said, one of the things I love about making field reports and recording videos is re-living activations a second time. It’s fun to remember the site conditions, the weather, the radio/antenna choices, and all of the folks I might have logged.
I enjoyed stepping back in time a couple of months for this one!
Lake James State Park (K-2739)
That Monday was the first day I surfaced to fit in an activation after fighting a respiratory bug the previous week. I felt much better and tested negative for Covid, so I made my way to Hickory to help my parents with some tasks.
On the way that morning, I stopped by Lake James to play a little POTA with one of my favorite radios in the world: the Elecraft KX1.
On October 23–as I mention in the video–the QRP world had only just learned about the new Elecraft KH1 and I had yet to receive the almost-production unit I ordered as a field tester.
I knew that once I received the KH1, I’d be using it heavily for a few weeks, so I wanted to fit in a little KX1 time in advance!
POTA in Color!
The weather and fall colors at Lake James were absolutely stunning!
New KX1 Tufteln Cover!
Back when I filmed this video, it had only been one week since the W4 SOTA campout where my friend Joshua (N5FY) gave me a few prototype snap-on protective covers for my KX1s.
These covers are very clever because they protect all of the important front-panel components yet remain very low-profile so add little bulk to the radio.
Joshua provides two new screws for the front panel (you simply replace out the stock KX1 screw); the cover magnetically snaps onto the higher-profile screws and seats itself securely.
I demonstrate my cover in the activation video.
At the time, this was a product Joshua was considering adding to the Tufteln line-up–since then, he’s made it available to order–click here to check it out.
At present, Joshua offers the covers in two colors: black and light brown. Mine are the light brown color.
You’ll notice in the video that Joshua added my callsign to the covers he gave me. I don’t think the production covers are customized with your callsign because Joshua makes these in batches. You would need to check with him about customization–I assume there would be an extra charge and lead time for that because it would require modifying the file and printing a one-off cover.At any rate, I love the covers and have added them to all of my KX1s. Note that I used a Sharpie to write the name of each radio on the cover–this makes it very easy to tell the difference between my KX1 models (they’re named Ingrid, Greta, and Ruby)!
Gear:
Note: All Amazon, CW Morse, ABR, Chelegance, eBay, and Radioddity links are affiliate links that support QRPer.com at no cost to you.
It was early enough in the morning that I decided to spend some time on the 40 meter band to work POTA “locals.” I deployed my Chelegance MC-750 with the 40 meter coil.
I tested the SWR and discovered it was high due to a loose connection on the end of the cable assembly–I fixed that and the SWR came down to 2.5:1. With the MC-750, I could have easily lengthened or shortened the whip to get a perfect match, but instead I took the lazy (& speedy) route and simply used the KX1 ATU to get a 1:1 match.
Even though I’d spent a long time talking about the KX1, KH1, the Tufteln cover, etc. in the video, I actually didn’t have a lot of on-the-air time. (Typical me to talk away my activation time!).
I started calling CQ POTA and the contacts started rolling in.
Within ten minutes, I’d already worked ten contacts.
I worked a couple more, then called QRT. Looking at the time, I had to end this activation earlier than I’d hoped. I needed to hit the road again.
I packed up in short order, but still took a few moments to enjoy the beauty of that lovely autumn morning.
QSO Map
Here’s what this five watt activation looked like when plotted out on a QSO Map:
Activation Video
Here’s my real-time, real-life video of the entire activation. As with all of my videos, I don’t edit out any parts of the on-air activation time. In addition, I have monetization turned off on YouTube, although that doesn’t stop them from inserting ads before and after my videos.
I hope you enjoyed the field report and my activation video as much as I enjoyed creating them. I enjoyed reliving this Octeber activation.
Of course, I’d also like to send a special thanks to those of you who have been supporting the site and channel through Patreon and the Coffee Fund. While certainly not a requirement as my content will always be free, I really appreciate the support.
As I mentioned before, the Patreon platform connected to Vimeo make it possible for me to share videos that are not only 100% ad-free, but also downloadable for offline viewing. The Vimeo account also serves as a third backup for my video files.
Thanks for spending part of your day with me!
Here’s wishing all of the you best of the Holiday Season!
Many thanks to Joshua (N5FY) who shares the following article about his KX1 portable field radio kit which will be featured on our Field Kit Gallery page. If you would like to share your field kit with the QRPer community, read this post.
N5FY’S Elecraft KX1 Minimal CW Kit
by Joshua (N5FY)
I started operating CW this past August and am having a blast! One great thing, or maybe its a bit of a problem for the budget, is that when you can work CW, there is a whole new world of HF radios to collect…I mean operate!
Not to mention the ability to pack out a small portable kit that can be thrown in a bag at the last minute when headed out the door. I have a few such kits but lacked a throw line for each. So, I picked up some more Arborist Throw Line from Atwood Rope Manufacture so I could finish out the first kit.
I just snagged a used, inoperable, KXPD1 paddle to complete my KX1 radio. I had to rebuild the jack on the key but did so in quick order and decided to make it out to my local park for a POTA activation. My plan was to finish up the kit with the throw line and then test out the new complete kit. Suffice to say, all went well!
The KX1, now out of production, has been a pleasure to operate CW with. This unit has the internal ATU option, 6xAA battery pack, and I updated the internals to add 80 and 30m. So this rig will run 20/30/40/80m.
There are 2 message memories, built in keyer, and even includes RF, AF, and bandwidth knobs for quick adjustment while operating. I’m no experienced CW operator, but this rig is hard to beat in my opinion. Then again, my KH1 hasn’t show up yet!
The antenna of choice here is my Tufteln 2 Wire No Transformer with a 41ft radiator and 17ft counterpoise. The internal ATU makes working 20, 30, and 40m simple and with no coax needed. I would use a much longer wire if I needed to work 80m. This antenna packs away very nice and not needing the Coax is a space saver. I have one version or another of my QRP antennas in each of my radio kits!
Packing a kit with no room to spare is almost like playing Tetris. I have a good bit of gear from Go Ruck, its all fantastic. For this kit, the 3L would leave a bit more space for some additional gear. If you are looking for some pockets as well, I like the GR2 Field Pocket. For this KX1 though, with the cover installed, I happed to forgo the bit of extra protection for the lightweight small size.
Many thanks to Scott (K4VOR) who shares the following article about his portable field radio kit which will be featured on our Field Kit Gallery page. If you would like to share your field kit with the QRPer community, check out this post.
My KX1 Go Box
by Scott (K4VOR)
I’ve been a ham since college but was out of the hobby for over 20 years, that is until 2020 and COVID. Suddenly I had a lot of free time (like all of us) being stuck at home and somehow the YouTube/Google machine took me down the rabbit hole that is CW.
I got my amateur radio license just after the CW requirement was lifted, so I hardly knew dit from dah. Granted, as an aviator, I had some experience “copying” morse code when tuning navaids such as VORs & DMEs. A whopping 3 letters sent at a blistering 7 wpm! But other than that, I was as green as it gets. To make a long (3+ year) story short, I dove head-long into that rabbit hole and today I am sending around 25wpm and can head-copy around 20wpm, something I once thought impossible. Anyway, that’s my story, now on to the field kit!
Over the years I acquired several of the more popular QRP radios, such as an IC-705, QCX mini, (tr)uSDX, and the AMAZING Elecraft KX2.
I knew about the KX1 but I never gave it a second thought. I mean, it’s just a piddly little 3W CW only kit-built rig, right? Well, then one day I stumbled upon one of Thomas K4SWL’s activation videos in which he was using his KX1 – Ruby. There was something about the simplicity of it all. A unique specimen of simplicity and elegance – potentiometers for AF gain, RF gain, and filter width, three momentary push buttons and a VFO. Heck, the thing barely has a display – only a 3-digit 7 segment! That basic “stick and rudder” aspect had me intrigued, but the hook for me was the sound!
Thomas describes it as an analog sound, something you might get from an old tube radio. It’s a buttery-smooth, warm resonance – something that is rare these days with modern SDRs and DSPs.
After hearing that sound, the KX1 became my unicorn radio. After over a year of searching, I finally found mine – a meticulously built 3-bander (40/30/20) with the internal ATU. I am happy to share my go-kit built for this rig, some of which was inspired by “Ruby” herself.
The kit contains everything I need to get on the air, all in one Pelican 1060 case.
I will start with the antenna. Nothing fancy. Just a BNC binding post adapter coupled with a 27’ radiator and a 16’ counterpoise. It tunes up nicely using the KX1 internal tuner. 1.0 on 20 and 30 meters and 1.4 or better on 40 meters. The antenna winder is a 3D printer one I designed to easily fit in the Pelican 1060.
The key is a Palm Radio Pico Paddle (no longer in production), although a K6ARK tiny paddle will rotate in and out from time to time. One day I would like to find a KXPD1 which sadly was not included with my KX1 when I bought it.
For antenna deployment, I have 65’ of “throw line”, a.k.a. masonry/construction twine, and a rip-stop nylon draw-string pouch that I to use as a throw weight by tossing a couple of rocks inside. The throwline stows away inside the nylon pouch along with a dollar store set of earbuds.
Photos: In the field
And that’s it! This has become my go-to kit that I grab whenever I think I might have the chance to play radio when I am out and about. Thanks for reading and I hope to see you on the air!
I was speaking with my buddy Joshua (N5FY) in mid September. He’d recently acquired an Elecraft KX1 and the topic came up about pairing the KX1 with the AX1 antenna. I realized that in all of my experimenting with the AX1, I’d never paired those two. What!?!
Time to fix that!
On Thursday, September 28, 2023, I had a nice midday window to play radio. After dropping my daughters off at their classes, I stopped by the French Broad Food Co-op and grabbed a container of their chicken noodle soup from the refrigerator section.
I then made my way up the Blue Ridge Parkway (K-3378) to the Craggy Gardens Picnic Area at Bearpin Gap–one of my favorite spots on the BRP.
Despite stunning weather and the beginnings of fall foliage, the parking lot was pretty empty. After all, it was a Thursday and a good week or two before leaf-lookers descend upon western North Carolina.
I pretty much had the picnic area to myself (there was one other person there). I picked a picnic table at the top of the hill under the trees.
Mahlzeit!
When my wife and I lived and worked in Munich, the salutation I learned before any other was “Mahlzeit!” At Siemens, I remember walking through the hallways and people I’d never met before exclaimed “Mahlzeit!” as I passed by.
I quickly learned that Mahlzeit essentially meant “Lunch Time!” and I still say it today to my family when I’m about to make or grab some lunch. Funny how these things stick with you.
Now where was I–? Oh yes…
First thing I did at Craggy was set up my stove to start heating the soup. I show this in my activation video below.
If interested, here are the components of my stove kit:
Next, it dawned on me that I would need to attach the AX1 counterpoise to the KX1. I didn’t bring one of my copper clamps to attach to the outside of the AX1’s BNC connector, so I needed to find another grounding point on the KX1.
I then remembered that the KX1 has two thumb screws on the bottom of the radio. Knowing Elecraft, I assumed that these screws could be used as an attachment point for a counterpoise, but I wanted to confirm that the screw itself had a direct connection to ground.
Fortunately, I keep a small multimeter in my supplemental gear bag in my car. It’s an inexpensive Allosun Pocket Multimeter. I use it for things like this: testing.
I set the multimeter to read continuity and then placed one probe on the outside of the KX1’s female BNC and the other on one of the thumb screws. Sure enough, there was a direct connection to ground. I didn’t need to worry about the KX1 chassis paint insulating the connection to ground because the thumb screw had a direct connection. Perfect! Continue reading Amazing POTA Fun: Pairing the Elecraft KX1 and AX1…but first, a little lunch!→
Many thanks to Evan (K2EJT) who shares the following article about his portable field radio kit which will be featured on our Field Kit Gallery page. If you would like to share your field kit with the QRPer community, read this post. Check out Evan’s field kit:
KX1 Field Activation Kit
by Evan (K2EJT)
I take a minimalist approach to most of my gear. I don’t like to carry anything I don’t need. Whether it’s what I pack in my daypack, an overnight pack, or my radio kit…..If I don’t need it, it’s probably not coming along.
That’s where this kit comes in.
This is the absolute minimum radio kit to do a field activation. While it’s not the lightest kit I have, it still comes in at only 1008 grams (2.25lbs), and that’s including the Pelican case which makes this kit rugged and waterproof (I have an SW-3B kit that weighs 700g, but it’s in an ultralight stuff sack).
This kit contains EVERYTHING (and I mean everything) to do an activation. The radio is an Elecraft KX1. It’s a four band radio with the internal ATU. Powering it are six AA Lithium Ion batteries. I love this radio, and I wish it was still in production, but these days they’re unobtanium unless you’re willing to spend a ton of money and get lucky and find one for sale.
The CW key is a cwmorse.us N0SA paddle. The headphones are a pair of old SkullCandy earbuds I’ve had forever, but sound great.
For an antenna I’m running a 41’ random wire antenna, with a 17’ counterpoise, constructed of 24ga silicone jacketed wire. That’s attached to the radio via a BNC binding post. While this setup isn’t the most efficient, it’s definitely the most compact and agile. Normally I run resonant antennas, but having the tuner allows me to run the absolute minimum antenna, and swap bands quickly, and that was the idea behind this kit.
The throw bag is rip-stop nylon with a paracord loop sewn in the top and a velcro closure across the opening. I fill that bag with rocks, seal it shut with the velcro, and it’s ready to go. The throw line is 65’ of 1.8mm high vis reflective cord. The throw bag doubles as a stuff sack for the cordage, so it’s all contained in one neat little unit that rolls up tiny.
Also included in the kit are a pencil and a logging sheet, as well as the KX1 cheat sheet.
I have lots of other field kits, but I wanted to showcase just how little you can actually get away with and still get the job done. Yes, I know you could build a Pixie kit and a tiny home made key and stuff and make the kit smaller and lighter, but I wanted a kit with no major compromises or downsides. This fits the bill. There’s nothing like a 100% complete kit that contains literally everything you need to do an activation that fits in the palm of your hand! Thanks for reading and 73!
Evan
K2EJT
Equipment:
Radio: Elecraft KX1 4 band w/ATU (no link since it hasn’t been in production in years)
If you’ve been reading QRPer.com for long, you’ll no doubt have gathered that I’m [understatement alert] a big fan of the Elecraft KX1.
A couple months ago, a good friend and supporter of this site/channel, reached out to me because he planned to sell his pristine Elecraft KX1. He’s in the process of downsizing his radio inventory in preparation of a move.
He wanted me to have first dibs at his KX1 and I couldn’t refuse. I knew it would be a great unit and I wanted two fully-functioning KX1s.
You might ask, “But wait Thomas, don’t you have three KX1s???”
Yes, this is true.
With this latest addition, I have now have two fully-functioning KX1s (a 3 and a 4 band version) and one other in need of repair. After I make the repair, I plan to give this radio to a friend (one who doesn’t read QRPer regularly) so will be back to two KX1s.
Since Elecraft has discontinued the KX1, they’ve become difficult to find on the market and when they do appear, they often demand a very high price.
That said, if you’ve been looking for a KX1, you will eventually find one. All of my friends who’ve wanted one have put out word and found willing sellers in due time. Elecraft sold quite a few of these back in the day, so there are units floating around out there.
Tuttle Educational State Forest (K-4861)
On Sunday, August 27, 2023, I had an opening to play a little radio and fit in a hike at Tuttle Educational State Forest.
At the time, I needed a little radio therapy and outdoor break: my mom had been admitted to the hospital the previous day (they released her a few days later and at time of posting she’s doing much better).
Tuttle was only a 30 minute drive from the hospital and, as I suspected, I was the only visitor there that Sunday–educational forests aren’t nearly as busy as other NC state parks.
After a nice 3-ish mile hike, I grabbed my radio backpack from the car and started recording an activation video.
My goal was to test this new KX1 and to set up CW message memories.
QRP radios, product announcements, reviews, news and more. Low power amateur radio fun!
Please support QRPer by adding us to your whitelist in your ad blocker. Ads are what helps us stay online. All of our ads are ham radio related--no junk, we promise! Thank you!