Category Archives: Guest Posts

K3ES Activates Waco Mammoth National Monument

Many thanks to Brian (K3ES) who shares the following guest post:


The National Park Service welcomes you to Waco Mammoth National Monument

Activating K-0975, Waco Mammoth National Monument

by Brian (K3ES)

At the end of November 2023, my wife and I loaded her minivan, and headed out into the first significant snowfall of the season.  I had already been out that morning in my 4WD truck to pull a friend’s car out of a ditch, so I was driving carefully.  Our drive took us from our home in northwest Pennsylvania to Baltimore, MD.  Happily, weather conditions improved as we went south and east.  We were meeting our son, daughter-in-law, and 2-1/2 year old grandson for a family trip to Waco, TX (we flew out of Baltimore-Washington International Airport early the next morning).  My wife and daughter-in-law are particular fans of Fixer-Upper and Chip and Joanna Gaines, all based in Waco.  Us men-folk were to be educated in the finer points of appreciating this pop-culture phenomenon.  Ultimately, we certainly did appreciate the finer points of dining in Waco.

One side-trip that amazed us all was a 10 minute drive up the road to Waco Mammoth National Monument.  This relatively new addition to the National Park system is also listed as Parks on the Air (POTA) entity K-0975.  Back in the days when the area occupied by the National Monument was private land, two exploring teenagers, who may not have had proper permission, found a bone, a big bone.  This bone was delivered to a local museum for identification, and ultimately determined to have been the femur of a female Columbian Mammoth.  Legalities being as they are, it took a while longer for the location of the discovery to be made public.  An interested and civic-minded land owner made the process less traumatic than might have been, particularly for the wandering teenagers.  He also started the process to preserve the site and its archaeological treasures for the public, ultimately leading to its designation as a National Monument.  Over subsequent years, archaeological excavation discovered a lot more bones – skeletons from an entire nursery herd of Columbian Mammoths, along with skeletons from other species that visited what was apparently a dangerous waterhole during the last ice age.

A view of the interior of the building constructed to protect the archaeological site.  Near the entry door is a full-sized artist’s rendition of a Columbian Mammoth.  Standing up to14 feet high at the shoulder, Columbian Mammoths were significantly larger than their better known Woolly Mammoth cousins.  This site is unique in that the bones of an entire nursery herd, including multiple females and their young, were found together here.
Some of the partially excavated mammoth skeletons contained in the enclosure building.
Also found in this excavation site was a Western Camel skeleton.  It is thought that the large number, numerous species, and wide range of ages of the skeletons discovered at this site resulted from entrapment in thick mud that formed the bottom of a persistent waterhole.

Since the discovery, many skeletons have been excavated and removed for study, but many more remain at the site awaiting future recovery.  A building has been constructed to cover the excavation and protect the remaining skeletons, and this building is the amazing focal point of the Waco Mammoth National Monument.  Ranger-led tours are available, and very much worthwhile.

Operating QRP CW on a beautiful afternoon at K-0975, Waco Mammoth National Monument.  My station is set up in a grassy field sometimes used for overflow parking.

Setting Up to Activate K-0975

After the tour and a look at the excavation site, I excused myself and set up to activate K-0975.  Before the trip, I had sent an email to Phil – WA5PQL, who is the most frequent activator at K-0975.  He was gracious and helpful in providing information about the park, the staff, and the locations most suitable for activating.  His assistance made a quick, low-stress activation a near certainty.  After checking in with the Park Rangers, I had directions and permissions, so all that remained a concern was HF propagation.

While the previous day had been overcast with drizzle, Friday, December 1, 2023, was sunny and warm.  It was perfect for walking around the site, and for an outdoor activation.  Unfortunately, the same sun that gave us the bright, warm day, had been active producing solar flares that could interfere with radio communications.  The only way to know for sure that I could make contacts was to set up my station and call CQ, so that is the path I chose.

Field kit contained in a re-purposed Peltor 4” x 6” x 9” padded headset pouch.  This compact kit was easily packed in a carry-on backpack for airline travel.  The pouch’s integral handle also made for easy transport to the activation site.

Field kit contents from the upper-left (click image above to enlarge):

  1. 33 gal trash bag for dry seating,
  2. 15 ft RG316 feedline with BNC male connectors,
  3. Two pieces of nylon cord,
  4. Medium-sized pill bottle to be filled with dirt or stones and used as a throw weight,
  5. 80 ft of Marlow Excel 2mm arborist’s throw line,
  6. BaMaTech TP-III paddles with connecting cable carried in an Altoids tin,
  7. Nail clippers as a TSA-approved tool,
  8. Elecraft KX2 transceiver with SideKX end-panels and polycarbonate cover,
  9. Tufteln 9:1 end-fed random wire antenna with 35 ft radiator and 17 ft counterpoise,
  10. Generic ear-bud headphones,
  11. Homebrew VK3IL-designed pressure paddles with adjacent protective sleeve sitting atop a plastic ziploc bag,
  12. Rite in the Rain notepad for logging,
  13. Pentel Twist-Erase 0.9mm mechanical pencil,
  14. Miscellaneous cable ties.

Not pictured is a Packtenna 10m collapsable fiberglass mast that was available, but not used for this activation.

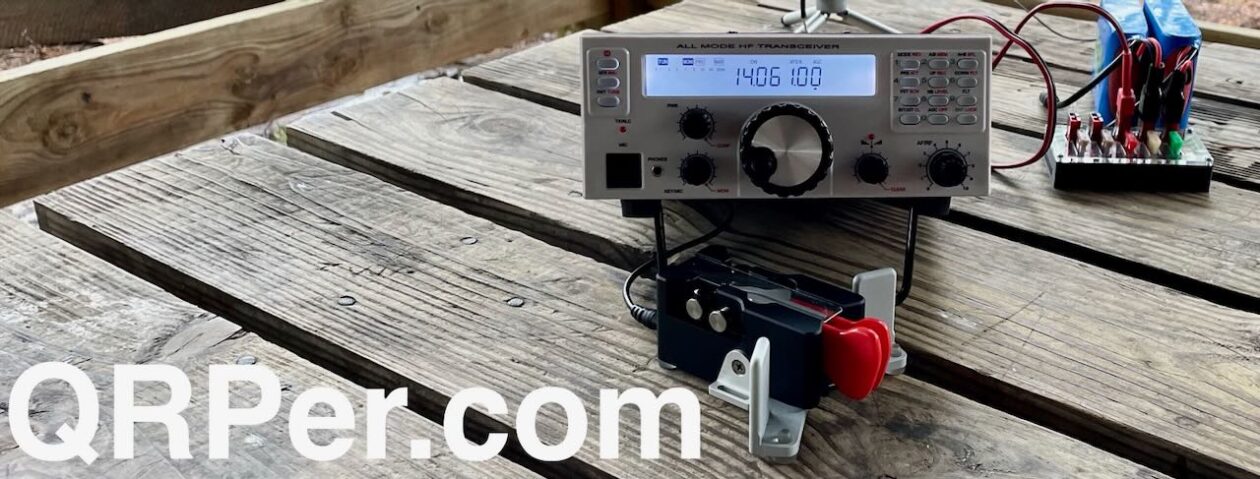
I brought a very small, but capable, field kit based on my Elecraft KX2 and a Tufteln End-fed Random Wire antenna.  A couple of CW keys, a short feedline, and generic earbuds completed the station.  I also brought a notepad and a pencil for logging, a plastic garbage bag for seating, and some cordage.  The most peculiar part of my kit was a small pill bottle with a hole in its lid.  I filled the pill bottle with dirt, passed the end of a 2mm line through the lid and secured it with a knot.  I was able to use the dirt-filled bottle as a throw weight to get the line over a tree branch for raising the antenna, then I detached the bottle and returned the dirt.  All elements of the kit worked as intended, and TSA asked no questions during my trips through airport security. Continue reading K3ES Activates Waco Mammoth National Monument

Field Radio Kit Gallery: KV4AN’s Icom IC-705 Field Kit

Many thanks to Steve (KV4AN) who shares the following article about his portable field radio kit which will be featured on our Field Kit Gallery page. If you would like to share your field kit with the QRPer community, read this post


KV4AN’s Icom IC-705 Field Kit

by Steve (KV4AN)

A requirements-driven portable communication capability, using a modular implementation concept, was the basis for my IC-705 Field Kit.  I’ve loved portable radio operating since shortly after getting my license back in 1975.  My first portable radio was the over-the-shoulder Kenwood TR-2200A 2m FM transceiver.  There is now a happy confluence of advanced electronics technology, customer-focused radio manufacturers, radio sport groups like POTA and SOTA, and hams who want to combine outdoor adventures with their ham radio hobby.   The result is the ability to create and operate highly capable portable ham radio field kits, such as the IC-705 Field Kit that I’m going to describe in this article.

The kit consists of up to three man-packable bags: a Radio Bag, an Antenna Bag, and a Computer Bag, as shown in figure (1).  The Radio and Antenna bags must be brought to every activation, but the computer bag can be left at home if I don’t plan to use digital modes.  I can also swap out Antenna Bags, depending on what kind of antenna you need for the specific activation location and park rules, like: ability to use a ground spike, size of activation area, presence of suitable trees, primary operating bands and expected propagation conditions, and so forth.

Figure 1.  IC-705 Field Kit loaded up and ready for a park activation (click image to enlarge).

Radio Bag

The Radio Bag contains everything necessary to operate the IC-705 in the field.  It can be carried in one hand, worn over-the-should, or worn as a fanny pack.  With the load-out listed below and shown in figure (2), it weighs around 15 lbs.

[Gear links list at end of article.]

A. Icom IC-705 Transceiver.  Chosen for its “all-band”, “all-mode” capability with base station features and performance.  It’s a superb, state-of-the art radio, and a joy to operate – but, it “feels” a little delicate with the large unprotected touch screen and protruding light plastic knobs.

B. IC-705 Front Panel Cover. This was chosen to protect the delicate front panel of the IC-705.  I didn’t want one of the cages, because they add bulk and weight to a reasonably small and light weight radio.  This cover fits perfectly, doesn’t mar the radio body, and provides great impact protection when the radio is not in use.

C. Icom AH-705 Antenna Tuner. This is a good antenna tuner and matches the IC-705 (in appearance and electronic functionality) very well.  It is large compared to the Elecraft T1, but it runs off two “AA” batteries, which I really like.  The tuner uses a BNC coaxial patch cable and a 1/8” stereo patch cable for connection to the IC-705.   I don’t need to use this tuner very often as my antenna typically has a low SWR on 40 – 10 meters.

D. Icom HM-243 Speaker-Microphone. The HM-243 comes with the IC-705.  I’ve never used the speaker part of it, but the microphone has good voice reproduction.  If needed, I planned to use the speaker in place of headphones.

E. N3ZN ZN-QRP Special Iambic Keyer Paddle.  I got this marvelous quality and wonderful feeling paddle in beautiful Blaze Orange – so I feel like I’m the radio operator from a downed aircraft trying to get rescued.  The paddle is a little heavy for portable use, but at least it doesn’t move around while sending.  It uses a 1/8” stereo plug patch cable for connection to the IC-705.

F. Tactical Range Bag. This bag was chosen because the IC-705 fit perfectly in the main compartment and there were additional compartments for all the small accessories.  It also came in Army Green color.

G. Icom MBF-705 Desk Stand. Stabilizes the radio when it is on a table or in the Radio Bag and positions it for easy viewing and operating.

Figure 2. Radio Bag and Contents (click image to enlarge).

H. Icom BP-272 Standard Battery Pack. 7.4v, 1880 mAh pack that came with the radio and attaches to the back of it.  I use this as the spare battery pack.

I. Icom BP-307 High-Capacity Battery Pack. 7.2V, 3150 mAh pack that attaches to the back of the IC-705.  So far, this battery pack has been sufficient for my POTA activations.

J. Tactical Drop Pouch.  This pouch fits in the bottom of the main compartment of the Radio Bag and can hold either a Bioenno 12V, 12Ah, LiFePO4 battery or the front panel cover (used as a spacer).  The IC-705 sits on top of the Tactical Drop Pouch when in the Radio Bag, which elevates it enough that the IC-705 can be easily operated.

K. Smiley Antenna Company TRI-Band.  This is a telescoping 1/4 wave 2m and 5/8 wave 440 antenna that attaches directly to the IC-705.  It performs well with the IC-705 and fits inside the tactical bag when collapsed.  Another advantage of the telescoping whip is it can be adjusted for best SWR.

L. USB Cable.  The USB C to Micro USB cable is used to connect the IC-705 to the portable station computer to control the radio and pass audio and data.  This cable is needed, even if you connect using WiFi for rig control and audio, to send GPS NMEA format position and time data from the IC-705 to the computer.  I was told by Icom Technical Support that the cable should not be longer than 3 feet and should have an RFI Choke at each end.  The combination of the short cable, USB C connector instead of USB A, and the RFI chokes seems to help the noise problem that that the IC-705 has when a USB cable is plugged into it.  The other solution is using the RS-BA1 software.

M. Emergency HF Antenna. This is a home-brew antenna with a 24 1/2 foot radiator and 12 1/2 foot counterpoise that attaches to the AH-705 Antenna Tuner with a BNC to binding post adapter.  It is rolled up on a line winder and there is some paracord to hold up the end of the radiator.  This is a back up antenna in case something happens to the regular antenna.

N. Assorted Coaxial Adapters: BNC to SO-239, SO-239 Barrel, BNC Elbow, and BNC to binding post.

O. Tactical Pen.  A nice heavy pen for outdoors use.   Used for logging.

P. All-Weather Notebook. Weather-proof notepad for outdoor use.  Used for logging.

Q. Leatherman squirt E4: A Swiss Army-like miniature tool set with a wire stripper and screw drivers.  It is used to perform minor repairs in the field.  This tool has been discontinued by the manufacturer.

R. Gerber Recon Task Flashlight.   A rugged miniature flashlight that runs on 1 “AA battery and has different color lens.

Antenna Bag

An Antenna Bag goes on every activation.  The primary bag contains the components of the Chameleon Antenna Tactical Delta Loop (TDL) antenna.  The TDL is a versatile antenna that can be configured as a small Inverted Delta Loop or a 17 foot ground mounted vertical.  I usually use the 17 foot ground mounted vertical configuration because it takes less than five minutes to deploy, performs well, doesn’t attract much attention, and does not require a tuner for 40 through 10 meters.

The Antenna Bag itself is the Sunrise Tactical Gear, Tactical Tripod Bag Gen 2 (32 inch length).  It is exceptionally durable and holds all the components of the TDL antenna.  It can be worn across the back for easy carrying.  The Antenna Bag and all components weigh around 11 lbs. Continue reading Field Radio Kit Gallery: KV4AN’s Icom IC-705 Field Kit

The Lifeline of CW and POTA

Many thanks to Teri (KO4WFP) who shares the following guest post:


The Lifeline of CW and POTA

by Teri (KO4WFP)

The past five months have been tumultuous. I am now divorced and my son and I are making a new life for ourselves with my family. Those of you who’ve been through a divorce know how stressful and difficult a process it is, especially when navigating it for the first time. You are undoing relationships and patterns of behavior and figuring out how to move forward and what that looks like.

Why do I tell you this? Partially because I want those of you who’ve said “where the heck have you been?” to know why I’ve been absent from QRPer. However, I also want to thank all of you in the ham community because it is this community that saw me through my difficulties. Hams are some of the kindest and most wonderful people, especially CW and POTA hams. This community has rallied to my side and given me a reason to keep moving forward.

As Thomas noted in his September 17 post of this year, CW is indeed “radio therapy.” After I relocated, it was six weeks before I had a home station again. Six LONG weeks without seeing my code buddies – Caryn KD2GUT, Glenn W4YES, and Charles W4CLW – on the air. I felt cut off not having those QSOs, not being able to get on the air when I desired, like someone had removed my legs! The absence reinforced how much CW and POTA mean to me.

While working to get a home station again, I latched onto POTA. I vividly recall driving home from my first POTA activation after leaving my ex-husband and, for the first time in several weeks, the stress temporarily melted away. Life, for a few hours, felt normal. I felt like my old self.

CW and POTA were indeed therapy as I put my life back together. Getting out and activating was good for my mind and body. Ham radio for me is about relationships and seeing ops who hunt me regularly was like reconnecting with friends saying “hi”.

POTA became an integral part of my healing process and I pursued activations at George L. Smith State Park and, my old stomping ground, Butter Bean Beach, part of Wormsloe State Historic Site.

George L. Smith State Park is a pretty site for POTA. The park’s focal point is Mill Pond Lake which was created by the damming of 15-Mile Creek in 1880. Visitors can rent kayaks or canoes to explore three paddling trails in the 412-acre lake and its wetlands but are warned against swimming due to the presence of alligators. The land adjacent to the lake has seven miles of nature trails through sand-bottomed forest with hardwoods and longleaf pine.

The old mill at the site still exists. The original floodgates are used to control the water level in the lake with the addition of an electric hoist to open and close the gates. The mill, known as Watson Mill, is housed in a bridge which was open to motor traffic until 1984 and is one of only two mills operated by the State of Georgia. Watson Mill housed a sawmill for lumber as well as a gristmill, the latter which remains operational for demonstration purposes.

After a quick drive through the park, I chose to set up on the hill next to the park office which offered an open area without adjacent power lines. It wasn’t long before my EFRW was installed in a tree and I was on the air. Continue reading The Lifeline of CW and POTA

Field Radio Kit Gallery: KD0FNR’s Rockmite 20 and Tuna Topper

Many thanks to Hamilton (KD0FNR) who shares the following article about his portable field radio kit which will be featured on our Field Kit Gallery page. If you would like to share your field kit with the QRPer community, read this post.


Rockmite 20 and Tuna Topper Pack QRP Punch

by Hamilton (KD0FNR)

Our ham radio field kit—in my mind—revolves around simplicity. I’ll walk you through a lot of details, because we have a blast with the field kit and I love talking about it. At the end of the day, it’s a kit radio and amplifier housed in a couple of cans with lengths of wire we bought at a hardware store for an antenna, a cell phone power brick, and a keyer glued together out of video game switches and an old battery case. We’ve thrown the kit into cloth shopping bags and backpacks with equal measures of success. We once patched an antenna connection using washi tape.

OK, I said ‘our’ and ‘we’, but who are we? I’m the dad of three kids—one of whom recently passed her Technician radio exam, KO6BTY—who are 12, 11, and 8 years old. Right now, they’re rarely on the radio—of course, that’s about to change—they help with most aspects of our radio outings.

Which brings up the question, what do our radio outings look like? Our outings are pretty equally divided between, camping and day trips. Our entire family has enjoyed camping—and done a lot of it—since long before I got back into ham radio. Each of the kids went on their first camping trip when they were a few weeks old.  Our camping trips range from local, public transit enabled outings—we take the bus to Pantol Campground, across the Golden Gate Bridge from San Francisco where there are two POTAs readily available: Mt. Tamalpais State Park and  Muir Woods. We also take multi-day/week trips: I grew up in New Mexico, so the kids and I frequently find ourselves back there activating or attempting to activate sites like Villa Nueva State Park, Organ Mountains National Monument, and Cibola National Forest, among others. These are the outings that have led to large-ish battery selections you’ll see below.

Our day trips are quick runs along various local bus, train, and ferry lines with a hike tacked on the end. Within the peninsula that encloses San Francisco, we have several POTA locations and two easily reachable SOTA locations. We pretty frequently bus to a spot, and then spend a few hours hanging out in a nice park getting some radio time.

Having said all of that, you might have guessed that our kit would be optimized for easy travel. You’d be right. Now, finally, let’s talk about the kit!

Radio Details:

All of our equipment is home-built. It’s evolved over the last year-and-a-half into he tidy kit you see above. Finally having a ‘typical’ kit picture is actually what inspired this article.

Equipment List:

[Please note: All Amazon links are affiliate and support QRPer.com.]

  • Rockmite 20
  • Tuna Topper
  • One 20 ounce can Dole Pineapple Slices (emptied—see support crew; and cleaned)
  • Two RJ-45 breakout boards
  • One spool butcher’s twine (two if you’re feeling bougie)
  • One Imuto power brick that supplies 15 V when funneled through:
  • One Adafruit USB Type C Power Delivery Dummy Breakout – I2C or Fixed – HUSB238
  • Two banana jack sockets (plus a few more for spares)
  • Forty feet 12 gauge insulated/stranded wire
  • Twenty-five feet (or so) RJ-45 Ethernet cable (scavenged from the parts bin at our local maker space)
  • One antenna launcher (scavenged from available fallen tree limbs onsite)
  • One donut Bag from your favorite donut store
  • One roll of washi tape

The Rockmite is a rock-locked radio with two available frequencies that are 500 Hz apart from each other. That makes our antenna design really simple; we’ve got a dipole that’s trimmed to be resonant at 14057.5 kHz. Project TouCans puts out a QRP maximum 5 Watts. Our field kit has evolved to that 5 Watts though. We started out with the Flying Rockmite at 250 mW, then we made a power bump to 750 mW, and then with the addition of a Tuna Topper amplifier and a lot of experimenting we finally achieved a QRP maximum 5 Watts output power.

The QRPp Rockmites–having so little power combined with lots of somewhat confusing reading about antenna matchers and coaxial cable and baluns–led to the original Flying Rockmite. “Do you know what makes you not have to discuss feed lines?” I reasoned, “Not having a feedline.” And so, the RockMite was inserted into the dipole. I brought the keyer controls down to me and sent the power up along an Ethernet cable. Continue reading Field Radio Kit Gallery: KD0FNR’s Rockmite 20 and Tuna Topper

Field Radio Kit Gallery: VA2NW’s Icom IC-705 Field Kit

Many thanks to Tom (VA2NW) who shares the following article about his portable field radio kit which will be featured on our Field Kit Gallery page. If you would like to share your field kit with the QRPer community, read this post


VA2NW’s Icom IC-705 Field Kit

by Tom (VA2NW)

I got my start in field radio with Summits on the Air (SOTA) a little over 12 years ago. With SOTA, size and weight are the main considerations when building out a field kit; you have to haul everything up a mountain after all.

These days, my focus has shifted to Parks on the Air (POTA). With POTA, activations I don’t need to include any hiking at all. With that in mind, I decided to build a field kit that focused on high quality gear to maximize performance and enjoyment while minimizing my impact on nature (i.e. no wires in trees, no spikes in the ground, etc).

The ideal use case for this kit is a rural POTA park or a low difficulty SOTA summit that involves zero to twenty minutes of hiking or walking for a medium length activation of one to three hours with a maximum setup and teardown time of ten minutes. This article showcases the various items in the field kit and provides some context on the decisions that were made about what I’ve included.

Radio

After buying and trying many QRP radios, I decided that I wanted an all band all mode QRP radio with a waterfall display, SWR sweep, tuning knob (Sorry KD1JV), CW filters, optional battery pack which can be removed or replaced easily in the field, full 5W output, reasonable power consumption, plenty of options for accessories, a large community, well written manuals, availability for purchase without a long backorder, and easy configuration with touch screen and/or intuitive menus.

The Icom IC-705 fit the bill.

Several of the Xiegu brand radios come close to meeting these requirements and are much more budget-friendly. However, I have encountered some issues with my Xiegu X6100 becoming too hot to touch in the first half hour of a normal CW activation, and that was concerning enough to me to take it out of contention for being my main portable transceiver.

Key

For the key, I chose the CW Morse double lever paddles with steel base. The base does add weight to the kit, but this key fits my operating style perfectly. I key with my left hand and write with my right hand, so having a solid base that keeps the key from moving when in use helps me avoid having to hold the key with my non-keying hand. The paddles are good quality and won’t break the bank. I really like the feel of the hard stop when the paddles hit the contacts.

The paddles are easy to use with or without gloves which is a huge plus where I operate in Canada.

Antenna and feedline

Throughout the years, I’ve experimented with many different types of antennas from simple wire antennas to magnetic loops to yagis to verticals and more. I’ve gone on many group outings and have gotten to see a lot of options. I live in Canada, and I wanted something I can use all year round. As I realized in the field last November with my JPC-12 ground spike vertical, you can’t drive a ground spike into the ground when the ground is frozen. I’m a big fan of wire antennas; however, I’ve never found a support system that I liked. Tree branches can break easily, especially in the winter, damaging the trees. Additionally, not all locations have suitable trees.

Telescoping poles are an alternative but need some sort of support, usually with something in the ground. Magnetic loops don’t require anything in trees or in the ground, but dealing with the narrow bandwidth and constant re-tuning makes searching and pouncing quite a chore. An antenna that can cover the most activte POTA bands, 20m and 40m, is also important to me. My last requirement for an antenna is one that doesn’t require an external tuner; manual tuners require some fiddling and auto-tuners generally require some sort of power supply and coax jumper. In both cases, external tuners generally have some amount of insertion loss.

Those requirements led me to focus in on a tripod mounted vertical antenna. There are several options in this space including the SuperAntenna, Slidewinder, Wolf River Coils, JPC-12 with tripod, REZ Ranger 80, and others. I ultimately picked the REZ Ranger 80. The key features that led me to choosing the REZ Ranger 80 were the quality, the bands supported, the online reviews, and the availability to ship to Canada without backorder nor complicated ordering process. It’s built like a tank, can go all the way down to 80m, has glowing online reviews, was in-stock, and I could take care of the customs and import fees at time of purchase with DX Engineering. Continue reading Field Radio Kit Gallery: VA2NW’s Icom IC-705 Field Kit

Field Radio Kit Gallery: KO4WDE’s Dual Purpose Xiegu G90 Field Kit

Many thanks to Doug (KO4WDE) who shares the following article about his portable field radio kit which will be featured on our Field Kit Gallery page. If you would like to share your field kit with the QRPer community, read this post


KO4WDE’s Dual Purpose G90 Field Kit

by Doug (KO4WDE)

I have always been an outdoorsman, and for all of my professional life I have been a teacher.   It wasn’t until 2021 that I became a ham. I started out with my tech, and earned my general a few days later.  I built a modest shack around an IC7300 and a Par Endfedz 80-10M EFHW. When these three facets of my life combined something sparked in me and I immediately did two things, took my radio with me outdoors, and I took it to school. Long story short, we now have a school radio club. (KQ4CWT), and I am a POTA junkie.

The Need:

To go portable, I would take my 7300 with me, powered by a Bioenno 20Ah battery, packed neatly into a hard case, with the battery and Wolf River Coil SB1000 stuffed in the front pockets of a massive brown deployment style bag.  My “go kit” was more like a “Hire a mover kit” and weighed a ton.  This worked well, but I really wanted something different.  I needed a portable field radio kit that would be small enough for me to use when hiking and camping, but also serve as a valid and friendly introductory platform for middle and high school students exploring ham radio.

I needed a radio that would provide some of the luxury of the IC7300, including the panadapter waterfall for seeing signals, as well as SSB, and digital mode capability.  The kids, like me, really like FT8.

The Solution:

I settled on the Xiegu G90 radio.  It was much smaller and lighter in weight, had less power consumption, and had many of the features that I thought would still hook kids’ interests, as well as serve me well in the field.  An internal and capable tuner is much appreciated as well. I love the G90, and my students love the G90.

The Build:

To build this kit, I started out with the basic components: the radio, the battery, and the antenna.  To power the radio I use a Bioenno 9ah battery.  It is a bit bigger than what I need but this comes in handy for FT8 activations and the demanding duty cycle penalty that entails, and gives me some slack for device charging. The Wolf River Coil antenna was replaced by an antenna that my club built as a project.   It is a 3D printed chassis and winder for the antennas components and wire designed by (IU10PK) and listed online as “tactical end fed antenna winder” on thingiverse. In addition to these basic components I added an FT8 kit consisting of a DigiRig Mobile, needed cabling and a Evolve III notebook pc.

After reading all of the gallery builds here, I decided to choose a medium sized sling bag to fit the rest of the loadout. Again, I was looking for something to pull double duty for POTA and student work.  My huge original “Hire a mover kit” taught me that I had a tendency to carry way too much. I wasn’t aiming for “Spartan Simple” but I wanted to cut as much as I could. I made a list of my radio critical components, and my support components and shopped accordingly.  I intentionally chose a bag slightly smaller than what I thought I would need to force myself to trim the fat.  I settled on the “Large Rover” sling pack by Red Rock Outdoors.  I chose gray because it would look more at home in my classroom than FDE or OD green, but the color has really grown on me.

The Bag: Red Rock Outdoors Large Rover

(Meme dog talisman adds 5db to all antennas- a wonderful handmade gift from a student!)

The main compartment:

 The main compartment of the bag carries the G90 (with the semi-attached and very bulky fan unit), battery and a Tactical Tailor shemagh I use as a table cloth or ground cover for my bum.  I use the rolled shemagh as a protective layer between the battery and radio.  The battery sits inside the main compartment nicely as well.  Inside the main compartment, there are two sleeves, the rear is unused but the front sleeve houses my coax cable.  The zippered “flap pouch in the top of the main compartment stores my hand mic.  I use little 3D printed protective covers for the mic connectors.

(Little 3D printed protectors for connectors)

The other compartment(s):

The front of the bag has a medium sized pouch with several elastic loops and sleeves.  I use this pouch for my EFHW antenna and my “K4SWL” style bare bones 25M arborist throwline.  There is a small zippered sleeve on the outside that carries an additional 100 feet of 3mm Paracord divided into two sections.

(The front compartment is quite roomy)

At the top of the bag, there is a small zippered pouch that houses my Digirig Mobile and assorted cabling for the G90.  It also carries my charger for the Bioenno battery, and a tiny Anderson Powerpole to USB-C PD charging adapter made by Tufteln that I use to top off the Evolve III’s battery.

The rear of the bag has a very nice sleeve for a device.  The evolve III is a perfect fit.

The Wrap-up:

Although I am new to ham radio and field operations I feel like this little budget kit works exceptionally well for its dual intended purpose.  It’s capable for use in the classroom (or school grounds) as a teaching tool, but also small enough to not murder me on the trail.

The Kit Components:

            Red Rock Outdoors “Large Rover” sling bag

  1. G90 radio with “H2” stand (note: this is an affiliate link that also offers a discount to QRPer.com readers)
  2. 9Ah Bioenno LiFePO4 battery and 2 amp charger
  3. 150A Power meter (Powerwerx clone)
  4. DIY 40-10m EFHW antenna (Link to 3d file)
  5. 25’ Rg8x coax
  6. 25 meters of Marlow Excel 2mm line and a 10oz weight.
  7. Digirig Mobile and cabling
  8. Tufteln Anderson to USB-C adapter
  9. Two 50’ foot lengths of 3mm paracord on scaled down 3d printed antenna winders
  10. Evolve III notebook
  11. 3D printed ethernet cable protectors for mic jacks
  12. Tactical Tailor Shemagh (Discontinued)

Note: Amazon links above are affiliate links that support QRPer.com at no cost to you. Thank you!

POTA by Bicycle: VA3MZD’s QRP Ham Radio Journey

Many thanks to Rod (VA3MZD) who shares the following guest post:


POTA by Bicycle: A Ham Radio Journey

By Rod Murray VA3MZD

First, some background: I earned my Canadian Basic With Honours Amateur Radio License in February of 2022 as a retirement goal while taking advantage of pandemic isolation time to read and study for the exam. I then chose VA3MZD as my call sign. Back in 2007, while teaching in Australia, my students gave me the Aussie nickname, Mr Muzzdog, and it stuck. I’m now Victor Alpha Three Mike Zulu Delta.

At about the time I got licensed, I acquired a Yaesu FT-818ND QRP radio. I had read and heard a lot about POTA and was eager to get on the air but also to operate outdoors. Being active in hiking, cycling and paddling, my immediate goal was to activate a local park on one of my outdoor adventures. I learned as much as I could about QRP and POTA from subscribing to Thomas’ QRPer Blog as well as numerous other channels. I was thrilled when I made my first HF QSO followed shortly thereafter with my first POTA contact as a Hunter from my QTH. This made me even more intent on activating a Park.

My activation attempts from a local park, however, were unsuccessful. QRP with a compromised, mini loop antenna wasn’t working for me. My first successful activation was unique and did not occur until a few months later, far from home.

In May 2022 I traveled to Vancouver, BC to visit family. One of the regulars on my radio club’s morning net (The Elmira Radio Club), a long distance Elmer, so to speak, offered to take me to a local British Columbia park and help me make my first activation. Despite having never met, Trevor VE7BM, scheduled a rendezvous east of Vancouver at VE-3304, Castle Park, and in half an hour, we had over 10 QSOs in the log. I was hooked!

My First Activation with Elmer VE7BM at VE-3304, Castle Park, BC

Upon returning to my home province of Ontario, I acquired an EFRW antenna that I eventually tested for the first time on Field Day in June of 2022. The Nelson 9:1 worked well with my FT-818 and I began taking it on visits to my local Conservation Parks and on hiking trips. I made several successful activations with it but I then ordered a much more portable Tufteln QRP EFRW that Thomas had demonstrated on his QRPer channel. It performed very well and became my regular POTA antenna after installing the Nelson 9:1 permanently in the attic.

Having four POTA units close to home, all within 10 km, made it very convenient to make trips by vehicle to activate them. What makes those 4 parks even more interesting from an outdoor activity perspective is that they are linked by a well maintained rail trail, The Elora-Cataract Trailway which just happens to be part of VE-5082, The Great Trail of Canada! The rail trail connection means that all of these parks can be easily accessed on foot or, my preference, by bicycle.

The Elora Cataract Trailway / The Great Trail of Canada VE-5082 near Shands Dam and Belwood Lake

I started taking my pared down kit, the radio, antenna, tuner, battery and throw line in my bicycle pannier on my regular rides. Then I’d set up the radio for a POTA Activation while visiting a park. My most frequented and my most favourite is VE-5319, Belwood Lake Conservation Area, because of the 10 km eastbound ride through farms and forests, over Shands Dam into the park. Not only is it a pleasant ride, it’s a 2-fer with The Great Trail!

POTA by Bicycle at Belwood Lake Conservation Area – VE-5319/VE-5082

In the westbound direction, The Trailway ends in the scenic and historic tourist town of Elora, and just beyond the town is The Elora Gorge Conservation Area, VE-1392, where the Canadian Heritage designated Grand River cuts a 22 metre chasm through the limestone bedrock.

It has serviced campsites, trails, picnic shelters and tables near mature White Pine trees (Ontario’s Provincial Tree) perfect for deploying a wire antenna. I’ve been fortunate to have met each of these Parks’ Superintendents, and have been able to promote Amateur Radio, my radio club, and also received their full support for POTA activations and Winter Field Day.

Activating VE-1392 Elora Gorge Conservation Area from a picnic shelter with a radio club colleague

Between the two historic mill towns of Fergus and Elora that make up the municipality of Centre Wellington and accessible from The Trailway, stands The Wellington County House of Industry and Refuge National Historic Site, VE-5928. Now renovated to serve as the Wellington County Museum and Archives, the historic limestone building has an interesting, well documented history. Continue reading POTA by Bicycle: VA3MZD’s QRP Ham Radio Journey

Learning from the best – a perfect SOTA morning with K6EL

San Francisco Radio Diary – Part 2

by Leo (DL2COM)

I can’t remember if I have ever walked through a eucalyptus forest before but I am pretty sure I have not as I would have instantly remembered the intense and pleasant smell.

eucalyptus trees
High eucalyptus trees on the north side of Mount Davidson (W6/NC-423)

The morning sunlight and a few scattered low clouds created a rather mystical atmosphere as I was hiking up a narrow and slippery trail on the north-east side of Mt. Davidson in Central San Francisco (W6/NC-423).

sun, fog and trees
This here? Yes please.

My research regarding the trail system of this compact urban mountain was barely existent so I did not end up using the south entrance (Landsdale Ave. & Dalewood Way) which would have taken me to the summit in only a few minutes on a dry and tidy path – but then sans the nice forest panorama. Not worth the tradeoff I’d say.

Mount Davidson Cross
Mount Davidson Cross – memorial to the Armenian genocide in 1915

Due to its proximity to the city center, Mt. Davidson is as easily accessible as pretty much anything in SF for visitors who don’t want to travel further than say a 30 min bus/Uber ride or so. Activators will be rewarded with stunning views of the bay area and the city’s skyline as well as a majestic cross, apparently a well-known SF landmark.

plateau on the summit of mount davidson
The big plateau on the summit of Mount Davidson

I had contacted Elliott (K6EL) prior to my trip to the U.S. who according to the SOTA database has been on Mt. Davidson many times (and on many other summits as I only learned later). This morning I got up early, texted him and was very happy that he agreed to join me spontaneously for my first U.S. activation. Elliott arrived only a few minutes after me as I was struggling to tie a rope to a stone slightly squinting from jetlag. Neither did I bring a throw weight nor a mast due to cabin luggage restrictions. I now know why I cherish these things so much but Elliott assured me that we’d get that wire up eventually and we started to chat.

It turned out that Elliott has done a lot of work for the SOTA and ham radio community. For example, as part of the SOTA management team and being a super active activator (only scratching the surface here): e.g. no.4 Honor Roll Summit-2-Summit (S2S) world-wide pushing almost 10k S2S QSOs. Wait what? That’s a hell of a lot of mountain-top radio experience, so his reassuring words instilled a high degree of confidence for my improvised antenna setup. Not only did we manage to get the 31’ random wire up in a high tree but he also brought a 2m HT which I had (I admit) forgotten in Germany.

While I was still busy setting up the station he had already bagged a handful of FM S2S QSOs. That’s how it’s done.

wire antenna in high trees
31′ random wire to 1:9 unun & 17′ counterpoise in a sorta inv. v-to-l’ish-shape

Suddenly two police officers showed up on motorcycles and I started gathering a number of arguments in my head as to why our activation is a completely legitimate thing (strange reflex or comprehensible?). They approached us in a very kind way and after we greeted each other Elliott pointed to our wire antenna and let them know that “We are ham radio operators and this will be our antenna for the next hour.” Full stop. Ha.

In fact the two officers didn’t need any arguments from us, instead they showed genuine technical interest and at some point we were all joking around together. I believe they were just happy to find everything in good order and maybe also catch a few warming sun rays. Still I loved the way Elliott presented our activity as the most natural and non-optional thing. I guess I just didn’t know how local police would react at first. A good reminder that mutual respect goes a long way.

By now the fog had cleared and blue skies showed all around. I was itching to get on the air! To break the ice I logged a quick S2S contact with WD4CFN on Max Patch, a mountain on the NC/Tennessee border. Off to a great start! Elliott suggested starting on 10m so that’s what I did.

ham radio operation from mountain top
Random rock – the best shack

CQ SOTA DE W6/DL2COM K…uff I needed a few attempts to get that W6/ prefix into a somewhat natural CW flow but then first contacts started rolling in.

F4WBN, Chris, with a strong signal from France. So cool to hear him on the other side of the planet as well. He was shortly followed by LW2DO from Argentina and then a bunch of US operators including four more S2S QSOs before S57S (Slovenia) and JG0AWE (Japan) topped off the log with a warm DX rain. WOW!

Today’s QSO Map

I could have called CQ forever but decided to call it a day after 27 QSOs and rather enjoy the sun, view and good company. After all, I also needed to get back to the city in time.

ham radio operators on a summit
Good times atop la montagna

Elliott kindly offered to give me a ride so we had some time to discuss – how could we not – the KH1, current DXpeditions, and various topics around SOTA, U.S. ham radio and the city of San Francisco.

san francisco park rules sign

I am thankful for this perfect SOTA morning.

Gear used:

vy 73 de Leo W6/DL2COM

Comparing Coaxial Loss in RG-58 and RG-316

by Eric, WD8RIF

I recently decided that I would operate portable during the upcoming ARRL 10 Meter Contest and would combine this operation with a pair of Parks on the Air (POTA) activations, one on the Saturday of the contest and one on Sunday. While putting together my field station for this, I realized I wanted to see how lossy my RG-58 and RG-316 feedline cables were on 10m. Yes, I could have resorted to online charts of feedline losses, and I know that the RG-316 is lossier than the RG-58, but I thought it would be fun and more enlightening to make actual measurements, to empirically determine the losses in my particular coaxial cables.

The two coaxial cables in question are both 25′ in length and both are equipped with BNC male connectors on each end. The RG-58 cable is a high-quality cable that was originally manufactured to be a 10Base2 ethernet cable, but it’s probably now over twenty years old. The RG-316 cable was recently purchased from Tufteln (link) and includes an RF choke near one end.

To make my measurements, I used my Elecraft KX2 (link) to generate RF into an Elecraft DL1 dummy load with RF detector (link), using a digital multimeter to measure the voltage at the DL1’s measurement points. I used the formula that came with my DL1 assembly instructions to calculate the measured wattage:
P = (((V x 1.414) + 0.15))^2)/50

I made measurements in the CW portion of the 10, 15, 20, 40, and 80m bands, with the KX2 set at 5 Watts output.

My first set of measurements was made with the DL1 connected directly to the KX2’s antenna jack using a BNC union:

Direct (no feedline)
Band Volts Watts
10 11.62 5.498
15 11.59 5.470
20 11.61 5.489
40 11.63 5.508
80 11.63 5.508

My immediate observation was that the KX2 appears to be generating more than 5w when it is set to be producing 5w but also that the KX2 output is essentially same from 10m through 80m.

My second set of measurements was made with the DL1 connected to the KX2 through the RG-58 cable:

Direct RG-58
Band Watts Watts
10 5.498 4.809
15 5.470 4.844
20 5.489 5.004
40 5.508 5.184
80 5.508 5.276

My third set of measurements was made with the DL1 connected to the KX2 through the RG-316 cable:

Direct RG-316
Band Watts Watts
10 5.498 4.190
15 5.470 4.322
20 5.489 4.507
40 5.508 4.774
80 5.508 4.959

I was pleased to see to see that both the RG-58 and RG-316 behaved as I expected them to: the loss increased with increasing frequency.

Using the magic of MS-Excel, I created a table of Loss in Watts for both cables, relative to direct connection and to each other:

Direct Difference (Loss) (Watts)
Band Watts RG-58 vs
direct
RG-316 vs
direct
RG-316 vs
RG-58
10 5.498 0.690 1.309 0.619
15 5.470 0.626 1.148 0.522
20 5.489 0.485 0.982 0.497
40 5.508 0.324 0.734 0.410
80 5.508 0.232 0.549 0.317

In looking at this table, it was immediately obvious that RG-316 is much lossier than the RG-58, particularly on 10m. By looking at the row for 10m, one can see that I am losing nearly 0.7 watts in the RG-58 but I am losing over 1.3 watts in the RG-316.

For completeness, I added columns for Loss in dB to the spreadsheet:

Difference (Loss) (dB)
Band RG-58 vs direct RG-316 vs direct RG-316 vs RG-58
10 0.582 1.180 0.598
15 0.528 1.023 0.495
20 0.402 0.856 0.454
40 0.263 0.621 0.358
80 0.187 0.456 0.269

This exercise showed me that for my upcoming ARRL 10 Meter Contest POTA outings, I would do best by connecting my antenna directly to my transceiver, if possible, without using either coaxial feedline. If conditions at the operating site require me to use feedline, I will chose the RG-58 over the RG-316.

The tables also tell me that RG-316 is pretty lossy regardless of the band; for my regular field operating, unless I’m planning to do bicycle- or pedestrian-portable operations where weight and bulk is a consideration, I’ll carry RG-58 instead of RG-316. (I purchased the RG-316 specifically for bicycle- and pedestrian-portable operations, and I plan to continue to use the RG-316 for those applications.)

At some point, I will repeat this exercise with RG-8X, a feedline that is very close in size to RG-58, is less lossy, but is also heavier and stiffer.

Field Radio Kit Gallery: WN1C’s Elecraft KX3 Camera Bag Activation Kit 

Many thanks to Thomas (WN1C) who shares the following article about his portable field radio kit which will be featured on our Field Kit Gallery page. If you would like to share your field kit with the QRPer community, read this post


KX3 and Speaker Wire Camera Bag Activation Kit 

by Thomas (WN1C)

For the QRPer’s Field Radio Kit Gallery, this is my KX3 and speaker wire in a camera bag activation kit.

This kit is the continuation of the equipment I used for my Maine ATNO expedition and other activities on that return to my parents almost a year ago. Primarily, it’s a change in bags and an improvement of the audio connection options for more sustained activations. Writing up this kit for the gallery also will probably be an incentive for further change. With how loosely packed it is, there’s space for options! You can see this kit in action on my recent trail activation.

The bag packed and ready for an expedition, even if just a little ways away.

The outside is the discontinued Peak Design Everyday Messenger 15″ v1. I picked this up lightly used on my local craigslist with an eye for expanding the kit contents capabilities. In that endeavor, it has been successful, but concentrating on this configuration to start:

Open the top to reveal the gear packed between dividers!

There’s a certain pattern (that I might not keep following in future re-packings), but the arrangement internally is:

  • Outer pouches: coax, radials, headlamp as necessary
  • Lid flap padded pouch: infrequently used adapters and short cables
  • Left division: antenna(s), throw line and weight, headset, coax, banana cables
  • Mid-left division: logging pouch with paddles and notebook
  • Mid-right division: KX3 with cover and heatsink
  • Right division: power cables, hand microphone, lithium-ion battery banks, LiFePO4 battery pack
  • Flopping around on top: TH-350 HT
  • Front zipper pouch: additional notebooks, earbud headphones, pen, coax, ARRL VE badge

Of course, not all of this gets used at the same time. Different LiFePO4 options with Anderson Powerpole connectors can be substituted. For quick and lighter operating (or when wearing more hats), the headset can be left behind. Anyway, to the details!

Full contents spread out much wider than I usually have space for! Featuring the wooden floor I rarely operate over because apartment living.

So, what is all of this?

Bags

  • Peak Design Everyday Messenger 15″ v1 (discontinued, acquired second hand) with an additional bright red divider stolen from one of my Crumpler camera bags
  • Case Logic accessories pouch from who knows where (underneath the notebook)
  • One of WesSpur’s low cost throw line bags (don’t get it, it’s smelly plastic and falls apart, as shown in the picture)

Radios

  • Star of the show: Elecraft KX3 in the “KX3 Pack” configuration (KX3, KXAT3, KXBC3, MH3) with Side KX KX3 Combo panels and cover, plus an aftermarket heatsink
  • TYT TH-350 tri-band HT (144-222-430 MHz) with bundled SRH-17 tri-band whip

Getting RF Out

  • 2x 28′ (ish) speaker wire on BNC-F to binding posts/banana connector, in use for a while, though now beefed up with a bit of heat shrink and crimped spade lugs
  • 4x 17′ speaker wire shorted together on dual banana plug (radials)
  • 6′ RG-58 BNC-M to BNC-M with a random split ferrite on it from who knows where
  • 2x Pomona banana test leads for occasions of connecting more things together
  • 60′ Marlow Excel Throw Line 2mm (a K4SWL recommendation)
  • WesSpur 10 oz Throw Weight
  • Assorted S-Clip Plastic Carabiners for the speaker wire, throw line, and whatever else needs clipping together
  • CablesOnline 25′ RG-316 with BNC for spare feedline
  • 2 foot BNC RG-316 jumper
  • Adapters: BNC F-F coupler, BNC-M to dual Banana-F/Binding Post, Dual Banana-M to BNC-F, BNC tee, BNC to center Banana-F/Binding Post; all provide options of hacking some options together

Getting Signals In and Out

  • Koss SB-45 Communication Headset (cheaper relative of the popular Yamaha headset; it shows, mostly in the cable quality)
  • Bamatech Bamakey TP-III Rot (an excellent set of dual paddles that can also serve PTT duty) stored in an Altoids Peppermint tin
  • Cable Matters Retractable 3.5mm Audio Cable
  • Hosa YMM-261 Stereo Breakout to allow use of the SB-45 electret mic with another switch wired to a 3.5mm plug for PTT on the KX3 mic port rather than just VOX
  • Custom microswitch to 3.5mm PTT (not very good at its job) using this snap switch
  • Elecraft MH3 hand mic from the kit configuration
  • Old Apple earbuds, headphones only (TRS)

Power

  • Bioenno BLF-12045W 12V / 4.5Ah LiFePO4 pack (can be substituted with the 3Ah pack I also have)
  • Anderson PowerPole to barrel plug for KX3 power
  • Old (sometimes RF noisy) USB Type-A power banks, one with a built-in flashlight (souped up with a much nicer white LED)
  • Misc USB cables, A to Micro-B and C for charging from batteries

Documentation