Category Archives: Field Reports

Pairing the Chameleon CHA LEFS with the Discovery TX-500 at Table Rock Fish Hatchery

Last time I visited Table Rock Fish Hatchery–this activation–it was a struggle to get the ten contacts I needed for a valid activation. Propagation was horrible that day, making it a proper struggle.

On Thursday, May 20, 2021, I thought I’d go back to the fish hatchery for another try! I really like the site: it’s open, has lots of trees, and the staff (and neighborhood dogs) are all very friendly.

My not-so-QRP diesel truck!

Thing is, as I drove to Table Rock, my buddy Mike informed me that propagation took a nose dive. Earlier in the day, it had been reasonably stable, but he noted that POTA activators were struggling in the afternoon and the propagation numbers were in the dumps.

There’s a beautiful little creek next to the picnic area.

My secret weapon: The Chameleon CHA LEFS

Shortly after I posted my “unboxing” video of the lab599 Discovery TX-500, Carl at Chameleon Antenna made a comment on my YouTube channel that he was going to send me their CHA LEFS (Lightweight End Fed Sloper) wire antenna since it’s resonant on 40, 20, 17, 15, 12 and 10 meters. In many ways, it’s ideally suited to pair with the TX-500 since this transceiver lacks an internal ATU. Side note: there is a cool project in the works called the DIY599 that adds a 60 watt amp and ATU to the TX-500 . 

I had only recently received the CHA LEFS and had not yet taken it to the field. Table Rock was the perfect opportunity.

When I know in advance that propagation is poor, I try to make my portable set up as efficient as possible, so that’s when I 1.) make sure I pull out a resonant wire antenna and 2.) use a wire antenna with longer radiators. The CHA LEFS fits both of these bills.

The CHA LEFS has a 63 foot radiator made of 20 gauge PTFE antenna KEVLAR wire. The winder has a large efficient transformer to match impedance, and there is an inline coil to make the most of the 63′ radiator. They also include 50′ of Micro 90 paracord.


Like all Chameleon antennas I’ve used, it’s built to military specs.

Table Rock Fish Hatchery (K-8012)

Table Rock is ideally-suited for a long-ish sloping wire antenna, too. The site has tall trees and open spaces that make stretching out the sloping radiator quite easy. Just watch those power lines!

The CHA LEFS takes longer to deploy that end-fed antennas with a feedpoint near the ground. I find it quicker to deploy, however, than dipoles.

I deployed the LEFS by first stretching out its radiator wire in the direction I planned to deploy it.

Next, I connected the coax feedline to the SO-239 on the LEFS winder and stretched it in the opposite direction of the radiator. Why do this? It helps keep the radiator and coax from twisting together as I raise the winder/feedpoint into the tree.

This is not a difficult antenna to deploy as one person. Of course, if you have a helper, it’ll go even faster (I’ve yet to convince Hazel to help me with antenna deployment).

I had launched the arborist line quite high into a tree at the picnic table where I planned to operate. I was able to elevate the LEFS feedpoint/winder about 47′ into the tree.

I used the supplied paracord to attach the radiator to a nearby branch. The end of the sloper was perhaps 6 feet off the ground (if memory serves).
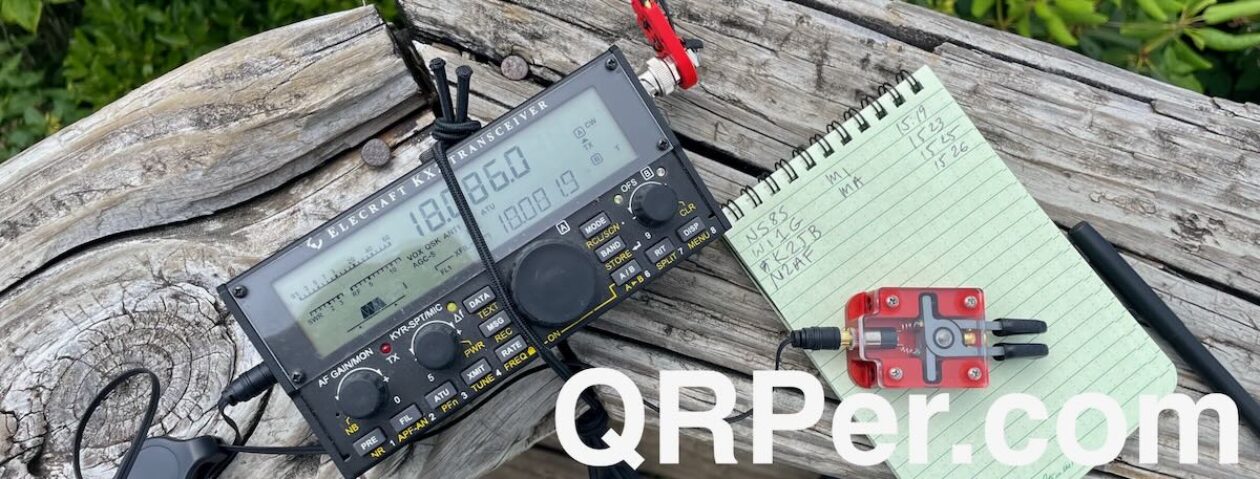
Gear:

On The Air

Knowing how poor conditions were from real-life K8RAT observations, I didn’t expect to actually validate my activation by logging the required 10 contacts. As I stated in my activation video, I was fully prepared to walk away with three or four contacts–I didn’t have a few hours to burn on an activation. I was simply happy to play with a new antenna, the TX-500, hang with the local canine welcome committee and enjoy the fine weather.

First, I hopped on 40 meters and discovered the LEFS provided a perfect 1:1 match on 7063 kHz. Very promising!

Next, I started calling CQ and the Reverse Beacon Network functionality of the POTA spots page must have quickly auto-spotted me.

Within 13 minutes, I logged six contacts! I was impressed. Mike (K8RAT) was in that first six contacts and he later told me it was one of the strongest signals he’d ever heard from me at a POTA activation. He asked what I was using as an antenna that day and said, “it was working!”

Next, I moved to the 30 meter band and worked K8RAT again (a rarity on 30 meters!) along with four other stations.

I ran out of time, so called it quits with 11 stations logged.

I did not expect to not only walk away with a valid activation, but to have completed it in such short order.

QSO Map

Here’s the QSO Map of my contacts all made with 5 watts of power:

Video

Here’s my real-time, real-life, no-edit video of the entire activation. Next time I take the LEFS out, I’ll try to remember to include setting it up:

Loving the CHA LEFS!

Talk about good first impressions!

As Carl suggested, I’m going to keep the CHA LEFS tucked away along with my PackTenna EFHW in the Discovery TX-500 pack.

When conditions are poor, I’ll spend the modest amount of extra time deploying this fine antenna.

The only CHA LEFS criticism I noted–and it’s a minor one–is that the in-line trap/coil isn’t very low-profile and takes a little attention to make it fall in the right spot when reeling the antenna up post-activation. Seriously. A minor criticism and I’m guessing Chameleon has a reason for it being on the large size–likely for power handling reasons.

Field Day is coming up, and I think I’m going to make the CHA LEFS one of Team Baklava‘s main antennas (Team Baklava = my buddy N3CZ and me!).

As for the CHA LEFS, I highly recommend it!

Days 2 – 3: A SOTA Adventure To Remember (Part 2)

I would like to thank everyone for their positive and kind comments from my first part of the SOTA adventure with NK8Q. I have a slight correction to make, Cole Mountain was the first summit we did on Day 2. As you can see below in the pictures, there were no trees to hang our EFHW antennas, so we brought along our fishing poles. This generated a lot of interest from the A.T. thru hikers asking what we were doing. On particular hiker told us he’s seen others doing SOTA at summits throughout his journey from Georgia until that day. This was a fairly steep climb to get to, but the scenery was fantastic and well worth the walk. We offered trail magic to several of the hikers and we had very good conversation with them all.

Heading back down from the summit are a couple of other views we saw. There were some trees outside of the activation zone.

We packed up and started heading down the mountain to the parking lot around noon with the next destination Rocky Mountain (W4V/BR-001).

We drove almost 3 hours to get to this drive-up summit. The “S” turns and elevation changes were worth it though as there was so many spectacular views of the mountains. The last 4 or 5 miles was up a very steep gravel road that had me white knuckling until we got to the top. This was a site with several towers for different things and not a lot of view. I was able to get 10 QSO’s at the summit. I recall it was getting very warm that afternoon and I was not looking forward to the drive back down the mountain on the access road. I figured out how to do the manual shifting in my Tucson and Mark followed me down the hill. It was a non-issue and then we had a long drive to where we thought we would be able to camp on Skyline Drive.

I got my 4 SOTA QSO’s, time to relax.

When we finally got back onto paved roads and eventually into cell phone coverage briefly; we were hoping to find a place to get ice for the coolers and maybe a place to eat. Well, we found a gas station in the middle of nowhere with ice and a little store and they happened to be selling their own fried chicken and fries. When we got to the south end of Skyline Drive entrance, the sign showed all of the campgrounds were full. Since it was already getting dark, we made the decision to get on I-81 and head north and found a Super 8 Motel in Newmarket, VA for the night with the plan to get back to Skyline Drive at the Thornton Gap entrance. We got up early and looked for a gas station and a place to eat. Conveniently, Dunkin Donuts has a gas station as well (we didn’t realize that until after we got gas) but had a good breakfast sandwich each and I got a large coffee. I believe Mark is only the second person I’ve ever known who does not drink coffee. I believe my large cup was consumed before we got to Skyline Drive that morning, which I believe was about 18 miles.

First Summit of the day was Hazeltop Mountain (W4V/SH-004), which was south on Skyline Drive. The scenic outlooks were beautiful on the way to the summit.

Once we reached the summit, there was not much to see. I set up a few yards off the A.T. and made 15 contacts. The band conditions were pretty decent. This was my set up at this location.

Next stop – Hawksbill Mountain (W4V/SH-001).  It was just after 12 noon when we got to the parking area, and there was a good mile or so of steep uphill climbing. The reward at the top was worth the climb! I got another 20 QSO’s in the logbook at this summit.

This dial pointed to the many summits within view of Upper Hawksbill.

Final summit for the day was Stony Man Mountain (W4V/SH-002). This was another steep climb, but the reward was also a beautiful view.  I made 8 QSO’s and Mark and I shared the antenna and radio due to the limited space and all the people walking around at the summit.

I will continue with Part 3 of our journey to the Summits in Virginia in the next post. I hope I have half the writing skills that Tom Witherspoon has and that I was able to hold your interest in the SOTA journey that Mark and I did. I will wrap up the story with a Part 3. Thank you for taking the time to read this.

Scott Lithgow
KN3A

Scott Lithgow (KN3A) is a contributor on QRPer.com. Click here to check out his previous posts.

A memorable Bakers Mountain SOTA activation with the Elecraft KX2 & PackTenna 9:1

Besides Lane Pinnacle, there’s been one SOTA summit, in particular, I was eager to activate this year: Bakers Mountain (W4C/WP-007).

I practically grew up in the shadow of this little outlier mountain in Catawba County, North Carolina–my home was only a couple miles away as the crow flies and it has always been a bit of a landmark in my childhood stomping grounds.

Growing up, the land in/around Bakers Mountain was basically off-limits and privately owned. In the late 1980s, one of the land owners gave a large tract of land to the county to protect it from development (which started booming in the area around that time).

In June, 2002, while I was living in the UK, Catawba County open up the 189 acre park and its 6 miles of trails to the public.

I love Bakers Mountain park. Even though the mountain isn’t terribly tall (1780 feet/543 meters ASL) parts of the trail system are fairly strenuous. When I want to escape and clear my head, the Bakers Mountain trails are the perfect medicine.

Bakers Mountain: What’s in a name?

An interesting tidbit about Bakers Mountain that I learned from one of the park rangers: it was originally called “McBride Mountain in the late 1700s, but as more German settlers moved into the area, German family names became predominant.

The Baker family had large tracts of land in/around the mountain and, locally, people started referring to it as “Baker’s Mountain” sometime in the 1800s and the name stuck.

Officially, the name of the mountain is “Bakers Mountain” although, I suppose, it should have been called “Baker’s Mountain” or maybe “Bakers’ Mountain.” An apostrophe was never added, though.

It’s a source of confusion for those who make maps and refer to the mountain. In the SOTA database, it’s referred to as “Baker Mountain.” That is incorrect, of course, but the SOTA database is likely built upon one of the topographic map databases where it’s incorrectly labeled.

So there you go. Tuck away this bit of trivia and sound like a local next time you’re in Catawba County!

Now where was I? Oh yes…

So on Wednesday, May 19, 2021, I packed my Elecraft KX2 and PackTenna 9:1 UNUN antenna in the GoRuck GR1, and hit the Bakers Mountain trail system.

The weather was perfect, although the humidity was incredibly thick that day.

Mountain Laurels were in bloom and flanked portions of the trail.

I took the main red-blazed loop trail.

The trail is very well-marked and maintained with maps posted throughout.

At one point, you’ll happen upon the old home site.

The trail has a few steep sections, but overall is pretty moderate.

There’s no missing the summit trail.

Following the orange mountain top trail will take you to a gazebo and observation deck near the summit.

Keep in mind, though, that this is not the true summit of Bakers Mountain and isn’t close to the 25M SOTA activation zone. Still, the views are fantastic here, so take a breather and soak up the Catawba valley.

Click the pano image below to enlarge in a new window.

To find the trail to the real summit, you must follow the path crossing under the power lines near the observation area–you can’t miss it. While the public isn’t encouraged to take this path–and it is not a part of the Bakers Mountain trail network–a park ranger told me that the current owners don’t mind the odd SOTA activator following the trail to the summit.

The path–since it’s not a part of the public trail–is a bit overgrown. Follow this path until you intersect an overgrown narrow access road. At the intersection take a left and this will lead you to the true summit. The ring road around the summit is well within the AZ.

I found a little spot to set up among the trees on the summit. No views, but it was the perfect space to deploy the PackTenna 9:1 UNUN!

Gear:

On The Air

This being my first time activating Bakers Mountain, of course I made a real-time, real-life, no-edit video (see link below). Sorting out a way to set up the camera position took me longer than deploying the antenna and unpacking the radio! It can be a real challenge on a stony mountain summit.

The KX2 paired beautifully with the PackTenna 9:1 UNUN. I got a great match on 20 meters.

I started calling “CQ SOTA” and spotted myself on the SOTA network using the SOTA Goat app.

My first contact was SA4BLM in Sweden–I almost fell off of my rock!

Next, I worked KR7RK in Arizona, AE0XI in South Dakota, and HA9RE in Hungary! All in eight minutes.

Wow!

Next, I moved up to the 17 meter band where I logged AC1Z in New Hampshire, F4WBN in France, and KT5X in New Mexico.

Finally, I moved down to 40 meters where I worked K3TCU in Pennsylvania, K8RAT in Ohio, W4KRN in Virginia, and K4MF in Florida.

My total activation time was about 25 minutes.

QSO Map

Here’s the QSO Map plotting out my QRP contacts. I must say, that modest PackTenna did a lot with my 5 watts! That and some good Bakers Mountain mojo! 🙂

Video

Here’s my real-time, real-life, unedited video of the entire activation from start to finish:

Click here to view on YouTube.

That was fun!

When I hike at Bakers Mountain, I add spur trails and connectors to make it as long as can in the time frame I have. The trip back to the car was actually a longer hike than it was to the summit.

But I had a spring in my step.

I was absolutely chuffed that my first activation of this particular summit was so exciting and fun. It still blows my mind what can be accomplished with 5 watts and a modest wire. I can’t wait to go back again.


Do you enjoy QRPer?

Please consider supporting us via Patreon or our Coffee Fund!

Your support makes articles like this one possible. Thank you!

Day 1: A SOTA Adventure To Remember (Part 1)

First of all, thank you so much Thomas Witherspoon (K4SWL) for allowing me the space to tell my recent story from my trip to Virginia. I hope you find it interesting. I certainly do not have Tom’s writing skills so I’ll do my best.

A quick introduction. I was licensed in 1983, call KA3LUW, as a Novice mostly a CW operator. I upgraded in 1992 to Extra with the 20 WPM code. I was mostly interested in DX and around 1996 went through some life changes and became inactive for several years until about 2003 when my Dad (N3FWI – now SK) gave me his Kenwood TS 450 to sell. I put up a temporary antenna and discovered PSK31. That actually got me back into ham radio as Dad let me keep the radio. At that point I changed my Extra call from WY3X to KN3A. Over the years my interest is still chasing DX and contesting. In 2015, I was chasing the W1AW year long event for the ARRL Centennial so I could confirm as many states on as many bands and modes as possible. When 2016 started, my ham friend, Mark, K3MRK told me I should get involved with NPOTA (National Parks on the Air) which was also celebrating their 100th anniversary. I was just so burned out from ARRL the prior year that I did not get involved. My interest in the hobby also started to wane as well, as I got into fitness due to health issues.

Fast forward to 2020. Mark continued to praise the now POTA program and all the fun he was having with it. It seemed to be something I would also enjoy as I could walk, hike and exercise as well as discover portable operations. On March 14, 2020, Mark convinced me to do a POTA activation with him at the local Sam Lewis State Park (K-1418) near my QTH. It was very cold and windy but we had a successful activation and I was hooked. Since then I’ve done 75 activations from 9 unique parks in 3 states. To say I am hooked is an understatement!

I have another good friend Mark, NK8Q, who is an avid Summits on the Air activator and chaser (SOTA). Mark lives about 2.5 hours west of me, and last summer we met and activated two Summits together. The first was a drive up summit and the second one required a little bit of hiking to reach the summit. I like the idea of walking, hiking and backpacking so SOTA is also something I enjoyed doing last year.

Two years in a row K3MRK and I have tried to get to Dayton, only to have them cancel due to the pandemic. I had scheduled a week off of work and decided to keep the time off and contacted Mark – NK8Q about possibly doing a backpacking SOTA adventure.

We talked about different places we could go to activate, and ultimately we decided to do several 10 point summits along the Blue Ridge Parkway, Skyline Drive and along the Appalachian Trail. For me, this was going to be not only a SOTA activation, but in some instances the activation also counts for POTA.  We both left our homes early morning on May 20 and meet in Natural Bridge, VA and we would spend the next 4 days heading north, while activating different summits. We actually realized about 100 miles north of Natural Bridge that Mark and I were only about a mile apart heading south on I-81, so we took advantage of 146.52 simplex the rest of the way to our starting point and we used FM simplex driving from summit to summit.

We arrived at Natural Bridge just before 10:00 a.m. and Mark asked if I wanted to activate K-3972 (Natural Bridge National Park). Sure, why not, it would be fun to do a quick activation. We found a nice spot to set up the antenna and radio. My equipment for this journey was a Sotabeams Bandspringer Midi and my ICOM 705. I put 11 QSO’s into the log the short time we were there and was a nice warm-up for what was ahead.

After the quick POTA activation, we started heading to our first summit, which was Apple Orchard Mountain (W4V/RA-001). This was along the Blue Ridge Parkway and the views heading there were spectacular. Once at the summit we explored the area and then found our operating spots. I made 20 QSO’s and 3 S2S (summit to summit).

Second summit was Cole Mountain. The parking area was about 700 feet below the summit of 4,020 ft. Most of this climb was along a private road that goes up to several towers and they were cutting the grass. They waved as we walked up and were also very close to the Appalachian Trail (AT). Cole Mountain yielded 27 QSO’s in a very short period of time.

We hiked back to the parking lot and proceeded to our next summit of the day at Petites Gap Trailhead where we went to Highcock Knob (W4V/RA-014) where we hiked about 700 feet in just over a mile. This was a fairly rocky and difficult climb and being tired from other summits and the drive down first thing in the morning, it was nice to be the last summit of the day. The elevation at the peak is 3,073. Mark and I had some issues getting our antennas through the trees at this summit and wasted a lot of time. Once the issue was resolved, I made 8 QSO’s. Mark and I decided it was time to start heading back to the parking area and call it a day. Since we were on the Appalachian Trail, we met many thru hikers heading from Georgia to their final destinations in May. Every one of them were really nice and eager to find out what we were doing at the summits and we made sure we had “trail magic” as they call it on the A.T. We carried extra water and snacks, and they were always much appreciated by the hikers. Just before we got back to the car, we met up with a hiker from Minnesota who was hanging his bear bag in a tree and he was preparing to camp for the night. When Mark and I got back to the car I thought, here I am with a cooler full of ice cold beer, I bet this man would appreciate a beer or two. I went back and he couldn’t get to the car fast enough! If you are ever hiking on the A.T. make sure you bring some trail magic as well. In the picture below, Mark was using my rig and we were right at the summit.

We left and went looking for a place to camp for the night. There were no campsites available so we stayed in a very old motel that I was afraid was going to be full of bed bugs or something. We survived and day 2 of the SOTA adventure was ready to begin.

(Part 2 is next)

Scott Lithgow (KN3A) is a contributor on QRPer.com. Click here to check out his previous posts.

Enjoying a casual trailside activation with the Xiegu X5105 and PackTenna 9:1 Unun

I love day hiking with radios.

When I pack all of my radio gear in a field kit that is compact enough to fit in a small day pack, it forces me to only take the essentials. This, in turn, makes for a quick deployment and pack-up.

I think this is one of the reasons I find Summits On The Air so appealing.

On Tuesday, May 18, 2021, I had a hankering to fit in a hike and, of course, play radio. I also wanted the option to fit in two activations, so needed a simple and short hike to minimize time.

Tuttle Educational State Forest (K-4861)

I decided to head to Tuttle Educational State Forest–one of my favorite accessible POTA sites–because their two mile loop trail was just what the doctor ordered. In fact, I knew exactly where I wanted to set up on the trail.

Tuttle is rarely busy–especially on a Tuesday afternoon.

I arrived on site and, as I was pulling my backpack out of the car, I was greeted by one of the Tuttle park rangers. He was incredibly nice and provided me with even more ideas of places to set up in the future along the trail and trail extensions. We must have chatted for 15-20 minutes–he had a number of questions about amateur radio and I never miss an opportunity to be an ambassador for both ham radio and POTA/WWFF.

Gear:

On The Air

The hike was amazing and, besides park rangers, I had the entire site to myself. About 1.5 miles into the hike, I found the spot I earmarked for this activation: a little open area with three wood benches on the side of the path.

This particular deployment reminded me how thankful I am that I discovered the Arborist Throw Line last year. I had the PackTenna deployed in three minutes.

It was so…effortless.

I decided to take the Xiegu X5105 out for another activation. Radioddity sent this to me on loan for a full evaluation and review. The previous day, I activated the Blue Ridge Parkway with the X5105.  I wanted to see how many activations I could accomplish off of one charge of the X5105’s internal battery, so after the BRP activation, I didn’t re-charge the battery.

As insurance at Tuttle, I brought along my trusty QRP Ranger LiFePo4 battery pack and hooked it up to the X5105. If the X5105’s internal battery died on me, it would be easy to simply turn on the QRP Ranger’s power switch and hop right back on the air.

I started one of my real-time, real-life activation videos (see below), then called CQ on 40 meters.

Maybe that quick antenna deployment was foreshadowing the activation, because in the span of 13 minutes, I logged 11 stations all on 40 meters.

I was very pleased to work P2P (Park To Park) contacts my friends Steve (KC5F) and Scott (KN3A). Thanks, guys, for hunting me!

Here’s my log:

I didn’t even move up to 30 or 20 meters after working the string of contacts on 40 meters because Tuttle is far from being a rare site and I wanted to fit in one more activation that afternoon.

The X5105’s internal battery easily powered the rig for the entire activation (perhaps a total time of 15 minutes). I suppose I’ll have to take it to yet another park on this same charge!

Packing up was nearly as quick as deployment. I owe thanks to one of my YouTube Channel subscribers for suggesting that I pack the Arborist Throw Line pouch by winding figure eight bundles of line on my hand (much like I do with antenna wire) and stuffing them in the pouch one bunch at a time. This saved me a lot of time.

While the portable throw line pouch isn’t as quick to pack as the throw line cube, this method made it a cinch!  I can’t find who originally made the suggestion, but I’m grateful–thank you!

Video

Here’s a link to the full activation video:

Photos

During my loop hike, I snapped a few photos (click to enlarge):


Well hello there, little fella’!

I’m most grateful to the late Ms. Tuttle for leaving this amazing park for all to enjoy. Her legacy protects this land for all future generations.

When you’re doing a park or summit activation, don’t forget to stop and take in a good dose of nature and the outdoors.

It does us all a world of good.

More X5105 thoughts

This second activation had me warming up a bit more to the X5105. I do like its size, and I think it’s a good rig for CW ops.

CW operation is very pleasant, actually, and keying feels natural. I was impressed that the battery held for a second activation, even though this was a very short one.

Again, I think the internal speaker audio leaves a bit to be desired–I dislike the audio splatter I hear at higher volumes–but for $550? It’s really hard to be critical.

During this activation, I still hadn’t learned how to program CW memory keying. A YouTube subscriber recently described the process and it seems overly cumbersome and much more complicated than it was in an earlier firmware version.  I’m going to contact Xiegu about this. Unless I’m missing something, it really holds the radio back from being pretty stellar on CW for the field op.

Readers, if you own the X5105 and can describe the best way to use CW memory keying, please comment with directions! I’d really appreciate it!

Thank you

Thank you once again for reading through this field report and perhaps watching the activation video.

I’d also like to thank the readers and subscribers who’ve recently supported me on Patreon and via PayPal. I am humbled and honored.

Thank you.


Do you enjoy QRPer?

Please consider supporting us via Patreon or our Coffee Fund!

Your support makes articles like this one possible. Thank you!

New radio day! A shakeout activation on the Blue Ridge Parkway.

I learn a lot about a radio the first time I take it to the field. I’m not sure if it’s because being out of the shack helps me give it my full attention, or if it’s because field conditions vary and this allows me to see how flexible and adaptable the radio is.

On Monday (May 17, 2021), I was eager to hit the field with a new-to-me radio.

The previous week I didn’t log even one park or summit activation. Typically I’d hit at least two. There were a couple of reasons for this…

First, we had a fuel shortage in western NC and I didn’t want to burn any extra fuel for activations knowing we had some important family errands that week.

Secondly, I needed to hunker down and finish a number of projects I’d been working on including a lengthy two-part field radio kit feature for The Spectrum Monitor magazine, and a new in-depth TX-500 review for RadCom.  FYI: Part one of my feature for TSM will appear as the cover article in the June 2021 issue.

We also had a number of family projects to sort out. So a week at home perfectly timed with the fuel shortage.

The new radio

I collect reader and viewer suggestions and when I see that there’s a radio or product, in particular, folks would like to see tested, I try to obtain one.

One of the most requested radios lately has been the Xiegu X5105.

A number of readers have asked me to obtain an X5105 and take it to the field. Many are considering purchasing this (incredibly) affordable full-featured QRP transceiver, others own it, love it, and want to see how I like it compared with my other radios.

Last year, I came very close to purchasing the X5105 for review, but opted for the Xiegu G90 instead (here’s my review of the G90).

Even though the X5105 is only $550 US, I really didn’t want to make a purchase at this point because I’m budgeting for a new MacBook, new video camera, and I just purchased the TX-500.

So I reached out to Radioddity who is a sponsor over at the SWLing Post. I’d been in touch with Radioddity a lot as of late because I’ve been evaluating and testing the Xiegu GSOC for the past few months. They lent me the GSOC (and a G90 because I sold after my review) and I was in the process of packing up both units to send back to them.

I asked if they could lend me an X5105 for a few weeks. They were quite happy to do so and dispatched one in short order.

A clear relationship

Side story…

Back when I decided to place ads on the SWLing Post and QRPer.com, I worried about any inherent conflicts of interest. I read magazines that review products and can tell that they’re being gentle in their criticism because there’s a two page ad of the product immediately following the review. I don’t like that.

This conflict is something that’s almost inevitable with any radio publication that grows to the point of needing monetization to support it.

I made a few Golden Rules up front:

1.) I would only place radio-relevant ads on my sites. Period.

2.) My ads and sponsorships would be hand-picked and by invite only. I choose who can be a sponsor.

3.) I’m up-front with sponsors that my reviews call it like it is. If they send me product to review, I will give it an honest evaluation based on real-life use. If I don’t like it or can’t recommend one of their products, I’ll let my community know.

I’ve lost a couple of sponsors over Golden Rule #3 over the years. I’m okay with that because I’d rather not allow an advertiser on my site that can’t take customer criticism.

I invited Radioddity to be a sponsor of the SWLing Post last year after I had some positive interactions with them.

The Xiegu GSOC

Radioddity sent me the new GSOC to review in November 2020. I discovered in short order that the GSOC had some major issues and, frankly, I didn’t like it and certainly couldn’t recommend it. I communicated my concerns about this product with detailed notes and suggestions for improvement. I was open and honest about the GSOC on the SWLing Post (read the thread here).

Radioddity not only embraced my criticisms but sent them to the manufacturer and thanked me.

Impressive.

Blue Ridge Parkway (K-3378)

But back to the activation!

So on Monday, May 17, I had an errand in town that took me right past the Blue Ridge Parkway Folk Arts Center. The detour to do an activation was maybe two minutes, so there was no “fuel-shortage” guilt! 🙂

Also, I had a good hour to burn before I needed to go home and pack for a quick trip to visit my folks.

Equipment list:

I deployed the PackTenna 9:1 random wire antenna specifically because I wanted to see how easily the X5105’s internal ATU could match it.

I hopped on 40 meters first, hit the ATU button and it quickly found a 1:1 match–good sign!

This turned out to be a pretty easy and simple activation.

I started calling CQ and within 12 minutes I logged 11 stations.

I moved up to 20 meters knowing it would be a tougher band, but worked one more station–KG5OWB at K-0756–pretty quickly.

I was quite happy with  logging 12 stations in short order. A nice contrast to recent activations where conditions were so poor it’s been a struggle to get even 10 contacts within an hour.

I would have stayed on the air longer but (as I mention in the video) I wasted a good 20-25 minutes waiting on the landscape crew to finish mowing on/around the site before I set up my station. I didn’t want to be in their way.

Here’s my log sheet from the POTA website:

Video

Of course, I made one of my real-time, real-life videos of the entire activation. I’ve quite a long preamble in this one, so if you’re interested in skipping straight to the on-the-air time, go to 16:24.

X5105 initial thoughts?

So far, I like the X5105. It certainly accomplishes its goal of being an all-in-one “shack in a box.”

I performed this activation only using the X5105 internal battery. In addition, the ATU worked perfectly with the random wire antenna.

I like the size–it’s much smaller than I imagined. It’s also fairly lightweight.

It feels rugged, too–I wouldn’t be concerned about it getting easily damaged in the field.

The speaker works pretty well, but if the volume level is pushed too hard, it starts to splatter. I wish it could handle a little more volume before the splattering kicks in.

The ergonomics are pretty good. It didn’t take long to sort out how to use most of the functions.

One area for improvement? The owner’s manual. It’s poorly written and (frankly) reads as if it was rushed to print.

For example, I wanted to set up CW memory keying prior to hitting the field. Unfortunately, the owner’s manual was no help.

There’s actually a dedicated page regarding CW memory keying, but the first thing it does is reference a different section of the manual (without giving a page number). I followed the procedure, but it didn’t work. In fact, it didn’t make sense as it seemed lead me down the path of digital mode macros. I think the manual may be referencing a procedure before the last firmware update (which, it appears, changed the menu structure significantly).

If you can help guide me through setting up CW memory keying, please comment! I’m sure it’s a simple process, but I haven’t sorted it out yet.

Overall, though? I see why the X5105 is so popular. It appears to compete with a loaded Elecraft KX2. It’s a bit larger, heavier, and less “refined” but it’s also half the price of a loaded KX2.

I also think it’s a great radio for CW operators. The keying feels natural and responsive. It uses relays instead of pin diode switching, so QSK includes a little relay clicking. I don’t find it to be too loud, though.

I’ll be taking the X5105 out again very soon.  I’ve got it for 6 weeks, so it will get plenty of park and summit time. If you own the X5105, I’d love to hear your comments on this portable rig.

Thanks for reading!

Pairing the TX-500 and MPAS 2.0 on a beautiful morning activation of the Blue Ridge Parkway

On the morning of May 10, 2021, I had a hankering to head to the Blue Ridge Parkway for a quick park activation.

I had a particular spot in mind–one that’s only two miles or so from my QTH as the crow flies. The only wrinkle in my plan was that we were expecting rain all morning and at our house we were in thick fog and light, steady rain.

Normally when I have these conditions, I look for a sheltered site, but I thought it might be a great time to take out the TX-500 since it’s weather-resistant. Why not, right?

I packed the lab599 Discovery TX-500, my Chameleon MPAS 2.0 vertical, and my Elecraft T1 antenna tuner to pair the two. I also brought along some rain gear.

Although the activation site is close to home as the crow flies, it actually takes about 30 minutes to drive there. By the time I reached the site, the skies were mostly clear and the sun was shining! This time of year, it reminds me of living in the UK: if you don’t like the weather, just wait five minutes.

Gear:

On The Air

This was very much a road side activation. The spot I chose isn’t an overlook–although it did provide amazing views–it was simple a pull-off.

This is where antennas like the MPAS 2.0 are so useful: they are self-supporting and very quick to deploy. Since I was set up right off the road, I also appreciate using verticals rather than wire antennas since the antenna and throw line aren’t in the way of others who might choose to park in the same pull-off.  I can easily deploy the counterpoise and feedline so that it’s out of the way.

As with most park activations, I started on 40 meters CW and only operated 5 watts.

I quickly racked up five contacts on 40 meters, then the band fell silent.

I moved up to 30, then 20, down to 80, back to 60 and 40 again.

About 30 minutes had passed since I was last on 40 meters, so new hunters were checking the bands. I snagged a total of seven more contacts in about eleven minutes.

Obviously, 40 meters was the only band open that morning!

A quick note about 80 meters

I get a lot of questions from readers and YouTube subscribers about my use of the 80 meter band during the daytime.

I go into more detail about this in the video, but contrary to what many think, 80 meters can be a very useful daytime band for POTA activators.

While it’s true that you’re not going to work DX on 80 meters during the daylight hours (else, highly unlikely), you can still work local and regional stations.

Keep in mind that POTA, WWFF, and SOTA activations aren’t about working DX. DX is fun and perhaps a personal goal, but it has nothing to do with success in achieving a valid activation.

Basically, any contacts–DX or local–will get you what is needed for a valid activation.

If, like me, you live in a part of the country where there are a concentration of park and summit hunters/chasers within a daytime 80 meter footprint, then hop on that band and give it a go!

I’m not sure how useful this might be for activations in sparsely populated areas like Montana or the Dakotas, for example, but along the east and west coast, 80 meters is your friend.

At this particular activation, I didn’t didn’t employ an efficient antenna for 80 meters. While I’ve made numerous 80 meter contacts on the CHA MPAS 2.0 in the past, it’s just not physically large enough to be efficient on that band.  The CHA Emcomm III Portable or another long wire antenna would have provided better results. But I knew that 40 meters and possibly 30 meters would be my best bet that day, so the MPAS 2.0 was a great choice.

Again: don’t forget about 80 meters. It’s helped me snag many an activation!

Video

Here’s my real-time, leal-life, no-edit video of the entire activation:

Click here to view on YouTube.

You might hear an audio pop when I’m keying on the TX-500. This is happening because I have the audio gain cranked up all the way for the video. While the speaker/mic can get quite loud, when I’ve got it located so far from the camera mic, I run it at 100% volume to be heard. I recently changed my CW T/R recovery time from 100ms to 400s which eliminated most of the audio popping.

Thank you for reading this field report! I hope you’re getting an opportunity to take your radios outdoors this week!


Do you enjoy QRPer.com?

Please consider supporting us via Patreon or our Coffee Fund!

Your support makes articles like this one possible. Thank you!

The Blue Ridge Parkway and some POTA with the TX-500 and MFJ-1984LP EFHW

The Blue Ridge Parkway is a massive national park.

This stretch of scenic road spans 469 miles (755 km) from North Carolina into Virginia and crossing 29 counties along the way.

I could activate the BRP every day for the rest of my life and find a new activation spot every single day.

But at the end of the day, I return to reliable spots that I love in particular because of the solitude, the access to trails, and of course the trees.

There are trees along the parkway I know so well, I should name them. They’re always there when I’m ready to deploy a wire antenna.

On Wednesday, May 5, 2021, I visited one of my favorite BRP activations sites that I used during the year-long National Parks On The Air (NPOTA) program in 2016.

This particular site is simply a small hill on the side of the road and at the top, there some excellent trees. There’s also a short path leading to the for the Mountains To Sea trail.

This particular spot also overlooks a valley and has a wee bit of altitude. I’m not sure how meaningful that is for an HF op, but it always seems to help.

Blue Ridge Parkway, NC (K-3378)

Of course, since the lab599 Discovery TX-500 was still so new to me, it had to come out to play.

I decided to skip using an ATU, keep things simple, and pair the TX-500 with my MFJ-1984LP EFHW (above).

Gear:


I started on 40 meters where I very quickly snagged my good friend, Eric (WD8RIF) who most likely saw my callsign on the RBN and kindly took a break from work to hop on the air work me 5 watts both ways. I’m willing to bet Eric was even a bit envious and wished he could have been outdoors putting parks on the air that morning. It’s fair play, though, because he’s often out doing multi-park runs while I’m working from home.

We must live vicariously through each other, right? Right.

Where was I?

Oh yes, the contacts started rolling in on 40 meters.

I worked K4NAN, KD8IE, K8RAT, N4EX, NE4TN, N9UNX, KB4PY, KC5F, KN3A, and NS4J on 40 meters in the span of about eleven minutes. I really enjoy that kind of cadence.

Next, I moved to 20 meters knowing it might not be an ideal band. I called CQ for nearly 10 minutes, then logged N6GR in New Mexico.

This activation reminded me that POTA often feels like a little impromptu family reunion as so many of the ops I logged that day were POTA friends and also enthusiastic activators.

I decided that 12 logged was a great number, so I called QRT and packed up. I most enjoyable activation!

The TX-500, clipboard, and my logging pads all tuck away nicely in the GR1’s slip-in rucking plate pocket.

Video

Of course, I recorded one of my real-life, real-time activation videos. Hazel and some very irritating flora are also featured.

Click here to view on YouTube.

Here’s a QSO Map of the activation as well:

I remember during National Parks On The Air, a hunter who worked me daily asked, “Do you ever get tired of activating the Blue Ridge Parkway?”

I told him that the BRP is so large, so diverse, and so beautiful, there’s simply no way I could ever get tired of it.


Do you enjoy QRPer?

Please consider supporting us via Patreon or our Coffee Fund!

Your support makes articles like this one possible. Thank you!

A windy, creekside QRP activation of Pisgah National Forest and Pisgah Game Land

Lately, I’ve had quite the backlog of reviews and evaluations building up. Family life has been active–and it always comes first–but also I’ve a number of projects on the table (two kit builds, one repair, two antenna projects), four articles for various publications, two new transceivers (the TX-500 and now an X5105 on loan), and a number of family business projects. ‘Tis the season, I reckon.

Normally, I’d be in Dayton, Ohio right now enjoying a weekend of fellowship and Hamvention/FDIM insanity, but all that was cancelled this year due to the pandemic.

I’ve had a number of projects that sort of force me indoors, but I haven’t felt like doing them. Spring in the mountains of western North Carolina is truly a thing to enjoy (save the allergies)–and it’s an incredible distraction.

On Saturday afternoon, May 8, 2021, my whole family wanted a little outdoor  distraction time, so we hopped in the car and drove to a nearby spot in Pisgah National Forest.

The drive takes nearly 50 minutes even though the actual site isn’t even 5 miles from the QTH as the crow flies. The weather was beautiful, but a front was moving through bringing strong wind gusts.

I had planned to set up my activation next to our  car along the forest service road, but to shelter myself from some of the winds, I decided instead to set up next to the nearby creek, down the hill a bit.

This particular site is actually located in both Pisgah National Forest and Pisgah Game Land–they overlap, which makes this a Parks On The Air “Two-Fer”.

Equipment

While setting up next to a creek makes for a beautiful little activation spot, it also adds a lot of extra background noise. Normally, I would have used some in-ear earphones with the TX-500 for sound isolation, but (after twenty minutes on the air and against my better judgement) I decided to make an activation video at this site, so used the speaker/mic instead.

I’ve activated this site numerous times in the past and while it has tall trees and loads of spots to set up, it’s also in a pretty deep ravine, surrounded by tall ridge lines.  While this is less a problem with HF as it would certainly be for line-of-site frequencies, history has proven that it makes for a challenging activation.

I deployed my new PackTenna 9:1 UNUN random wire antenna as a vertical. I’m glad I chose the PackTenna because it’s such a low-profile antenna, I knew it would be less affected by the strong wind gusts.

I also decided to employ my Emtech ZM-2 manual antenna tuner during this activation. Why? Because I had never used it with the PackTenna before. So why not?

On The Air

I hopped on 40 meters and started calling CQ. Thankfully, the Reverse Beacon Network found me and the POTA website automatically created a spot from the RBN information.

I worked four stations in four minutes! This was a much better start than I’d ever had at this site before.

Then, nothing…

About 20 minutes passed as I called CQ on 40 meters. This was going to be a challenging activation after all.

I decided to move up to the 30 meter band. I thought there might be some value in showing how to tune the ZM-2, so I started recording one of my real-time, real-life activation videos knowing that the audio might not be ideal with the rushing creek.

On 30 meters, I was able to pick up three more contacts in fairly short order, giving me a total of seven contacts. Only three more needed to validate my activation!

At least 20 minutes had passed since I was on 40 meters, so I decided to hop back down there hoping some new hunters might be monitoring the POTA spots.

Sure enough, I was able to add five more contacts in ten minutes!

My 12th contact is on the back of this log sheet: KF4YEY in FL.

I likely spent a total of one hour on the air. By the time it was over, my wife and daughters were ready to hit the road again: temps had dropped pretty quickly in that one hour time frame and the gusts were strong enough my wife was concerned it could knock some branches loose. (I was less concerned because I always check a site for widow-makers and power lines before setting up.

Video

Here’s my real-time, real-life activation video starting about 20 minutes into the activation:

With such a simple radio kit, packing up was very quick.

This was my second activation with the new TX-500. I really do love this radio.

A number of folks noted in my last TX-500 video that there was an audio pop present as I keyed the radio either with my paddles or with the built-in memory keyer. I had never noticed this before, but I think I know why it’s happening. In my videos, I crank the speaker/mic volume up all the way so the audio can be heard. When I do this, the T/R relay audio pop/recovery is quite noticeable.

I think I may slow the relay recovery to something like 400ms so the audio doesn’t try recovering between characters. The TX-500 isn’t capable of full break-in QSK anyway, so there’s really no need for a 100ms recovery. I’ll also share this feedback with the engineers at lab599 as I suspect this can be sorted out in firmware. In the shack, it’s not an issue because audio levels are in the normal range, but in the field when the audio is cranked up, it’s pronounced. This also would not be an issue if using earphones, of course.

I do love this TX-500 and am very happy I’ve officially purchased it from lab599 and added it to my transceiver arsenal! Now to give it a name and make it official…


Do you enjoy QRPer?

Please consider supporting us via Patreon or our Coffee Fund!

Your support makes articles like this one possible. Thank you!

Discovery TX-500: Attempting a speedy POTA activation with a new rig and new antenna

While I love the opportunity to head outdoors and play radio, I also love shaking up my field kit and trying different combinations of radios, antennas, and other station accessories.

When using new-to-you gear, though, a best practice is to set everything up at home before you hit the field. This way, you can confirm that you have everything you need and you can also familiarize yourself with the gear prior to activating a park or summit.

Last Sunday (May 2, 2021), I threw caution to the wind. Well, sort of.  At the very last moment, I decided to squeeze in an activation en route to my sister’s home to do some brush-cutting and yard work.

The lab599 Discovery TX-500

Basically, I was chomping at the bit to take my lab599 Discovery TX-500 to field.

You see, in August 2020, I received an early pre-production TX-500 to evaluate for one week. In that seven day span, I activated seven parks with the TX-500 and enjoyed every minute of it. Because the loan period was limited, I packed a lot of TX-500 air time that week, then wrote this review for The Spectrum Monitor magazine.

As I mentioned in a previous post, if I would have had the opportunity to buy that loaner TX-500 last year, I would have. It wasn’t an option, though, as so few working models existed at the time. Now that I had a TX-500 in hand again, I couldn’t wait to hit the field with it.

Last Sunday, the weather was beautiful in western North Carolina, but clouds were moving in and we expected scattered showers in the latter part of the afternoon. The last thing I wanted to do was my sister’s yard work in the rain, so I needed to make the activation a speedy one.

But the TX-500 wasn’t the only piece of new gear. I also recently ordered and received a PackTenna 9:1 UNUN random wire antenna. I wanted to see how well it would perform, too, so I decided to pack my Elecraft T1 ATU and give it a go, too!

For the record: when you’re in a hurry, it’s not only a really bad idea to hit the field with a new radio and antenna, but to also throw the entire field kit together in 5 minutes before walking out the door.

On the drive to Lake James,  I mentally packed and re-packed the field kit trying to decide if I might have left out a crucial component (say, an adapter or cable). I also made the decision not to make a real-time, real-life video because 1.) this would surely  turn into a very clumsy deployment, 2.) I was pressed for time and didn’t want to set up the video, and 3.) I only had my iPhone with me to make the recording which would mean I would be giving up Internet and mobile phone access at the park which is important for spotting purposes.

So what did I do?

As I turned into the park entrance, I decided to make a recording of the entire activation from set up until the last logged contact.

Why would I do this to myself?

I reminded myself that the goal of my YouTube channel is simple: real-life, unedited examples of field radio operating. 

All of us, at some point, use new equipment in the field and we stumble through the process as we give the system a shake-out. So why not record it, right?

My iPhone battery had about 80% capacity. I knew if I tried to use the personal hotspot while recording the video–so that I could spot myself on the Microsoft Surface Go tablet–it would run down the battery in 20 minutes or so.  I immediately put my iPhone in airplane mode to preserve the battery.

Lake James State Park (K-2739)

I know this park quite well and assumed it would be busy on a beautiful Sunday afternoon. It was, in fact. I was confident I’d find a good operating spot, though, because they’ve a large picnic area and loads of tall trees to support wire antennas. And mid-afternoon, it was unlikely all of the picnic tables would be occupied.

Gear:

I found a nice spot to set up and deployed the PackTenna in short order.

Since my iPhone was doing video duty, I didn’t take extra photos.

I hooked up the Elecraft T1 and attempted to find a match on 40 meters.  I thought I did find a match at first, but it turns out that the T1 was in Bypass mode. I didn’t have my reading glasses handy, so thought I saw a great match on the TX-500’s display. Turns out it was floating around 2:1. Still: not a bad match.

I worked five stations, then moved to the 30 meter band. It was then I finally realized the T1 was in bypass mode. I found my spectacles, read the front panel of the T1 and remedied that in short order (I can never remember the button press combo to toggle bypass mode!).

I tuned 30 meters and got a great match.

On 30 meters, I worked two stations.

I then moved up to 20 meters where I worked two more.

Then I moved back down to 40 meters where I topped off the activation with an additional three contacts for a total of 12 as I called QRT.

I’m very grateful to my buddy Scott (KN3A) who worked me on three bands all while he was activating a park in Pennsylvania! Thanks for those P2Ps, Scott!

In fact, I’m grateful Scott took the time to work me on multiple bands because it help bring my numbers above the 10 stations needed for a valid POTA activation.

Video

QSOmap

After going QRT, I quickly packed up my gear (which was easy because there were so few parts), and started the 45 minute drive to my sister’s house. Fortunately, the rain held off the whole time I did the yard work!

I’m so happy to have a TX-500 back in the field radio arsenal.

Shortly after this activation, I officially purchased this loaner TX-500 unit from lab599. As I said in my “unboxing” video, there was no way I was sending this unit back. 🙂 Now I won’t feel bad if it gets dinged or scratched!

I’m sure the TX-500 will be in heavy rotation for a while. Please comment if you have any questions about this radio or the 9:1 UNUN PackTenna. I’d be happy to answer your questions!


Do you enjoy QRPer.com?

Please consider supporting us via Patreon or our Coffee Fund!

Your support makes articles like this one possible. Thank you!