On Wednesday, May 21, 2025, I had another opportunity to squeeze in a POTA activation during a late morning drive back to the mountains after visiting my father, who was in the hospital at the time.
Once again, I chose one of my favorite POTA sites that I don’t get to visit nearly enough these days: Tuttle Educational State Forest.
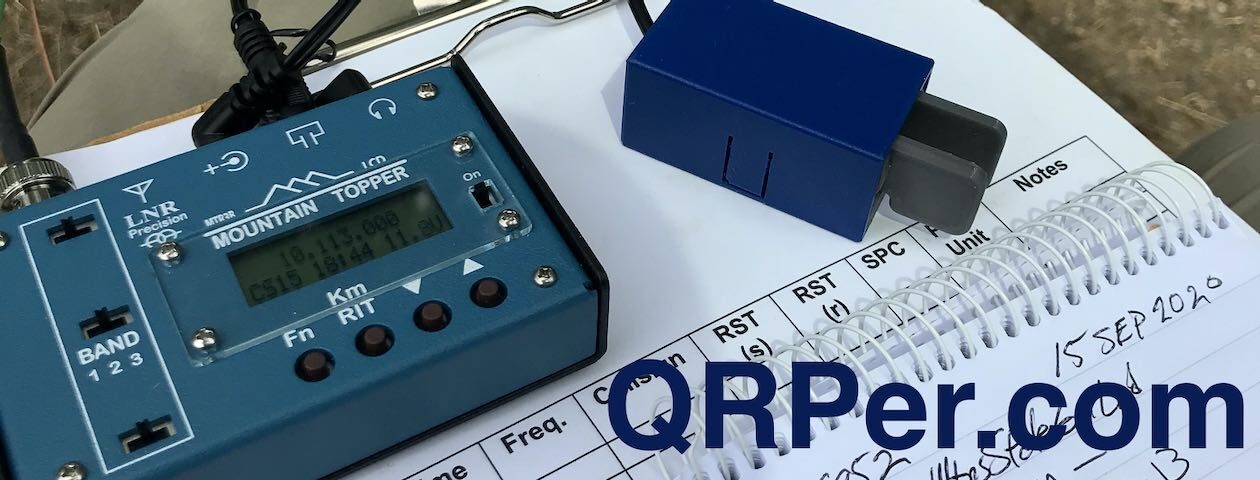
Tuttle Educational State Forest (US-4861)
The weather that Wednesday was nearly perfect, and I was really looking forward to getting on the air.
One advantage of early-to-late morning activations this time of year is avoiding those unpredictable afternoon pop-up thunderstorms that are so common and can chase one off the air.
I picked out a shady picnic table beneath a canopy of trees, hoping it would provide a few good options for hanging a sloper.
Spooltenna Time!
As I mention in the activation video, I was an early beta tester of the Spooltenna. Just before Hamvention, Rob (KO4HUI) sent me a final production version so mine would match what’s now shipping. This was the first time I’d deployed the production model in a sloper configuration.
Full disclosure: I didn’t pay for this antenna, as I volunteered as a beta tester. Rob and his wife Christi also invited QRPer to join the affiliate program, so QRPer earns a small percentage of any sale made through our link.
When I surveyed the trees around my site, I realized I didn’t immediately see a branch directly over my operating position. That’s really what a sloper needs—especially with this antenna—because the feed point is elevated and a bit heavier than something like the far end of an EFHW radiator. I also wanted to maximize height using my 25′ cable assembly, which meant a more vertical hang would be best.
Eventually, I spotted the perfect branch. It took a couple tosses with the throw line–my window to hit it was narrow–but that’s part of the fun!
Slopers have great performance characteristics, so it was worth the (wee bit of) extra effort. And to be fair, if I deployed slopers more often, I’d probably be a lot better at it!
With the Spooltenna deployed, I simply set up my Yaesu FT-818 and I quickly checked the SWR on 20 meters where I planned to start the activation. Turns out, it was a near perfect match! Woo hoo!
Time to get this activation started!
Gear
Note: All Amazon, CW Morse, ABR, Chelegance, Spooltenna, eBay, and Radioddity links are affiliate links that support QRPer.com at no cost to you.
The day before I left on my week-long FDIM/Hamvention trip, I received a package in the mail from Radioddity containing their soon-to-be-released HF-009 vertical antenna.
In the spirit of full disclosure: Radioddity is not only a sponsor of QRPer, but we’re also an affiliate—meaning that if you purchase items via our affiliate link, we receive a small percentage of the sale, and you get a small discount. Radioddity sent this antenna to me free of charge. I don’t know yet if they want it back after I evaluate it, but let’s assume (for future transparency) that they don’t.
My Bias
When I evaluate gear, I like to take you along for the ride—and that means actually using the gear in the field.
It took me a few weeks to get around to evaluating the HF-009. Not only was I swamped post-Hamvention, but honestly, a part of me wasn’t looking forward to tinkering with this antenna.
The HF-009 is a multi-band vertical that uses a slide‑and‑tap center coil system. I know many operators who love sliding-coil verticals, but I’m just not one of them.
Early on in my POTA days, based on reader recommendations, I purchased the venerable Wolf River Coils vertical antenna. It uses a sliding coil system—like the HF-009—though its coil is located at the base of the antenna.
I immediately saw why these antennas are so popular: they deliver multi-band performance without needing an ATU, and they’re surprisingly effective. I had some fantastic activations with my WRC TIA.
My Wolf River Coils “TIA” vertical antenna on Mount Mitchell
But I eventually sold the TIA after discovering the Chelegance MC-750, which I found much easier to deploy and use.
Sliding coil antennas can be a pain to tune. Most friends who use them also carry an antenna analyzer to help dial in the best SWR before hitting the airwaves. While I eventually learned the “sweet spots” on the WRC coil, I often had to tweak it—especially on lower bands like 30, 40, and 80 meters. The more coil you use, the higher the Q—and the narrower the bandwidth.
Personally, I prefer antennas I can just set and forget (like the MC-750), or those that are non-resonant and rely on an ATU for matching (like the Chameleon MPAS Lite).
To be clear, this is just my preference. Center- and base-loaded coil verticals are very popular for good reason: they work. The more you use them, the easier they get. They’re just not my default go-to.
Getting Started
Normally, I film the “discovery” phase of a new antenna or radio in the field—experiencing the full unboxing and set-up for the first time on video, in real time.
But with the HF-009, I wasn’t comfortable doing that. Given my previous experience and bias, I decided to first test the antenna at the QTH, identify good match points for 40, 30, 20, and 17 meters, and then take it to the field.
I set up the HF-009 at home, grabbed my RigExpert analyzer, and spent about 15 minutes finding match points on the coil. Honestly? It wasn’t as tedious as I’d expected.
Because the coil is mounted at a comfortable height—not at the base like the WRC—adjustments were easier. The coil itself is smooth to adjust; I suspect it uses a finer gauge wire than the WRC, which has a clickier feel. The HF-009 is much more fluid.
To remember the coil positions, I took photos of the slider settings and saved them in the Notes app on my iPhone for quick field reference. That turned out to be a very good idea.
Very First Impressions
Before I get ahead of myself, here are a few things I immediately liked about the HF-009:
It comes with everything you need, including a coax cable and an SO-239 to BNC adapter.
The included carrying case is well-organized and feels solid.
When broken down, it’s compact and easy to pack, with shorter segment sections that fit nicely into a backpack.
The slider mechanism is smooth, responsive, and placed at a comfortable height.
The loading coil is sealed—unlike my WRC vertical, whose exposed coil was affected by moisture.
Overall, build quality feels excellent.
On The Air: Blue Ridge Parkway (US-3378)
Of course, the best way to put the HF-009 through its paces was to take it to a park and put it on the air.
On Monday, June 9, 2025, I dropped my daughter off at a class and had well over an hour to play radio, so the HF-009 came with me to the Folk Art Center picnic area on the Blue Ridge Parkway!
Since I’d set up the HF-009 once before, it came together very quickly. In fact, I think it’s right there with the MC-750 in deployment time, which is very much a good thing.
I decided to pair the HF-009 with my Penntek TR-45L Skinny. Why? To be honest, I didn’t fully trust the SWR to be acceptable using only the photos I’d taken for the coil slider placement. The TR-45L has a beautiful analog SWR meter, which I find much easier to read in situations where I might need to fine-tune an antenna.
I also packed my RigExpert analyzer because it allows me to make adjustments as I read the SWR.
Turns out, though? It wasn’t an issue at all. During the activation (spoiler alert), I moved from band to band and—solely based on the photos I took of the slider switch position—the SWR was spot-on each time!
Gear
Note: All Amazon, CW Morse, ABR, Chelegance, eBay, and Radioddity links are affiliate links that support QRPer.com at no cost to you.
Like so many other SOTA activators, I’m constantly tweaking my gear to optimize it for all the variables we encounter in the mountains. One of my main antennas is, of course, an EFHW. Paired with my KX2, I generally get sub-1.6:1 SWR on 40, 20, 15, and 10. However, 30m has an unacceptably high SWR. I considered switching to a multi-link EFHW, but hopping up to change links to chase an inadvertent S2S on another band is inconvenient, especially when the link for low bands is generally well beyond my reach and requires lowering the antenna.
To fully optimize my EFHW I decided I needed to come up with a way to add a “remote” link for 30m. After a couple of design iterations, I came up with the light-weight and compact remote antenna link shown/described below. The version described here is not my final one. While this “pill bottle” version is still quite small, I’d like to reduce the size even further.
Let’s start with the end…
Here’s the final product. It weighs under 1 oz. and is ~2.5” long. I have included a complete parts list at the end of the article.
My design considerations were:
Small and light
Range of at least 75 ft.
Reasonable battery life
Waterproof
Durable
Able to withstand the current at the 30m position on the antenna
Doesn’t adversely impact antenna performance on other bands
Easy to connect and disconnect from the antenna
Executive Summary
For those in a hurry, here’s a summary description of the remote antenna link. It consists of a very, very small remote control Bluetooth relay powered by two CR2032 batteries (user supplied). A set of contacts (either normally open or closed) lead from the relay to male and female 2mm bullet banana connectors in the cap of the pill bottle. Two matching bullet banana connectors at the antenna plug into the remote control link.
To operate, you simply open the bottle, switch on the batteries, re-install the cap, extend the antenna, and plug the bullet banana connectors at the antenna into the opposite pair embedded in the cap of the pill bottle. When you are ready to operate, you just push the remote button. When the remote button is pushed, the relay opens or closes thereby making or breaking the link and physically shortening or lengthening the antenna. Below is a picture of both sides of the mini-relay (antenna wire not shown)
The relay can run on 3.5-12 volts and can handle 1A. The included 1-button transmitter sends a signal (455mHz) to the relay and either opens or closes a set of contacts depending on how the user programs the relay.
Wiring It Up
I won’t bore you with a detailed written explanation…it’s a pretty simple build. Below are a simple wiring diagram and a series of photos with build details [click images to enlarge].
Making It work
The relay has three operating modes: latched, momentary, and toggle. Because I wanted the 30m link to be normally connected when the relay is in standby waiting for a signal from the remote control and open and stay open when I pressed the remote button, I had to reprogram the relay. Programming is accomplished by turning the unit on, then putting a 22ga wire jumper between the two “programming dots” and then pressing the remote button until the LED on the relay board flashes the number of times specified in the instructions for the operating mode you want. The instructions are not very clear, so I recommend connecting the unit to your VOM in continuity mode to figure out the button/LED flashing sequence that corresponds to how you want the relay to behave.
Testing
The unit is rated for 1A so, to be sure I wasn’t going to blow it up when I transmitted with 10 watts, I used ChatGPT to produce a very nice graph showing the current at the 30m position on the antenna for each band when transmitting with 10W. Here’s the graph. Luckily, the maximum current at the 30m position (~43’) is .6A at 7.062 MHz.
I tested the unit on my KX2 by setting my operating frequency and then putting the KX2 tuner in bypass mode and pressing the button on the remote control; Ding…the SWR jumped immediately to the expected pre-determined (and acceptable) SWR value for the 30m band!
The unit draws 7mA when in standby and 32mA when the relay is energized. Assuming 40 minutes of operating off of the 30m band (relay not energized) and 20 minutes on the 30m band (relay energized), I calculated that approximately 17mA would be drawn from the two CR2032 batteries. Given that a CR2032 battery has a capacity of 220mAh, they should provide about 12 hours of operation.
If you’ve been a QRPer.com reader or subscriber to my YouTube channel for long, you’ll know I’m quite the fan of super-compact, low-profile antennas like the Elecraft AX1 and AX2.
Although AX antennas are certainly a compromise in terms of performance, I find them surprisingly effective for on-the-air programs like SOTA, POTA, and WWFF. While they’re not high-gain, they’re also far from the “dummy load” some make them out to be. In fact, the best DX I’ve ever worked in the field was with my Elecraft AX2 and just 5 watts of power—check out the field report.
It covers 30 through 10 meters and uses a 4-position band selector plug, which I personally find more rugged than the AX1’s band switch. Like its siblings, the AX3 is designed to pair with an ATU, but unlike the AX1/AX2, it doesn’t need to physically mount to the transceiver—so it’s compatible with virtually any rig and tuner combo. The AX3 also supports up to 30 watts.
Despite the added versatility, the AX3 still packs incredibly small: the whip, base, and tripod legs collapse to just 6 inches, yet the whip extends to 45 inches in the field. The side-mounted BNC connector avoids awkward cable bends or adapters.
In the spirit of full disclosure, I’m in the testing group for the Elecraft KH1 and, as such, I was aware the new AX3 was on the horizon, but I had not yet tested it in the field until I ordered one and it was delivered on Tuesday, April 29, 2025.
From Unboxing to Activation
Since Hurricane Helene wiped out our local post office, my buddy Vlado (N3CZ) has kindly allowed me to have parcels delivered to his house. When he told me that “a small box” had arrived from Elecraft, I knew exactly what it was.
I had an errand in town that afternoon, so I swung by Vlado’s, picked up the package, and then stopped at the Blue Ridge Parkway Folk Art Center to perform the AX3’s debut activation.
Of course, I packed my Elecraft KX2, thinking it would only be right to pair the AX3 with an Elecraft radio for its first outing!
In my activation video (below), you’ll see that assembling the AX3 was incredibly simple right out of the box. I ordered the full AX3 package, which includes the antenna, mini banana plug, counterpoise wire, tripod legs, BNC-to-BNC cable assembly, and a small nylon storage bag.
I attached the tripod legs, screwed on the whip antenna, clipped the counterpoise to the ground lug, and connected the BNC cable. In less than a minute, the antenna was fully deployed and ready to go!
Gear
Note: All Amazon, CW Morse, ABR, Chelegance, Spooltenna, eBay, and Radioddity links are affiliate links that support QRPer.com at no cost to you.
My new Elecraft AX3 antenna arrived in the mail. The weather when it arrived was 73° F and sunny with a slight breeze. Space weather was calm. It seemed like the perfect recipe for a POTA expedition to the unofficial antenna testing range at Silver Sands State Park (US-1716) here in Connecticut on the Northern shoreline of Long Island Sound to try out the AX3. Given that this antenna is specifically designed to be light and portable, I chose my Elecraft KX2 to pair it with, which is also light and portable.
Conrad, N2YCH testing the new Elecraft AX3 at Silver Sands State Park, Connecticut
The AX3 operates on six bands. Out of the box, it can do 30,20,17,15,12 and 10 meters. With the optional AXE1 adapter, you can add 40 meters as well. Elecraft says an ATU is required, which I have built into my KX2. I tested using FT8 on 30/20/17 & 15 meters, the four positions labeled on the front “jumper block.” Using FT8, I was able to use the PSKreporter.info website to get a sense of where my signals were being received. This antenna is capable of handling 30 watts, which is amazing for its size. I ran 10 watts from the KX2.
Unlike the AX1, which needs something to hold it in place such as a tripod or the optional bipod, the AX3 comes with three legs to turn the base into a tripod.
AX3 integrated Tripod
At the park, I tried using the legs which lasted all of 30 seconds before the Long Island Sound breeze blew it right over on its side. Anticipating that it might be too breezy down at the shoreline, I brought a slightly heavier tripod along. The good news is that the bottom of the antenna is tapped with a ¼-20 hole to connect to any standard camera tripod. The heavier tripod did the trick.
Elecraft KX2 with new AX3 antenna
I used a three foot piece of coax as recommended and I had no problem with RFI into the radio or the computer. The KX2 was able to tune to 1.0:1 SWR on all bands except for 17 meters, which was right around 2.0:1. I should note that I had the 13’ counterpoise laying on the ground for this test.
KX2 1.0:1 SWR on 20 meters
I began on 20 meters and in 20 minutes, I had the 10 QSO’s needed to activate the park.
Map showing spots on 20 meters.
Next I QSY’d up to 17 meters.
PSKreporter.info spots on 17 meters
Here, I had plenty of spots, yet I struggled to get two in the log before I gave up and QSY’d to 15 meters. Changing frequency is as simple as pulling the jumper block out and moving the arrow to the correct frequency.
Jumper Block used to change bands
Thankfully, 15 was open and my first QSO was with a station in Ukraine and my second was in California.
QSO Map – Dark Blue are 20 meter contacts, Light Blue are 15 meters and Purple are 17 metersCompleting a QSO with the Ukraine on 15 meters
I made contacts on 20, 17 and 15 meters. Could I manage something on 30? I tried but to no avail. I was spotted by stations on PSKreporter, but after calling for some time, I figured that midday in Connecticut was just not the best time for that band. Before I packed up for the day, I went back to 17 meters which was definitely better than earlier and I logged three more for a total of five on the band.
PSKReporter spots on 15 meters using the AX3 antenna
I took the opportunity to go back to Silver Sands a few days later to try the antenna on 12 and 10 meters, which I did not do on the first trip out. I also wanted to see how elevating the counterpoise might affect the performance. It was downright windy, so I brought along a camera tripod this time to provide more stability. Obviously, the extra weight carrying a full size tripod wouldn’t be ideal for a SOTA activation, but for my test, I brought it along.
AX3 on camera tripod
The high band propagation was miserable when I went out, I was wondering if I’d be able to make any contacts at all. I was pleased to see that elevating the counterpoise allowed 17 meters to easily match to the antenna with a 1.0:1 SWR. I then tried 15, 12 and 10 meters which also tuned right up and I made contacts on all bands. 10 and 12 meters were open to my south. I made QSO’s with Belize, Mexico, Ecuador, the Dominican Republic and Puerto Rico.
QSO Map Day 2 – Purple is 17m, Light Blue is 15m, Pink is 12m and Yellow is 10m (click image to enlarge)AX3 on camera tripod with elevated counterpoise
The AX3 did not disappoint.
Making QSO’s from California to the Ukraine and down into South America while sitting at a picnic table in a park in Connecticut with just 10 watts using such a small antenna is simply amazing to me. I like the AX1, which I used primarily on 20 meters. Having the multi-band flexibility of the AX3 is very nice, especially now that the upper bands are active, and it provides more flexibility for operating portable and being able to change bands on the spot to adapt to the ever changing band conditions.
Some time before Easter I noticed that I am close to 1000 QSOs at my favourite place at the “Kalte Feld”, a POTA and SOTA activation zone and would soon qualify for the POTA Kilo Award. I like the Kalte Feld for the quiet, spacious area with a hut that is vending traditional basic food and beverages – which in Germany usually means good beer and different sausage types (and other stuff – to be fair). I already wrote some articles about the history of the area and my activations.
The conditions at the activation zone are quite good. I have made 2 activations there with more than 100 QSOs (and many smaller), so I thought it should not be too difficult to complete the required QSOs in one day.
DAY 1
The weather for the Easter weekend was expected to be one of the first warm and sunny days this year. So, on Easter Sunday, I headed to the area to get the last missing 49 QSOs for my POTA Kilo Award. Easter hiking has a centuries long history in Germany. This and the nice weather made the area quite crowded. The close airfield for gliders was busy and the whole time while operating there they were in the air above.
The barbecue places and outdoor seating around the mountain hut were busy but happily the bench some meters away that I am normally using, was still available.
I wanted to start with an end-fed half-wave antenna for the 20m band, tied to a 10 meter (33 ft) fiberglass mast. This is a very easy and quick to deploy antenna and I like it, especially if there is not too much space for antennas with a larger footprint. Since it’s a straight vertical, it also has a higher chance for DX contacts – when the conditions allow that. The antenna is Open Hardware and you can find further details on GitHub.
The mast was tied to the bench and the antenna was raised. Besides the comfort, the possibility to tie a mast to it is the second reason why I am always looking for benches.
The conditions were far from being perfect, and it took me 40 minutes to get 18 CW QSOs on the 20-meter band. Switching to SSB wasn’t a big help either, and I soon gave up with only 3 additional SSB QSOs in the log.
I had brought another antenna with me that I wanted to try. The 10 meter (33 Ft) fiberglass mast also has the perfect height for a ¼ wave vertical on the 40-meter band. So I cut 5 wires to a length of about 10 meters (33 ft) and connected 4 of them together at one end with a cable lug and attached another cable lug to the vertical element.
I then used the basis of the JPC-7 antenna for the coax plug and for connecting the vertical element and the radials. There are a lot of articles and videos about ¼ wave vertical antennas. But the information is usually about either elevated and resonant radials or random length ground radials. I wanted to have resonant radials, but I could not be bothered with carrying all the stuff nearly 2 miles to a summit for elevating 4 x 10m (33 ft) wires, so I simply left them on the ground.
My idea was to try a full size vertical for the 40 meters band with resonant radials that still is portable and fits to my existing equipment.
The SWR was quite nice being close to 1.0 : 1 at the CW portion of the band, so I started operating.
The conditions were similarly difficult as on the 20-meter band. It took me 25 minutes for another 18 QSOs.
As it became increasingly cloudy, I checked on my mobile and saw that rain was approaching fast. Since I had roughly 2km or 1.5 miles descent ahead of me, I stopped abruptly with just 10 QSOs short of the POTA Kilo Award.
A bit disappointed, I called it a day.
DAY 2
I could not leave the missing 10 QSOs for long. The very next day, Easter Monday, was a public holiday in Germany. And as the weather started nice, I again made my way to the activation zone. Continue reading Experimenting My Way to the POTA Kilo Award→
I tried using an Alpha Antenna 100w 10-40m mag-loop antenna for a POTA activation. I operated on FT8 so I could monitor where my signal was being received by using the PSKreporter.info real-time signal reports from stations that spotted my transmission. I really didn’t know what to expect or how a loop antenna would perform in the park compared to a vertical or wire antenna. Did it work? You bet. Would I recommend it? I’ll share my observations and results below and let you know at the end.
I bought this antenna used on QRZ.com’s swapmeet. It was clear to me upon receiving it that the prior owner had taken very good care of the antenna. I set it up on my patio for a quick test before heading to a park.
Mag Loop Test from the N2YCH QTH
It sets up quickly. The tuning is a little challenging to learn at first but there’s no doubt when you get it right, since the received signal is easy to peak once you find resonance. The tuning knob has three turns from 40m up to 10m. Moving it slowly from the bottom of the HF band up to the top, you’ll find the sweet spot and you can peak the received signal on your radio’s S-meter. I checked it with my RigExpert antenna analyzer and as you’d expect, the bandwidth was very narrow, but it was resonant and the SWR was 1.4:1.
The Alpha mag loop can do 100 watts SSB but only 5 watts on digital modes. I fired up my KX3, set it for 5 watts and called CQ. I made three quick contacts and was satisfied that the antenna was working. I checked the spots on pskreporter,info and found it interesting to see a narrow band of stations from Minnesota and Wisconsin down to Florida spotting me.
Pskreporter.info map of spots from Mag Loop
On to the park: Indian Well, US-1684 in Shelton, Connecticut
Knowing that the antenna was working, I brought it out to one of my favorite places to activate, Indian Well State Park (US-1684). Again, set up was fast and I was able to tune up on 20 meters pretty easily.
Alpha Magnetic Loop Antenna at Indian Well State Park in Connecticut
The antenna was receiving the FT8 signals at S-9 with the KX3’s pre-amp off and you can see below that I was decoding nearly 50 stations per FT8 cycle. If you look closely at the JTAlert screenshot below, you can see I was receiving stations from all over the US as well as Canada, South America and Europe. There’s no doubt the mag-loop can hear very well.
Forty-seven stations are being received and decoded. POTA stations in the bottom right pane
I called CQ and had a few responses right away. However, I was finding it challenging to get stations to reply. It took almost an hour for me to get my 10 contacts to activate the park, which is unusual. I should mention that the space weather was acceptable, sitting just below Kp3, so that wasn’t the reason.
Once again, I checked Pskreporter.info. Interestingly, it had the same pattern of spots that I saw when testing the antenna at home, a band from Minnesota to Georgia. Of the first 10 contacts I made, four were in North Carolina, two in Florida and the rest were coming from within that narrow band who could hear me.
Spots from US-1684 using the Mag Loop
I understand that a mag loop is directional, so I tried moving it 90 degrees to see if it made a difference. Not really. The spot map looked the same after the change in direction. I was able to receive a few more EU stations after I moved it. I did have to re-tune the antenna after I turned it, the SWR had gone through the roof.
For comparison, after struggling to make contacts on the loop, I decided to set up my “go-to” antenna of a 17’ telescoping whip on a 10’ mast with a counterpoise.
Buddipole with 17’ telescoping whip and elevated counterpoise
I unplugged the mag loop and plugged in the vertical using the same transceiver set at 5 watts. Take a look at the stations who could spot me on PSKreporter now…
PSKReporter Spots with vertical antenna on 20m QRP
Clearly, that same 5 watts from the KX3 had better coverage on the vertical than using the mag loop.
Here’s a screenshot of WSJT-X on the vertical (click image to enlarge):
WSJT-X and JTAlert reception using 17’ vertical with counterpoise
Once I switched to the vertical, I knocked out 10 more contacts in just 20 minutes.
So, after all that, what do I think?
The Mag Loop sets up quickly, uses very little space and finding resonance isn’t difficult to do. It receives very well, of course this is one of the true advantages of mag loops, is their inherent ability to receive well in noisy environments.
As an antenna to use for transmission? Well, I think this is where the challenge lies, for me anyway. It was certainly hearing stations way down in the noise from far away. However, as you can see by my real-time reception reports, it did not give me the wide transmission coverage that I’m used to with the vertical. Maybe this would be different on SSB with 100 watts, but it’s a difficult to measure SSB reception like you can with digital.
Can you activate a park with it? Yes, indeed. Would it be my first choice for POTA? Probably not. If you were using this on SSB, the antenna itself (not the radio) would need to be re-tuned for every frequency change (if you were hunting), which is not convenient. If you are the activator, then you could tune up for the frequency you selected and it would be good to go.
My next test with this antenna is to try tuning it to a WSPR frequency and comparing spots it receives to my other antennas. I suspect this it where it will shine.
Check out the following announcement posted to the QRP-L discussion group by Wayne (N6KR) at Elecraft:
We’re pleased to announce the AX3 whip antenna.
This highly integrated antenna covers six HF bands, handles up to 30 W, and has many features to facilitate quick-deployment POTA/SOTA and general QRP field operation:
Coverage of 30/20/17/15/12/10 meters (+ 40 meters with AXE1 adapter)
Right-angle BNC connector for direct coax attachment
Unique low-loss, plug-in contact block simplifies band switching
Built-in tabletop tripod
Housing, whip and removable tripod legs quickly disassemble into 6″ (15 cm) pieces
1/4-20 threaded mount in base for use with taller tripods and hiking poles
Two counterpoise attachment points (mini-banana jack and binding post)
Supplied with waterproof nylon bag and counterpoise wire
Many thanks to Jonathan (KM4CFT) who shares the following note:
We are pleased to announce the release of some new products: a 100 watt version of the popular KM4CFT End Fed Kit as well as a Leg Strap, which is perfect for those who have the KM4CFT paddles, Bamakey TP-III or ModernMorse Paddles (or any small magnetic paddle).
Recently, @JasonMartinRF left a comment on my YouTube channel mentioning his excitement about getting on the air with CW but also his concern about the high cost of antennas—especially self-supporting options that don’t require trees. His comment resonated with me because many operators face the same challenge when setting up a portable station, particularly for POTA or other field operations.
I immediately thought of my friend Eric McFadden (WD8RIF), who has extensive experience with lightweight, affordable wire antennas that don’t rely on trees for support. Eric has long used a homemade end-fed random wire (EFRW) antenna paired with cost-effective mast solutions, making it a great choice for portable activations. I asked him if he’d be willing to share the details of his setup, and he generously wrote up the following guide.
A Budget-Friendly Self-Supporting Antenna System for POTA
by Eric (WD8RIF)
Because I’ve long used low-cost homemade wire antennas for POTA, and since I usually don’t rely on trees to support these antennas, Thomas asked me to describe an antenna and support systems I often use for my POTA activations.
My “Go-To” antenna for POTA is a 28½’ end-fed random wire (EFRW) antenna with three 17’ counterpoise wires. This antenna covers 40m through 6m (and sometimes 80m) and is constructed from inexpensive speaker wire which can be purchased at big box stores in 50’ and 100’ spools. This two-conductor cable can easily be split into two conductors and the thick insulation helps prevent the finished antenna from tangling.
The idea behind the EFRW antenna is that the length of the antenna is not close to a ½-wavelength on any frequency for which it will be used. The EFRW is not resonant on any band of interest and, thus, it requires the use of an antenna tuner (ATU).
The benefit of the EFRW is that it can be stealthy and lightweight, it can be relatively short when compared to simple resonant antennas, and it can support operation on multiple bands. It is true that this antenna requires the use of an ATU, but even an inexpensive manual tuner can be used for this purpose.
To construct my version of the EFRW, split the speaker wire into two separate conductors. Cut one conductor to a length between 28½’ and 29’ to create the radiator. Cut three more conductors approximately 17’ long. Strip a ½” or so of insulation off of one end of each of the four wires. If you wish, install banana-plugs on the stripped end; I put a green, red, or orange banana plug on the radiator and “stackable” black banana plugs on the three 17’ counterpoise wires so I can easily attach all three of them to a single “ground” post. Install an insulator of some sort on the far end of the radiator wire, or create a small loop on the far end of the wire using a knot or a nylon wire-tie for hanging the antenna. (I use military buttons as insulators on my field antennas, and I often use large paper clips to hang the wire to the top of my mast.)
The speaker-wire end-fed random (EFRW) wire antenna. The three 17′ counterpoise wires are on the left; the 28½’ radiator is on the right.
You can connect the radiator and counterpoise wires directly to your ATU-equipped transceiver or external ATU using a simple binding-post adapter or, preferably, a 4:1 unun. No coaxial feedline is needed or, in fact, recommended.
An LDG 4:1 unun (left) and a simple binding-post adapter (right).
I regularly use a simple binding-post adapter when I’m in the field with my Elecraft KH1 or KX2 field kits. I use a homebrew 4:1 unun when I’m in the field with with my Elecraft KX3 field kit. I use a commercial LDG 4:1 unun (link) when I’m in the field with my Yaesu FT-817ND field kit. (I should note that my KH1, KX2, and KX3 are each equipped with internal ATUs. The FT-817ND doesn’t have an internal ATU but I use a no-longer-available LDG Z-11 ATU with it when I deploy a non-resonant antenna.)
In the field, I suspend the 28½’ radiator as a vertical, as a sloper, or as an inverted-vee, and I lay the three 17’ counterpoise wires directly on the ground, arranged as symmetrically as possible while trying to avoid trip-hazards. (If space is limited, I might lay down only two counterpoise wires or, maybe, even just a single counterpoise wire.)
I usually support the EFRW with a 31’ Jackite telescoping fiberglass mast(affiliate link) or an inexpensive Goture Red Fox Super Hard 720 carbon-fiber fishing pole (available from multiple sellers on Amazon) from which I’ve removed the top three sections to create a sturdy 18’ pole that collapses to less that 30″. (If you order a Goture 720, be sure to order the “7.2m” version because the top three sections are far too whippy to support a wire.)
I’ve supported the 31’ Jackite mast using a drive-on base (more on this below), bungied to a fence-post or sign-post found on-site, and bungied to my folding camp-chair.
I’ve supported the Goture Red Fox 720 on a custom stake (more on this below) and bungied to my bicycle.
The Goture Red Fox 720 mast bungied to my bicycle and supporting a wire antenna as a sloper; the KH1 station is on the picnic table.
The sort of bungie I use to strap a mast to a post, my bicycle, or a folding chair.
I often support my 31’ Jackite mast using a homemade drive-on base. This base is constructed from a scrap of 2”x10” pine about 23” long, a 4″ black plastic toilet flange, a 2’ length of white PVC chosen to provide a friction-fit in the toilet flange, and a PVC reducer at the top. The photos below should provide enough information for you to build your own. I don’t glue any of the plastic items together; I rely on friction to hold the pieces together and I slip the 2’ pipe out of the toilet flange for easier transport in my car. (Disclaimer: I drive a small Honda Fit; I don’t know how well a 2”x10” pine board would survive repeated abuse by a large SUV or pick-up truck.)
The components of the drive-on mast support: a piece of wood, a toilet flange, and some PVC.The drive-on mast base, assembled.The drive-on mast base in use at Burr Oak State Park. The 31′ Jackite mast is supporting the 28½’ EFRW as a vertical and three 17′ counterpoise wires extend out from the bottom of the front passenger door. The station is inside the car.
The spike for the Goture Red Fox 720 is simply a 7” length of white PCV just big enough to slip the large end of the mast into, with a matching PVC cap on one end drilled to accept a 3/8” diameter, 8” long spike. Originally, I tried using epoxy to secure the spike in the cap, but this failed, and now I’m using an appropriately-sized push-nut to hold the spike in place. (The PVC and the 8” spike were found at the local big-box store; the push-nut was found at a local well-equipped hardware store.)
The Goture Red Fox 720 and the custom spike.A close-up view of the push-on nut securing the metal spike to the PVC cap.
I hope this article gives you some ideas for your own field operations!
A huge thanks to Eric (WD8RIF) for taking the time to document his antenna setup in such detail! His approach demonstrates that you don’t have to spend a fortune to get on the air with an effective self-supporting antenna system.
Personally, I believe that using an arborist throw line, a tree, and a simple wire antenna is often the most affordable and effective way to get on the air. However, depending on where you live or where you activate, trees may not always be an option. That’s why having a self-supporting antenna system in your toolkit is always a good idea—it gives you the flexibility to operate anywhere.
If you’ve built an affordable self-supporting antenna system that works well for your field operations, I’d love to hear about it! Feel free to share your experiences, designs, or recommendations in the comments or in a guest post. The more we exchange ideas, the more we can help fellow operators—especially those just getting started—find practical, budget-friendly solutions for getting on the air.
Connecting an international community through low-power field radio adventures.
Please support QRPer by adding us to your whitelist in your ad blocker. Ads are what helps us stay online. All of our ads are ham radio related--no junk, we promise! Thank you!


 As I mention in the activation video, I was an early beta tester of the Spooltenna. Just before Hamvention, Rob (KO4HUI) sent me a final production version so mine would match what’s now shipping. This was the first time I’d deployed the production model in a sloper configuration.
 Eventually, I spotted the perfect branch. It took a couple tosses with the throw line–my window to hit it was narrow–but that’s part of the fun!
 With the Spooltenna deployed, I simply set up my Yaesu FT-818 and I quickly checked the SWR on 20 meters where I planned to start the activation. Turns out, it was a near perfect match! Woo hoo!

 I started calling CQ POTA and was pleasantly surprised: 20 meters had some life! Continue reading POTA QRP: A Mid-Week Reset with the FT-818 and Spooltenna!


 This will be corrected tomorrow.


