Many thanks to Scott (KK4Z) who shares the following post from his blog KK4Z.com:
Naming Radios
by Scott (KK4Z)
Men in general, have a habit of naming things. All sorts of things, cars, body parts, you name it, we will cast our own nickname on it. I thought I would share some of the names I have given my radios. Typically, I don’t just throw a name on something. I am around it for a while, before I decide what I am going to call it. My poor dogs, when I first get them, I go through a plethora of names until I find one that fits. My latest dog, a boxer mix from the pound was named Hawkeye by them. I got him home. I had to get to know him.
He ended up being Andy but likes to be called pup-pup. Maybe his last owners called him that. He’s still very much a pup but is going to be a great dog.
I will start with my main radio which is an Icom IC-7610. It is my workhorse radio. It is probably the best radio I have ever owned. I have worked the world on it and it does everything I need it to do. I call it Zeus, the king of all my other radios. I believe there is not a radio out there that can do anything that Zeus cannot do. Any improvements over Zeus would be marginal.
Back in September, I was contacted by Jesse Chen (BD7LLY) who has been a long-time reader of QRPer.com. Jesse is also the founder of Chelegance (a.k.a. JNCRadio): a company that has been producing ham radio gear and accessories since 2020.
Jesse reached out and asked if I would consider evaluating a couple of the field portable antennas he designs and produces in China.
In truth, I get a lot–and I do mean loads–of requests to evaluate products and I pass on 97% of them. I only have so much time and I simply don’t bother with gear I think is unnecessary or that could be cheaply made.
Before replying to Jesse, I did a little research on Chelegance and discovered that DX Engineering now distributes their products. I decided that if DX Engineering liked the quality well enough to add Chelegance products to their catalog, then it must be up to a decent standard. I’ve never purchased anything sub-quality from DX Engineering.
I also like the fact that Jesse is a real amateur radio operator.
After checking back in with Jesse, he decided to send me two of his portable HF antennas: the M-104 and the MC-750. In full disclosure, he sent these to me at no charge–i.e. free–with the idea I could do a proper evaluation and share my thoughts both with him and with my readers.
He knew that both of these antennas had the potential to compliment my style of portable operating. I also told Jesse not to rush ship them to me as I was quite busy. I received both antennas at the end of October.
The first antenna I wanted to try was the MC-750.
The Chelegance MC-750
When I received the parcel from Jesse, I was very impressed with the MC-750’s custom soft-sided case. The stitching and quality of it are much better than I would have expected. The interior is custom designed to hold all of the MC-750 antenna components. There’s enough extra space in it, in fact, that I can also carry a 40′ RG-316 feedline inside.
Product Photo by Chelegance
The antenna basically consists of the following components in the supplied padded bag:
A heavy stainless steel ground spike and matching unit
40 meter coil
50 cm antenna arm/extension
5.2 meter telescoping whip
4 yellow counterpoise wires with a wire winder board
The only antenna I have that might compare with the MC-750 is the Chameleon CHA MPAS Lite which is one of my favorite portable HF antennas for its quick deployment, and overall quality. For reference, the CHA MPAS Lite retails for about $360.
As with Rand’s recent post about his effective vehicle setup, I and others also use a small operating table inside the vehicle. I’ve tried a number of approaches to antennas. Without elaborating on those schemes, I’ll note that winter is now closing in here in NH. As a result, I’m now operating exclusively from my truck. My interest is now in minimizing setup and tear-down times. Barry (WD4MSM)
also commented about the improvement in vehicle-mounted antennas with an added ground. I’d like to quantify that.
I’d recently ordered a number of Hustler Mobile antenna components. They’re used as a stationary-portable setup using that company’s high-quality mag-mount. As I first evaluated the antenna, I was disappointed to find the minimum SWRs to be on the high side.
These results were related to the ‘floating’ coax shield, which serves as a counterpoise with the mag-mount setup. Worse yet, these results were inconsistent. Touching the coax connector shell at the antenna analyzer caused the SWR to jump up, as did just changing the way I held the analyzer. Bad juju! It means RF inside the vehicle, with the potential for RF-‘hot’ symptoms at the rig.. Adding a 1:1 balun inline eliminated the stray RF at the rig, but didn’t do much for the SWR. It’s also just one more gadget to bring along.
A better fix was a custom bracket that bolted to the truck frame. I first confirmed that there was low-resistance continuity between a target location and the vehicle’s cigarette lighter shell. This was something of a ‘comedy of errors’. I had a sheet-metal angle bracket on hand and went to work enlarging a hole in it. This had the usual outcome: a drill bit grabbed the workpiece and spun it. The bracket itself was buckled beyond redemption and my finger’s now healing well. A length of 1-1/2 inch aluminum angle bracket was just the ticket. Note that the mounting hole needs to be offset from the coax fitting mount. This avoids an interference between the mounting bolt and coax connector shell. Ask me how I know. The bracket assembly uses a specialty coax fitting from DX Engineering. It’s their part number DXE-UHF-FDFB.
This bracket is bolted down on one of the corners of the Tacoma’s passenger seat assemblies. It’s the closest location to the antenna I found without drilling holes and cutting the coax. For this vehicle, it’s a 10mm bolt and was paint-coated for appearance reasons. I replaced it with a stainless-steel bolt from a hardware store. It’s important to include a split-lockwasher between the bolt and the bracket. This’ll keep the conductivity to the frame good over time. The bracket is deburred and its corners rounded to preclude injury to passengers.
In any event, it’s out of the way of the seat’s legroom space. A 3-foot coax cable assembly brings the coax nicely up behind the rig atop the operating surface.
So- how’d it work? It’s like the difference between night and day! The broad SWR curves vanished – replaced by typical characteristics for monoband antennas. The sensitivity to handling the coax has vanished. (A representative curve at right.) The curves are narrower, and that’s actually a good sign- it means that unwanted resistances have been reduced.
With this fix in place, here are the SWR minima:
Frequency SWR
14060 1.04:1
21060 1.05:1
28060 1.16:1
I took advantage of the CQ Worldwide CW Contest this past weekend. I was able to work 101 stations on 10M, 15M and 20M with this setup. That was from a State Park 5 minutes away. The attraction was a large and sunny parking lot, and solar gain was such that I needed to leave the truck door open several times. This area is kept plowed out in winter, and I may try for the POTA ‘kilo’ award from there at the 1000-contact benchmark.
You see, I did something I’d never suggest others do: in a moment of boredom, I casually cruised the classifieds listings found on QTH.com.
One of the very first listings was for a TEN-TEC R4020 CW QRP transceiver. The price, if memory serves, was $120 (+/- $10) shipped.
Ten-Tec Model R4020 (Product Photo: Ten-Tec)
Without even thinking, I sent a message to the seller:
“I’ll buy it if it’s still available!“
He responded noting I was the first to reply to the ad, so it was mine if I wanted it.
I did, of course.
The R4020 arrived that same week, I opened the box, applied power to confirmed it powered up, then placed it on the top shelf in my shack.
At the time, I had a mountain of review and evaluations in process along with several articles in the pipeline for TSM and one for RadCom, and simply didn’t have time to properly explore the R4020. I thought it might be fun saving it as a little reward for meeting my deadlines.
Then, frankly, I just forgot about the R4020. This spring was a very busy time for me family-wise, then I spent the summer in Canada, and most of this fall has been all about catching up after having spent the summer in Canada. Funny how that works!
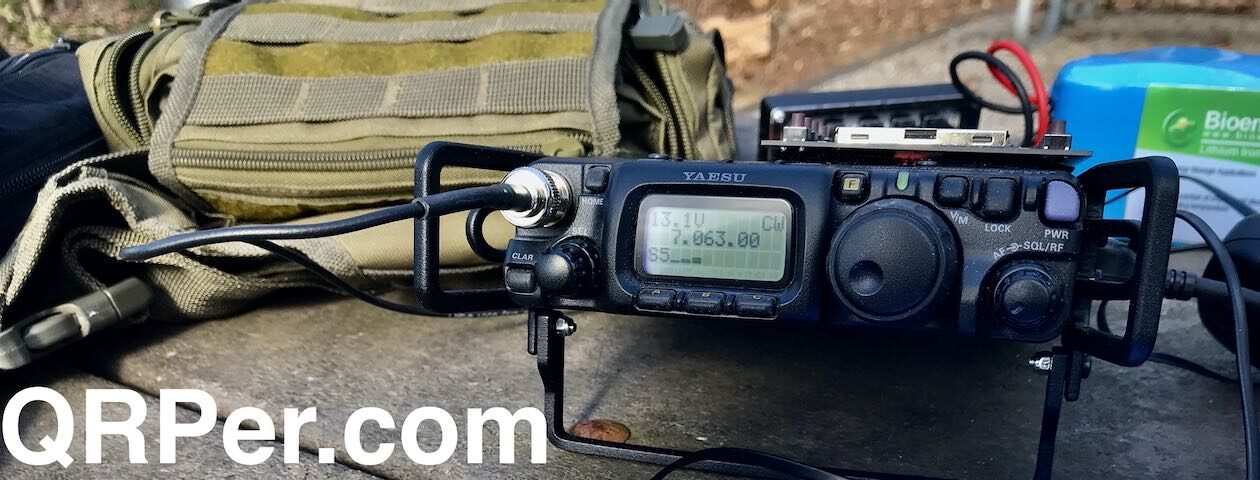
Fast-forward to November 11th, 2022 when I was packing a field radio kit to take on an overnight trip and I noticed the R4020 on the top shelf! My reward, finally–!
I quickly packed the R4020 in my Spec-Ops Order Pouch along with a 3Ah Bioenno LiFePo4 battery and a power cable.
South Mountains State Park (K-2753)
On Saturday, November 12, 2022, I jumped in the car and headed to South Mountains State Park with the R4020.
This past year, I’ve mostly set up at South Mountain’s Clear Creek Access on the west side of the park, but this time I decided to make my way to the equestrian picnic area near the main entrance and ranger station.
I’ve just learned that my buddy Mark (N6MTS) at Halibut Electronics has just kitted up a new batch of his CMCC Test Rigs and is now accepting orders. I know that some of the experimenters in our community might appreciate this brilliant bit of gear that Mark originally designed as a piece of test gear for his own workbench.
I asked Mark to shed a little light on this kit and exactly what it does:
A Common Mode Current Choke, aka a 1:1 Current Balun, is a common (pardon the pun) device in a ham shack. They can be used: at the Antenna feed point to prevent dangerous unbalanced return currents on the outside of the feedline, at the Radio’s antenna port to minimize RF noise picked up on the feedline, on DC or AC power cables and other interconnect cables to minimize RF pick-up in the shack, etc.
Most RF test equipment, such as a (Nano)VNA, measures the Differential Mode of a system, that is, the balanced currents that flow on the INSIDE of a coax cable. This is great for measuring things like: the frequency response of a filter, the complex impedance (or SWR) of an antenna, or the loss of a length of coax.
It cannot measure the Common Mode of a system, that is, the unbalanced current that flows on the OUTSIDE of a coax cable. This means it cannot (directly) measure a Common Mode Current Choke.
The Halibut Electronics Common Mode Current Choke Test Rig converts the Differential Mode signal generated by the VNA into a Common Mode signal, and places it on the outside of the shield of a coax system. This allows the VNA to directly measure how effective the choke is at choking common mode RF currents. Once you can directly measure a device, you can measure the real world effect of changes you make, and optimize the device for your specific use case. As opposed to relying on calculations and predictions of ideal conditions in free space.
The Common Mode Current Choke Test Rig is a kit that requires some assembly, using a soldering iron and Philips head screw driver.
As I mentioned in previous field reports, the W4G SOTA Campout was amazing fun this year. I enjoyed hanging with Joshua (KO4AWH) as we activated a total of three summits and a few parks–plus it was great meeting so many fellow SOTA activators at the Saturday evening potluck!
On Sunday morning, October 16, 2022, it was time to pack up the campsite and hit the road.
Although I was a little pressed for time, I decided to fit in one more activation as Joshua packed up his tent and before we took down the 40 meter Tufteln end-fed half-wave.
Chattahoochee-Oconee National Forest (K-4473)
Fortunately, our campsite was within Chattahoochee-Oconee National Forest and since all I needed to do was to connect my rig to our campsite antenna, setup took all of two minutes.
I pulled out the Mountain MTR-3B for this activation. It had been quite some time since I used this wee radio because I had only recently finished a review of the MTR-4B V2 (look for that review on QRPer.com very soon).
The MTR-3B is now permanently at-the-ready inside my MTR-3B ultra portable field kit, but since there was already an antenna and key in place, I only needed the radio, power cord, logging items, and battery.
The Ham Radio Workbench podcast has just published their 2022 Holiday Shopping Show episode. I had the honor of being a guest in this episode and…well…it was essentially a license to release my inner enabler which–in the best of times–I have a difficult time containing.
Seriously, though, it’s always so much fun to hang with George, Vince, Mike, Rod, and Mark–they’re great guys.
I would suggest freezing your credit card in a block of ice before listening to this episode.
You’ve been warned!
If you’d like to see “how the sausage is made” check out this unedited video of the entire episode including before/after the podcast recording:
Or, if you’d rather hear the podcast–which is trimmed and formatted–you can listen via the embedded player below, or on the Ham Radio Workbench podcast website.
Many thanks to Mike (KE8PTX) who shares the following tip:
[Recently, I walked into a] big box store and this caught my eye:
When separated, they have very little memory.
So now we have four 25 foot radials. Bonus was all were different colors. Easy to untangle.
Performance, so far, is good. Total price with clip: 12 bucks.
That’s a brilliant tip, Mike! Thank you for sharing. Like you, I’m always on the look out for products that could serve double duty in the world of amateur radio. While one can find less expensive sources of wire, for 100% copper wire pre-cut to a standard radial lengths, this is a pretty good deal!
I did some searching and pricing varies between various suppliers.
Many thanks to Brian (K3ES) who shares the following field report:
K3FAZ, K3STL, and K3ES POTA in the Cold with a Bonus Gear Report
K3STL and K3ES at the entrance to K-0621.
by Brian (K3ES)
K3ES Perspective
Saturday November 19 dawned clear and cold in northwest Pennsylvania, but the truth is that I was up well before dawn. The third Saturday of each month, I try to make the 2 hour drive south to help with Skyview Radio Society’s monthly Volunteer Examiner (VE) testing session for new or upgrading licensees. Clear skies (which matched the forecast) meant that road conditions would not be a problem. So, shortly after 5 am I pointed the truck south.
One of the creature comforts I appreciate about our VE session is meeting for breakfast before the test. It was obvious on arrival at the restaurant that the VEs would greatly outnumber the test candidates, but many hands make light work. Coffee and an omelet definitely helped fuel the effort. Since the test sessions normally last less than 2 hours (and that held true this time), three of us VEs had made plans for post-test session POTA.
Before launching into the field report, let me acknowledge that K3STL’s photography was instrumental in providing a report with visual appeal. Personally, I almost always forget to take the pictures.
POTA Plan
John “Tall Guy” K3STL, Steve K3FAZ, and Brian K3ES in the parking lot at K-0621.
The plan for the day was to attempt activation of two POTA sites, Beechwood Farms State Conservation Area (K-0620) in suburban Pittsburgh, and Todd Sanctuary State Conservation Area (K-0621) about 20 miles further to the northeast. John “Tall Guy” – K3STL and Brian – K3ES would do a short activation of K-0620, then meet Steve – K3FAZ at K-0621 for the rest of the afternoon.
Knowing it would be a cold day for mid-November (temperatures peaked for the day just barely above freezing), each of us made plans to adjust for operating from our vehicles. That meant that we would be doing parking lot activations at both locations. While we each normally activate with slightly different operating styles that are suited to outdoor POTA operations, some tweaks made it possible to have wind and weather protection for this outing. In hindsight, it was a perfect choice.
I mentioned in a previous post that I’m quite behind publishing activation videos. Much of this has to do with the fact that I’ve been a pretty busy activator (by my standards) the past couple of months.
While I don’t make field reports and videos for each of my activations, I usually do one or two per week. Two is typically the max I can post because my field reports take 3-4 hours each to write-up and publish; it can be difficult carving that kind of time out of my busy schedule!
In order to catch-up, I’ve decided to post shorter format field reports from time-to-time; especially for reports like this one where I give quite a lot of info and detail in my activation video.
Immediately after wrapping up our SOTA activations on Black Mountain, we decided to hit a park on the way back to the campground. Desoto Falls National Recreation Area made for a short detour and a nice way to relax after a few miles of hiking that day.
We pulled into the parking area of Desoto Falls and set up our stations in the picnic area placing some distance from one another to help with any interference.
I pulled out my trusty Penntek TR-45L and two 28’/8.5m lengths of 24 gauge wire. I extended the radiator vertically and unrolled the counterpoise on the ground. The wires were connected to the binding posts on the back of the TR-45L (red=radiator, black=counterpoise). I used the built-in manual Z-Match tuner to match the impedance in short order.
Connecting an international community through low-power field radio adventures.
Please support QRPer by adding us to your whitelist in your ad blocker. Ads are what helps us stay online. All of our ads are ham radio related--no junk, we promise! Thank you!
 Many thanks to Scott (KK4Z) who shares the following post from his blog KK4Z.com:


