If you read QRPer regularly—or listen to the Ham Radio Workbench podcast—you probably know I’m a bit of a pack geek.
Okay… that’s a gross understatement.
I’m more of a quality-pack evangelist.
For many operators, a pack or field bag is just a way to transport gear—an afterthought. But for me? It’s one of the most important parts of the kit. In some cases, I’ve spent more on the bag than the radio it carries.
Why? Because I believe a well-built pack should last a lifetime—ideally long enough to pass down to my kids. I never want to worry about a zipper failing me on a summit descent, or a strap breaking in the backcountry. To me, a good field pack is mission-critical.
That’s why I don’t mind paying more for bags that are overbuilt and made to last—especially when they’re made here in North America, where it’s still possible to produce high-quality gear locally with skilled labor and fair, living wages. In fact, if I lived in Germany, France, Japan, or anywhere else, I’d try to support local makers too—especially in categories like packs and bags that don’t rely heavily on global supply chains the way our beloved electronics do.
Red Oxx Fan Here
My Red Oxx Micro Manager EDC pack.
One company that consistently exceeds my expectations is Red Oxx, based in Billings, Montana.
Their customer service is second to none.
I’ve been buying Red Oxx gear for over a decade, and I’ve been impressed not just with the thoughtful designs and rock-solid construction, but also with their No Bull lifetime warranty. If a Red Oxx bag ever fails you—for any reason—they’ll repair or replace it. No caveats, no hoops to jump through. Even if you bought it secondhand–they don’t need or want the original receipt–they know their own bags.
My Red Oxx Hound pack.
It’s not a marketing gimmick—it works because they over-engineer their gear from the start. They expect it to last.
Recently, Red Oxx launched a new video series on YouTube, showing how they make some of their most popular bags—and how you could make them too. So far, they’ve started with simpler designs like the Aviator Kit Bag and the Lil Roy.
My Red Oxx Lil Roy
As someone who appreciates craftsmanship, I’ve been blown away by the attention to detail and the way each component is purpose-built. Even the stitching is layered with redundancy—if one line fails, there’s another ready to hold.
Thanks for indulging me on this little gear tangent. I’m not on Red Oxx’s payroll—I’m just a long-time, happy customer who genuinely appreciates what they do. I even keep in touch with their team from time to time because I admire their ethos and craftsmanship.
If you’ve got a company in your part of the world that builds gear with this same kind of care and commitment to quality, I’d love to hear about it in the comments. Always happy to discover and support makers who choose quality over quantity.
On Wednesday, May 14, 2025, my good friend Eric (WD8RIF) and I started our drive from Athens to Dayton, Ohio. We left Eric’s QTH early that morning—not because it’s a long drive (it’s only about 2.5 hours)—but because we wanted to activate at least two new-to-me parks en route and still arrive early enough to stop by the Commissary at Wright-Patterson Air Force Base, check into our hotel, and meet up with friends for dinner.
The day before, I wasn’t able to activate a park in West Virginia as planned due to thunderstorms in the area. I also heard that propagation was incredibly poor—something we’ve seen off and on lately—so if you’re planning to validate an activation, be sure to budget extra time to reach your ten contacts.
That Wednesday morning started off foggy and misty, but the clouds quickly burned away and gave way to a beautiful day.
Amish farmers are not an uncommon site in rural Ohio.
Since I was firmly in WD8RIF’s activation territory, I let him do all of the planning for us that day. (Let’s be honest—I tend to let Eric do all of the planning no matter where we’re roving! Don’t tell him that, though.)
Lake Alma State Park (US-1967)
Our first stop was Lake Alma State Park near Hamden, Ohio.
Lake Alma is a beautiful park with large parking areas, great lake access, and numerous ideal spots for a POTA activator to set up.
Eric suggested we check out the gazebo, but I was keen to use one of the picnic shelters because it sat right beside an old-growth hardwood tree—just the kind I like to use to support my antennas!
Often when Eric and I do joint POTA activations, we activate at the same time to save time. In this case, we decided to take turns—me first at the key.
I knew Eric had never used a Penntek TR-45L, so I brought along my “skinny” version of this magnificent little rig. Paired with a 40-meter EFHW deployed next to the shelter, I figured we’d have nearly ideal conditions—even if propagation wasn’t.
MW0SAW’s 40M EFHW ready for action!
Setup was quick and easy!
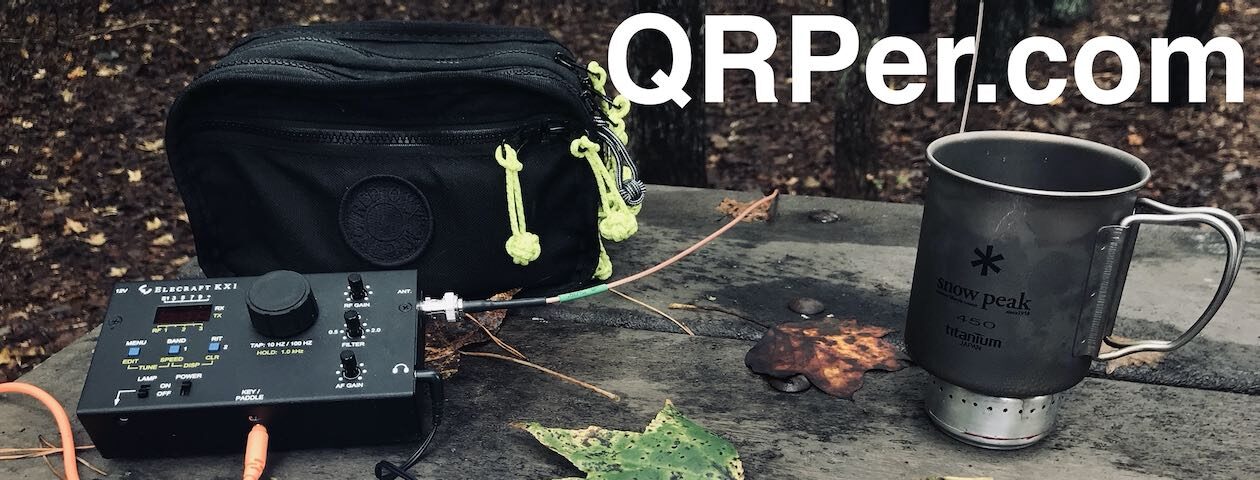
My Red Oxx Micro Manager has become the TR-45L Skinny’s pack of choice!
Somehow, I managed to go first, so I prepped my log and aimed to get ten contacts to validate this new park.
Gear
Note: All Amazon, CW Morse, ABR, Chelegance, eBay, and Radioddity links are affiliate links that support QRPer.com at no cost to you.
Radio
Penntek TR-45L “Skinny”
Antenna System and Throw Line
MW0SAW’s Homebrew 40M EFHW built on a SOTAbeams Winder
This year’s Hamvention was truly incredible. While I haven’t seen the official attendance figures, I can only assume it was highly attended based on my observations.
Once again, my friend Mike (VE3MKX) captured a plethora of photos at Hamvention—both in the flea market and the indoor exhibit areas—and has generously shared them with us here.
Readers, there’s a bit of a backstory to this guest post by my friend Jamie (AA4K). During the W4SOTA campout in October 2023, Jamie showed me his favorite field radio: the (tr)uSDX. I’ve used the (tr)uSDX for a couple of activations, but I’ll be honest—I haven’t exactly shown it a lot of love. I’ve even complained about its audio and receiver performance in the past. Jamie, on the other hand, really enjoys using his and makes a solid case for it as a field radio.
Jamie showing me his (tr)uSDX during the W4SOTA campout.
I asked if he’d be willing to write a guest post for QRPer, and he agreed (eventually!). When I saw him at Hamvention this year, he told me the article was ready—and in true form, he sent it to me via Winlink… using his (tr)uSDX.
A Case for the (tr)USDX
by Jamie (AA4K)
Introduction
There are many factors that must be considered when choosing a field radio. How big and heavy is the radio? How hard is it to repair or replace the radio if it becomes damaged or lost? How hard is the radio to operate? How power-efficient is the radio? Does the radio have the desired/required modes and features? Of course, the most fundamental question is, “Does the radio work?” I will try to answer these questions as I lay out… a case for the (tr)USDX as perhaps an almost perfect field radio.
The last two contacts on this page were with my friends Carlos (KB4CO, now AE2W) and Thomas (K4SWL).
How big and heavy is it?
The first question is an easy one. Aside from small home-brew radios such as K6ARK’s “Choking Hazard”, there isn’t a smaller or lighter commercially available radio out there that I am aware of. The (tr)USDX measures 112 x 61 x 50 mm (I trimmed the encoder post and used a lower profile knob), and weighs 5.3 oz, or 151 g. The next closest currently available commercial radio is perhaps the QRP Labs QMX. This radio is very comparable in size (110 x 64 x 38 mm) and cost, but it does weigh more at 7.3 oz, or 207 g. The more rugged metal case probably plays a big part in the weight difference.
The (tr)USDX is often sold as a kit for about US$86 (+$20 for the case) [QRPer affiliate links]. Any repairs should simply involve desoldering affected components and replacing, or possibly just updating the firmware. I am a relative noob when it comes to kit building and this kit is honestly not very difficult to build… about one day. The instructions and support videos provided by the hardware developer, Manuel DL2MAN, are very thorough. I learned a lot about radios from building the kit. If you have no interest in kit building, the assembled radio can currently be purchased from Amazon for US$138, complete with a case. Whether purchased as a kit, or already built, the band pass filters on the radio board will need to be tweaked to get the most out of your radio.
How hard is it to operate?
The (tr)USDX only has 4 buttons including the rotary encoder: Menu, Encoder, Enter, and PTT. The Menu and Encoder cover the majority of the adjustments, and most of the time I don’t use the Enter and PTT buttons. The PTT functions only as a ptt or cw key depending on the mode (yes, if your key breaks mid activation, you have a built-in backup key). The single-layer menu system is simple to scroll through, and the most commonly used items are near the front of the menu.
The most challenging aspect of operation for some people is the tiny OLED screen which gets obliterated in bright light. Reading glasses do help, although when you become familiar with the menu are not as important. I would love to see a version with an e-ink display and, more importantly, a push-button wheel rotary encoder (to remove the protruding knob).
How power-efficient is it?
This radio sips power. I tested the radio I built using a LiFePO4 battery that supplied 13.56v. The current draw on receive is 66.1 mA, and 570 mA on CW keydown into a dummy load. A properly tuned (tr)USDX delivers about 5w on each of the five bands when fed ~12v. A set of three 18650s in series will provide the proper voltage and power the radio through many activations.
Does the radio have the desired/required modes and features?
The (tr)USDX is not for princesses. It is a minimalist’s radio. But if you start from the perspective of an ultralight backpacker who has to justify every gram in their kit, this radio checks all of the boxes. It is a five band radio (Low, Classic, and High band models available). It is capable of doing voice, cw and digital modes. Thanks to a beta update from the firmware developer, Guido PE1NNZ, this radio will interface with a computer without requiring a soundcard. One of my favorite features of the radio is the built-in SWR meter. With the SWR feature enabled in the menu, just put the radio in CW mode and press the PTT to find out if your radio is happy with the current antenna arrangement.
This photo was taken while sending the text of this article via Winlink to Thomas, K4SWL.
Does the radio work?
Although my total activation count is nowhere near as high as many of you, I have used the (tr)USDX for a majority of my successful POTA (156 as of this writing) and SOTA (72 as of this writing) activations. My confidence in this little radio was demonstrated when I used it on an ATNO activation of Admiralty Island National Monument (US-4537) in Alaska.
Conclusion
One reason why I like to participate in SOTA and POTA is that it gives me an opportunity to practice field radio deployment and operation with the goal of being ready to communicate anywhere and anytime. This level of readiness means that I have the necessary equipment with me all the time. For me, the (tr)USDX is my EDC (every day carry) radio. It can bounce around in my backpack (in its protective case, of course) and be ready to deploy if needed. If it were to get lost or broken, I can fix or replace it easily. And I find it to be easy enough to use with the understanding that it isn’t a luxury radio.
The author at ~11,000’ in Uncompahgre National Forest.
If you own the popular MTR-3B V4 transceiver, you’ll be pleased to hear that a new and greatly improved manual is now available on the LNR Precision website.
If you’ve recently picked up an MTR-3B V4—or if you’ve had one for a while and want clearer documentation—I highly recommend grabbing this updated guide.
On Tuesday, May 6, 2025, I made a little time in my afternoon schedule to take my Venus SW-3B on a final POTA activation.
I might have mentioned in previous posts (and certainly on the Ham Radio Workbench) that starting in April, I’ve been trying to downsize the shack a bit. This is a process I go through at least annually. My shack/office is very small, so things pile up quickly—and I like to divest myself of gear as best I can.
During this process, one of my readers here on QRPer reached out and asked—on a whim—if I’d consider selling him my Venus SW-3B. I gave it some thought and decided to do so.
I love the SW-3B, but the truth is, I hadn’t used it in a long while. It’s been tucked away in my headrest kit for more than a year, and I just haven’t been reaching for it. That and, frankly, I’ve a couple of MTR-3B LCDs, an MTR-4B, and an MTR-3B Currahee model–I’m flush with super compact transceivers.
I agreed to sell him the SW-3B but told him I wanted to take it out on one final activation—and that’s exactly what I did!
Blue Ridge Parkway (US-3378)
I had to fit this activation into a one-hour window while my daughter was in a class. Fortunately, the class was no more than a mile from the Blue Ridge Parkway. Unfortunately, if I wanted a site with a picnic table for easy operation and setup, I wasn’t terribly close to one.
Luckily, I had my complete SOTA kit packed, including my Helinox chair and Tufteln knee board. With those two items—paired with the SW-3B—I could operate comfortably just about anywhere.
I picked a spot on the side of the road, very close to the parkway entrance from US-25. I knew the drive back to her class would take no more than three minutes.
I paired the SW-3B with my KM4CFT 30-meter end-fed half-wave, which includes a 40-meter linked extension. I figured with this antenna, I could operate on 40, 30, and 20 meters (by removing the link if necessary).
Lately, propagation has been flaky, so having a bit of frequency agility is key to a successful activation!
Gear:
Note: All Amazon, CW Morse, ABR, Chelegance, Spooltenna, eBay, and Radioddity links are affiliate links that support QRPer.com at no cost to you.
Like so many other SOTA activators, I’m constantly tweaking my gear to optimize it for all the variables we encounter in the mountains. One of my main antennas is, of course, an EFHW. Paired with my KX2, I generally get sub-1.6:1 SWR on 40, 20, 15, and 10. However, 30m has an unacceptably high SWR. I considered switching to a multi-link EFHW, but hopping up to change links to chase an inadvertent S2S on another band is inconvenient, especially when the link for low bands is generally well beyond my reach and requires lowering the antenna.
To fully optimize my EFHW I decided I needed to come up with a way to add a “remote” link for 30m. After a couple of design iterations, I came up with the light-weight and compact remote antenna link shown/described below. The version described here is not my final one. While this “pill bottle” version is still quite small, I’d like to reduce the size even further.
Let’s start with the end…
Here’s the final product. It weighs under 1 oz. and is ~2.5” long. I have included a complete parts list at the end of the article.
My design considerations were:
Small and light
Range of at least 75 ft.
Reasonable battery life
Waterproof
Durable
Able to withstand the current at the 30m position on the antenna
Doesn’t adversely impact antenna performance on other bands
Easy to connect and disconnect from the antenna
Executive Summary
For those in a hurry, here’s a summary description of the remote antenna link. It consists of a very, very small remote control Bluetooth relay powered by two CR2032 batteries (user supplied). A set of contacts (either normally open or closed) lead from the relay to male and female 2mm bullet banana connectors in the cap of the pill bottle. Two matching bullet banana connectors at the antenna plug into the remote control link.
To operate, you simply open the bottle, switch on the batteries, re-install the cap, extend the antenna, and plug the bullet banana connectors at the antenna into the opposite pair embedded in the cap of the pill bottle. When you are ready to operate, you just push the remote button. When the remote button is pushed, the relay opens or closes thereby making or breaking the link and physically shortening or lengthening the antenna. Below is a picture of both sides of the mini-relay (antenna wire not shown)
The relay can run on 3.5-12 volts and can handle 1A. The included 1-button transmitter sends a signal (455mHz) to the relay and either opens or closes a set of contacts depending on how the user programs the relay.
Wiring It Up
I won’t bore you with a detailed written explanation…it’s a pretty simple build. Below are a simple wiring diagram and a series of photos with build details [click images to enlarge].
Making It work
The relay has three operating modes: latched, momentary, and toggle. Because I wanted the 30m link to be normally connected when the relay is in standby waiting for a signal from the remote control and open and stay open when I pressed the remote button, I had to reprogram the relay. Programming is accomplished by turning the unit on, then putting a 22ga wire jumper between the two “programming dots” and then pressing the remote button until the LED on the relay board flashes the number of times specified in the instructions for the operating mode you want. The instructions are not very clear, so I recommend connecting the unit to your VOM in continuity mode to figure out the button/LED flashing sequence that corresponds to how you want the relay to behave.
Testing
The unit is rated for 1A so, to be sure I wasn’t going to blow it up when I transmitted with 10 watts, I used ChatGPT to produce a very nice graph showing the current at the 30m position on the antenna for each band when transmitting with 10W. Here’s the graph. Luckily, the maximum current at the 30m position (~43’) is .6A at 7.062 MHz.
I tested the unit on my KX2 by setting my operating frequency and then putting the KX2 tuner in bypass mode and pressing the button on the remote control; Ding…the SWR jumped immediately to the expected pre-determined (and acceptable) SWR value for the 30m band!
The unit draws 7mA when in standby and 32mA when the relay is energized. Assuming 40 minutes of operating off of the 30m band (relay not energized) and 20 minutes on the 30m band (relay energized), I calculated that approximately 17mA would be drawn from the two CR2032 batteries. Given that a CR2032 battery has a capacity of 220mAh, they should provide about 12 hours of operation.
Just a quick note: ABR Industries—known for their high-quality, US-made coaxial cable assemblies—is running a 20% off site-wide sale now through Monday, June 2nd.
Here are links to some of my favorite ABR cable assemblies:
It’s hard to believe that Four Days in May (FDIM) 2025 has already come and gone—and even harder to believe that attendance was even larger than last year!
What an amazing event.
As always, FDIM is my favorite part of the Dayton Hamvention weekend. If you’re a QRPer and haven’t made it to FDIM yet, I can’t recommend it enough—this gathering is pure QRP energy from start to finish.
I truly enjoyed meeting so many QRPer readers and supporters in person. Thank you for stopping by and sharing your stories—it was an absolute highlight for me!
Once again, I was so busy chatting and connecting that I barely had time to snap any photos. Thankfully, my friend Mike (VE3MKX) came to the rescue with another fantastic gallery.
Day two of Hamvention 2025 was absolutely amazing—and the weather couldn’t have been more ideal. I wish I had time this morning to write a proper recap, but I’m grabbing a quick breakfast and heading back to the Greene County Fairgrounds for day three.
That said, I wanted to drop a quick note and share a photo of a little surprise from the Flea Market…
Even though I told myself I wouldn’t buy another radio at Hamvention, I spotted one I simply couldn’t pass up:
I already own a TR-35 (a rig I absolutely love), so I let that one go. But I didn’t have an MTR-4B in my collection… and that red chassis in the early morning sunlight? Irresistible. The asking price was $200—very fair, in my opinion—so I snagged it.
Later that day, I showed it off to my good friend Joshua (N5FY), and wouldn’t you know it—he gifted me one of his MTR-4B protective covers!
As soon as I got back to the hotel room that evening, I installed it.

 Why? Because I believe a well-built pack should last a lifetime—ideally long enough to pass down to my kids. I never want to worry about a zipper failing me on a summit descent, or a strap breaking in the backcountry. To me, a good field pack is mission-critical.


