Tag Archives: Field Radio Kit Gallery

Field Kit Gallery: NL5E’s Lightweight KX2 SOTA/POTA Alaska Backpacking Radio Kit

Many thanks to Eric (NL5E) who shares the following article about his portable field radio kit which will be featured on our Field Kit Gallery page. If you would like to share your field kit with the QRPer community, read this post. Check out Eric’s field kit:


NL5E SOTA/POTA Backpacking Kit

Description

Hello! NL5E here.

I’m one of the rare SOTA activators in Alaska (I also use this same kit for POTA). Anyone that has looked at a map of this state will know that we have some interesting difficult topography. Many of our summit hikes start out near sea level, but are 3000-6000 vertical feet of climbing to get to the summit. So I built my kit with compactness, versatility, and weight in mind. Everything weighs approximately 2lbs (not including the battery, I don’t always take it).

My primary operating modes are CW, FT8, and SSB.

To facilitate those modes I tried to keep everything as small as possible while still being usable. For example, I debated using N6ARA’s tiny paddle, but I found I made too many sending errors. The N0SA paddle is a perfect medium between portability and sending ability. For FT8 the FT8CN app has been a good alternative to carrying a Raspberry Pi or small laptop and the well loved Digirig is probably the best audio/cat interface on the market today. I don’t do a lot of SSB (especially at QRP levels), but the K6ARK mini microphone is a wonderful improvement over Elecraft’s comically massive microphone for the KX2. I added headphones so I don’t disturb anyone on popular summits and so I can hear CW a bit better.

My antennas of choice tend to be random wires and End Fed Halfwaves.

With the KX2 I chose to use K6ARK’s 20w antenna kits and built both a 9:1 and 49:1 version. I usually carry the 9:1 just to have the band flexibility as it will work from 40m-10m. If the ground is wet enough I’ve had it tune up to 80m.

For the 49:1 I chose 20m because bands lower than that have mediocre performance from the latitude. Because of how short both these antennas are, they pair very well with the SOTAbeams Carbon 6 mast. From a summit a 19’ mast is usually tall enough to work most of the US and lots of Asia from here. The only modification I made is gluing the top 2 sections together for durability. To attach the antenna wire I use a small Niteize carabiner and a prussik loop.

I also wanted to ensure that I could power many different devices while out hiking. I settled on an Anker battery because it is easy to power phones and the radio without having to bring a bunch of different adapters like I would with a dedicated 12V battery.

I know someone will mention protection and the bag I chose. Yep, a silnylon stuff sack offers zero protection from bumps and impacts. I firmly believe that hams “over baby” their equipment and think that their radios will hilariously explode if sneezed on wrong. I settled on the Gems Products cover and rails as a good solution to keep the radio from getting destroyed in a backpack. So far so good. I added the dry bag to my list for rainy days.

I didn’t include one in the images, but I also usually have an HT with me, but most summits don’t have good line of sight to our population centers. I usually run a Yaesu VX-6R with Diamond RH77CA or MFJ Longranger. I will usually run 2m FM when I am close to Anchorage or Palmer. I also didn’t include my logging solution, but that is usually HAMRS on my iPhone or a Rite in the Rain book and pencil. I find CW is easier to log on paper for some reason.

Thanks for looking and perhaps I’ll hear some of you on the air.

Component List

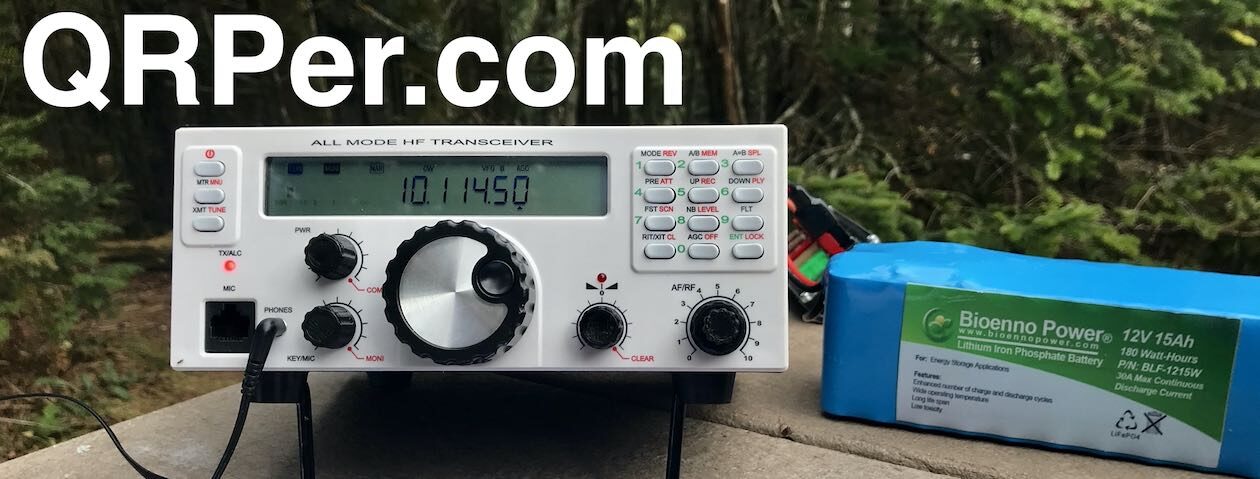
Radio: Elecraft KX2 with Side KX Heatsink and Cover

Antenna: K6ARK Random Wire with 29’ of polystealth wire and antenna winder

Note: I also run a 49:1 EFHW cut for 20m (not pictured, looks the same).

Dog: Luna. Standard issue Alaska Husky. Smol in size. Adds 5 dB gain to all antennas. Adds 45 lbs, but is self transporting.

Support: SOTAbeams Carbon 6

CW Paddles: CW Morse N0SA SP4 Paddle

Microphone: K6ARK mini microphone with printed case. Built from Digikey Parts.

Headphones: Sony Earbuds – could be any old ear buds. These work fine.

Digirig Mobile with Cables: Lets face it. Sometimes FT8 is all that works. I’m in Alaska.

Android Phone: Galaxy S10. Dealers choice for a phone. It exists only to run FT8CN instead of carrying a laptop for FT8.

Power: 

JacobsParts 15V 5A USB C PD cable 5.5×2.5mm DC (Ferrite Added)

Note: Outputs approx. 14.5V when measured using my multimeter. Radio shows the same/

Anker 747 25600mAh battery

Miscellaneous Items:

5.5×2.5mm to 4.0×1.7mm DC Adapter: Allows charging of various HT radios using the Anker battery with JacobsParts USB C cable

-Shower Cap: The all important rain cover for the KX2. Just in case. Just make sure it is transparent.

Storage: Sea to Summit 3L UltraSil Stuff Sack or Sea to Summit 3L Dry Bag

Field Kit Gallery: W4EMB’s Penntek TR-45L Portable Kit

Many thanks to Ed (W4EMB) who shares the following article about his portable field radio kit which will be featured on our Field Kit Gallery page. If you would like to share your field kit with the QRPer community, check out this post. Ed writes:


My QRP Portable Set up

by Ed (W4EMB)

Radio: I have one priority rig I use 99% of my time. It is the TR45L Penntek. I have both versions. The fullsize one with built-in tuner and battery, I also have the “Skinny” version. The skinny does not have the tuner nor battery. My second Rig is the Yaesu 817 with the Windcamp Battery upgrade. I also have a 40m only QSX and the 5 band TruSdx.

Penntek TR45L Skinny with external batter and external tuner.

Antenna:  I use the Chelegance MC-750 most of the time, but also use a Homebrew EFHW with 49:1 balun and 67’ of wire.

I have the QRP guys Tri-Band vertical kit, and two pieces of 16ga Speaker wire cut to 33’ that I carry as well. To support the EFHW and Speaker wire antenna, I use the SOTABEAMS 10m (32 ft) “Travel Mast”.

For the QRP Guys Tri-band vertical, I use the SOTABEAMS Carbon-6 ultra light 6m (19.6 ft) mast. To support the 32’ mast I usually just lean it into the trees and slope my EFHW up from the feed point.

For the speaker wire antenna, I run the “red wire” straight up the mast while it is strapped to the picnic table. The “black wire” is simply thrown out across the ground. I might even elevate the black wire with sticks.

My carbon-6 fits right into a piece of 1 ¼ inch PVC pipe I have clamped to my brush guard on my van. Or, I use a Tiki-Torch stake to hold my carbon-6 in open ground.

carbon-6 with Tiki-Torch stake supporting and using the Tri-band Vertical.
carbon-6 inside of PVC pipe with the QRP Guys Tri-band vertical.

I find for me, that my QRP Guys antenna works great on 20m without a tuner. But when I try to use it on 30m or 40m, I require a tuner. For this reason, I lean on my MC-750 to be the main antenna.

I have modified my MC-750 slightly. I made my own set of radials to match the factory ones. I chose to make them out of silicone wire. I find it to be more flexible and does not kink or tangle as easy as the standard factory radials. I used 3mm banana plugs and 24ga yellow wire. I also crimped small ring connectors onto the ends of the radials. I did NOT strip the insulation and place them on the wire. I simply crimped them on the silicone. I use them to stake down the wire. I use four nails as “stakes” to pin the wire down. I find I only stake the radials out when I am on un-even ground.

The second modification, I made a set of “double” radials out of 26ga green silicone wire. Colors do not matter. It is what I had. I spread them evenly around the base of the MC-750.

MC-750 with “double radials” and RG316 for coax.

My key is a Czech military straight key from the 1950s. It was new old stock when I bought it. I also carry a small mini set of paddles. For the TR45L radio, I can not play my recoded CQ or 73 with out a paddle. The “play” button is dit or dah trough the paddle jack.

For coax, I use RG316 and the appropriate adapter for the MC-750.

I have two pencils from Kuru Toga. One pencil is .5mm the other is .7mm. I make my own POTA log sheets and I paper log, and then type them later. I am a not talented enough yet to play with a tablet or PC while operating. I have only done CW for the last 12 months.

On my table: I have a really thin yoga mat. I find the concrete picnic tables a bit rough on my equipment. The yoga mat can get a bit sticky when it is warm, so I drape a small hand towel over the edge where my arms lay. I also have a Write in the Rain tablet in full size paper. I have been out early in the mornings in this summer and humidity and steamy fog makes normal paper hard to write on. The .7mm pencil matches up well with the Write in the Rain paper.

Chelegance antenna pictured in the background. K-2965 Paris Landing State Park

I have found CW and POTA have re-energized my ham radio hobby and resurrected it from a dusty shack, to a fun out door activity.

My first challenge was how to get from the car to the table in one trip. Downsize to the necessities. Next was figuring out the antenna and radio combo that could work in different conditions. By conditions I mean space.

Location, location….. I had a dog run between me and my antenna. It pulled my radio right off the table and tumble behind the dog. So now I choose my locations like Bill Hickock… always face the door. Hihi. Food for thought.

Thank you to Thomas for inspiring me to get out there and do it. His you tube videos were great copy practice to give me the confidence to get out there. Finally, my Elmer. John, KM6NN. Without him I would have never started my CW journey. He is a true Elmer in every definition of the word. I am proud to know him and lucky he is in my life. Thank you John.

Gear:

Note: Check out W4EMB on YouTube as he makes his 1st POTA “Kilo” 

Field Kit Gallery: KM4CFT’s QRP Labs QMX/QCX-Mini Go Kit

Many thanks to Jonathan (KM4CFT) who shares the following article about his portable field radio kit which will be featured on our Field Kit Gallery page. If you would like to share your field kit with the QRPer community, check out this post. Jonathan writes:


Hi Tom,

I thought I would share the two go kits I have. I tend to customize my equipment and supplies before I go on a POTA or SOTA outing but I keep these for the rare occasion when I want to grab a radio real quick. [The first on is my] QRPlabs go kit:

The kit is for my QRP Labs QMX/20 meter QCX mini. It contains everything I need to operate 20 meters CW.

The case is a regular Lowepro case that I got with my KX2 when I purchased it from another ham. I did not realize it came with it so I accidentally ordered an extra from Elecraft which I now use with the KX2 kit [featured in a future Field Kit Gallery post].

The kit uses many components from K6ARK, including the 20 meter EFHW antenna and the retractable paddle.

The battery is a TalentCell from Amazon. I use it because it supplies 12v instead of 13.8v. One of the downsides of the QMX is that it cannot handle 13.8v, so I have to stick with 12.

I keep a cheap pair of earbuds with me just in case but I try to bring a nicer pair of headphones whenever possible.

Hopefully this information is useful to you and your readers!
-Jonathan KM4CFT

Readers: Check out Jonathan’s YouTube channel by clicking here.

Field Kit Gallery: K4EAK’s Truck Portable SW-3B Field Kit!

Many thanks to Skip (K4EAK) who shares the following article about his portable field radio kit which will be featured on our Field Kit Gallery page. If you would like to share your field kit with the QRPer community, check out this post.


[I]n my truck I carry a little field kit for impromptu POTA activations.

I also have an FT-891 to an ATAS-120 permanently installed in the truck, which is another possibility for impromptu activations, but that requires me sitting in the truck for the activation. Not my favorite way to activate …

The SW-3B truck kit consists of:

All in a large Bagsmart electronics travel organizer (the case is too large, but since I only carry it in the truck, it didn’t matter)

With the case hung over a headrest hook behind the driver’s seat.

What a great idea [to share field kits]. I’m really curious to see what others post.

73 Skip K4EAK

Field Kit Gallery: N8PEM’s MTR-3 Portable Field Radio Kit

Many thanks to Chris (N8PEM) who shares the following article about his portable field radio kit which will be featured on our Field Kit Gallery page. If you would like to share your field kit with the QRPer community, check out this post.


MTR-3 Field Kit Build by N8PEM

Ham radio is a hobby best enjoyed in community with others.

Ever since I began operating QRP portable a few years back I had admired the Mountain Toppers.  Granted my Elecraft KX2 is a perfect daily driver.  I’ve been lucky to have that as my sole portable QRP rig for some time.  That didn’t stop me from dreaming of an ultralight QRP portable kit centered on an MTR3.  High resale prices and scarcity made it a purchase I had long put on the back burner.  But then one day I saw my good friend Julia, KF8JBB, while walking my dog in the park.  So I stopped to chat.

Figure 1:  Antenna Design

Like many of us, Julia is an avid QRP and CW enthusiast.  She has numerous QRP and SWL radios.  Life is also pretty busy for her.  She doesn’t get out to operate as much as she would like.  As we chatted on that warm August evening, she offered to gift me her MTR3.  For her, it was time to move that rig on to a good home so it would get it’s proper use.  But the shrewd negotiator in me knew to never accept a first offer.  I countered.  I’d take the MTR3 off her hands if she let me build her a QRP portable antenna in return (later I also threw in a built N6ARA TinySWR kit for good measure).  She accepted.  The next day she dropped off the rig.  The fun of outfitting an ultralight (UL) QRP kit began.

I quickly determined that I wanted to build a trapped 20/30/40 meter EFHW antenna to match the three bands on the Mountain Topper.  I prefer end feds, and I wanted the challenge of building traps for the first time.  Keeping in mind I wanted an UL kit, I could also leave the coax at home with an end fed.  I had read that a trapped EFHW can be shorter than a standard EFHW due to the inductance of the traps.  This appealed to me as I knew from experience that getting a 40-ish foot antenna up in the air is much easier than a 60-ish foot antenna.  It took nearly six weeks to research, procure parts and build out this antenna, partly due to the fact I had to build this antenna twice.

My first attempt at this antenna build wasn’t good.  I couldn’t get SWR better than about 1.8:1 on any band.  I hadn’t tested every component at every step of the build.  Thus, I had a hard time determining what went wrong.  I used 100 and 150 pF capacitors for the traps which proved to have marginal shortening effects.  I needed more turns on the toroids!  I decided to do more research and start over.

Thanks to advice and blogs from folks like Dan AI6XG and Fred KT5X, I settled on a different, better design of the trapped EFHW.  I ordered more parts.  Switched out to 15 and 33 pF capacitors.  I took my time to build and test this antenna in a step by step manner.  The results were much better the second time around.  Overall 45 feet 8 inches long and weighing two ounces.  SWR better than 1.5 to 1 on all three bands.

I had the idea to place a TinySWR kit in line between the RCA plug and the end fed matching unit.  I know there are SWR kits which can be installed within the radio, but I didn’t want to modify the MTR3 in any way.  The stock design is sublime.  I also built a back-up emergency antenna into the design.  If for some reason I have a trap fail, I installed a bullet connector right before the first trap.  Thus, I can disconnect the 30 and 40 meter portions of the antenna and  have a basic resonant 20M EFHW.  These thoughtful touches seemed to perfect the antenna.

Photo 1:  Completed miniSWR, matching unit, 30m trap, and 20m quick disconnect

I tried to be thoughtful with the other choices in my kit as well.  At 3.5 ounces and the size of a bag of coffee, the LowePro CS40 padded case proved to be ideal.  I found it cheapest from a UK-based eBay seller.  I made my flight deck out of the steel housing from an old external CD Drive.  I measured, cut and filed the edges.  It’s perfectly sized for loose Rite in the Rain paper, lightweight and thin.  A metal flight deck also can hold the magnetic base of my CW paddles.  When it came to the battery, I decided to go with a RC airplane LiPo battery.  Fuzzy math told me that the 650 mAh would give me more than enough operating time.  Once complete, I was happy to find the entire kit weighed in at just 18 ounces, not counting a throw weight or collapsable mast.

Photo 2:  The completed MTR3 kit

My first activation with this kit was September 21st.  I wasn’t sure how well I would do.  Band conditions weren’t the best the previous two days.  I went to my favorite spot, Bunker Hill (W8O/SE-009) located within Great Seal State Park (K-1954) in south central Ohio.  It’s a short 20 minute hike to the high point on what was a partly cloudy 70 degree Thursday morning.  I set the antenna up in a sloper configuration, gave my dog Togo some treats, ate half my sandwich, took a sip of coffee, and pulled up the POTA and SOTA spotting pages.

In just over an hour I had made 54 QSOs covering all 3 bands.  The MTR3 combined with the trapped 20/30/40 EFHW worked flawlessly.  It was an absolute joy to operate.

Photo 3:  First activation complete

That joy came from the sublime kit for sure.  But enjoyment also came from the community carried within the kit itself.  The MTR3 from Julia KF8JBB.  The paddle and wire winder designs from Adam K6ARK. The MiniSWR Kit from Ara N6ARA.  The Trap PCB boards from Tim N7KOM.  The toroids, capacitors, and antenna advice from Dan AI6XG.  The blog post from Fred KT5X.  The 3D printing from my nephew Colin.  Even the RigExpert I bought from Glen W1ND this Spring was integral.  This kit is an homage to that community.

Figure 2:  First Activation QSO Map

If you made it to the end, thanks for reading!  I hope it was interesting and helpful.

TU 73 EE,

Chris N8PEM

Radio Kit

Antenna Build