Since then, I’ve been getting a few updates from my friend as, I assume, Xiegu releases preliminary info.
This is the latest illustration (click to enlarge):
You can see Xiegu is certainly eyeing the park and summit activators out there.
They’re also touting digital mode operation and I’ll have to assume this means the radio has an internal sound card which would certainly simplify a field-portable digi mode kit.
I was originally told that the G106 had six bands, but this image implies 80-10 meters including the WARC bands. We’ll have to verify this once the production marketing information is released. Since this is the 2022 Hamvention weekend, we could be learning more int he next couple of days.
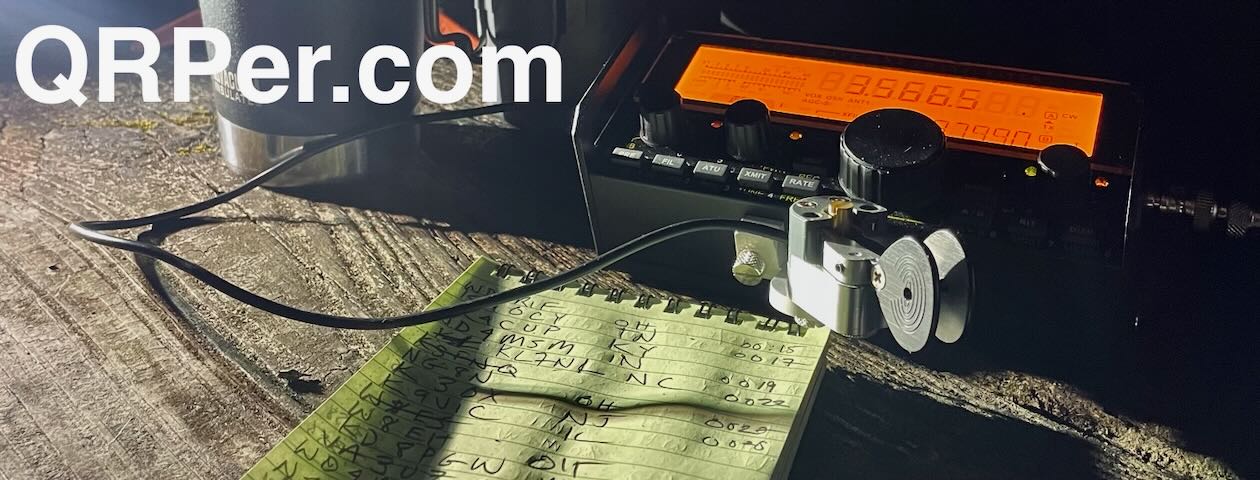
As I drink a cup of coffee and type this post, I’m also packing my camping and radio gear in the car for a four day POTA expedition with my buddy, Eric (WD8RIF). As I mentioned in a previous post, it’s what we’re doing in lieu of going to the 2022 Hamvention.
I’d planned to write up a field report this morning (I’ve a few in the pipeline) but I simply don’t have the time to do a proper job and I like taking my time with these reports.
Instead, I unearthed a “Hike and Talk” video I made earlier this year and completely forgot about.
Be warned…
My “Hike and Talk” videos aren’t for everyone. I don’t edit them–they’re pure unscripted stream of consciousness. And they’re quite long by YouTube standards.
If this isn’t your sort of thing, just skip this one–I won’t be offended.
On this particular day, I had the future of amateur radio on my mind.
Since it’s been a couple of months since I made this video, I listened to it this morning while packing if for no other reason than to simply refresh my memory. Since I don’t typically do this sort of thing (sharing my thoughts and opinions out there in the public space) I always find it a bit cringe-worthy to review these after the fact. I’m no authority on any topic and never want to paint myself as one, so I typically only discuss these things in interviews and even then, I rarely, if ever, listen my interview post-broadcast (save this one, perhaps).
Proud Prof
But this rambling “Hike and Talk” session reminded me of something that still makes me swell up with pride. I mentioned one ham radio class in particular that I taught for the high school students in our home school cooperative.
It reminded me of a couple of photos I took during that class:
In this first photo (above), I took the class out to the parking lot at the school and I had them set up a (then prototype!) Mission RGO One transceiver on a folding table under a large tree. I had the students erect both an end-fed resonant antenna and a simple 20 meter vertical. I picked the RGO one because all of the adjustments we had talked about in the classroom—AGC, Filters, A/B VFOs, Direct Frequency Entry, Pre Amp, Attenuation—are on the front panel and one button press away. Plus, it’s just a cool radio!
We hopped on the air with one of my students calling CQ (SSB) on the 20 meter band. Her very first contact was with a station in Slovenia—and she simply beamed with excitement. Thank you propagation gods!
In the photo above–taken a week or two later–we were forced to play radio indoors. I’d planned to set up the ALT-512 QRP transceiver outside and see what sort of DX we could work with a simple home brew mag loop antenna. Heavy rains moved in, though, so we moved back to the classroom, they set up the loop in a small window of this large brick building, and we worked station after station on FT8. You can see one student operating, another logging, another looking up each grid square and address, and one at the board calculating how many miles per watt we were achieving with each contact. We had huge fun!
All of the young ladies in my class passed their Technician exam by the end of the term and are all now licensed amateur radio operators. They were all amazing students.
I couldn’t have been more proud of them.
The Video
But I digress. Here’s my “Hike and Talk” video in all its glory:
I hope you enjoyed watching (or skipping) the video!
Of course, I’d also like to send a special thanks to those of you who have been supporting the site and channel through Patreon and the Coffee Fund. While certainly not a requirement as my content will always be free, I really appreciate the support which allows me to open up my work life to write more field reports and film more activation videos.
Here’s wishing you some rewarding radio activity this week!
A friend who works in the amateur radio industry has shared the following photos and given me permission to post them.
These are images of the Xiegu G106 HF transceiver (click to enlarge):
As a field operator, one thing I noticed immediately are the protrusions around the faceplate that protect the encoder and what I assume in a multi-function knob. The form-factor seems to be roughly that of the Xiegu G90 (even smaller) with a backlit LCD display that resembles the Xiegu X5105 (only, again, much smaller).
I’m assured this isn’t vaporware, and I have to assume we’ll learn a lot more about the G106 soon.
The front panel is incredibly simple, so I must assume it’ll reply on menus for filter control, etc.
I have no other details at this point. When I learn more about the Xiegu G106, I’ll post updates here on QRPer.com.
Xiegu G1M replacement
Update (17 May 2022): I’ve just learned that the Xiegu G106 is the replacement for the Xiegu G1M . It’s sports 6 bands [actually, it might be more according to this update] has 5 watts of output power, and, of course, is SDR based like other Xiegu products. I’ve also learned it can receive wide band FM (hence the FM broadcast band image above).
Yesterday, Icom posted the following teaser and image above on Twitter in advance of the 2022 Hamvention:
Are you ready for Dayton Hamvention 2022? Something new and exciting is on the horizon, visit us in building 2 from Friday, May 20 through Sunday, May 22.
At first, I was scratching my head because the product image (at the top of the page) looks like an IC-705, but the frequency displayed is 5.780 GHz. Then I remembered mention of Icom’s SHF (Super High Frequency) Band Challenge some months ago.
Basically, Icom seems to be repurposing the IC-705 platform to be used as a controller for the SHF transceiver. Why not? The IC-705 has fantastic ergonomics and a brilliant spectrum display.
In order to mitigate line losses, the SHF transceiver/RF module is designed to be mounted directly on a tower at the antenna and controlled remotely via a LAN cable. Here’s a simple diagram from Icom’s news release:
Here’s what the SHF RF module looks like:
Icom will have the new SHF-P1 controller prototype on display at the 2022 Hamvention:
I think it’s pretty cool that Icom’s working on a 2.4 GHz/5.6 GHz project even during these challenging times for manufacturers. I’ve never even tinkered in these frequency ranges, but I think it would be a lot of fun to explore.
Many thanks to Dale (N3HXZ) who shares the following guest post:
Ergonomics of Operating CW in the Field
by Dale (N3HXZ)
About a year ago I started getting active in Parks On The Air (POTA) and Summits On The Air (SOTA). I had always been an avid hiker and backpacker, and though I am getting up there in years (recently retired!) these amateur radio opportunities were just the medicine I needed to rekindle my passion for the outdoors and amateur radio.
Thanks to Thomas (K4SWL) and his blog post and videos I was able to quickly come up to speed on the basics and get out into the field for CW activations. I quickly discovered that operating CW in the field is quite different from operating at home. The creature comforts of a good chair, a level and spacious operating table, and isolation from the weather makes for a great experience in the shack, but is not available in the field, especially if you are backpacking to your destination. My early activations were sitting on a rock, or the ground, and using only a clip board to mount my rig (Elecraft KX2), locate my CW paddle, and place a notepad to record QSO’s.
While simple, this operating setup poses problems. Attaining and maintaining a flat workspace is tough in the field in order to keep things from shifting or falling off the clipboard, especially if you are not firmly seated. There is not enough space to set your wrist in order to steady your CW operating, and the notebook pages can flap in the wind, or the wind can blow your logbook clear off the table while operating. I realized I needed to upgrade my mobile station! Continue reading Dale’s solution for enhanced CW field ergonomics→
Hamvention weekend is one of the big highlights of my year and–until the pandemic–I hadn’t missed a single on in more than a decade.
I was really looking forward to this year if for no other reason than to connect with friends I only see at Hamvention.
My buddy Eric (WD8RIF), his son Miles (KD8KNC), and sometimes our good friend Mike (K8RAT) attend Hamvention together. We split accommodation, car pool, and fit in park activations before, during, and after. We also fit in an annual pilgrimage to the USAF museum. It’s incredibly fun.
As fun as Hamvention is–which is insanely fun–I realized that it was going to be a pricey 3-4 night excursion when I already have some pretty epic, much-anticipated travels planned this summer with my family.
Since I had literally no items on my Hamvention shopping list (Eric didn’t either) and since I wanted to funnel all of my travel monies into the amazingness that awaits us this summer, I had a hard time justifying the costs of the trip.
So I reached out to Eric who, turns out, was feeling much the same way.
I’ve had a SW-3B for a couple of years now. Even use it in the ham shack.
I also have a KX2. From packing the KX2 around, I have noticed problems with the main tuning encoder, probably from having weight up against it. I pack it in one of the bags they sell.
Just what you need for yours. I also found a similar cover for the KX2. Next on my list.
Enjoy your posts.
73, Rick K8BMA
Thank you so much for sharing this, Rick! I believe you printed KN6EZE’s side panels and cover that are available on Thingiverse. I am definitely planning to print some of these as well. One reader noted that the encoder is a bit of a weak point on the SW-3B and it should be protected in transport if possible.
I’m a pretty organized field radio guy if I do say so myself.
In all of the hundreds of field activations I’ve attempted since the days of the National Parks On The Air (NPOTA) program, I’ve only arrived on site two or three times and discovered I was missing a key component of my field kit. Out of those times, only once do I remember that the missing component prevented my activation (it was hard to power my radio without a battery and power cable). The other times, I was able to improvise.
or one that’s modular, where component families (transceiver, antenna, power, etc) are in their own packs and can be moved from pack to pack.
I always prefer having dedicated field kits, but they’re pricey because they require a dedicated antenna, battery, radio, key/mic, earphones, pack, connectors, and sometimes even their own throw line.
I assemble modular kits around a particular radio and antenna system prior to leaving the QTH to go on an activation. I have a method for doing this which prevents me from leaving stuff behind.
Save this time…
On Thursday, April 7, 2022, before leaving the house for a quick overnight trip, I grabbed my SOTA pack and disconnected my Elecraft KX3 from the KXPA100 amp in the shack.
My pre-side rails KX3 in the shack.
My KX3 is used a lot in the shack–along with the Mission RGO One and Ten-Tec Argonaut V–it’s one of my staple rigs at the QTH. I didn’t think I would have time to complete an activation on this quick trip, but if I did, I wanted to use the KX3. I also grabbed one of my pouches that contained a 12V battery, distribution panel, and power cord.
Also inside the pack was my Elecraft KX2 kit. It was in there from a previous activation, so I just left it in the bag.
When a window of opportunity for a quick activation opened on Friday, April 8, 2022, I grabbed it. I didn’t have time to go far afield, so I chose to activate the closest park to where I was running errands that day.
Fort Dobbs State Historic Site (K-6839)
As I was driving to the site on I-40, it dawned on my that I might have forgotten to pack an antenna.
Not a good feeling, but I was only 10 minutes from the park, so there was no turning back.
You see, a couple days beforehand, I did a bit of an antenna inventory at the QTH–I took all of my antennas out of their packs, checked them over carefully for any damage or fault points and made notes.
I normally keep a 20M EFHW antenna in my KX2 field kit, but I remembered that also I removed it during the inventory.
Once I arrived at Fort Dobbs, I opened my SOTA pack and confirmed that I had no antenna. Not a one.
I kept a clear head and realized that if I wanted to complete the activation, I needed to do one of two things:
Search the car in case, somehow, I had a spare antenna floating around in there. Unlikely, but I’d feel like a fool if I aborted an activation with an antenna in the car.
Go to a nearby hardware or dollar store and find some cheap wire. The KX3 has a brilliant internal ATU to match pretty much any wire I connect to it.
Many thanks to Pat (N0HR) who shared following question in a comment:
Thomas
I simply love your videos – both your impressions of the gear and the activations themselves. Great stuff.
I’m curious – now that you’ve played with both the SW-3B and the Penntek TR-35, which is the favorite? Seems like they’re both roughly in the same price range.
Thanks for your fantastic channel and website
73, Pat N0HR
Thank you for the kind words, Pat, and great question! Several people have asked me variations of this very question recently.
I like both radios, so I’ll frame this in a way that might help others make a purchase decision.
My wife decided this winter that she would like to see me playing radio outdoors rather than in the shack during the summer months so graciously purchased a KX2 for me for Christmas. During the long wait for it to arrive I think I read most everything on your blog about 3 times. I noticed in several of your postings that you were using a folding lap desk designed and printed by CarolAnne N0RNM.
Her design inspired me so I designed a copy cat of sorts. I wanted mine to be slightly larger so it ended up being 8.5” wide and 14” high when unfolded. 8.5 X 7 when folded up. Like CarolAnne’s it has the same recessed area to attach a sticky pad and I added cutouts in which to put a leg strap.
Now if the weather would only improve so I can go do my first SOTA and POTA activations.
And, wow! Your wife purchased you a KX2 for Christmas? She’s a keeper indeed! 🙂
By the way, loads of people have asked me about the N0RNM kneeboard and I believe within the next couple of months it may be available for purchase. This would be convenient, of course, for those without a 3D printer at home.
I’ll certainly post an announcement here on QRPer.com when it available.
 Yesterday, I posted some photos of the new Xiegu G106 transceiver.


