All posts by Thomas Witherspoon

A little off-grid radio and offline camping!

If you were hunting POTA contacts last week, you might have seen my callsign pop up in the spots quite a few times at New River State Park (K-2748).

Morning reading along with a proper brew in my C.R.A.Q. coffee mug!

Our family decided to take a little break from everything–including the internet–and simply enjoy the great outdoors and a little camping in our small travel trailer (caravan).

Our ferocious guard dog protecting the camp site from hostile invaders. Note that she’s actually awake and alert. A rarity indeed!

It was amazing fun.

In terms of radios, I limited myself to two. While we had room for more, I decided in advance I wanted to spend some proper bonding time with my Yaesu FT-817ND.

I’m so glad I did.

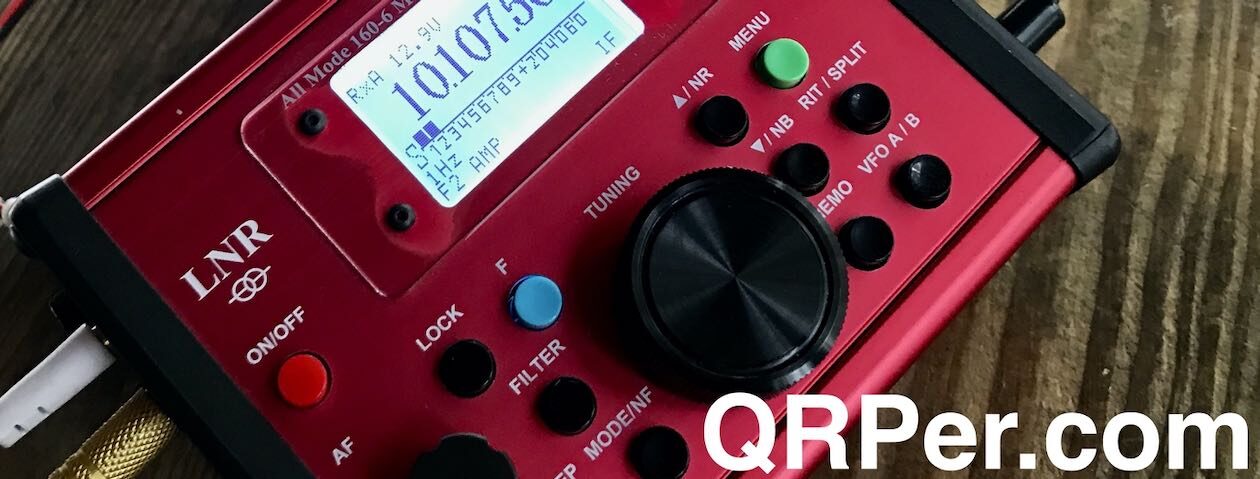
I also brought the Elecraft KX2 but primarily planned to use it when operating off-site. This way, I could keep the FT-817ND system hooked up and ready for action at our camp site.

In fact, the KX2 remained in my SOTA pack for the duration of the trip as a grab-and-go. I had an absolute blast with it activating the summit of Mount Jefferson.

Solar power

This camping trip gave me an excuse to use a station accessory I purchased last year: my Buddipole Powermini 2.

The Powermini 2 is a very compact and capable charge controller with an input for solar panels, a battery, two DC outputs, and even a USB power output. A genius little device.

I’ve been asked a number of times why I don’t do solar charging in the field during my activations. There are a few reasons, actually:

  • First of all, my activations tend to be short in duration–perhaps 45 to 75 minutes. I could easily operate for a few hours on one battery charge with most of my QRP radios. In other words, I rarely need to recharge in the field.
  • Often, my field activation sites are shaded by choice. Since I like to hang wires in trees, those same trees would block sunlight from ever hitting my panels.
  • Finally, unless I’m testing a new radio, I tend to take the least amount of accessories necessary to complete the activation. This is especially the case with SOTA activations. Since I’m unlikely to use solar panels, I leave them in the car or at the QTH. I do, however, keep them packed and at-the-ready should the need arise.

I paired the Powermini 2 with PowerFilm Solar folding panels I purchased many moons ago at Hamvention (I’m guessing in 2012 or so–?). These were blemished units and I snagged them for a brilliant price. Looking back, I wish I would have purchased a few more.

They’re only 5 watts each, but I run them in parallel to feed the charge controller with the equivalent of 10 watts.

QRP gear is so efficient, these modest panels actually do a respectable job keeping the battery topped off. At New River State Park it helped that our picnic table was in full sunlight most of the day.

Sure, we had shore power at the site, but where’s the fun in that?

QRM

During the week, the site had low levels of RFI/QRM. That all changed during the weekend when new campers moved in along with their leaky switching power supplies and noisy inverters.

On Saturday, I found it too frustrating to try making contacts from the campsite–the noise floor was a steady S7 with peaks around S9 simply washing over all but the strongest signals. I regretted not packing my Chameleon loop antenna.

Instead of fighting the QRM, I abandoned it. I drove to a large isolated picnic shelter at New River and set up the KX2 and CHA MPAS Lite antenna.

The site was noise-free and I had amazing fun.

Videos

I made quite a few activation videos, so I’ll eventually post them with abbreviated field reports.

Frankly, I am still catching up from having been offline so long.

Thank you

Massive thanks to my good friend Eric (WD8RIF) who took care of QRPer.com while I was gone. He’s been moderating comments and making sure scheduled posts published properly. In fact, my friend Robert Gulley (K4PKM) was holding down the fort over on the SWLing Post too. I’m so thankful to both of them.

Also, many thanks to all of the hunters who worked me on multiple bands and in multiple modes. A special shot out to NE4TN who was a life saver and spotted me on several occasions when the connection between the POTA site and Reverse Beacon Network were down. Many thanks, OM!

Of course, I’d also like to send a special thanks to those of you who have been supporting the site and channel through Patreon and the Coffee Fund. While certainly not a requirement as my content will always be free, I really appreciate the support. Your support actually helps to make radio fun like this possible.

Here’s wishing everyone an amazing weekend!

Cheers & 72,

Thomas (K4SWL)

Jim’s Icom IC-705 travel kit housed in a Nanuk 915 rugged waterproof case

Recently, I was in in touch with Jim (WA7VFQ) who was trying to decide which radio to take on a vacation to the North Carolina coast. He replied with details about the field kit he put together for the trip which will require air travel. Jim writes:

Last year in one of your QRPer posts you mentioned your search for a case for one of you radios. I commented that I had a Nanuk case that I liked and promised pictures.

Well, we are finally there!

It wasn’t until yesterday that I decided to take my Icom IC-705 over my Elecraft KX3 [on vacation]. I had new foam for the case and last night I did my “foam plucking” and I’m pleased with the outcome. I had a couple of Icom decals and since it wasn’t the Elecraft, one of them wound up on the exterior. Some guy on the internet was touting the Tom Bihn Travel Trays; we have 4 on them, 3 large and one small. All are headed to NC with us. One of them will carry my extra radio gear.

The Nanuk 915 (above) houses the Icom IC-705 (with cage), a RigExpert 230 Stick analyzer, Bioenno 4.5 Ah battery and Mat 705 Plus ATU. Continue reading Jim’s Icom IC-705 travel kit housed in a Nanuk 915 rugged waterproof case

Field Report: My first POTA activation with the Penntek TR-35

My most recent field report and video featured the Penntek TR-35 but it was not my first activation with this fantastic little QRP rig!

I pushed the last field report and activation video to the front of the line so that I could show how CW message memory keying worked in the TR-35’s updated firmware. It was, in my opinion, a major upgrade!

What follows is my field report from April 1, 2022: my first POTA activation with the Penntek TR-35. This video was made a week or so before I learned that WA3RNC was working on the new firmware.

Side note: If you’d like to read my full review of the TR-35, check out the May 2022 issue of The Spectrum Monitor magazine.

Although I’d used the TR-35 in the shack for more than a month I was eager to find an opportunity to take it to the field. April 1, 2022 was that day and I made a little detour to one of my favorite local POTA sites to break in the TR-35… Continue reading Field Report: My first POTA activation with the Penntek TR-35

A review of the Xiegu X6100 portable SDR transceiver

The following article originally appeared in the April 2022 issue of The Spectrum Monitor magazine:


A review of the Xiegu X6100 portable SDR transceiver

by Thomas (K4SWL)

Do you remember when band scopes and spectrum displays started appearing on radios?  It was a pretty phenomenal innovation. Being able to “see” what was in your neighborhood on a particular radio band was incredibly useful, especially to operators who like to hunt stations, and to DXers who wanted to follow the reply pattern of DX stations running split. Spectrum displays, among other things, gave operators an overall “big picture” of band activity, and it was truly insightful.

Additionally, the advent of SDR (software-defined radio) architecture made not only spectrum displays but also time-based waterfall displays accessible in radios of all price ranges.

From the perspective of both a ham radio operator and a shortwave radio listener, I can tell you that once you become accustomed to the benefits of a spectrum display, when you don’t have one, you feel like you’re cruising the band wearing blinders:  it’s just that essential.

As a result, many hams and SWLs have come to rely on these features. No doubt customer demand has pushed manufacturers to include spectrum displays on almost all new SDR-based transceivers––even portable transceivers!

Enter the X6100

In November 2021, China-based radio manufacturer, Xiegu, started shipping their latest SDR transceiver: the Xiegu X6100.

Xiegu has become quite a household name among HF field operators.  I’ve reviewed both the Xiegu G90 and the Xiegu X5105. The common theme is their affordability, portability, superb built-in ATUs, and impressive feature set. Admittedly, high-end performance––in terms of receiver as well as audio performance––is not their strong suit, but in the field you don’t necessarily need contest-grade performance. I’ve found that both the G90 and X5105 are quite effective and adept in the field and at home. Many a new ham operator has turned to Xiegu products to begin their foray into the world of HF.

Judging by appearance alone, you can tell that Xiegu was targeting the same operators who might consider the Icom IC-705. Cosmetically it’s strikingly similar in terms of knob, screen, and button placement on the front panel.

The X6100 also has Bluetooth and WiFi connectivity, like the IC-705: a first for the sub-$1,000 portable radio market. But unlike the IC-705, this functionality was not in place with the first production run of the X6100. It’s being slowly implemented via X6100 firmware updates.

But in my view, that’s where the similarities with the IC-705 stop. Based on the announced X6100 specifications, I could tell well before the X6100’s release that it would lack many of the features that make the IC-705 such a hit; features like a touch screen, D-star mode, VHF/UHF multimode, built-in GPS, built-in D-Star, built-in repeater directories that can auto-load the repeaters closest to the operator, advanced filter shaping, and so much more.

But the X6100 and IC-705 share enough similarities that field-portable HF enthusiasts have taken notice…Nonetheless, it’s one major difference that has really caught their attention. Continue reading A review of the Xiegu X6100 portable SDR transceiver

Bob’s new stainless key and stealthy speaker wire that snags serious QRP DX !

Many thanks to Bob (WD4EWZ) who writes:

Thomas,

Let there be no doubt that your speaker wire antenna is awesome! I have been licensed for 46 years but was inactive during much of that time. I finally pulled the trigger, largely on your reviews, on a new Icom IC-705, AH-705 and PowerWerx PS.

I live in a very HOA restricted area so antennas were my bane. I built your speaker wire antenna not expecting much, and for the first few days I got nada. The bands were terrible and the antenna was looped around my lanai.

On Friday I had an inspiration. I made a throw line, moved an unused bird feeder anchor post and got the antenna about 40 feet up into a tree. The wire is invisible from the street, and we have more latitude in the backyard. My wife likes it so much she wants me to just leave it there, and make another for POTA/SOTA.

Does it work? Oh my goodness… Last night I nailed 9K2BM in Kuwait on 20m SSB, and this morning the JAs were melting the face off my IC-705.

This antenna is a wonder. As is the 705, after a week of learning how to optimize the settings.

Joe, at HRO in Winter Springs warned me that the 705 had a learning curve, and I foolishly said ‘yeah, sure.’ I do this (computer science/IT/data science) for a living. Don’t worry about me.’ Wrong! A huge learning curve, but I’m getting there.

Also, my new paddles recently arrived. I love this little stainless paddle — the magnets are strong enough to hoist a car, and the price is amazing… $69 on Amazon [affiliate link]!

I am using a 4″ square steel forging plate I had from my days of making metal jewelry. (Too many hobbies). It works a treat.

Thanks so much for your writings and 73.

Bob (WD4EWZ)

Thank you for sharing this, Bob! Loads of readers have asked me about those stainless paddles, so it’s great to get a report on them. 

I also love how you’ve implemented the speaker wire antenna in such a stealthy way! And the DX you’ve snagged? Simply amazing.

Thanks again for sharing!

Scott’s Icom IC-705 “Shock Box”

Many thanks to Scott (KA9P) who writes:

Enclosed are a few detailed pictures of the system I’m using to protect my Icom IC-705 in the wild.

I wanted a system that would protect the radio from shock and vibration when I dropped it in use, or tripped over a cable, as well as when in transit.

Some research lead me to Sorbothane, a commercial vibration damping material available in small lots on eBay, and to a Sorbothane applications engineer. The engineer recommended that a good way to protect electronics is to use a “box-in-a-box” concept where the equipment resides in an inner box with vibration dampers between the inner box an outer box.

Sorbothane’s on-line calculators suggested that for the IC-705’s weight, some relatively small pads on each wall would be adequate.

So I started with the bottom 4.5 inches of a Harbor Freight ammo box, and added four 1/4 inch thick, 1 inch by 1 inch Sorbothane pads to the bottom and two long sides.

Then I added an aluminum plate to the inside side surfaces of the pads, and lined the plates with neoprene (see the drawing above). The neoprene adds a bit of additional padding, but primarily lets the 705 slide into “the inner box” while putting a little bit of pressure on the pads. The manufacturer recommends a slight loading pressure on the pads for proper damping.

The radio is fastened into the box with an adjustable depth 1/4-20 threaded locking knob, positioned to put a little force on the back wall vibration pads when tightened down.

The cover is made of aluminum angle stock and Lexan, and provides good protection for the front of the radio when not in use.

This “shock box” solves a lot of problems for me.

1) I can leave the cage on when operating, using dongles out the front for things I want to change like the antenna, mic, battery power, headphones or paddles. Leaving the radio in the box avoids field handling errors, to which I am prone.

2) If the internal battery needs to be changed in the field the radio comes out quickly by removing the single 1/4-20 knob and screw. But the battery can be charged in the case with a USB or power plug dongle, again avoiding handling.

3) The depth of the box protects the entire periphery of the radio front, much like the handles do for the sides of a cage, and the radio remains enclosed/covered on all sides except the front. I’ve used it in snow and rain without issues when the wind isn’t bad.

4) Impact protection is really high other than for a direct frontal panel hit within the box. The plastic box takes the first hit, deforming a bit and transferring the rest of the energy to the vibration damped inner box. Not worried about dropping the radio anymore.

5) The use of Sorbothane’s “box-in-a box” with vibration pads concept leaves a channel surrounding the radio to promote air flow and heat dissipation. For me this is much better than using the radio in a box cushioned with foam, which blocks air flow and can trap moisture.

6) The box provides a handle, which the 705 really does need in the field.

7) The footprint of the Harbor Freight box is just about a hand and glove fit in the bottom of most serious packs, making it easy to carry when backpacking.

On the downside, it’s a bit ugly, but it’s cheap, maybe $40 US to build. Other than wanting a gasket to provide better weather and dust proofing when closed, I’m happy with it.

-Scott (KA9P)

A bit ugly? Scott, I think it looks great!

I feel like shock absorption is one of the things lacking in many of the IC-705 cage solutions out there. I always feel like when a metal/aluminum frame is paired with a hard plastic chassis, in a field drop the plastic will be the weak point. 

This adds to the bulk of the IC-705 (in terms of overall size) but likely doesn’t add a lot of extra weight. In your manpack/chest pack situation, this is a great bit of engineered insurance for your $1300+ rig!

Thank you for sharing!

Field Report: Testing the new Penntek TR-35 firmware during a POTA activation!

Since I have a busy family life, I always look for opportunities to fit a little field radio time into my schedule.

My policy is to always keep a radio field kit in my car or truck so I can take advantage of any last minute opportunities.

On the morning of Wednesday, April 20, 2022, I was scheduled to take my car in for warranty/recall servicing at the dealership.  I decided in advance that if the service could be completed in two hours or less, I’d relax in their waiting room with my MacBook, drink a cup or two coffee, and attempt to make a dent in my email backlog.

If the service was going to take longer than 2 hours, I decided that I’d use one of their loaner/courtesy cars and activate a nearby park.

The dealership is about 45 minutes from my QTH and I’ve activated most of the parks nearby it, save one: Holmes Educational State Forest.  I’ve been wanting to activate this park for ages, but my travels these days simply don’t take me in the direction of the park very often; it’s a good 75 minute drive from my QTH.

Uncertain how long the dealership would need my car, I grabbed my SOTA backpack that had a full field kit inside based on the Penntek TR-35 transceiver.

TR-35 Upgrades!

Why the TR-35? Because I was testing new firmware that added a huge upgrade: two CW message memories!

I won’t go into details about the new upgrade in this field report since I describe it both in my activation video (see below) and in this post which relays the announcement from WA3RNC.

Suffice it to say, I was itching to see how well the new message memories work during a proper activation.

Front of the line

Since this upgrade was just made public, I thought those of you who either own the TR-35 or are plotting to purchase the TR-35, might want to see it in action. For this reason, I pushed this video and field report ahead of all of the others in my pipeline.

The really weird part about publishing this video so quickly is that one of my next field reports and videos will actually feature the first time I took the TR-35 to the field about 3-4 weeks ago! Back then, CW message memory keying wasn’t even on the table.

Activation time

I arrived at the dealership around 9:00 AM (local) and the first thing I asked was, “So how long do you think this will take?” The representative looked at the work to be performed and said, “Three or four hours, likely. If you’re in a rush, maybe two hours.

I decided I wasn’t in a rush because I’d much rather be playing radio at a new-to-me park than sitting in a waiting room.

I asked if I could borrow one of their courtesy cars and he replied, “We assumed you might want one Mr. Witherspoon, so we already reserved one for you.”

Woo hoo!

Holmes Educational State Forest (K-4856)

The drive to Holmes Educational State Forest from the dealership took perhaps 30 minutes or so–it was a gorgeous day and a beautiful journey. Continue reading Field Report: Testing the new Penntek TR-35 firmware during a POTA activation!

New Penntek TR-35 firmware adds CW message memory keying

John (WA3RNC) has just announced a new firmware (V.0.24) upgrade for the Penntek TR-35 that will start shipping in all TR-35 orders starting Sunday April 23, 2022.

The new processor adds two new features:

  • The ability to record and playback two CW message memories
  • A function to toggle the display from black with blue characters to solid blue with black characters

Of course, the big upgrade–in my world–is the addition of CW message memory keying and I can confirm that it works very well. More on that below…

Obtaining the upgrade

As John (WA3RNC) states in his announcement:

The good news is that any TR-35 can be upgraded with a simple replacement of a properly programmed plug-in microprocessor, or with the reprogramming of the original microprocessor. No other hardware changes are required.

But…there is bad news. The availability of the Atmega328P-PU microprocessor has gone from “buy it anywhere for $1.95″ in mid-2021″ to “virtually unavailable anywhere at any price” today. Delivery dates are quoted as May of 2023 for orders that I placed last year. 

[…]Because of this critical chip shortage, I do not have a sufficient inventory of the Atmega part to be able to send out programmed microprocessors for upgrades. What parts I do have are destined for production of TR-35 and TR-45L transceivers.

Therefore, a TR-35 firmware upgrade will require that the transceiver be sent to me freight prepaid for reprogramming, along with funds for return shipping and insurance of $15.00.

Understand that there is no charge for the actual upgrade reprogramming, only for the cost of returning your unit to you.

I think is excellent customer service, actually, and a clever way to get around the chip shortage: use the chip you already have.

Again, if you’re buying a new TR-35, it’ll ship with the latest firmware.

If CW message memory keying or inverting the OLED screen colors aren’t important to you, it’s not necessarily worth upgrading because the new firmware only includes the new features.

Testing message memories

Recently, John sent me an upgraded chip with an early Beta version of the new firmware to thoroughly test in the field. I replaced the TR-35 chip myself.

I tested the new functionality in the shack and on a dummy load.

As with most built-in CW message recorders, you’ll need to set the CW speed to a comfortable setting before recording. During the recording process, you need to send accurately spaced characters, else, for example, the software might interpret the “AN” in your callsign as a “P.”

The first time I set memory 1 to “CQ POTA DE K4SWL” it took three tries to get it right. When I set the second memory to “BK TU 73 DE K4SWL” I recorded it in one go.

Recording message memories on the TR-35 is at least as easy as directly recording a message on my KX2 or KX3. I’m pleased.

In the field

Last week, I took the upgraded TR-35 to the field and used the message memory keying during my activation.

It worked beautifully.

John sorted out a clever way to initiate playback without having to make any hardware additions to the radio:

  • To play a message memory, simply tap the AUX switch down and then hit the left side of your paddle to send message #1 or the right side to send message #2.
  • Recording messages works the same way, but instead of a short press of the AUX switch, you initiate a long press.

Even this early version of the upgrade worked well.

Field report and video coming soon!

I’m going to push the field report from last week to the front of the line because I know many of you will be curious to see how it plays in the field. Hopefully, I can post this by Monday (April 25).

My Penntek TR-35 Review

FYI: My full review of the TR-35 will be in the May 2022 issue of The Spectrum Monitor magazine.

Speaker Wire SOTA & POTA: Another rendezvous with Rendezvous Mountain!

I get a little thrill out of checking out new parks and summits.

When going to a new-to-me site, I typically do quite a bit of research in advance. With parks, I look up directions to the entrance, hiking trails, park boundaries, and try to sort out the best potential activation sites on a map. With a summit, it can be much more complicated, but reading previous activator notes really saves a lot of headache. That’s especially the case here in the States where many summits are on private/gated land and/or could require bushwhacking off trail with no mobile phone service.

Then again, returning to a site I’ve been to before is also quite nice. I know what to expect and that often opens up the door to more confidence with time planning, antenna choices, and what to pack in terms of gear.


On Friday, March 25, 2022, I re-visited a site I hadn’t been to in nearly a year: Rendezvous Mountain Educational State Forest.


What’s great about Rendezvous is that it’s both a POTA and SOTA site.

On top of that (no pun intended) the activation zone of SOTA summit 2543 (W4C/EM-082) is on a road where Rendezvous Mountain Educational State Forest (K-4859), and Rendezvous Mountain State Game Land (K-6941) overlap. One activation yields two parks and one summit!

Last year, it took a bit of research to make this discovery. I studied both the park and game land maps, then compared those with a Cal Topo map. If interested, check out that field report here.

Rendezvous Mountain

I arrived on site around 12:45 local. The park was void of visitors–I almost felt like I’d arrived on a day when the gates should have been closed.

As I grabbed my SOTA backpack out of the back of the car, a ranger pulled up in his truck and  asked if I was planning to hike. I told him about my plans and asked if it was okay that I hike the forest service road to the summit. He said, “Sure. But when you reach the prison crew doing brush cutting on the road, make sure one of the guards sees you before you attempt to pass them.”

Okay then.

I thanked him and double checked that it was actually not a problem to hike the road and he said, “Go for it!” Continue reading Speaker Wire SOTA & POTA: Another rendezvous with Rendezvous Mountain!

The Yaesu FT-817/FT-818 and narrow filter availability

IMPORTANT UPDATE:

After this article was originally posted, I discovered a very easy way to assemble your own narrow CW filter. Click on this link to read a post that describes, in detail, how you too can build a replacement Collins narrow CW filter for the FT-817/818 series radios (plus other similar Yaesu models). 

What follows is the original article:


So I’m a big fan of the Yaesu FT-817/818 series radios. This general coverage QRP radio has had a longer market run than any other transceiver I can think of and for good reason.

While the 817/818 lacks some of the advanced features of more modern field rigs and have no internal tuner, it makes up for it by:

  • sporting multi-mode HF, VHF, and UHF coverage,
  • having two selectable antenna options (a front panel BNC and back panel SO-239),
  • being incredible durable/rugged,
  • featuring excellent QSK (albeit with a bit of relay clicking…which I actually like),
  • and  generally being very affordable (prices typically from $400 used to $650 new).

In addition, they tend to hold up well with time.

For the price? I feel like you get a lot of radio with the FT-817/818.

This is the reason why I often recommend the FT-817ND and FT-818ND if it sounds like a good match for the operator.

One gotcha though…

I’m starting to realize that there is one downside to this rig especially if you’re primarily a CW operator: optional narrow filter availability. Continue reading The Yaesu FT-817/FT-818 and narrow filter availability