Category Archives: QRP

Coffee, QRP, & Question: Is any field kit more portable and versatile that Elecraft’s KX2/AX1 combo?


Lately, I’ve been kitting out another fully self-contained field radio kit that would be small enough to fit in my EDC (everyday carry) laptop bag–something super compact.

I’ve been getting some great ideas from those of you who have added your kits to the Field Radio Kit Gallery.

[By the way, if you’ve submitted your kit to the gallery and haven’t seen it yet, note that I’m posting these in the order received and there are many in the pipeline!]

I’ll likely build my EDC field kit around the Elecraft KX1 or the Mountain Topper MTR-3B, then pair it with a good wire antenna.

My EDC laptop bag: the Tom Bihn Stowaway

But this process got me thinking: if money was no object, and I wanted the most compact and versatile multi-band field kit, what radio and antenna system would I choose?

My answer? A kit built around the Elecraft KX2 and AX1 antenna.

In my experience, the KX2 AX1 combo is hard to beat. It’s compact, effective, low-profile, and you can set it up pretty much anywhere.

Let’s explore my reasoning here keeping in mind–in my world–this is a very deep rabbit hole to go down. I’ll do my best–no promises–to keep this as concise as possible:

Compact, Low-Profile, Self-Supporting, and Simple

Here are all of the components of my typical KX2 AX1 field kit:

This is all that is needed for a field activation.

And if you’re an SSB operator? You don’t really need a microphone because one is built into the KX2 (that said, I’d suggest you build a compact mic if you plan to do a lot of SSB operating).

If I wanted to make this kit even a bit more versatile? I’d add a kneeboard to the list. This gives one the ability to operate without a picnic table.

I recently published a video showing how the KX1 and AX1 can fit on a kneeboard.

Portable and Versatile

What makes this field kit so portable is that the KX2 is one of the most compact general coverage HF transceivers on the market.

It’s certainly the most compact (at time of posting) when you realize that two important components–the battery and ATU–are internal options.

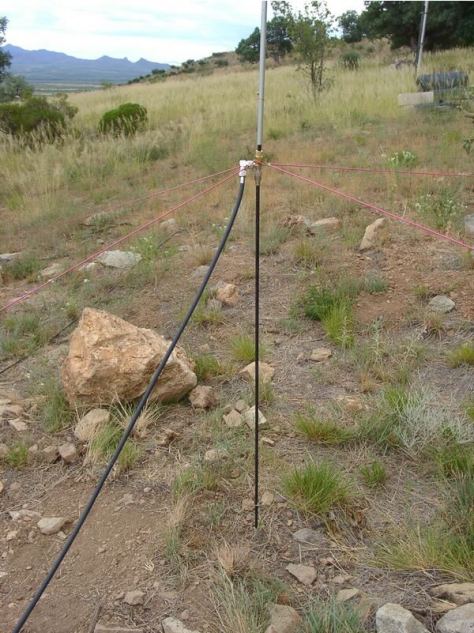
The AX1 antenna is also incredibly compact–it comes apart in such a way that no one component is longer than about 6 inches. What you see in the photo above is the entire radio and antenna system.

Yes: A Compromise

Sure–and let’s get this out of the way right up-front–the AX1 is a compromised antenna, and being a massive fan of simple wire antennas myself, I know a properly deployed wire in a tree is going to provide better gain each and every time.

Also, people who live in more remote parts of the world–say, Hawaii, the Yukon, or Perth, Australia–where the amateur radio density is sparse within their propagation footprint, the AX1 will not be as productive as it is for me here in the eastern half of North America. Continue reading Coffee, QRP, & Question: Is any field kit more portable and versatile that Elecraft’s KX2/AX1 combo?

Video: Wayne (N6KR) demonstrates the Elecraft KH1 at Pacificon SOTA Luncheon

Many thanks to Rex (KE6MT) who shares the following video made at the at the Pacificon SOTA Luncheon (2023):

Click here to view on YouTube.

The Arizona 10-Point Madness Summit-to-Summit Event

The Arizona 10-Point Madness Summit-to-Summit Event

by Charlie Brown (NJ7V)

“How can I accumulate a bunch of summit-to-summit points all at once, for Summits on the Air?”  This was a question Pete Scola WA7JTM had been pondering for years.  He initially thought it might be fun to choose several 10-point summits that were near each other, have a person operate on each summit, and then rotate to a new summit every so often.  Eventually, this idea gave way to the Arizona 10-Point Madness Summit to Summit event.  With an invitation from Pete, all willing SOTA participants gathered on a 10-point summit on September 19th, 2018, and 10-Point Madness was born!

The Arizona 10-Point Madness Summit to Summit event is a casual on-air gathering, where Summits on the Air participants set up their ham radio station on the top of summit . . .  at approximately the same time.  Operators are on simultaneously so that there is an overwhelming availability of summit-to-summit contacts to be made.  This event occurs every year on the first Saturday of October.

Fred (N7PN) 2023 10-Point Madness

There was a focus on 2-meter contacts the first year we did this.  We learned quickly during the 2018 inaugural event that it was true madness for 31 ham radio stations to contact 26 nearby summits all at the same time, especially on 2 meters.  We tried alternate 2-meter frequencies and even considered a net control operator.  However, in the end, we learned to just wait patiently for our turn to call for contacts on 2-meters, or if it was extra busy, we just moved off to HF for a while and returned later.  As a courtesy, we now monitor 2 meters and return to it throughout the event to give the operators a chance to come and go.

Adam (K6ARK) 2022 10-Point Madness

That first year was amazing.

We collectively made 1104 contacts, 354 of which were VHF.  And yes, we scored a lot of summit-to-summit points.  We averaged 140 points each, with a grand total of 4324 s2s points for all the Arizona stations.  We announced the event to several online platforms and invited others to participate, and had a few people join us from outside of Arizona. All of them had fun and saw good results as well.

Our 6th annual event concluded a few weeks ago.  Participation has been steady in Arizona but we have seen an increase outside of Arizona.  We had about the same number of Arizona participants as years past, but total contacts increased to 1403.  The average s2s points per participant increased to 169, with a grand total of 4906 s2s points.  I was amazed that Keith KR7RK earned 400 s2s points this year for this event – a new record, I think.  These are only numbers for Arizona participants.

I read on social media that Josh WU7H, who was participating from Washington state, had 55 total s2s contacts and only a fourth of them were from Arizona.  We received some statistics from stations in Georgia, South Carolina, Wisconsin, Texas, Nevada, Washington, Oregon and more.  It is a lot of effort to compile the statistics but it would be interesting to include people outside of Arizona in the future.

Joe (KE9AJ) 2022 10-Point Madness

Here are a few things that have stood out to me over the past 5 years for this event:

In 2019, Josh WU7H and DJ WW7D participated from Washington.  They won the award for most challenging activation in my opinion, operating from a snow packed summit in below freezing temperatures.  But that didn’t deter them!  They continue to come back year after year.  They are tough!

In 2022 my friend Adam K6ARK was participating on a summit in California.  I was able to make a 2-meter CW and SSB contact with him from my summit, 327 miles away.

Several others in Arizona also made contact with him.  While not record breaking, this is long haul for 2-meters.  And this year, I was able to make 19 DX contacts with one summit-to-summit into Germany.  It seems like there are a lot of DX contacts to be made every year, but this was a record for me.

Finally, this year Pete WA7JTM made a contact on every single band from 1296 MHz down to 1.8 MHz.  That’s 16 different bands.  How amazing is that?

The point is, you can make this event into whatever you want.  Experiment and try new things because there are people listening.  And of course, you do get a ton of summit-to-summit points.

WW7D on High Rock 2019 10-Point Madness
Josh WU7H and DJ WW7D operated from High Rock

Dave AE9Q sent an email out to the Arizona participants and inquired about the radios, antennas, and power sources used for the event and as you can probably guess, the list was very diverse.  I’m not exaggerating.  Just about every QRP HF radio, VHF/UHF handheld, Antenna, and power source you can think of was used – Log periodicals, mono-band double-bazookas, double zepps, whips, Yagi’s, end-feds, QRP and QRO HF radios of all types, HT’s with microwave capabilities, mobile vhf radios, amplifiers, lipo and lifepo batteries.  The list is long.

Sandy (W7NRS) 2023 10-Point Madness
Ray (W7USA) 2023 10-Point Madness

We recognize that other SOTA associations do similar events, like the Colorado 14er event and the Pacific Northwest Not Quite Fourteener event, to name a couple.  These are all great opportunities to get on the air and have fun with QRP radio in the field.

I’m sure you have heard about how amazing the SOTA community is.  If you get out on the summits or frequently chase, your call sign becomes familiar to others.  So much so that you feel a personal connection and sense of comradery every time you make contact with them.  During these events you see many of your good on-air radio friends.  It’s like a reunion.

The Arizona SOTA association thanks the many chasers and participants outside of Arizona who make this event more and more exciting every year.  We hope to see even more participate next year.  Just pick a summit, put your alert on the sotawatch.sota.org.uk web page, get on top of the summit and have a blast!

Readers: Do yourself a favor and subscribe to Charlie’s YouTube channel Red Summit RF. It’s chock-full of SOTA radio goodness. I’m also a fan of the All Portable Discussion Zone podcast–subscribe if you haven’t already!

Introducing the new Elecraft KH1 handheld-portable CW QRP transceiver

WG0AT holding the Elecraft KH1

From Elecraft:  something BIG, in an incredibly small package…!

Just this morning, Elecraft introduced the new Elecraft KH1.

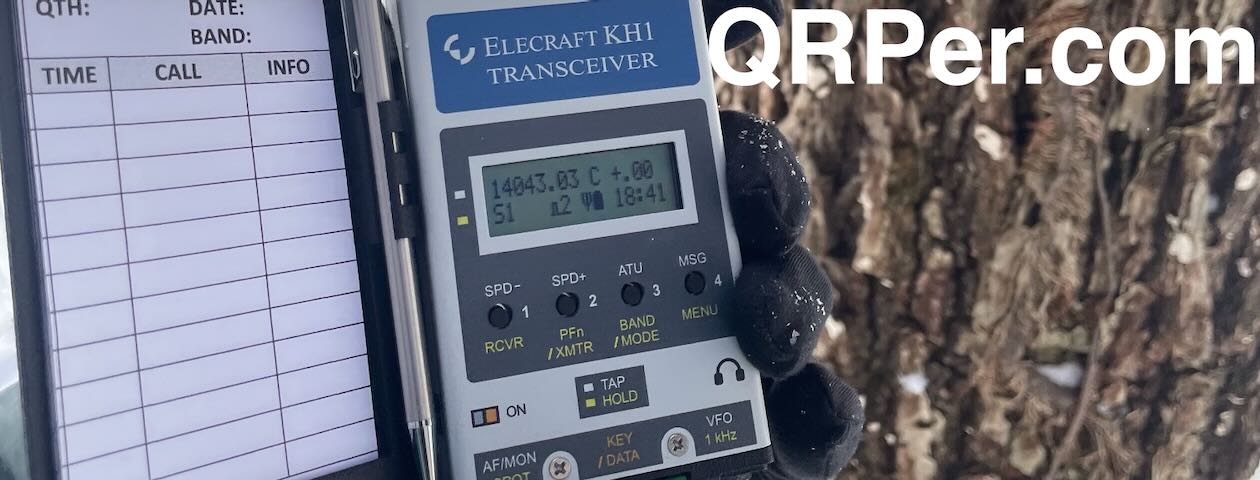
In brief, the KH1 is a five-band (40, 30, 20, 17, and 15 meter) handheld QRP CW transceiver with options for an internal battery, internal ATU, whip antenna, and fold-out logging pad.

Exciting!  And if you’d like to get the scoop on this new handheld radio–– along with photos––we’ve got it here.

Q: What is the Elecraft KH1?

WG0AT with the KH1 making contacts pedestrian mobile.

A:  The Elecraft KH1 is a compact, five-band CW QRP transceiver designed for both handheld and tabletop operation. Indeed, the “H” in the model number signifies “Handheld.”

To be clear, although it is quite small, the KH1 isn’t just a tiny radio:  it’s ergonomically purpose-designed, to be a pedestrian-mobile CW station.  It’s lightweight, easy to hold and use, and will fit both right and left-handed operators. With the optional “Edgewood Package,” it also includes a fold-out logging pad.

Q: How much does the Elecraft KH1 weigh?

A: With all options (ATU, Antenna, Battery, and logging pad) the KH1 weighs in at a featherweight 13 oz.

Q: What features does the Elecraft KH1 offer?

A:  Here’s a feature list from the Elecraft brochure:

KH1 features:

  • 40-15 meter ham bands
  • 6-22 MHz for shortwave broadcast band listening
  • CW mode; 5 watts, all bands
  • ATU includes whip & high-Q inductor for 20/17/15 m
  • 2.5 AH Li-Ion battery & internal charger
  • CW decode & 32K TX log
  • Scan/mini-pan feature
  • RTC [Real-Time Clock]
  • Full remote control
  • Speaker
  • RIT, XIT, & VFO lock
  • Light gray case stays cool even in bright sunlight
  • Three CW message memories with chain and repeat functions

Like nothing else on the market…

The KH1 design is all Elecraft and built on several years worth of design iterations. It is, no doubt, fueled by Wayne’s passion for handheld portable HF.

Again, the KH1 focuses on ergonomics that would make handheld operation not only easy, but enjoyable.

The two main multi-function controls (the AF Gain and Encoder), for example, are located on the bottom of the radio. This gives the operator easy and ergonomic access to the controls while the radio is in-hand.

The four buttons on the top of the radio default to the most useful functions one would need while operating portable. Using them to dig deeper into the menu levels, however, is also intuitive and well thought-through.

While the KH1 menus and features are naturally not as deep as those of the KX2 and KX3, it’s impressively well-equipped for a radio this size. At the end of the day, it’s a much more simple field radio––by design––than its KX2 and KX3 predecessors. If anything, it’s more akin to the venerable KX1!

(Source: Elecraft)

The KH1’s paddles (KHPD1) are located at the bottom of the radio––they flip down for transport, and up during use, so your fingers are well away from the AF and Encoder knobs.

The KH1 has an optional internal ATU that is not as wide-range as that of the KX3, KX2, or T1, but is much better than that of the KX1. I understand that it’ll match most of what you throw at it.

Wayne told me that one of the most complicated parts of the KH1 design was the fold-out logging pad. He wanted the logging pad to be functional for one-handed operation. The indents around the loose-leaf logging sheets allow you to pull out a completed sheet and slip it behind the others in the stack.

The logging sheets are available as a PDF download; simply print and cut. No doubt, the format would be easy to modify.

Whipped!

This is the part I love: the KH1 is designed to operate with a telescoping whip antenna.

Basically, you unclip the whip from the side of the radio (assuming you have the ATU/whip option) and screw it on the top of the top. The ATU will match the whip antenna––there’s a mechanical slide switch that selects 15/17 m or 20 m high-Q inductance for whip––or an external antenna on the BNC port.

If you’ve been reading my field reports and watching my videos, you know I’m a huge fan of the Elecraft AX1 antenna. The KH1 basically has the option of a built-in AX1 antenna…Just take my money!

Speed…and stealth

If the counterpoise is already attached and wrapped around the body of the KH1, you will be able to deploy the station and be on the air in about 20 seconds.

As many of you know, I’ve always said that the secret power of the AX1 and AX2 antennas is speed of deployment. The KH1 allows for an even speedier deployment.

This will be most especially appreciated when activating summits in the winter where exposure to the elements from simply setting up the antenna and station will often make your hands go numb.

Also, the KH1 is so low-impact and low-profile, you’ll be able to activate parks that might otherwise be off limits to an HF field installation. I know of one urban park that, with permission, I’ll definitely use the KH1 to activate; it has no park benches and no trees, just a strip of grass around a historic building in the middle of a city. Perfect for the KH1!

KH1 versus KX2?

The KH1 and KX2 are very different animals. Elecraft actually produced this comparison chart to help potential customers make a purchase decision.

KX2 & KH1 Comparison Chart (PDF)

My advice? If you have a KX2 on order, don’t cancel it.

The KH1 is not a KX2 replacement. The KX2 is a much more capable radio. The KH1, however, is a radio focused on ultra lightweight, low-profile, pedestrian-portable, CW HF field operation.

A KH1 review?

Yes, it’s coming! I will purchase and review the KH1 “Edgewood” package. My unit should ship next week, so look for updates and photos, and I will push those field reports and videos to the front of the line.

To be completely transparent:  I have been in a volunteer group of testers for the KH1. Other than this, the only real affiliation I have with Elecraft––besides knowing Wayne, Eric, and some of their staff––is being a long-time customer. I own, or have owned, every radio they’ve ever made, save the K3 and K4 lines. And it’s Elecraft that makes my favorite field radios.

Product Brochure

Click here to download the KH1 product brochure.

Pricing & Availability

As with all Elecraft products, you’ve many options in terms of pricing.

Basic KH1 ($549.95 US):  Including the KH1, power cable, USB cable, manual

KH1 Edgewood Package ($1,099.95): Includes all BASIC KH1 items, plus all options (KHATU1 Antenna Tuner, KHPD1 Keyer Paddle, KHLOG1 Logbook Tray w/mini-ballpoint pen, KXBT2 rechargeable Li-Ion battery, KHIBC1 Internal Battery Charger,  and ES20 Custom zippered carrying case)

Click here to view the Elecraft KH1 on the Elecraft website.

Field Radio Kit Gallery: W7UDT’s QRP Labs QDX Digital Mode Field Kit

Many thanks to Rand (W7UDT) who shares the following article about his portable field radio kit which will be featured on our Field Kit Gallery page. If you would like to share your field kit with the QRPer community, check out this post.

Rand writes:


My Digital HF Field Kit…

by Rand (W7UDT)

Thomas & the gang… this is (de) Rand W7UDT

The QRP Labs QDX is yet another, brilliant creation from genius Hans Summers. Hans has created a cult following, with an assortment of kits, and assembled bargains of fun!

Many of you know this, and have his gear. And as sexy and alluring my Elecraft KX2 may be, it’s often, as a minimalist, that I reach for my QCX Mini(s), or my QDX (Hi & LoBanders).

I guess it’s a touch of OCD that compels me to minimize and simplify my field kits. (Yes, I need help!) And yet, if you too, upon reading this confession, find it all too interesting and read on.

Here’s the QDX field deployment in a nutshell…

Deploy the antenna, a LNR Precision Trail Friendly End Fed Wire. With a toss and some luck, the weight clears the chosen branch and the antenna is hoisted aloft.

Often I operate along the Boise River Greenbelt, just off the path near the river. I find that perfect spot to operate.

The flow of water, doesn’t make too much noise, and doesn’t matter with this mode, FT8. Only that it has a sunny view, and it’s comfortable and dry.

The QDX transciever & DC Pack is velcro’d to a clipboard, and once secured, I attach a 6′ section of RG316 and an inline 1:1 balun. The BNC coax is then connected. A trusted prussick knot, attachs the coax and clipboard, and provides the strain relief and work surface needed to operate.

8″ USB c/b cable connects the QDX with my Samsung Galaxy S20 Ultra, to the QDX. The transiever is powered by a 3aH 12v DC Pack of (3) 18650 LiFePo4 batteries. With the swich thrown, it archs to life. I then open the FT8CN app on my Samsung, select the Comm Port, and Wow! What fun!

The software does all the work, and even logs the contacts automatically. An occasional touch to the screen, can have you operating at will. It’s a free app on GitHub, that will pleasantly surprise and surpass any low estimations of ‘Free Chinese Stuff.’

All this can be viewed on YouTube, watch Linas LY2H.

Here’s my assembled field kit for my QDX (LoBander). I absolutely love this thing!

It’s a very tight kit. As simple as Hans ‘the Man!’ can make it. What a capable marvel of creative genius. Here’s a pic…

These modes offer error correction, and incredible Dx. The software function flawlessly, and automatically logs the contacts. Hang it high, and the antenna is happy! Easy, cheap and fun! 72 de W7UDT Rand

Notes ~ FT8, JS8 Call & RTTY Only, using the amazing & free FT8CN software.

Field Radio Kit Gallery: K6ARK’s Ultra Lightweight QRP Field Kit

Many thanks to Adam (K6ARK) who shares the following article about his portable field radio kit which will be featured on our Field Kit Gallery page. If you would like to share your field kit with the QRPer community, check out this post.


by Adam (K6ARK)

To me, the pinnacle of portable amateur radio involves Summits On The Air (SOTA) activations in particularly remote and hard-to-reach areas.  Many require long approaches, difficult climbs, and high-altitude travel to get there, so minimizing the size and weight of my portable radio kit is of utmost importance.  To that end, I’ve managed to refine my smallest fully functional kit down to quite a compact and light-weight package.

An MTR2B which operates on 20 m and 40 m.  It has been repackaged into a custom-designed 3d printed case is the core of the system.  It has been repackaged into a 3d printed case which cuts the weight of the radio by about 60% from the original aluminum and steel case, and shrinks it in thickness by about 50%.

The key is built-in to the rig – a capacitive touch design I adapted from the M0UKD design.

Brass cap nuts installed on the corner of the case provide the capacitive sense touch points for the left and right paddles.

A 9v form-factor rechargeable lithium-ion battery with a USB-C charge port powers the system.  The lower voltage reduces my transmit power to 2.5 or 3 watts, but also provides a bit more protection for the final amplifier transistors when my antenna setup is less than ideal.  It has sufficient capacity to run this power-efficient little rig for a few hours from a summit.

The antenna is a 40m End Fed Half-wave with a matching unit built from an FT50-43 size toroid directly onto an RCA connector and protected with heat shrink tubing.  28 ga PTFE insulated stranded copper wire forms the radiating element, and it’s stored on a down-sized 3d printed winder of my own design.

The primary components of the kit weigh in at just 4.8 oz (136 g), and the padded camera case adds another 1.8 oz (51 g).   Although the case isn’t particularly light, it provides excellent protection to the rig.

And because most of the summits I bring this rig to are void of trees, a compact telescopic pole is an essential addition.  The one I typically bring packs small and weighs in at just 5.5 oz (156 g) but provides about 10 ft of elevation above the ground.  The cap is leashed so I can’t lose it, and the tube is coated in heat shrink for protection when I cram it into the rocks for support.

In the end, it’s quite a capable kit for just 12.1 oz (343 g) of pack weight.

Check out my ‘Sierra Solitude’ video series as a prime example of a trip where this setup is perfect for my needs.

73 DE K6ARK

Readers, do yourself a favor and bookmark Adam’s YouTube channel which is chock-full of SOTA and ultralight radio goodness!

The prettiest activation ever – Spray Valley Provincial Park

As always there are lots of links within the article. Click one! Click them all! Learn all the things! ?

Ahhh .. few things in life compare to the view one sees while lakeside in the mountains. The flat water is a stark contrast to the towering mountains nearby. There is at least a 4000′ difference in height between the two at my destination in this story. For me, nothing so succinctly tells me where I fit in the world as when I stand among these giants.

So It was with that big goal in mind that a drive through the mountains of Alberta’s Kananaskis Country region was called for. The drive would take me through sweeping vistas, over high mountain road passes, along nearly 100km of gravel roads in no-cell-service backcountry while racking up nearly 400km of travel in one day.

Along the way I activated two never-before done parks in the POTA system and scouted out one more to be done at a future date. This is the story of the lakeside activation… but first, watch the short video to understand why I’m gushing on the beauty of this particular spot and written this atypical (for me) article about the activation itself.

The Drive to the activation

Overview of the trip. Darker lines indicate gravel roads. First activation is along the westernmost gravel road along the lakeshore.

For those of you that want to replicate this trip, here’s the route I took shown on the map above.

From just before when I turned north off Highway 541 to Highway 40, and until I reached Canmore, there is zero cell service. Same again turning onto Highway 68 from 40 until Bragg Creek.

Alberta has much backcountry that is well beyond cellular range. Working at The Candy Store(tm) as I do, I have access to items like the Zoleo Satellite Communicator to give me text messaging and SOS capabilities should I need them. Before I discovered SOTAmat, I used the Zoleo for all of my spotting in backcountry.

Continue reading The prettiest activation ever – Spray Valley Provincial Park

Testing the Ionosphere: A 100 milliwatt to 1 watt POTA Activation During a CME? Why not!?

Sometimes, I like the odd “exercise in futility.”

I enjoy shaking up routine and since POTA and SOTA activations are my routine, they end up being the shakers.

On Monday, September 18, 2023, I found out that our planet was rotating into a large CME (Coronal Mass Ejection). This CME made all of the space weather news and we planned for either some potential radio blackouts or at least very unstable conditions.

As I’ve said many times before, I never let the potential for poor propagation stop me from hitting the field. Don’t let it stop you either.

Lake Norman State Park (K-2740)

I had a full afternoon to play radio, so I made my way to Lake Norman State Park.

En route, I tried to think of a way to shake up the activation a bit. I planned to activate at the same spot I had during my last visit because I knew the park’s main trail system was still closed and, frankly, I wanted to take advantage of the EV charger at the visitor’s center again!

I’d packed MW0SAW’s End-Fed Half-Wave (the gift that keeps on giving, Steve) and I did have one new radio toy (more on that later).

I also had a lot of time–at least, more than I normally do during a POTA activation–so I thought it might be fun taking my KX2 down to the lowest power setting it has: 100 milliwatts.

I’ve activated parks with 100mw before, but never intentionally on a day when I knew propagation would be poor.

I figured with enough time, maybe I would get the ten contacts needed for a valid POTA activation.

If not, it would be fun trying!

Why Milliwatting?

At the end of the day, I think taking our radios and antennas to their low-power extremes gives us a taste of what we can actually do with so little signal.

I remember shortly after I bought my first Elecraft KX1 in 2008, I was speaking with a local ham and he told me that a maximum output of three watts was pretty useless and that I really needed a minimum of five watts if I expected to make any contacts.

Part of me did feel like perhaps I’d bought something more akin to a toy–fun to look at and hold, but not terribly practical.

Then I started using that KX1 to make contacts and even carry on extended rag chews. Turns out, three watts gets a lot done!

Today, I’ll often run my MTR-3B with three watts or even less when activating a summit and the results are simply outstanding–fabulous DX and contacts galore.

I know 100mw is a proper compromise, but I like knowing what I can achieve with so little. Tinkering with it in the field and listening to signal reports (also reading RBN stats) gives me a good idea.

In an emergency situation? If I could only push 100mw into a decent antenna, I know it wouldn’t be ideal, but I know it wouldn’t be futile either.

Begali Adventure Dual

Another activation motivation was the opportunity to test my new-to-me Begali Adventure Dual paddles. Continue reading Testing the Ionosphere: A 100 milliwatt to 1 watt POTA Activation During a CME? Why not!?

Check out US7IGN’s “PFR-5” QRP Radio!

My good friend, Wlod (US7IGN), sent me the following message recently and has kindly allowed me to share it here on QRPer:

Hi Thomas,

I was going to write to you too. I saw your posts on QRPer.com about QRP field kits and decided to share my collection of QRP radios, which I keep now. One of them is my homemade one.

I called it PFR-5 because it has 5 bands, unlike original PFR-3, which was taken as a basis.

The rest are my friends’ radios that I’m temporarily storing. Tulip/Tulipan SDR from SP3OSJ, ELECRAFT KX3, and copy of Mountain Topper and original PFR-3.

I did not compare them, because this needs to be done outside the city where there is no noise and you can evaluate their RX performance, which I cannot do now for obvious reason.

Have a good day!


73 de US7IGN!

Thant’s brilliant, Wlod! I think you may have the only PFR-5 in the world! Ha ha! I love how you marked it as the “Ukrainian Edition” and gave it that brilliant image on the front face.

Thanks for sharing with us, OM! I dream of the day you can take these radios to the field and give them a proper comparison. 

Guest Post: The Full Moon, Eels, and /P Operation on Mount Peyton, NL, Canada

VO1DR on top of Mount Peyton

Guest Post: The Full Moon, Eels, and /P Operation on Mount Peyton, NL, Canada

by Scott (VO1DR)

Introduction

I have been eyeing Mount Peyton in central Newfoundland for years as an attractive spot for /P HF operation.  Even before my radio adventure to Mount Sylvester (reported earlier in QRPer.com), I have been seeking a way to get up Mount Peyton.  Like Mount Sylvester, Mount Peyton is an inselberg of granite protruding above the glacial plain of central Newfoundland.  However, Mount Peyton is even larger and higher; an elongated ridge about 800 m long reaching up to 487 m (1,599 ft) above sea level.  For SOTA enthusiasts, it is designated VO1-CE-005, multiplier 4.

Figures 1 and 2 show the location local topography around Mount Peyton.

Figure 1 – Highway map of central Newfoundland showing Mount Peyton and landmarks
Figure 2 – 1:50,000 scale map I used during trip showing topography near Mount Peyton and our hiking route.  Each block is 1 km on a side.

Mount Peyton is a case of “so near and yet so far”.  Just west of Gander, this ridge is visible in the distance south of the Trans-Canada Highway (the main arterial highway traversing the island of Newfoundland).  However, in summer there is no trail directly to the top, and access to its base is only via rough ATV tracks and wet bogs.  One must get to the base of the mountain, then hike overland to the south side and climb a long inclined cleft in the hillside to the top.  This cleft is the surface trace of a fault in the underlying granite (see route on Figure 2).  By contrast in winter, Mount Peyton is a popular and readily accessible snowmobile destination with dozens of machines roaring up this same cleft on a thick blanket of snow.

The Full Moon and Eels

Looking at maps and Google Earth, an approach on foot would entail a three-day hiking trip.  While this sounds delightful, my current living situation would not permit this, and in addition I have no hiking buddies able and willing to make such a commitment.  So, it became clear I needed all-terrain vehicles (ATVs) to get quickly to the base, so we could do the entire trip in one long day.

I don’t own an ATV and after multiple attempts over this summer to find any ATVers interested in such an adventure, there were no takers.  Apparently ATVers like to ride, but don’t like to get off their machines ?. I finally found a local outfitter (Paul) who not only could supply ATVs, but had hiked multiple times to the top of Mount Peyton – a perfect fit.  For safety, I needed at least one extra person to go to the top.  All other potential radio or hiking companions fell by the wayside for various reasons, so it became just me and Paul.

As is common in rural Newfoundland, Paul is a Jack of all trades and is also a commercial eel fisherman.  American Eels (Anguilla rostrata) have a fascinating life history (https://en.wikipedia.org/wiki/American_eel) and inhabit freshwater rivers and streams in Newfoundland.  Paul harvests them in conical net traps anchored to the stream bottom (Figure 3).

Figure 3 – An eel trap in place in a local stream.  Eels move into the large mouth and get trapped in the bottom cage.

He told me that eels run during the new moon and stay put near the full moon.  Now doesn’t that ring deep bass notes of evolutionary biology!?  Since eel fishing is an important part of Paul’s income, we agreed to fit in my radio around his eel-catching.  He would be available around the full moon when the eels were sluggish; toward the end of September, the moon was full on the 29th.  Given the local weather, we settled on Tuesday, September 26 as our day.  Isn’t life fascinating – the moon controls eel movement, which controls human movement, which controls our /P radio expedition!

Getting There was Half the Fun

I drove from St. John’s to Paul’s cabin west of Glenwood, NL on the afternoon of Sep 25, on the beautiful shores of Indian Arm Pond (Figures 4 and 5).

Figure 4 – Paul’s cabin on Indian Arm Pond
Figure 5 – Shoreline of Indian Arm Pond

We planned an early departure on the ATVs.  Sun-up was around 7 am and sun-down was about 7 pm, so we had 12 hrs of daylight to work with.  September 26 dawned bright and clear (Figure 6) and we were soon packed and underway on two ATVs (Figure 7).  We drove for over 2 hrs on a wide range of roads, tracks, and rough trails to a point where we dropped the ATVs and started hiking (one way distance 26.7 km or 16.6 mi).

Figure 6 – Dawn over Indian Arm Pond on September 26.  Time to get moving!
Figure 7 – Scott on Polaris 450 ATV ready to go.  Black lumbar pack on right.  Blue survival bag on left.  Pole strapped on my left.  Radio and spare water in elbow compartments.
Figure 8 – Turtles are huge in Newfoundland
Figure 9 – Passing over beautiful Neyles Brook.  This is quintessential central Newfoundland scenery.
Figure 10 – Magnificent Mount Peyton looms in the distance.  This view is toward the nearly-vertical NW face.  We are about half-way there.  After dropping the ATVs, we will hike around the right end and climb up the far (SE) side.

This trip reinforced that I am not a motor sports guy.  The ATV ride was long, bone-jarring, and noisy.  Buying an ATV at great expense and doing this for “fun” is a mystery to me; and forget about seeing any wildlife.  But, hey, the ATVs got us there; we couldn’t have done this trip without them! Continue reading Guest Post: The Full Moon, Eels, and /P Operation on Mount Peyton, NL, Canada