
Guest Post: The Full Moon, Eels, and /P Operation on Mount Peyton, NL, Canada
by Scott (VO1DR)
Introduction
I have been eyeing Mount Peyton in central Newfoundland for years as an attractive spot for /P HF operation. Even before my radio adventure to Mount Sylvester (reported earlier in QRPer.com), I have been seeking a way to get up Mount Peyton. Like Mount Sylvester, Mount Peyton is an inselberg of granite protruding above the glacial plain of central Newfoundland. However, Mount Peyton is even larger and higher; an elongated ridge about 800 m long reaching up to 487 m (1,599 ft) above sea level. For SOTA enthusiasts, it is designated VO1-CE-005, multiplier 4.
Figures 1 and 2 show the location local topography around Mount Peyton.


Mount Peyton is a case of “so near and yet so far”. Just west of Gander, this ridge is visible in the distance south of the Trans-Canada Highway (the main arterial highway traversing the island of Newfoundland). However, in summer there is no trail directly to the top, and access to its base is only via rough ATV tracks and wet bogs. One must get to the base of the mountain, then hike overland to the south side and climb a long inclined cleft in the hillside to the top. This cleft is the surface trace of a fault in the underlying granite (see route on Figure 2). By contrast in winter, Mount Peyton is a popular and readily accessible snowmobile destination with dozens of machines roaring up this same cleft on a thick blanket of snow.
The Full Moon and Eels
Looking at maps and Google Earth, an approach on foot would entail a three-day hiking trip. While this sounds delightful, my current living situation would not permit this, and in addition I have no hiking buddies able and willing to make such a commitment. So, it became clear I needed all-terrain vehicles (ATVs) to get quickly to the base, so we could do the entire trip in one long day.
I don’t own an ATV and after multiple attempts over this summer to find any ATVers interested in such an adventure, there were no takers. Apparently ATVers like to ride, but don’t like to get off their machines ?. I finally found a local outfitter (Paul) who not only could supply ATVs, but had hiked multiple times to the top of Mount Peyton – a perfect fit. For safety, I needed at least one extra person to go to the top. All other potential radio or hiking companions fell by the wayside for various reasons, so it became just me and Paul.
As is common in rural Newfoundland, Paul is a Jack of all trades and is also a commercial eel fisherman. American Eels (Anguilla rostrata) have a fascinating life history (https://en.wikipedia.org/wiki/American_eel) and inhabit freshwater rivers and streams in Newfoundland. Paul harvests them in conical net traps anchored to the stream bottom (Figure 3).

He told me that eels run during the new moon and stay put near the full moon. Now doesn’t that ring deep bass notes of evolutionary biology!? Since eel fishing is an important part of Paul’s income, we agreed to fit in my radio around his eel-catching. He would be available around the full moon when the eels were sluggish; toward the end of September, the moon was full on the 29th. Given the local weather, we settled on Tuesday, September 26 as our day. Isn’t life fascinating – the moon controls eel movement, which controls human movement, which controls our /P radio expedition!
Getting There was Half the Fun
I drove from St. John’s to Paul’s cabin west of Glenwood, NL on the afternoon of Sep 25, on the beautiful shores of Indian Arm Pond (Figures 4 and 5).


We planned an early departure on the ATVs. Sun-up was around 7 am and sun-down was about 7 pm, so we had 12 hrs of daylight to work with. September 26 dawned bright and clear (Figure 6) and we were soon packed and underway on two ATVs (Figure 7). We drove for over 2 hrs on a wide range of roads, tracks, and rough trails to a point where we dropped the ATVs and started hiking (one way distance 26.7 km or 16.6 mi).


This trip reinforced that I am not a motor sports guy. The ATV ride was long, bone-jarring, and noisy. Buying an ATV at great expense and doing this for “fun” is a mystery to me; and forget about seeing any wildlife. But, hey, the ATVs got us there; we couldn’t have done this trip without them!
We Were Not Alone
September is the beginning of big game hunting season in Newfoundland (including caribou, moose, and black bear). We wore hi-visibility clothing to avoid being shoot at. While the noise from the ATVs scared every living thing away from view, we did see evidence of recent wildlife, including fresh droppings and tracks from caribou, moose, coyote, and fox. Figure 11 shows a fresh caribou dropping (smaller than moose). This was less than a day old and will dry into a pile of small pellets. Figure 12 shows a dropped moose antler.


View from the Top
The view from the top was stunning. I am so glad we waited for a bright, blue-sky day. Figure 13 shows a 360o panoramic view from the top, panning left to right starting from the ENE end of the ridge. You can blow Figure 13 up to see details. Panning left to right you can see prominent landmarks, lakes and rivers. The “Boobies” are the local name given two anatomically-shaped hills used as waypoints and landmarks.
During our stay at the top, we spotted a single large stag caribou alone in a bog (see Figure 13), sniffing the fall air. He was magnificent, even from ~3 km distance through binoculars. This being rutting season, he was seeking five or six does to make up his harem. He will keep that group together and protected until mating is done.

The early Newfoundland geologist, James Howley, visited this very spot on Mount Peyton in 1874. Needless to say, his trek was tougher and on foot (from the coast) and without the benefit of roads, power lines, or ATV tracks. But it would have been markedly quieter and more serene, free of the noise of traffic, ATVs, and planes, and the cast-off trash from careless people on machines. In his annual geological report he wrote:
“The scene which presents itself on all sides from this isolated summit is indescribably grand.”
This still holds true 149 years later.
At our feet was another beautiful sight, a luxurious growth of club moss (Lycopodium horizontalis).

Radio Set-up and Contacts
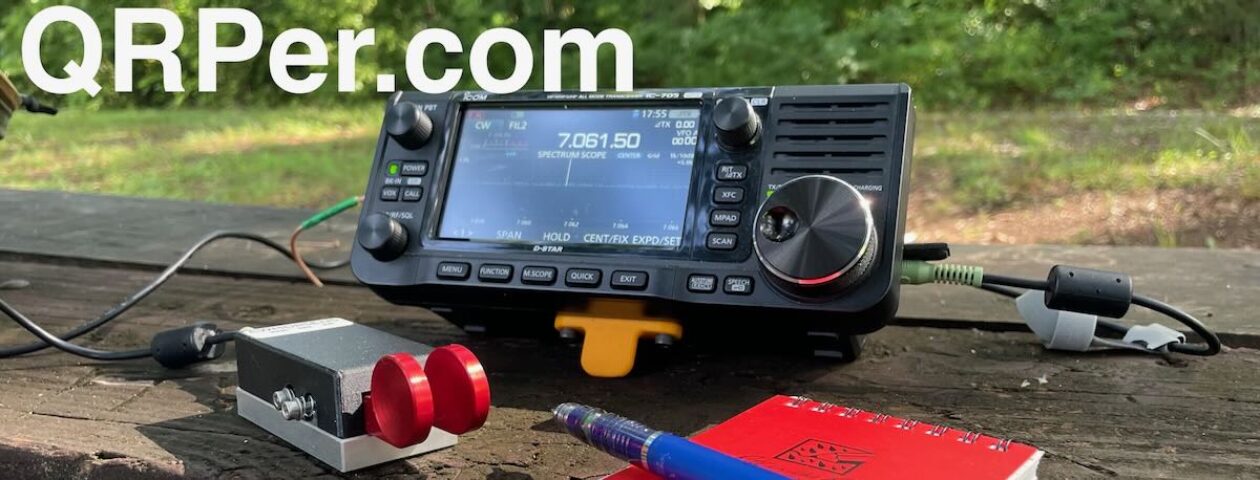
Radio: Icom IC-705 transceiver
ATU: Homebrew ZM-4 ATU built into Altoids tin (see article in Sprat #196)
Power source: 10-cell NiMH AA battery bank; plus internal IC705 battery
Antenna: 18.3 m (60 ft) random wire deployed on 5.8 m (19 ft) telescoping fibreglass pole. Feed point 0.6 m (2 ft) off ground at base of pole through homebrew 9:1 impedance coupler. Antenna wire ran vertically from coupler for 5.2 m (17 ft), then sloping down to ENE for 13.1 m (43 ft); tied off at top of a 1.2 m (4 ft) hiking pole. Slightly raised single radial 5.0 m (16.5 ft) long extended from ground side of coupler WNW (axially opposite to antenna wire); tied off to rock 0.15 m (6 in) above ground.
Figures 15 and 16 show details of my radio set up.


I had packed the IC-705 (without its exoskeleton frame) in a wrap of ½ in dense foam packing sheet, inside of a plastic .30 cal ammo box, along with battery pack, paddle, cables, mic, and ATU. All was snug and firm inside. This turned out to be important as the ATV ride was rough with lots of jolting and banging. I checked the radio before we started our ascent hike and it worked fine; a tribute to solid construction by ICOM.
For operating, I rigged a single ¼-24 bolt through a hole in the sidewall of the ammo box to mount the rig on top when the ammo box was laid on its side. This made a stable platform in field, up out of the mud and crud, and at a good angle up for viewing. My operating position was on a piece of nylon tarp laid on ground. I built up a seat of rocks next to it.
A 60 ft RW is my current go-to antenna for /P use. I found I always want to band-hop, especially when bringing a multi-band rig. So, I end up bringing my Altoids ATU. Since I always have that, I decided to just bring the 60 ft RW and leave resonant and multiband EFHW antennas home. This RW is quick to set up and has always tuned easily on all bands I’m interested in (40-10 m). You could extend this to 72 ft for better performance on 80 m. If antenna set-up space is limited, I just deploy less of the 60 ft length (choosing 29 ft, 36 ft, 41 ft or 54 ft length, whichever suits the site). Little wraps of white PVC electrical tape mark those lengths on the 60 ft RW. I tightly coil and wrap the excess wire at the far end and it becomes invisible at RF. I put up as much wire as space allows, following the “more wire higher” mantra. The weight of wire antennas is negligible, so I bring a second RW as a backup.
While on top of Mount Peyton, 20 m and 17 m were open, 15 m less so, and 10 m was just cosmic hash. The noise floor was so low, the waterfall display was a solid dark blue – hardly any noise! Signals just popped when you tuned onto them – a delight. I listened around the low ends of 20 m, 17 m and 15 m and made three good contacts:
- W1AW/3 in Pa on 20 m with 3 W. RST “5NN” (flattering, but unrealistic; see “Soapbox” below). No great shakes for QRP DX, but affirmed my system was working.
- DK4RW, Wolf near Frankfurt, Germany. 3 W on 17 m. RST 449. No that sounds legit; thank you Wolf for useful info. 4,311 km/ 3W = 1,437 km/W. Good stuff!
- DJ7PW, another Wolf in Rechberghausen, Germany (near Stuttgart), 3 W, 17 m, RST 549. Also sounds legit; thanks Wolf! 4,569 km/ 3W = 1,523 km/W, woohoo even better!
I heard many Europeans and North America stations as far west as Arizona. I had a sked arranged with radio pals Don (ND6T) in California and Dan (N7CQR) in Oregon, but we did not connect. I tried SSB with 10 W on 17 m (but no luck). I operated for about two hours. I’m not an *OTA guy, so three contacts including two robust DX QSOs were very satisfying for my outing, especially those with authentic RSTs.
The Kite Lives to Fly Another Day
I had developed a backpacking version of my sled kite for QRP radio use, and intended to fly it from the top of Mount Peyton. This was modified from the kite I used on Mount Sylvester. Figures 17 and 18 show the kite packed up (0.3 m x 0.15 x 0.1 m) and partly unpacked. This is a two-cell sled kite with new additions of collapsible struts (made from aluminum tent poles) and reinforced cell openings (made from screw-together thin fibreglass rods). If anyone wants to get into kite details, please reach out.


In steady, laminar wind, this kite fairly jumps out of my hands up into the sky and just hangs there. But the wind conditions and morphology of Mount Peyton were against me. The wind on Sep 26 was from the NW, straight against the 215 m (700 ft) nearly vertical NW face of Mount Peyton. As a result, the wind was deflected nearly straight up past the summit ridge. The air where we stood on the ridge was completely calm; not a blade of grass moving. But 10 m away, just beyond the lip of the cliff, the wind was whistling upwards at 20-30 km/hr! An amazing situation – we were inside a perfect curl of dead air between the strong up-draft along the cliff face and the curling eddies that extended SE from the summit ridge. This was like being in the eye of a hurricane, on its side.
In a “might as well try” effort, we deployed the kite along the ridge (I payed out 200 ft of line and held the kite near the cliff edge to catch the wind). It did catch some air and rose a few feet, then collapsed on its side. Repeated twice, then I gave it up. Kites need steady laminar air to go.
Lessons Learned
Would I do this again?
Well, yes and no. This was how we spent our time during the Mount Peyton trek:
- 0745 depart cabin on ATVs
- 1000 drop ATVs at base of MP, start hiking
- 1200 at summit, eat lunch, play radio, photos
- 15:15 depart summit, hiking down
- 17:10 back at ATVs, drive back
- 18:45 back at cabin.
That’s a total of 11 hrs on the go – 2hr 45 m in and 1 hr 35 m out on ATV (total 4 hr20m on ATV, 53 km roundtrip, average speed only 12.2 km/hr). Add to that a 2 hr hike up and 1hr 55 m hike down (total 3 hr 55 m hiking). Total time on summit – 3 hr 15 m; radio operating time – 2 hrs. This long day reminded me of a typical North American Thanksgiving meal – 5 hrs to cook, 20 min to eat, and 3 hrs to clean up, leaving everyone in a state of happy exhaustion.
Having said that, it was definitely worthwhile going up Mount Peyton, if for nothing else than to see that view which is indeed “indescribably grand” and to be at an historic place “where once they stood, we stand”*. But the ATV approach was long, gruelling and bone-crunching. I don’t see how the SOTA multiplier is only 4. Other than zooming up on a snowmobile, it is hard to get there! Going again, I would make this a three-day backpacking trip on foot (not in hunting season). So much more peaceful, quiet and in touch with the natural surroundings.
Packing radio
It is definitely prudent to overpack a delicate radio when there is rough bumping, jarring, or vibrations during travel (i.e., on an ATV). A plastic ammo box plus dense foam is good for light-weight bomb-proof protection. Hiking on foot is a different matter – much less physical jarring. I (and I suspect others) tend to overpack my gear when backpacking and pay the price of humping unneeded weight.
Flying Kites
Flying kites rarely works out well around summits. The wind is too turbulent and chaotic. Best to keep kites for beaches, flat plains, deserts, tundra, or polar areas. I have a backpacking version that might be of interest to some. Still refining this.
Soapbox
In parting, I ask, honestly, why give nonsense RST reports? Why not take 5 seconds to report an authentic RST? IMHO, phony, auto-reply “5NN” reports are a sham, a disservice to CW communication, and a ridiculous add-on for so-called minimum QSO requirements (e.g., in contests, and heard in many *OTA QSOs). Can anyone explain or justify what value such reports add? (not simply that “it’s required”). If you send a baseless “5NN” report, this can be viewed as a wireless equivalent of littering; emitting meaningless chaff on the air waves. It is sadly ironic that in such cases a totally meaningless string of three characters is used to validate a QSO. Surely, we can do better with our use of allocated radio spectrum. Honest and diligent CW practice should include authentic RST reports. The next time you get a robotic “5NN” RST, I recommend you send back “Real RST?” Let me know what you hear.
*From The Ode of Newfoundland anthem.
72, Scott Schillereff, VO1DR
Wo-I’m glad Scott shared the whole story of this adventure with us. My wife and I had the very good fortune to visit with Scott and his lovely bride Janet in St.Johns in September. He talked about this adventure but I didn’t grasp the full sense of what he was doing. I was enlisted to attempt contact with him after our return to Oregon but unfortunately I wasn’t able to hear him. I’ll share something about Scott-we were invited to a special event in St.Johns by Scott that’s a gathering of Newfoundland singers and storytellers ,which was absolutely amazing! And in addition to Scott’s radio skills he’s a superb singer and traditional Irish musician,and a hilarious poet! I took my KX2 pack on the trip hoping to get some radio time,and Scott suggested I try Signal Hill in St.Johns-a
Canadian National Park and POTA Site. It’s the perfect radio location as this is where Marconi first received a transmission from England in 1901, thus starting the entire notion of transatlantic and long distance radio.
I was only able to manage 4 contacts due to poor propagation,but I did a a contact with a station in EA6-Balearic Islands. I was using the KX2 and the ‘magic’ AX1. Scoti-what a wonderful travelogue and let’s keep trying for S2S or P2P!