 I try to start each year by doing a POTA or SOTA activation on New Year’s Day.
POTA actually issues a certificate for completing an activation on New Year’s Day so there are typically loads of activators and hunters working the bands. It’s an ideal time to play radio.
This year, we had a number of family activities on New Year’s Day, but I made a little time to fit in an activation during the late afternoon at my most accessible spot on the Blue Ridge Parkway: the Southern Highland Folk Art Center.
As with my last activation, I suspected I would be operating in the dark, so I brought my LED lantern along for the ride.
Although not intentional, this New Year activation had a lot of new-to-me stuff involved!
New VK3IL Pressure Paddle
The prior evening–on New Year’s Eve–while my wife and daughters were watching a classic movie movie marathon, I used the time to heat up the soldering iron and work through a few kits and projects that had been sitting on my desk.
One of those projects was a Pressure Paddle designed by David (VK3IL).
Michael (G0POT) sent me the Pressure Paddle circuit board and heat shrink via Andy (G7UHN) several months prior. [Thank you so much, fellas!]
To my knowledge, the VK3IL Pressure Paddle isn’t available in complete kit package, but it’s quite easy to source everything yourself.
On his website, David provides the Gerber files you’ll need in order to purchase the circuit boards from your favorite manufacturer (I’m a huge fan of OshPark here in the States).
Next, you simply need to order the components. Here’s the list assuming you’re using DigiKey:
- Quantity of 2: 732-7579-1-ND (CAP CER 10000PF 10V C0G/NP0 0805)
- Quantity of 2: BSS806NH6327XTSA1CT-ND (MOSFET N-CH 20V 2.3A SOT23-3)
- Quantity of 2: 311-470KCRCT-ND (RES 470K OHM 1% 1/8W 0805)
- Quantity of 2: 1738-SEN0294-ND (RP-C18.3-ST THIN FILM PRESSURE S)
- Quanity of 1: Three conductor wire with a (typically) 3.5mm plug (note that I had one of these in my junk drawer)
Keep in mind: the components are surface-mount. If you’re not used to working with SMD components (ahem…that would be me) I suggest buying a few spares of each in case you lose or damage one or more during the build.
It also helps to cover the finished board in heat shrink not only to protect the board and make it easier to grip, but most importantly (if you’re me) hide your electrically-sound yet unsightly surface mount soldering job.
The build might have taken me 20 minutes.
New FT-817ND Narrow CW Filter
 Some time ago, I purchased a second FT-817ND with the idea of doing full-duplex satellite work. I later realized I could be taking the second FT-817ND out to the field more often if I simply had another narrow CW filter installed, so I built one.
This New Year’s Day activation was actually the first time I’d taken this particular FT-817ND and its new narrow filter out to the field!
New Armoloq TPA-817 Pack Frame
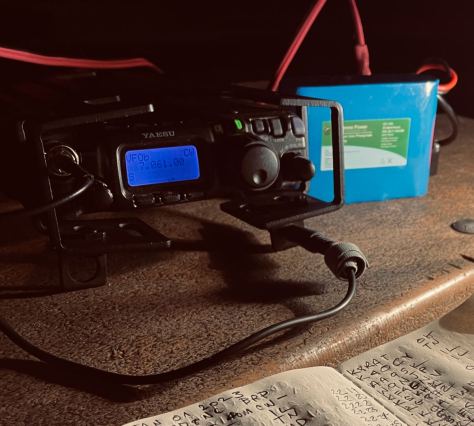
Earlier this year, I also decided that I wanted to outfit my 2nd Yaesu FT-817ND with an Armoloq TPA-817 pack frame. The idea was to experiment with building a rapid-deployment field kit around it.
This is actually one of the big projects I’m working on in 2023. I’ve yet to sort out the antenna mount I’d like to use with this frame based on how I plan to deploy it.
I should add here that I purchased this TPA-817 pack frame used from a kind reader who noticed I’d mentioned the TPA-817 in a September post.
Blue Ridge Parkway (K-3378 NC)

It was late in the afternoon on January 1, 2023 when I arrived at the Folk Art Center on the Blue Ridge Parkway in Asheville.
I quickly deployed my Chelegance MC-750 vertical antenna.
Thus far, each time I’ve deployed the TPA-750 I’ve essentially used it like a non-resonant antenna, allowing my ATU to find matches across the bands.
On this occasion, I had no ATU, so deployed the MC-750 for 40 meters using the silk-screened frequency guide on the MC-750 stainless telescoping whip.
This guide helped me achieve a very acceptable 1.5:1 SWR. I then simply extended the antenna bit until I got the SWR down to about 1.2 or 1.3:1.
I’ll admit, this is a huge selling point for the MC-750: it’s nice to have a portable vertical that is so easy make resonant on 40 meters and above.
I deployed the rest of my gear, then prepared my logs–time to hop on the air!
Gear
Note: All Amazon, CW Morse, and eBay links are affiliate links that support the QRPer.com at no cost to you.
- Yaesu FT-817ND
- Armoloq TPA-817 Pack Frame
- Chelegance MC-750 (DX Engineering US, WIMO EU, Moonraker UK)
- VK3IL Pressure Paddle V2
- Spec-Ops Brand T.H.E. Pack EDC
- Bioenno 3 aH LiFePo Battery (Model BLF-1203AB)
- Ham Radio Workbench DC Distribution Panel Model HRWB101
- Rite In The Rain Weatherproof Cover/Pouch
- Moleskine Cahier Journal
- GraphGear 0.9mm 1000 Automatic Drafting Pencil
- Camera: OSMO Action Camera with Joby tripod (affiliate links)
- Goal Zero Lighthouse 600 Camping Lantern
On The Air
 I hopped on the air and–wow!–the 40 meter band was hopping!
Within ten minutes I logged the 10 stations needed for a valid park activation.
All-in-all, I logged a total 33 stations in 40 minutes on the air.
I was on borrowed time at this point, so hopped off the air with more stations out there to work. I had a date with the wife that evening (who was actually off camera with me) and needed to pack up and move on!
QSO Map
Here’s what this activation looked like when plotted out on a QSO Map.
Activation Video
Here’s my real-time, real-life video of the entire activation. As with all of my videos, I don’t edit out any parts of the on-air activation time. In addition, I have monetization turned off on YouTube, although that doesn’t stop them from inserting ads before and after my videos.
Note that Patreon supporters can watch and even download this video 100% ad-free through Vimeo on my Patreon page:
Click here to view on YouTube.
The VK3IL Pressure Paddle Rocks!
 Of course, the piece of new kit that was really being tested that evening was the VK3IL Pressure Paddle and was I impressed–!
I see why Mike (G0POT) said he initially built his as backup paddles, then they quickly became his main field paddles: they’re affordable, portable, and insanely accurate.
While I still prefer (personally) the feel and experience of using a mechanical key, I must admit that I believe my sending was more accurate with the Pressure Paddles. I made fewer mistakes, at least, during this particular activation.
If you’ve been looking for a fun project and a new key, I can highly recommend the VK3IL pressure paddles!
Thank you
 Thank you for joining me on this New Year’s Day activation!
I hope you enjoyed the field report and my activation video as much as I enjoyed creating them.
 Of course, I’d also like to send a special thanks to those of you who have been supporting the site and channel through Patreon and the Coffee Fund. While certainly not a requirement as my content will always be free, I really appreciate the support.
Resolutions…
I hope your New Year is off to an amazing start and that all of your radio resolutions come to fruition in 2023!
I’ve heard from some of you that you hope to do more activations, improve or start learning CW, and/or to go completely QRP in the field. I’d love to hear what your radio resolution is this year.
Me? I hope to add about 20 new-to-me parks this year if my travels allow. This might even call for a mini RATpedition like Eric (WD8RIF) and I did last year. (I’ve still got a couple of those videos to post!)
I’ve also got a few mini challenges lined up and I really look forward tackling those! Stay tuned!
Thanks for spending part of your day with me! Now go play some radio!
Cheers & 72,
Thomas (K4SWL)


Hi Thomas. I bought two of those boards from Artur and assembled one with a filter purchased off eBay. Works great! Thanks so much for bringing this idea forward…
same here- Great service from Artur and even for someone who is all thumbs soldering like I am it was a pretty straightforward process, and what a nice difference for CW. Glad I got my 818 when I could at the end of the year . . .
I was just thinking on how elegant and light an MC750 and QCX mini just powered by a 9V battery plus VK3IL paddles and RG316 would be. All components so light and small and to be deployed in minutes.
QCX Mini 20m is ordered and will arrive soon and so is MC750.
Thomas, I was thinking about the TPA frame as well, for a dedicated field pack. I discovered I could do a “proof of concept” using the PortableZero rails I have on the 818 now, a right angle 239-to-BNC adapter for the rear antenna, with a BNC jumper to the front of the radio, the SOTABEAMS APP adapter on back with power cable feed to the front, right angle rear plug keyer cable feed to the front – but capturing the TPA frame idea by using very small zip ties to attach the cabling to the rails, all forward-facing as though one would need to attach all from the front, as in the TPA-in-a-bag idea.
Having done all that – I’m not sure that I’m so enamored of the concept as to lose the beauty of the small profile of the 818 in my quest for a pack radio. At least for me I’m not in situations where it’s a challenge to pop it out of the bag and have it up and running quickly with the few connections necessary.
On the other hand, one of the neat things about our hobby is that we often do things “just because we can” even if it’s not strictly “because I need to” so I’ll be very interested to see how the process works out for you! I do like the idea for inclement weather / SOTA use where you would want to limit outside exposure – or you want to wear it using a chest mount bag or pack.
Just ordered all of my parts from Digikey and Oshpark. Looks like a fun build! 73, K8JLW
I wonder if the whip alone is available ? Price ?
I like the “silk-screen frequency guide on this whip.
Thanks,