 The Blue Ridge Parkway is one of the easiest POTA sites for me to activate when I’m at the QTH.
Pretty much anytime I head into Asheville from home, I’m going to cross the parkway. The BRP is such a refuge, I often take it to avoid hitting the Interstate or a busy highways. It takes longer, but it’s orders of magnitude more peaceful and pleasant than, say, Interstate 40.
On Monday, September 13, 2021, I had a small opening in my schedule in the afternoon and decided to pop by the Folk Art Center for a quick picnic table activation since I was passing by.
The Folk Art Center is a site where I typically deploy smaller, lower-profile antennas to keep from interfering with others who are enjoying the park. I try to keep my antennas very close to my operating spot and my counterpoises on the ground in a space where others aren’t likely to tread.
In the past, I’ve used the Wolf River Coils TIA, the Elecraft AX1, Chameleon MPAS Lite & MPAS 2.0, and once, a Packtenna 9:1 UNUN random wire. I avoid anything that slopes so that I don’t inadvertently “clothesline” unsuspecting vacationers!
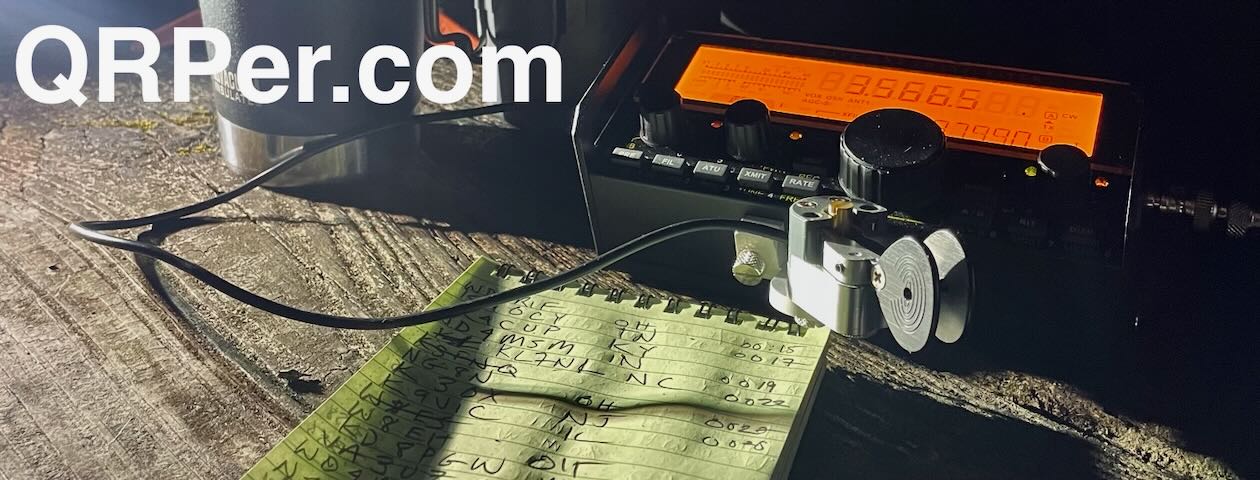
On this trip, I had the Chameleon MPAS Lite vertical and a new toy: the Chameleon Universal Clamp Mount (CHA UCM).
Over the past couple of months, a number of my YouTube channel subscribers suggested that I check out the CHA UCM–I assume many already owned one. Frankly, I wasn’t even sure what the UCM was. Carl at Chameleon follows my channel and simply commented in a video, “We’re sending you a UCM”–at no charge to me.
So there you go.
It arrived a few weeks ago–right around the time I did this park activation with Max (WG4Z) who was using a UCM to support his vertical antenna. Max, I should add, was also one of the people urging me to check out the UCM.

So what is the UCM? It’s simply antenna clamp mount.
According to Chameleon, the UCM is made from a 6061 aluminum extrusion channel that’s almost 1/4″ thick. It’s large enough to accommodate a surface 3-1/2” in height/thickness.
It’s both lightweight, yet incredibly robust. Like all of the Chameleon products I’ve ever used, it feels insanely durable.

The CHA UCM is a handy tool when you have a picnic table to use as your antenna support. This could give you slightly more height than you might get from a compact tripod or certainly a stake in the ground but, most importantly, it’s super quick to deploy and provides very sturdy support for an antenna. An excellent option if you’re at a windy site.
I also like it because it’s low-impact. Some historic sites and protected wildlife areas may forbid putting stakes in the ground or hanging wires in trees: if you can find a picnic table (or bring a folding one) the UCM will keep your antenna as low-impact as possible. It’s hard for anyone to complain about it.
What I like, of course, is how it helps to speed up antenna deployment. I can see using this on both picnic tables and mounting it to the bed of my truck.
Blue Ridge National Parkway (K-3378)

I arrived on site and was pleased to see that it was pretty quiet.
As I set up the station, a couple stopped by the table, one saying, “I’m just too curious about what you’re doing here!” I pulled out a one-page ARRL flyer I keep which explains ham radio in general, then gave them a quick intro to POTA and mentioned SOTA. I’m guessing they were 30 years old or so and they seemed genuinely interested–asking loads of questions. I was happy to oblige. I really wish Hazel–my friendly canine ham radio ambassador–would have been with me on this outing, though.
Gear:
- Yaesu FT-817ND
- Elecraft T1 ATU
- Chameleon CHA MPAS Lite
- Chameleon CHA UCM
- N0SA portable paddles
- ULTRA-PK CW memory Keyer KIT
- GoRuck GR1 USA
- Bioenno 15 aH LiFePo Battery (Model BLF-1215A)
- Tom Bihn Large Travel Tray
- Amazon Basics Large DSLR Gadget Bag (affiliate link)
- Rite In The Rain Weatherproof Cover/Pouch (affiliate link)
- Jovitec 2.0 mm Mechanical Pencil (affiliate link)
- Muji A6 Notepad (affiliate link)
- HEROCLIP Carabiner Clip (attached to my backpack–affiliate link)
- Portable Zero FT-817 Side Rails and Bail
Another piece of gear I don’t think I’ve used in an activation video before is my ULTRA-PK CW memory Keyer.
 I purchased this kit on eBay earlier this year thinking it would pair well with some of my transceivers (like the FT-817ND) that lack built-in CW message memory keying. It’s a super simple kit–it might have taken me 25 minutes to build. The case is 3D printed.
So far, I’ve been very pleased with this keyer. Indeed, my only issue with it is I need to figure out a way to protect the front panel buttons from getting pressed while in my pack. No doubt, I’ll try to sort out a 3D printed solution!
On The Air
 After hooking up all of the gear, I started recording an activation video and called CQ on 30 meters.
Within four minutes, I worked two stations: VE3DQN and AK9A. While I worked both of those stations, another curious person popped by my table to ask about my setup. Turns out, he was quite familiar with ham radio and, having just retired, was planning to study for his Technician and General exams. I politely asked him to pause a moment while I worked these two stations but in each case, he continued talking (guessing he simply didn’t understand). I’ll be the first to admit that my mind can only focus on one thing at a time, so I tried to give my CW contacts attention, but pretty sure I fumbled both of those contacts. That’s okay, it’s worth it to have the opportunity to promote ham radio to someone who is obviously very interested.
I spoke with this gentleman for perhaps 10 minutes, then started calling CQ again.
Then my my camera overheated in the sun and shut down.
I pulled out my OSMO Action camera which I luckily had in the pack, and started the video again. The activation video below starts at this point.
I decided to then move to the 40 meter band and worked seven stations in 17 minutes. I then hopped up to 30 meters again where I worked three more stations.
At this point, I was really out of time. Between speaking with all of the guests that popped by and having to switch out cameras, I spent longer than I had planned at the park.
Although I had quite a lot of station components on the table, it was super easy to pack up.
QSO Map
Here’s the QSO Map for my picnic table activation. I was quite impressed with the results. There’s a lot of magic in 5 watts!

Video
Here’s my real-time, real-life, video of the activation, starting after my first two 30 meter contacts:
Click here to view on YouTube.
Thank you
Again, thank you for reading this field report and a special thanks to those of you who are supporting the site and channel through Patreon and the Coffee Fund. While certainly not a requirement as my content will always be free–I really appreciate the support.
Here’s hoping you get a chance to play radio outdoors or chase a few parks or summits from your QTH.
My advice? Make time for a little radio therapy!
Cheers & 73,
Thomas (K4SWL)
Hamalert notified me you were on 40m 7.062.9 and 7.063 yesterday while I was home for lunch but I couldn’t copy you 🙁 I’m in Stillwater Oklahoma. Oh well, maybe next time when conditions are better. 73 de AI5DD
40M is often a tough one for OK, typically I get into that area with 30M or 20M. Yesterday I think I completed the entire activation on 40 meters. I’d planned to hit 30, but simply ran out of time.
Next time, I hope!
Cheers,
Thomas
K4SWL
I activated at James K Polk State Historic Site (K-6848) yesterday with the same UCM antenna setup with a Hustler mobile whip and my IC-705 & LDG Z100Plus. I used a 33′ piece of coax as my counterpoise since I put the antenna on an adjacent picnic table. It was a quick early morning activation.
I really enjoy these articles for QRP events.
I do wish with the photos would include more of the antennas. Good to see the rig setup, but the antennas are very important.
Hi!, Good morning, all,
I use this system of Pick-Nik table for years.
I began with the “Buddipole Antenna Clamp”, which is a good sturdy one but: I modified it by removing the “QUICK TURN KNOB” because it was not stable enough in windy area.
I use it with Outbacker Perth Plus, hamstick , or Buddistick antenna.
With Buddistick, I use it with arms and longer whips, ( Full size no compromise). Ok , this one is a monoband, but If I want to change band, I have to adjust it with the analyser, and Bingo .
Since I discover the “CHA UCM” it is much better, for different thickness of pick-nik tables/ balcony railing, even on a chain link fence , even wood fences.
Conclusion:
The CHA-UCM is really handy. strudy tool which has a place of choice in my grab and go Bag. Thumbs up Chameleon antenna.
73 Mike VE2TH The QRP’er didit…
Thank you for that info, Michel! I always wanted an Outbacker Perth Plus back in the day! I see how it might pair nicely with the UCM!
Hope to catch you on the air soon!
Cheers,
Thomas
K4SWL
VEry good article,thanks.
Often we see the North American map with the QSOs. Tells a lot, tells the real story.
Where you get this map???
73, ron, n9ee/r