A question I’ve received several times since sharing my last field activation with the MTR-4B is “why do Mountain Topper radios have three individual band switches–?”
That’s a great question and the answer is actually in the product manual.
The following comes from the MTR-3B manual but also applies to the MTR-4B (save the 4B has four band positions instead of three):
The band is selected by three, three position slide switches. For proper operation, all three switches must be in the same column[…]. It’s easy to get into the habit of flipping each switch in sequence from the top down.
The top switch tells the processor which band to operate on and connects the Receiver input filter to the first mixer. The middle switch connects the transmitter low pass filter output to the antenna and connects the antenna to the receiver input filter. The bottom switch connects the output of the transmitter PA to the low pass filter.
The manual is correct: it’s easy to get in the habit of sliding all three switches with band changes. It becomes second nature in very short order.
It’s easy to tell that all of the switches are in the correct position as well because without all three switches selected, the receiver sounds deaf and audio muted. With them in position, the receiver sounds “alive.” (That said, the noise floor is so low on these radios, it’s quite possible you might think they’re not engaged properly if there aren’t many signals on the band!) Of course, it’s very easily to visually inspect the switches and confirm they’re in the correct position.
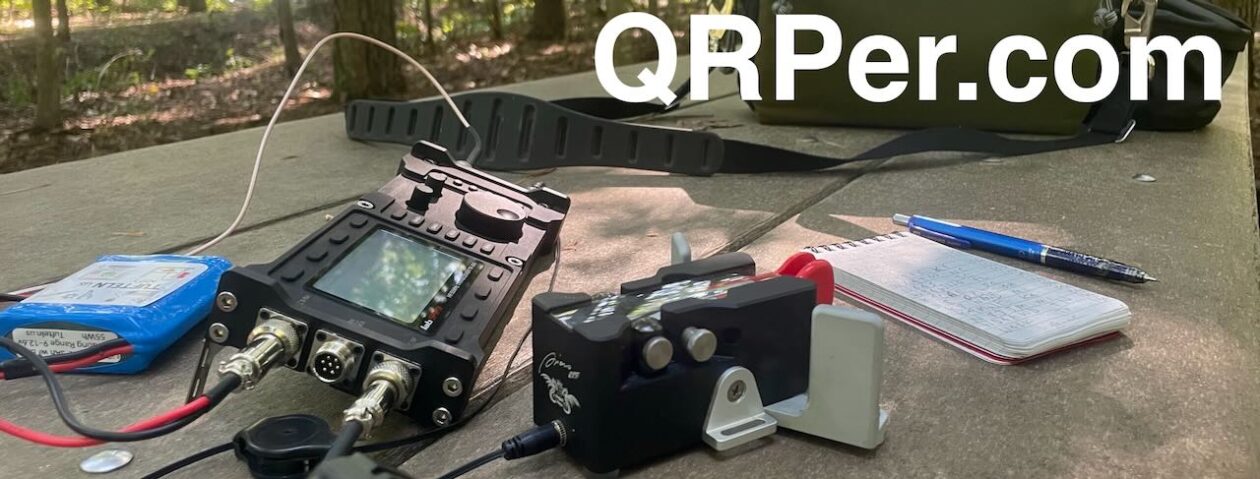
Side note: On the Mountain Topper series, each band switch is an independent mechanical switch. On the Venus SW-3B (which was no doubt inspired by the Mountain Topper) the two band switches are bound together as one:
You can’t tell from looking at the photo above, but if you slide the top switch, you’re also sliding the bottom switch: the two switches are only one mechanical piece. An interesting design choice!
Side Note: The (now discontinued) Mountain Topper MTR-5B had a more complex series of six switches. Here are the instructions for it along with a drawing from the MTR-5B manual:
I hope this helps clarify how/why the Mountain Topper series uses multiple switches for band changes!
Maybe it’s just in the nature of those of us who love QRP.
We get a small thrill out of seeing what we can accomplish with less.
AX1 Doubts?
On the morning of February 7, 2022, I received an email from a subscriber in South Carolina who had placed an order for a new Elecraft KX2 and an AX1 antenna package. He picked this particular combination because he wanted the most simple and easy-to-set-up field radio system for impromptu CW POTA activations and a little random QRP fun.
He mentioned that, at his age, mobility is a bit of an issue and even though he knew a wire antenna would be more effective, deploying it while walking on uneven ground just wasn’t in the cards. The AX1 was a much more manageable and packable system. Plus, as he said, “I’m not going out to work DX. I just want to play and have fun.”
Only a week after placing his order, he was having buyer’s remorse which prompted his message.
He explained that he had exchanged emails with a friend in his radio club who told him he’d made a foolish mistake and that the AX1 was completely ineffective as an antenna and would only lead to disappointment. His friend said [direct quote here], “I owned [an AX1] for a month and was never able to make a single contact. It is really good at being a dummy load and nothing more! This thing shouldn’t be marketed as an antenna. It doesn’t work.”
I pointed out that I’ve used the AX1 numerous times in the field and have yet to be disappointed.
Before I used the AX1, I too, was very skeptical but after actually using it (instead of simply theorizing about it) I found it’s one of my most valuable antennas for a quick and fruitful activation. I pointed him to this playlist that includes all of my AX1 activations on YouTube. In all of these activation, I’ve limited myself to 5 watts as well even though the antenna can handle a full 10 or 15 watts from the KX2 or KX3.
I told him I’d been planning to pair the AX1 with my Mountain Topper MTR-3B and, it turned out, that very day a small window of opportunity opened in the afternoon. I told him we could both see how the AX1 might perform with three watts of power, especially since he’d planned to use 10 watts with his KX2.
I’ve been spending more time with my Mountain Topper MTR-3B (“Tuppence”) recently and have been thoroughly enjoying this little radio’s companionship.
Since I made a dedicated ultra-compact field kit for the MTR-3B, it has also been even easier to toss it in my backpack and take it on little field adventures. The field kit is truly a grab-and-go and even includes a throw line and weight.
On Friday, January 28, 2022, after a total of six individual park activations during the previous two days (a POTA RaDAR run and my first 2020 Antenna Challenge activation) driving back to the QTH I thought, “surely I can skip doing an activation today.”
That quickly turned into, “Wait a minute…I’ve got enough time to fit in both an activation and a hike!”
So I made a quick detour off of I-40 to visit the Clear Creek access of South Mountains State Park.
South Mountains State Park (K-2753)
I pulled into an empty parking area; not really a surprise on an early Friday afternoon. In addition, I figured many were out grabbing bread and milk since winter weather was in the forecast.
On January 26, 2022, I fit in multiple park activations in one day as a RaDAR (Rapid Deployment Amateur Radio) run. My hope was to activate four or five sites between 14:00 – 21:30 UTC.
Here are the field reports and videos of my first four activations:
The next park in my run (#5) was Tuttle Educational State Forest and it was the final park in this modest RaDAR run!
I packed up the gear at Johns River Game Land in a matter of three minutes, popped it all in the car, then drove 8 minutes to nearby Tuttle Educational State Forest which, at this point, almost feels like a home away from home.
Tuttle Educational State Forest (K-4861)
As I pulled into the Tuttle parking lot, I found my buddy Max (W4GZ) activating the park from his truck. It was no surprise finding Max here since I had just worked him Park-To-Park (P2P) from Johns River next door.
Max delivered some precious cargo: some more of his mom’s homemade QRP pickles!
Recently on Twitter, I created an informal poll and asked if anyone else named their radios.
Here are the results:
I quickly found out that I’m in the 6.7% minority who freely admit that they name their radios.
We can also assume, however, that a healthy percentage of the “Neither confirm nor deny” crowd do too. They just have a professional reputation to maintain!
Truth is, I don’t name all of my radios; only the ones with “personality” that I plan to keep permanently.
Tuppence
My gift to myself after completing my very first CW activation in 2020 was to purchase a Mountain Topper MTR-3B from LnR Precision. I’ve always admired these tiny hiker-friendly transceivers and have watched as Steve Weber (KD1JV) updated the design over the years.
There’s no cure for my pack obsession. I’m constantly in a state of assembling and testing the most efficient kits I can conjure up.
Since I rotate a fair amount of radios in my activations, the majority of my kits are modular; meaning, components like antennas, ATU’s, batteries, log/pen, and cables are packed in their own small pouches/pack. Before embarking on an activation, I simply assemble the components in a backpack along with the radio/s I might use that day. Over the years, I’ve developed a certain workflow with this process that ensures I don’t forget components or pack the wrong ones.
But by far, my favorite type of kit are those that are fully self-contained–proper grab-and-go kits that have everything I need inside to, for example, activate a summit.
Note: the following post originally appeared on our sister site, the SWLing Post.
The Par EndFedz EFT-MTR triband (40/30/20M) antenna
In July, I purchased a tiny QRP transceiver I’ve always wanted: the LnR Precision MTR-3B. It’s a genius, purpose-built little radio and a lot of fun to operate in the field.
It’s also rather bare-bones, only including a specific feature set built around ultra-portable CW operation.
While the MTR-3B has features like CW memory keying, a wide operating voltage (6-12 VDC), extremely low operating current (20 ma in receive), real-time 24 hour clock, and a full compliment of keying adjustments, it lacks other features like a volume control, SWR meter, speaker, and built-in antenna tuner.
Some of those may seem like big omissions but SOTA and POTA activators who like extremely lightweight/portable gear love the MTR-3B for being so purpose-built.
The MTR-3B (and its predecessors) operate on three bands: 40, 30, and 20 meters. These are, without a doubt, my favorite bands when operating portable since antenna lengths are reasonable.
Since the MTR-3B doesn’t have an internal ATU, you need to pack an external tuner or, better yet, a resonant antenna–ideally, one that can be used on all three bands.
Although many of my portable transceivers have built-in ATUs, I rarely use them because I primarily operate with resonant antennas. Resonant antennas are more efficient–giving you the maximum mileage per watt. In addition, they’re also more simple: connect them to the rig and hop on the air. No tuner or tuning required.
The EFT Trail-Friendly antenna is incredibly compact and quite easy to deploy.
I’ve mentioned in previous posts that I’m a big fan of the Par EndFedz Trail-friendly EFT tri-band antenna (above) which is resonant on 40, 20, and 10 meters. I’ve activated well over 130 parks with this little antenna.
After I took delivery of the MTR-3B, I borrowed the Trail-friendly EFT antenna from my KX2 field kit. It worked well on 40 and 20 meters, but it doesn’t cover the 30 meter band. Also, by borrowing the EFT from the KX2 kit, I broke one of my rules: never borrow from one field kit to feed another. This led to me leaving the EFT hanging in a tree at a remote park and returning a week later–a three hour round-trip(!!!)–to retrieve it. (FYI, in all fairness, I also blamed my trusty canine companion for this mishap!)
I was very pleased with this decision as I’m guessing LnR Precision wanted to hand off antenna production so they could focus on the very popular Mountain Topper transceiver line.
Vibroplex is owned by my buddy, Scott Robbins (W4PA), who is not only a successful entrepreneur, but also an award-winning contester and DXer. I’ve known Scott for years and knew he’d not only be a great steward of the Par product line, but also push new innovations.
I emailed Scott asking if Vibroplex had a field-portable antenna that would be resonant on 40, 30, and 20 meters. Turns out, there’s a Par antenna designed specifically to pair with the MTR-3 series transceivers: the Par EndFedz EFT-MTR.
The new EndFedz ® EFT-MTR is a 40m/30m/20m tri-band QRP antenna rated up to 25 watts. The “MTR” name was selected as LNR Precision developed this antenna to be the perfect companion to the wildly popular 40/30/20m Mountain Topper QRP transceiver. The EFT-MTR’s total length is 65′ of 22 AWG polystealth wire and weighs less than 4 ounces! It is built with the same high level of workmanship and quality that you have come to expect with all EndFedz ® antennas.
A particular innovation on this antenna: This EndFedz is a little different than previous designs. The user has the option to remove an SMA connector at the end of the 30M resonator to enable just 30 meters, or keep the SMA installed for 40 and 20 meters. Because of the broad bandwidth of the antenna, it is unlikely that it will require tuning in the vast majority of deployments. This is particularly true of 30 meters where the band is very narrow. As our tagline states, “They Just Work!”
Included with the EFT-MTR is the EndFedz Antenna Winder. Conveniently allowing winding up the antenna line to not have a tangled mess at the end. The winder will hold both the antenna and 25 feet of RG-174U coaxial cable (optional accessory).
Scott offered to send me an EFT-MTR to evaluate in the field (disclaimer: at no cost to me) and I accepted without hesitation, of course!
An EFT-MTR field review
I’ve taken the EFT-MTR antenna to three park activations at this point and have formed some opinions about it.
The EFT-MTR fits perfectly in a slide-in pocket in the main compartment of the Boot Boss.
First of all, I couldn’t be more pleased with the size as it fits perfectly in my MTR-3B field kit built around my Red Oxx Booty Boss pack.
I really like the built-in antenna winder: it’s larger than that of the EFT Trail-Friendly, but also much easier to wind up and manage post-activation.
I’ll admit, the length of the EFT-MTR was a bit surprising the first time I deployed it: 65 feet. Keep in mind, though, I had been used to a much shorter 41 foot radiator on the EFT Trail-friendly. Occasionally, I operate in spots where I simply don’t have the room to deploy a long antenna. I also worried that the EFT-MTR resonance might be negatively affected by winding its way through trees and over a branches. The MTR-3B transceiver does not like high SWR values and has no built-in SWR meter to monitor it. Last thing I wanted to do was harm the MTR finals.
You might be able to spot the feed point of the EFT-MTR at my activation of K-6952 this week.
Fortunately, winding its way through trees doesn’t seem to have a significant impact on SWR.
Each time I’ve taken the EFT-MTR to the field, I’ve also taken my KX2 which I’ve used to read the antenna’s SWR value. So far, the difference has only been negligible and SWR well within the tolerances of the MTR-3B. Score!
I should note here that since I’ve started using an arborist throw line, I’m also able to hang antennas much higher than I could before. This has had a huge impact on all of my field activities.
Removing the SMA cap changes the EFT-MTR from a 40/20 to a 30 meter resonant antenna.
To be resonant on 40, 20 and 30 meters, the EFT-MTR requires a field modification. On the coil about 2/3 the way up the antenna, there’s an SMA connector with a small screw on cap (see above). When the cap is on (thus completing the connection) the antenna is resonant on 40 and 20 meters. You must remove the cap for it to be resonant on 30 meters.
Since I’ve been using the EFT-MTR, I start an activation on 40 meters (which is typically my most productive band), then move to 20 meters (typically, my least productive). If I have the time, or need the extra contacts to confirm a valid activation, I lower the antenna, unscrew the SMA cap, and raise the antenna again.
I thought at first this would be a major pain, but it hasn’t. Now that I’m using an arborist throw line, it’s super easy to lower and raise antennas. But even when I’ve used fishing line, it really hasn’t been an issue.
The only issue I see is I’m afraid I’m going to lose that little SMA cap in the field. To prevent this, I’ve made it a routine to immediately put it in the internal zippered compartment of the Booty Boss pack. I might find a source for those caps, though, just in case I still lose this one.
I’ve been very pleased with the EFT-MTR’s performance. I’m guessing it’s actually higher gain than my beloved EFT Trail-Friendly antenna. On my last activation with the EFT-MTR, I knocked out eight 40 meter contacts in about eight minutes during a period of poor propagation. Note that the MTR-3B was only pushing 3 or 4 watts of power.
I then moved to 20 meters where, frankly, propagation was so crappy I didn’t hang out there long. Instead, I lowered the antenna, removed the SMA cap, and started calling on 30 meters. Within a few minutes, I racked up the rest of my contacts.
I was very pleased with how quickly the Reverse Beacon Network picked up my CQs and was thus auto-spotted on the POTA website.
Conclusion?
If you own a Mountain Topper MTR-3 series transceiver, I highly recommend the EFT-MTR antenna. As with my EFT Trail-friendly and Par sloper, the quality is top-shelf. I expect the EFT-MTR will last even longer than the EFT Trail-friendly since the winder is so accommodating and the in-line coil is designed so that it doesn’t snag on branches as easily.
I’m looking forward to much more field fun with the MTR-3B and EFT-MTR combo!
I received my Mountain Topper MTR-3B last week, and I’ve already taken it on a POTA activation.
Last weekend, I decided to break it in on a POTA “two-fer” site: Hampton Creek Cove State Natural Area (K-6246) and The Overmountain Victory Trail (K-4577) in Tennessee. Hampton Creek Cove was actually an ATNO (all time new one) so it was a trial by fire!
In short, the MTR-3B was marvelous. I’m so impressed.
As I mentioned in a previous post, I’m building a full SOTA/POTA activation kit for the MTR-3B. I already have a kit built around my KX2 and I don’t want to “borrow” any items from it (so I’m not surprised later in the field when an item is missing).
The TalentCell Rechargeable 12V 3000mAh Lithium Ion Battery Pack is the little black box.
I also used my Whiterook paddle (which needs new paddle arms at this point) but that will soon be replaced with a set of N0SA portable paddles I recently ordered.
Since the MTR-3B has no volume control, I used a pair of 20 year old Sennheiser earphones I bought when I lived in Munich. These have been in a drawer for ages because I now prefer using in-ear earphones with silicon earpieces for better comfort and sound isolation. But the Sennheisers have one thing none of my other earphones sport: in-line volume control.
While the earphones worked well for this activation, I’d still prefer a set of in-ear earphones with in-line volume control. Any suggestions from MTR-3B owners? Also, I’d like a compact amplified speaker with volume control to carry as an option when needed. If you can recommend one, please comment!
I’m writing an article for The Spectrum Monitor magazine about portable power later this year. I noticed that a number of MTR-3B owners swear by 11V rechargeable cells that are used in the RC and drone markets. Many have a similar compact form-factor as the common 9V battery. I understand, however, some of these cells need special chargers and equipment to balance them.
I would appreciate any and all information about these batteries.
In the meantime, Rich (N8TGQ), recently shared a pic of his Mountain Topper portable pack. Check it out:
I think it’s brilliant how he’s mounted everything on a compact plastic cutting board inside the case. Rich says that what he loves about this set-up is that everything is there, ready to go–simply plug in the antenna!
I love seeing how others build out their field kits! Please comment or contact me if you’d like to share yours here on QRPer.com!
QRP radios, product announcements, reviews, news and more. Low power amateur radio fun!
Please support QRPer by adding us to your whitelist in your ad blocker. Ads are what helps us stay online. All of our ads are ham radio related--no junk, we promise! Thank you!