I saw your recent video post of an activation using the IC-705 and I thought you might appreciate one of my recent related projects. Earlier this year I purchased an Icom IC-705 and because I planned to carry it backpacking for Parks and Summits on the Air, I knew I needed some type of physical protection for it since it would be knocked around a bit on rocks and rough surfaces and during transport. The only cases I could find did not fit my vision; they were either too expensive or too flimsy. So I decided to fabricate my own.
I purchased a 9″ x 18″ sheet of 1/8”, 5052 aluminum. I bent it (with LOTS of effort) in two places which created a “U” channel. The lengths were 4.5″ x 3.5″ x 4.5″. I then cut off the excess and used it to make the side pieces. I then did some research on aluminum brazing which led me to purchase some “AlumiWeld Rods” from Harbor Freight and a canister of MAP gas. I then cut the pieces for the front and sides and brazed them in. You may notice the amateur looking joints on the sides of the armor.
I also wanted to have a mic and key port on the front of the enclosure so as not to be continuously connecting and disconnecting those items directly from the radio and for convenience.
The entire assembly was planned to fit perfectly in the plastic orange ammo box also shown. It is made by a company called Sheffield which is in the U.S.
The radio mounts in the armor via the AMPS pattern screw holes on the bottom. I believe they are 4mm screws… not supplied by Icom. The radio is also electrically connected to the armor via the four screws as well as the shields of the mic and keyer ports.
I recently added the vent holes on the top panel for a less than obvious reason. Although they do serve a dual purpose, my primary reason for adding them was to avoid blocking its GPS reception, but factors of cooling and weight reduction do apply.
73 de Dan (KQ8Q)
This is an absolutely brilliant project, Dan, and to my eye, there’s nothing amateur about it. The coating looks fantastic and I like all of the effort you put into stand-off space to protect the rig and connections. Mounted in that orange box, I think you’ve got an all-weather solution.
A few weeks ago–on July 12, 2021–I popped by Lake James State Park to do a quick activation with the Icom IC-705. It had been a while since I’d used the ‘705 in the field and the little rig was begging to go outdoors.
Here’s the funny part: I completely forgot about that activation! Two days ago, while browsing my photo archive, I noticed the video I made of the activation and, of course, the memory came flooding back.
In my defense, it has been a crazy summer and the weeks/days seem to all blend together in my head.
Thing is, this activation was memorable for a bad reason: QRM (human-made radio noise). It was also memorable for some of the folks I worked on the air.
Lake James State Park (K-2739)
I arrived at Lake James and was a bit surprised to practically have the place to myself.
I found a picnic table with a view of the water, deployed my speaker wire antenna, and set up the IC-705. As with all of my activations, I was only running 5 watts.
I attached the speaker wire antenna’s BNC binding post adapter directly to the mAT-705 Plus ATU.
Propagation was–you guessed it–forecast as very poor.
It felt that way when I hopped on 40 meters at first as the band was pretty quiet..
Still, I managed to log 5 contacts on 40 meters (two in SSB, three in CW) before moving up to 20 meters which served me well.
I worked a total of eight stations in nine minutes on 20 meters.
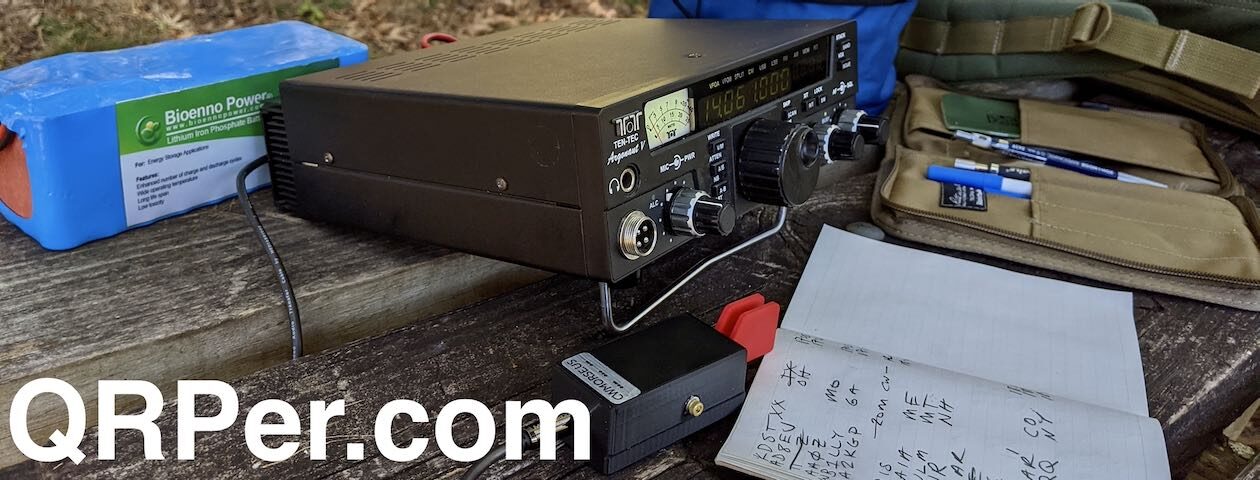
QRM
Check out the noise level on the waterfall display!
If you watch the video, you’ll hear how nasty the QRM was at times.
I keep forgetting that there’s a source of intermittent radio interference at the Lake James visitors center. The spot where I set up the station was only 25 meters or so from that building. I believe the center was responsible for the QRM I first experienced during the activation. Whatever the device is generating the QRM, it doesn’t last for long periods of time–it cycles.
The second batch of QRM was emanating from a small boat that pulled up to the dock in front of my site. It was nasty and completely wiped out the 20 meter band. When the owners turned off the boat and stepped onto the dock, the noise stopped completely. Later, when they got back into the boat, the noise started again. I have to assume it was something in their motor causing the QRM. I suspect they may have been using a DC trolling motor.
Memorable contacts
POTA activations often feel like a gathering of friends. I often see many of the same callsigns in my logs and it’s a lot of fun working them each time.
Also, it’s a lot of fun to work stations further afield. At Lake James, I was very pleased to work NK7L in Washington State, IK4IDF in Italy, and HA9RE in Hungary. My back of the envelope calculations tell me that I was pushing 1,000 miles per watt when I worked Elemer (HA9RE). To be clear, all of the work was done on his end as he has some world-class ears; just check out his QRZ page!
For some reason when I logged HA9RE, I copied VA4RE. I’m not sure why, but after packing up it hit me that I had logged him incorrectly (funny how brains work!). I reviewed the video on-site and confirmed it was indeed HA9RE.
Here’s my QSO Map:
I was also very pleased to finally work Dave Benson (K1SWL). He’s very well-known in QRP circles for his amazing Small Wonder Labs kits. Dave’s a great guy and, of course, loves playing radio in the field.
Video
Here’s my real-time, real-life, unedited video of the entire activation. Apologies in advance as I really needed a wind screen over my microphone that day–I had the mic and camera a little too close.
Loop next time!
The next time I hit Lake James, I plan to deploy a Chameleon loop antenna. I think it will have a significant impact on the QRM levels at that particular part of the park. Of course, I could easily move further away from the noise source (that’s the easiest solution) but I’d like to see how effectively a loop might mitigate the QRM. That and it’s been years since I last used a compact mag loop antenna in the field.
Thank you
Again, thank you for reading this report and thank you to those who are supporting the site and channel through Patreon and the Coffee Fund. While certainly not a requirement–never feel an obligation to do so (especially if you’re investing in your first station, for example)–I really appreciate the support.
Here’s wishing you some outdoor radio fun in the near future!
An easily accessible, multi-function button on the IC-705’s “back rim” gives a great improvement over the stock noise reduction. (ICOM, with all your resources, why can’t you design a DSP NR circuit that works as well as BHI’s? )
I admit it! I’m in love with BHI Ltd.’s DSP noise reduction accessories. I’ve owned most of their popular models like the DSP Desktop Speaker, and have installed BHI low-level audio modules in six different receivers and transceivers.
How is it that an audio-based DSP noise reduction accessory can be so effective? Only BHI knows, but they clearly have top-notch algorithms that rival the best of noise reduction circuits in contemporary Yaesu transceivers. (Personal bias alert: I find Yaesu’s approach to noise reduction (“DNR” in Yaesu-speak) to be quite superior to ICOM’s, and this is what got me thinking about improving the transceiver with an internal BHI NEDSP1901-KBD module in the first place.)
The noise reduction feature in the IC-705 and its IC-7300 base station counterpart is merely “OK” in my opinion, but the addition of BHI’s NR makes a significant difference in S/N and intelligibility of signals. It’s simple enough to use an external BHI product and connect it to your rig’s speaker or headphone’s audio path, but it adds wiring and complexity. The ICOM IC-705 modification described in this article is a neat, clean, internal solution needing no external wiring or power supply.
Like many I’ve taken the plunge on an Icom IC-705. Even though I sold off an old Yaesu 817 to finance part of it, it still cost a very pretty penny and I didn’t want to shell out more for a tilt stand or bail.
Especially at the rather extravagant prices they’re going for now. $30, $40? No thank you. (Really, the radio, at $1300, should have come with one in the box, but why beat that dead horse – it is what it is.)
In any case, I looked around the house for something to DIY one with. I found a couple of metal angle brackets, screws that fit the mounting holes, and some tiny rubber bumpers to shield from nicking up the radio’s plastic case. Voila! Instant tilt stand. See pics:
And just the right angle too. My plan is to plastic-dip the brackets so I can get rid of the bumpers as well as not nick up any softer surface the radio sits on.
IC-705 Bluetooth Question
Meanwhile, a question for you and other owners of this radio.
What’s up with the Bluetooth function? I have three bluetooth speakers and a small audio amp with built in BT, and I can’t get audio to play through them. The unit sees the accessories and connects. But no sound. I’d updated the firmware to 1.24, just in case they might have addressed any issue. Still no joy.
That being said, I can control the radio via BT with android apps, etc, but no audio. A very disappointing development for such an expensive radio.
Oh well. The good with the bad and all that…
Joe Patti (KD2QBK)
Thank you for sharing this, Joe! That’s a very clever and simple solution for the IC-705 stand.
As for the Bluetooth functionality, I’ve yet to use it. Hopefully, someone here can chime in and comment with advice!
Many thanks to my friend Ollie–an SWL in Germany–who shares the following guest post:
German spies are eavesdropping on you!
I recently made the first all-night listening sessions at the German North Sea coast for this year. On the night of June 10th/11th I picked up 2 POTA SSB activations over here and I thought you guys might find it mildly interesting what that sounds like here. 🙂 Condx were just going down from “slightly elevated” to “regular solar minimum” values that evening.
RX was an Icom IC-705, antenna is a 10m/33′ lazy monopole (running 10m wire vertically up a fiberglass pole, no counterpoise, no matching network, balun, flux capacitor, just a wire and pretty conductive ground).
Video: KI5OLV activating K6574 (Lower Neches Wildlife Management Area, TX), around 1:40 UTC
Video: W8CFS activating K-1552 (Warren Dunes State Park, MI), around 23:00 UTC, condx to the stateside were dipping at that time
I don’t know that W8CFS had brought to his park, KI5OLV brought an IC-7100 and was running its 100W into a hamstick antenna on his truck. Nothing to learn from that really, I’m just happy I can hear y’all! 🙂
By request, I’ve just posted another transceiver comparison video. This time, we take a look at the lab599 Discovery TX-500 and Icom IC-705 to determine which radio might better suit your needs.
As I mention in the video, I see these portable QRP radios as being in two different classes:
the TX-500 for operators who want the most rugged, efficient, and weather-resistant general coverage transceiver currently on the market and
the IC-705 for operators who want the most feature-packed high-performance portable transceiver on the market
Both radios are excellent options for hams who, like me, prefer playing radio outdoors.
As I mentioned in the video, I knew I’d forget some important points while making the live recording. Here are some extra notes I wish I would have included:
SSB operation: Both radios have excellent features for the SSB operator including EQ settings for both transmit and receive which is a major plus for a QRP radio. I wouldn’t make a purchase decision based on SSB operation–both are excellent.
CW operation: CW operators will be pleased with both rigs. It’s important to note, though, that the TX-500 doesn’t have full break-in QSK like the IC-705. The TX-500 has at minimum a 100ms recovery time after keying a character. That’s a quick recovery, but not fast enough so that an operator can hear between characters formed; especially at high speeds. The IC-705 has full break-in QSK and it sounds great. Note that both the TX-500 and IC-705 use relays, not pin diode switching, so you can hear relays clicking inside the radio, but both are pretty quiet.
Protecting the IC-705: There are a number of IC-705 3rd party cages appearing on the market. These can be used to help protect the IC-705 in the field. Numerous readers and YouTube channel viewers have recommended the IC-705 Carry Cage by Peovi. From what I’ve seen, it looks to be the best of the bunch, but it doesn’t do a lot to protect the lower back portion of the radio–the part of the chassis that meets a surface. I feel like it’s not quite what I’d want, thus hard to justify $135 for it. Other aluminum and 3D printed cages seem to add too much bulk to the radio or obstruct some of the most common connection points on the sides (antenna, key, ATU control cable, speaker/mic, etc.).
TX-500 connectors and cables: The TX-500 uses GX12 mm connectors that are widely used in aviation, commercial and military applications. They’re easy to find online, but the price per each with shipping is typically around $7.00-8.00 US. You get a better deal if you buy in bulk, but often bulk packages of 5 or more are of the same pin count/configuration. W2ENY has posted a number of accessory cables, spare connectors and even a military-style handset on his eBay store and website. The Icom IC-705 uses more standard 1/8″ and smaller two and three conductor plugs.
Receiver Performance: Based on Rob Sherwood’s receiver test data table, the IC-705 has a performance edge over the TX-500. In the field, this difference is not noticeable. Indeed, both radios have very respectable numbers. If I had to choose one radio over the other if operating in a CW contest, for example, I’d give slight preference to the IC-705. I’ve used the TX-500 during a CW contest before, however, and found it did a brilliant job blocking tightly-spaced signals–click here to watch the short video.
It’s a very compact radio for being so incredibly feature-rich and I love the portability simply using the attached battery pack. Since I operate mostly 5 watts with all my rigs, I rarely bother bringing an extra battery with it in the field.
With that said, I worry about the IC-705 more than any other portable radio I take to the field.
For one thing, it’s a $1,300 US rig. That’s not chump change for most of us.
The IC-705 also has a large color touch screen display. In fact, it’s the only field portable radio I own with a touch screen display. The touch screen has a matte finish and is pressure-sensitive rather than capacitive like most tablets and smart phones. Many capacitive screens use something like Corning Gorilla Glass which is actually quite durable and resistant to scratching and puncturing. It’s not perfect by any means (I think we’ve all shattered or broken a capacitive screen) but they’re more durable than the pressure-sensitive screen on the IC-705.
The IC-705 chassis feels very solid and it seems to be sealed very well, but at the end of the day, the chassis is make of a durable plastic material which is prone to scratching and I have to assume easier to damage than, say, the FT-817ND’s metal chassis.
Ray Novak with Icom America is a friend and when I took delivery of the IC-705 I mentioned how I felt protective of it in the field, fearing I might damage it in my backpack or even tumbling off a rock during a SOTA activation. Ray basically said that, as with everything new, I’ll get used to it and become more comfortable in the field.
I’ve never completely gotten there, though, and I’ve had this radio for a good nine months now.
I’m a backpack guy, so when the IC-705 is packed for field action in one of my Red Oxx or GoRuck backpacks, I house the IC-705 in a $14 Ape Case Camera insert. It’s not perfect, but fits it well.
I mentioned in my review that I eventually wanted to find a better solution.
I’ve looked at a number of 3rd party “cages” and numerous readers and YouTube channel viewers have recommended the IC-705 Carry Cage by Peovi. From what I’ve seen, it looks to be the best of the bunch, but it doesn’t do a lot to protect the lower back portion of the radio–the part of the chassis that meets a surface. I feel like it’s not quite what I’d want, thus hard to justify $135 for it (Peovi, send me a loaner to try out if you wish to prove me wrong.)
Other aluminum and 3D printed cages seem to add too much bulk to the radio or obstruct some of the most common connection points on the sides (antenna, key, ATU control cable, speaker/mic, etc.).
The form factor of the IC-705 is otherwise fine, but its chassis design does make it a little more difficult to protect than, say the KX3 or FT-817/818.
I’ve come to the conclusion that most of the time I use the IC-705, it’s on POTA activations where it’s sitting on a picnic table. Although I’m a backpack guy, this is the perfect time to kit out a ruggedized, weatherproof case.
Which case?
I started looking at cases last week and, being transparent, I’m a bit of a snob about these things. I want a case that’s made by a reputable company to protect the ‘705–I’m not going to hunt for one at a Walmart or Canadian Tire.
I’ve owned a few Pelican cases over the years. All have been smaller ones like the Pelican 1060 I’ve used with my KX1s. Pelican has a solid reputation and are certainly the best-known in this market and Pelican still makes all of their cases in the USA.
I’ve also been looking for a reason to try the case manufacturer, Nanuk. They design and manufacture all of their products in Canada and have a great reputation. Their pricing is the same or, at times, even slightly more competitive than Pelican for comparable cases.
Although I rarely care about the color, I decided I wanted a light grey or silver color for this case as opposed to black (my standard default), yellow, or another bright color.
In the Nanuk case line, their Nanuk 915 was probably the correct size to give the IC-705 enough padding, and allow space for all other accessories and items I’d need in the field.
I was just about to pull trigger on the Nanuk 915 via the Nanuk website and decided it would make sense to also check pricing on Amazon.com for both units.
The Nanuk 915 was about $76 (affiliate link) with the pick foam insert–a great price–but only that price in the black color. The silver color was about $97.
I then checked the Pelican 1400. The black case with foam insert was $95, but the silver one was $79.95. Since I really wanted silver and since I had a slight preference for the 1400’s dimensions, I purchased the Silver Pelican 1400 (again, affiliate link).
Amazon offers free no-hassle returns, so once I receive the 1400 next week, I’ll carefully measure and double check everything before digging into the pick foam!
A case for advice…
I’ve never kitted out a larger Pelican case with radio gear. I would welcome any and all advise from those of you who have. Since it’s easy to remove pick foam, but impossible to put it back if done incorrectly, I really want to follow best practices. Please comment!
Last Tuesday (April 27, 2020), I grabbed my radio gear and my boots then headed to the Blue Ridge Parkway for a quick morning activation.
There were three factors motivating me: 1.) the weather was amazing 2.) I had three free hours in my schedule and 3.) I was eager to pair the LDG Z-100 ATU with the Icom IC-705 for the first time.
Hazel–my canine companion–was as eager to hit the field as I was.
“Let’s go, Dad!”
When she heard me grab my boots, she met me at the door with tail wagging.
I did plan to hit the Blue Ridge Parkway, but had not decided on an actual site. The lowest hanging fruit (easiest sites to reach from the QTH) are the Folk Arts Center and the Blue Ridge Parkway Headquarters. I wanted more altitude, though, so we drove to the Craggy Gardens Picnic Area.
This is a favorite spot for our family, but this time of year can be quite busy–especially around noon. I hoped that I could beat the crowds by arriving early. We pulled into the parking lot around 9:00 AM and were one of the only cars there (score!).
Blue Ridge Parkway (K-3378 NC)
Hazel and I found a concrete picnic table overlooking the parking area and I quickly deployed the CHA Emcomm III Portable over a short tree with my arborist throw line. (Have I mentioned before how AMAZING an arborist throw line is? Why yes, I have!)
I made a video of the entire activation including pairing the Z-100 Plus ATU with the IC-705 via the supplied command cable. In true K4SWL style, I didn’t read the Z-100 Plus owner’s manual or connect the Z-100 Plus to the IC-705 prior to recording.
Frankly, I forgot to read the manual I wanted to show what it was like pairing the Z-100 Plus and IC-705 for the first time without having even referenced the manual. Fortunately, it couldn’t have been an easier process: connect the command cable, and go into the ATU function menu to activate the tuner.
I started my activation on 80 meters and–although the band was dead quiet–I worked K8RAT, WD8RIF, K4JAZ and ND1J in about six minutes.
Next, I moved up to 40 meters where I worked nine more stations in about thirteen minutes.
Finally, I moved to the 30 meter band where I worked two more stations in about five minutes.
One first for this activation was working K8RAT in north central Ohio on all three bands! His signal was incredibly weak on 30 meters, but I recognized his sideswiper “fist” or operating style.
At the end of the activation, I tested the Z-100 Plus by having it match the Emcomm III Portable random wire all the way up the band to 6 meters. It did a fine job.
No surprise here as the Z-100 Plus is a well-loved ATU that’s been on the market for quite some time already. At $150 it’s a proper bargain of an ATU. Unlike the mAT-705 Plus which only pairs with the IC-705, the Z-100 Plus is RF-sensing and can pair with any transceiver on the market.
Video
Here’s a video of the entire activation including pairing the Z-100 Plus with the IC-705 for the first time:
QSOmap
Here’s a QSO map of the entire activation:
This was a very enjoyable activation at one of my favorite Blue Ridge Parkway picnic areas. It was especially pleasant to have the place all to ourselves–a true rarity! I think Hazel was a bit bummed that our local red squirrels (we call them “Boomers”) weren’t out in full force. They’re proper “Squirrel TV” for her since she must be on a leash on the parkway and can’t chase them as she does at home.
If you’re ever travelling the Blue Ridge Parkway, this is a great area. As I mention in the video, the Craggy Gardens Picnic Area also borders a vast tract of land–accessible by a forest service road on the site’s driveway–where the Pisgah National Forest and Pisgah Game Land overlap for a POTA two-fer (here’s a previous report including this two-fer).
Craggy Dome–a SOTA summit–is also very close by. In addition, Mount Mitchell State Park is only 20-25 north on the parkway and offers up both a POTA site and SOTA summit. So many possibilities on this part of the BRP! One could easily activate four parks and two summits in the space of a few hours.
Sure…the sign is a little rough, but the site is nearly ideal.
Lately, when I hit a park or summit to do an activation, I allow a little extra time.
We’re truly in the doldrums of the solar cycle at present, but we’re heading into Solar Cycle 25 with the promise of more sun spots and better propagation. (At least, the ARRL is banking on it!)
If you’ve been doing field activations these past few years, you know how to cope when there are few or no sun spots. You might get less DX contacts, but you can still validate an activation easily enough.
But some days, propagation is unstable or wiped out altogether based on the particles, winds, and CMEs our local star might decide to hurl our way.
Last week (April 12, 2021), I stopped by a new-to-me site: Table Rock State Fish Hatchery.
It was very much an impromptu activation as I decided to visit the site on my way back home after spending time with my parents. Max (WG4Z) mentioned that he had recently visited the site and it had easy access–I checked the map and saw that it was, perhaps, a 30 minute detour.
Table Rock State Fish Hatchery (K-8012)
I arrived on site and found a number of concrete picnic tables and a load of trees ideal for suspending a wire antenna.
Before I deploy an antenna–a wire or vertical–I always check for power lines or cables in the vicinity. This site did have them so I deployed my antenna in such a way that there would be no possible way they could touch.
Always look for power lines!
My buddy Mike (K8RAT) told me in advance that this would be a challenging activation because band conditions were so rough, so I decided to deploy my Chameleon CHA MPAS 2.0 antenna as a random wire instead of a vertical.
I didn’t have my instruction sheet for the MPAS 2.0 so forgot to use the strain relieve at the base of the antenna (not a big deal) and I added a counterpoise wire. I knew it would radiate well.
Next time, I won’t forget to attach the strain relief!
I paired the Icom IC-705 with my mAT-705 Plus ATU knowing this would give me frequency options across the bands. Setup was actually very simple.
I hopped on the air assuming 40 meters might be somewhat fruitful.
Turns out, it was not.
Contacts were slow coming and I could tell conditions were very unstable. In the span of 30 minutes, I had only worked five stations. That’s a very slow rate compared with a typical activation.
I eventually made my way to the 60 meter band and was very happy to rack up an additional three contacts in fairly short order. (I often forget about 60 meters, but it’s a brilliant band and proper blend of 80 and 40 meter characteristics.
When I felt like I’d worked all available stations on 60 meters, I went back up to 40 meters and finally added three more contacts in 20 minutes.
If I’m being honest, this activation felt like a proper struggle. I was fully prepared to call it quits without having logged 10 stations to validate my activation simply due to my schedule. This activation took me to the threshold of my available time.
In fact, I recorded one of my real-time, real-life videos of the activation, but decided I wouldn’t even bother posting it because…well…it would be too long and had so few stations calling in.
In the end, though, and against my better judgement, I uploaded the video to YouTube because, frankly, activations like this are a reality in 2021.
In fact, once I returned home, I looked at the POTA and SOTA discussion groups and there were numerous reports of failed and troublesome activations that afternoon with ops running much more than QRP power.
I even read a report of one unlucky operator who was attempting his first ever POTA activation during that same span of time. He was not able to gather his 10 needed contacts and felt somewhat deflated. I shared my story with him because I think he feared either his gear or his technique were to blame. He was running SSB which would have put him at even more of a disadvantage that day.
Still…I had fun!
A bad day in the field is better than a good day in the office, right? Right!
While I might have been frustrated with the poor propagation, it didn’t stop me from enjoying this outing. The weather was beautiful, and I even had a canine welcoming committee pop by for a visit (you can see that in the video). I also worked a number of friends that day on the air including (I later found out) one very new CW operator.
Although you can’t see it in the photos or video, the Fish Hatchery is close to Table Rock which is a beautiful mountain here in western North Carolina. The drive to the site is quite scenic.
I don’t do POTA, SOTA, or WWFF for the numbers–I do it because I love playing radio outdoors.
Time is your friend
My activations are normally very short because I squeeze them into my weekly schedule. Keep in mind that, regardless of propagation, you can almost always get your 10 contacts with enough time. It also helps if you’re activating a site that is either rare, or if it counts for multiple programs (I’ll often find SOTA summits that are on state or national park land). Chasers from multiple programs are a good thing!
I’d encourage you to check band conditions before leaving home and simply plan to spend more time on the air if conditions are poor. Bring a book with you and put your CW or voice memory keyer to work while you dive into your favorite novel. 🙂
Keep in mind that sometimes our local star will surprise us with amazing band openings. The activation after Table Rock was a case in point. Stay tuned!
Have you struggled to complete an activation recently? Or have you struggled as a hinter/chaser? Please comment!
Without a doubt, the most popular type of question I receive from readers here on QPRer.com and over at the SWLing Post has to do with making equipment purchase decisions.
In the past two months, I’ve had numerous questions from QRPer readers asking my opinion about choosing between the new Icom IC-705, or the Elecraft KX2. In fact, as I started putting this post together this morning, I received yet another email from a reader asking my opinion about these two iconic QRP transceivers!
I love both of these radios for different reasons, so the answer is not an easy one.
Let’s discuss this in some detail…
I decided to make a video talking about the pros and cons of each transceiver and note the reasons why one might pick one over the other. My hope is that this will help inform a purchase decision:
QRP radios, product announcements, reviews, news and more. Low power amateur radio fun!
Please support QRPer by adding us to your whitelist in your ad blocker. Ads are what helps us stay online. All of our ads are ham radio related--no junk, we promise! Thank you!