Those of you who subscribe to the Elecraft newsletter, no doubt, took note of this particular news item:
Price Increases Coming in November
By now you may have seen and heard the numerous communications regarding the impact the global pandemic is having on supply chains, and what has in turn resulted in price increases of raw material, parts, and transportation costs. Unfortunately, we have also been affected by these increases. Given this situation, we will be increasing prices of products across all product lines on November 15, 2021. Any orders before November 15, 2021 will be honored at the lower prices.
We value your business and thank you for your patience as we navigate these challenging times.
Elecraft isn’t the only manufacturer who will soon increase prices. I’ve spoken with other manufacturers who’ve told me that, along with raw materials/parts, even their shipping and packing supplies have increased as much as 15-20%. For many manufacturers, this takes a deep cut into narrow profit margins, so price increases are inevitable.
If you’ve been planning to purchase an Elecraft product even knowing there may be a lead time involved, you might consider pulling the trigger before November 15, 2021.
Anthony (K8ZT) works two 20M stations from the Sacramento platform.
Many thanks to Susan (WB2UQP) who shared this piece by Anthony (K8ZT) which was originally posted to the Elecraft KX forum. Anthony kindly gave us permission to re-post it here on QRPer.com:
AX1 Success Story
All year I have been taking part in State QSO Party Challenge with the goal of working all 45 events.
The problem was I would be on an Amtrak trip on the California Zephyr during the entire California QSO Party (ironically arriving at my destination in Emeryville, CA just after CAQP ended).
So my opportunities to get the two required contacts would be on one of the platforms during one of the Zephyr stops (usually around 5 minutes, but with a few 10-minute stops) so there would be no way to set up an antenna. I was using my Elecraft KX2 and purchased an AX1 for the trip.
My first opportunity was 10 minutes at Glenwood Springs, Colorado Station.
Using the KX2 and AX1 with counterpoise I was able to work three stations in CA on 20 Meter CW: K6XX, W6FRU, and N6TV.
During my next opportunity, now as an in-state station, from the Sacramento platform I worked two stations on 20 Meters:
W0BH in KS on CW, and K2KR in CO on SSB
-Anthony Luscre (K8ZT)
I love this, Anthony! Combining rail travel and radio? It can’t get better than that!
I also love this because it points out the advantage of compact radio setups like the KX2/AX1 pairing: they allow you the flexibility to operate in time frames and conditions other setups might not easily accommodate.
To think that you met your goal of working the State QSO Party from Amtrak platforms in 5 to 10 minute windows of time? Wow!
And it doesn’t even look like you’re breaking a sweat!
This year I’ve been trying to make dedicated posts and videos to address questions I’m asked most often by QRPer.com readers and my YouTube channel subscribers. The idea is to have a link I can send in a reply instead of trying to give a comprehensive answer in an email.
One question that’s been surfacing a lot lately is a variation of:
“Which should I buy, Thomas? The Xiegu X5105 or the Elecraft KX2?”
I’m sure the reason I’ve been getting this question is because I reviewed and purchased the Xiegu X5105 earlier this year and have used it on a number of activations.
I’ve owned the Elecraft KX2 since 2016 so have a lot of experience with this little field radio as well.
Many thanks to Carolanne (N0RNM) who shares the following guest post:
A Booty Boss Micro Radio Kit
by Carolanne Fisher N0RNM
I am a bit of a tinkerer and an aspiring POTA activator, so when I received my Elecraft KX2 a couple of weeks ago with its way-too-big carry bag, I immediately started to think about ways I could keep the KX2 protected on the trail in a much lower-profile, light-weight, and easy-to-carry kit that would always be ready to go. The trick was to find a case of just the right size, with plenty of built-in organization and flexibility to build the kit around. I found what I hoped would be exactly what I was looking for from the excellent Red Oxx Manufacturing company (redoxx.com) — a soft-sided compact bag they call the Booty Boss Waist Pack. At least the specs looked good…
My Booty Boss Micro Radio Kit, packed up and ready to roll. The color isn’t exactly “low-profile,” but I figure there is more than enough black and gray in the world.
I am certain that whoever designed this bag did it specifically with the KX2 in mind. It is small enough to take anywhere, yet it fits my entire setup, including the radio, an extra battery pack, an AX1 antenna, complete with its 40 meter extension coil, 2 counterpoises, along with other necessities perfectly. I printed and spiral-bound a small note pad, shoved in a few accessories, and I was ready to rock and roll. The bag is even lightly padded for a bit of peace of mind. I am a CW-only kind of op so a mic is not a concern, especially since if I absolutely needed to use phone, the KX2’s built in mic would serve perfectly fine.
A peek into the top of the fully packed bag. I replaced the carrying strap that came with the bag with a Red Oxx Claw Non-Slip strap to make a more secure carry.
I tested the bag during several “back-porch activations” and everything seemed to work great. That is until I tried to use it under more realistic conditions — without the shaded picnic table to deploy on and the comfortable chair to sit on. Sitting on a rock while balancing the radio on my knee with its floppy AX1 antenna, and note pad while actually tying to send code proved to be a bit more than I could handle. It was clear that something like a clipboard was necessary to complete the micro radio kit, but a normal-sized clipboard would completely break the one-tiny-bag ethos.
A couple of years ago I designed and 3D printed a portable folding easel to support my sketchbook, watercolors, water etc. when out and about nature journaling or urban sketching. It worked great for that so I made a smaller version, added a recess for the radio and made sure it had room for the notepad. In order to fit in the bag, the size, even when opened to its full 8” x 9.5” size is a bit cramped, but with the addition of a leg strap, like a pilot’s lap desk, it it does the trick.
The complete current contents of my micro radio kit. Total weight: 4.3 Pounds
Here is everything currently in the bag and how it all gets stowed:
Front zip pocket
13’ and 33’ counterpoises for use with the AX1
An extra 28.5’ random wire antenna with 50’ of mini throw line attached (fly fishing backer line with two 1 oz. fishing weights) along with a 17’ counterpoise
Front main compartment
Folded radio desk
Note pad
Pencil
Two small interior pockets
Binder post
Spare KX2 Battery
Interior zip pocket
Spare set of paddles w/ KX2 attachment and cord (by Peter GM0EUL)
Spare pencil
Copy of my radio license
Rear main compartment
Ax1 antenna (whip, 20 and 40 meter coils) lying the bottom
KX2 (fits in the bag with the KXPD2 paddle attached)
Large slip pocket
Ear phones
Kit fully deployed with the KX2 on the custom radio desk.
The KX2 fits flat on its back or up on its kick stand in its custom sized recess. A sticky gel pad (from Amazon) placed in the recess pretty much “glues” the rig to the desk until you want to remove it.
Although I don’t use it all that often, the AX1 is my all-purpose, quick-to-set-up and a snap-to-put-away antenna. I mount the bipod inboard to the radio (over the BNC connection) so it fits on the desk to provide support. I wedge the bipod out from the rig with a spare pencil or a stick from the trail placed between the rig and the front leg to take some of the twist pressure off the BNC connector.
Although the micro radio kit holds everything I need to make contacts, there are plenty of times that I like to have a more luxurious set up — a folding chair and table, my Alex Loop antenna, tripod, lunch, iPad, etc. Or perhaps I’m off for a multi-day and need an external battery, a solar charging system, food, shelter, etc. This scenario is precisely where the micro radio kit really comes into its own. It is tiny enough to slip into just about any bigger bag or placed on the waist belt of a backpack. No more wondering if you remembered this or that bit of radio kit or loosing track of things you borrowed from another kit. If you actually did forget something extra you thought you packed, not to worry, the micro radio kit has everything you need right inside to make contacts.
As a tiny everything necessary, nothing extra radio bag, the Booty Boss micro radio kit is, well, the BOSS!
– Carolanne (N0RNM)
Thank you so much for sharing this, Carolanne! As you know, I’m a massive fan of Red Oxx gear and also own the Booty Boss. It’s simply brilliant that you can even pack a folding radio desk inside! Thank you so much for sharing your field radio kit with us.
When it comes to parks, I haven’t picked up many new-to-me “uniques” lately.
In truth, though, I’ve put more effort into activating unique summits which takes more time to plan, plot, and activate. SOTA has taken a bite out of my park uniques, but I’m good with that because to me it’s less about my park/summit numbers and more about the exploration and outdoor radio time.
On Tuesday (July 6, 2021) however, I added one more unique to my 2021 park count: Mountain Island Educational State Forest (K-4858).
This park is actually a modest detour during my weekly travels, but I’ve never popped by for an activation. You see, unlike other state parks I visit, Mountain Island isn’t yet open to the public on a daily basis. On their website, they state that visits must be arranged in advance, so I reached out to them the morning of July 6 and they promptly replied, welcoming me for a visit and activation that very same day!
Off the beaten path
Since this state park isn’t yet open to the public, I didn’t see the typical brown highway signs pointing me to the park entrance, but Google Maps steered me right to the front gate where there’s a sign.
The gates were unlocked and open, so I pulled into the property and met with two of the park staff who were incredibly kind and accommodating. They were both familiar with the Parks On The Air (POTA) program which made it much easier for me to ask about spots where I could set up my station.
First, though, I wanted to know more about Mountain Island Educational State Forest so I asked ranger Laura about the history of the site.
Turns out, Mountain Island is the newest Educational State Forest in North Carolina and has been in the works for more than 20 years.
The Forest is a vast conservation area that protects 12 miles of shoreline on Mountain Island Lake in the Catawba River Basin. This lake is the primary drinking water supply area for Charlotte, Mecklenburg and Gaston Counties. She told me that one in 23 North Carolinians rely on this area for their source of water.
Much of the land was originally owned by Duke Power who put it up for sale in 1998. Conservation groups purchased the land from Duke’s real estate agency in 1998 and put it into a conservation easement. The land is actually in two counties (Gaston and Lincoln) and a portion in the city limits of Gastonia.
The NC Forest Service now manages the forest and supports the public-private partnership with the counties, municipalities, and conservation groups.
Mountain Island has been actively educating school groups and the public about the river basin and local flora/fauna for many years by appointment. Currently, a new education center is being built on the property and will soon be open to the public with regular business hours. Being so close to population centers, I imagine they’ll stay busy!
Shade
Park ranger Laura was kind enough to allow me to set up under a huge tree in front of their ranger station.
I was grateful for the shade: it was 92F (33.3C) and humid.
There were no picnic tables under the tree, but I happened to have two folding chairs in my car. I used one as a table and the other as a chair. I flipped over my GoRuck GR1 backpack to make a stable base for the Yaesu FT-817ND.
I was super pleased to put the Yaesu FT-817ND back on the air. It’s been a while since I’d used it in the field because my review radios (TX-500, X5105, etc.) have taken priority.
I love the FT-817ND and believe it’s actually an exceptional transceiver for CW and SSB ops. The CW full break-in QSK is wonderful and I actually like the mechanical sound of the T/R relay switching (if you like pin diode switching, you should look the other way, though!). With the 500Hz CW filter installed, the front end is pretty bullet-proof, too!
This was the first time I had paired the FT-817ND with my 28.5 foot speaker wire antenna. The random wire antenna needs a good ATU to match impedance, so I employed the Elecraft T1 this time (soon I’ll also try the LDG Z-100A).
I had planned to do a little SSB work, but quickly realized I’d forgotten the FT-817ND microphone. A shame because this site actually has excellent mobile phone service so I could have spotted myself to the network. Next time–!
I started on 40 meters CW and worked ten stations in 21 minutes. That’s a perfect pace for me!
Next, I moved to 20 meters where I worked six more in 9 minutes.
I was incredibly pleased with how well the speaker wire antenna performed–especially on 20 meters.
From the Piedmont of North Carolina, I worked Montana, Texas, New Hampshire, and Italy with 5 watts into $4 worth of speaker wire.
I did a quick back-of-the-envelop calculation and discovered that I yielded about 943 miles per watt!
To be clear, IK4IDF did all of the heavy lifting in our contact with his 9 element Yagi, but still it’s awfully exciting to put DX in the logs with only fair propagation.
Video
Of course, I made a real-time, real-life video of the entire activation (save the set-up and take-down):
I packed up quickly because I had a SOTA activation planned that afternoon on Anderson Mountain. I’ll post a field report and video of that activation soon.
Rev 4 FT-817 Buddy Board
Also, I’m about to start soldering together G7UHN’s new Rev 4 FT-817 Buddy Board! Revision 2 worked wonderfully, but revision 4 now includes a CW memory keyer among other upgrades! (Woo hoo!) All of the components are now in the shack–just a matter of soldering them together and programing the Arduino Nano. Andy, if you’re reading this, expect a call from me soon, OM!
Thank you!
I’d like to thank all of you for reading this field report and I’d especially like to thank those of you who contribute to QRPer.com via Patreon and our Coffee Fund. While my content will always be free and QRPer is very much a labor of love, your support helps me purchase gear and supports my radio travels. With that said, if you’re saving up for your first radio or need to invest in your own kit, I’d rather you support yourself.
My goal with QRPer is to champion field radio operations and encourage others to discover the benefits of playing radio outdoors!
Here in the Asheville, NC area, there’s one mountain that almost anyone can recognize by sight: Mount Pisgah.
Mount Pisgah is prominent because not only is it one of the taller summits bordering the Asheville basin, but it’s also home to the WLOS TV tower and and a cluster of public service and amateur radio repeaters.
I’ve been eager to activate Mount Pisgah for Summits On The Air (SOTA). Along with Bearwallow Mountain, and Mount Mitchell, it’s one of the most popular SOTA summits in the Asheville area.
Being so accessible from the BRP, the Mount Pisgah trail also receives a heavy amount of foot traffic. Being locals, our family tends to skip this trail when we’re venturing along the BRP because it can be so congested at times.
Mount Pisgah (W4C/CM-011)
On Tuesday, June 1, 2021, Hazel and I decided to hit Mount Pisgah fairly early and avoid the crowds.
We arrived at the trailhead around 8:15 AM and there were very few cars there–a good sign indeed!
Hazel was chomping at the bit to start our hike!
The trail is only about 1.5 miles with a 700 foot elevation gain, so not strenuous.
It was blissfully quiet and we only passed two other groups of hikers on the way up.
I’ll admit that I was keeping an eye out for black bears, though. We saw bears very close to the trailhead entrance on the BRP that morning. I may have mentioned before that black bears are not something to be feared here in western North Carolina; they typically avoid people and your chances of being fatally injured by a black bear are incredibly slim–right there with being struck by lightening.Still, the black bears that wonder near populated spots like Pisgah along the parkway are often fed by tourists and lose their fear of humans. Not only that, but they even expect people to be food dispensers. Not good. As we say around here, “a fed bear is a dead bear” because feeding bears leads to aggressive behavior and the poor creature’s eventual euthanization.
But I digress!
Hazel and I reached the summit and were happy to find that we were alone. Pisgah’s summit can get very crowded as there really isn’t a lot of space–only a large viewing platform next to the massive tower.
When we arrived on site, the summit was surrounded in clouds.
I briefly considered operating from the viewing platform, but knew I would have to cope with a lot of curious hikers while trying to operate CW. Since I’m not a good multitasker, I decided to do what many SOTA activators do: carefully pass under the tower and find an activation spot on the other side of the summit.
Hazel and I found a small overgrown trail used primarily by those working on the tower. I deployed my station in a small clearing.
For this activation, I chose my Elecraft KX2 and paired it with the Chameleon CHA MPAS Lite which has quickly become one of my favorite SOTA antennas.
I deployed the CHA MPAS Lite perhaps 15 feet away from my operating spot, in the middle of a spur trail. I was able to extend the 17′ vertical without touching any branches. I rolled out about 20-25′ of counterpoise wire along the ground.
After setting up, it dawned on me that I’d forgotten my clipboard. No worries, though! I simply flipped over my GoRuck GR1 pack and used the back as an operating surface.
On The Air
Not only was this a summit activation, but also a park activation–indeed, a two-fer park activation at that! The summit of Mount Pisgah is in both Pisgah National Forest (K-4510) and Pisgah State Game Land (K-6937).
If I’m being honest here–since I’m not a “numbers guy” and don’t follow my activation counts closely each year–it’s very tempting not to announce or count this activation in both the SOTA and POTA programs since K-4510 and K-6937 aren’t rare entities. The main reason for this is because, back home, I end up doing double entry with my logs: loading them via the SOTA online log submission tool, then entering them in N3FJP or TQSL for submission to the POTA and WWFF programs. It can be very time-consuming doing this.
I am working on a way to “massage” the ADIF file data so that I can submit it to both programs with less effort.
But, of course, I announced the activation on both SOTAwatch and the POTA site. At the end of the day, I’ve never *not* announced a dual SOTA and POTA activation because I can’t help but think it might offer up the sites to a new POTA hunter. It’s worth the extra log entry later.
Another plus with activating a site in two programs is that you’ll likely be spotted in both thus increasing your odds of logging the necessary contacts to validate your activations.
Turns out, snagging valid activations that Tuesday morning was incredibly easy. And fun!
Fabulous conditions!
I started on 20 meters CW and logged fifteen stations in eighteen minutes. The band was energized because not only did I easily work stations from France, Slovenia, and Spain in Europe, but also stations all over North America from the west coast to as close as the Ohio valley and into Canada.
I wanted to play a little SSB, so I moved to the phone portion of 20 meters and spotted myself on the SOTA network. I worked five stations in eight minutes. Fun!
Next, I moved up to the 17 meter band and stayed in SSB mode. I worked five more stations in nine minutes. Had I only activated this site in SSB on 20 and 17 meters, I could have obtained both a valid SOTA and POTA activation in 17 minutes.
Even though I knew I needed to pack up soon, I decided to hit the CW portion of 17 meters before signing off. I started calling CQ and was rewarded with sixteen additional stations in eighteen minutes.
Phenomenal!
All in all, I logged 41 stations.
Here’s the QSO Map of my my contacts–green polylines are CW contacts, red are SSB (click to enlarge):
A welcome interruption!
If you watch my activation video, you’ll note that as I moved to the 17 meter band and started calling CQ, another hiker popped in and introduced himself.
Turns out it was Steve (WD4CFN).
As Steve was setting up his own SOTA activation on Mount Pisgah next to the observation deck, his wife, Patty, heard my voice off in the distance giving a signal report.
Steve and I had a quick chat and coordinated frequencies so we wouldn’t be on the same band at the same time and interfere with each other.
After finishing my activation, I stopped by the observation deck and spent some time with Steve and Patty as Steve finished his SOTA activation and packed up his gear.
Steve was also using an Elecraft KX2 and strapped his telescoping fiber glass mast to the side of the observation deck to support a wire antenna. Very effective!
Hazel and I hiked back to the trailhead with Steve and Patty. It was so much fun talking ham radio, QRP and SOTA with kindred spirits. What an amazing couple!
Steve and Patty were actually on a multi-day camping trip in WNC and planned to hit two more summits by end of day. In fact, I got back to the QTH *just* in time to work Steve (ground wave!) at his second summit of the day. It was fun hunting someone I had just spent time with on a summit!
Steve and Patty: Again, it was a pleasure to meet you both!
Hazel and I both needed a little trail time that Tuesday morning. Hiking to the summit in the low clouds, taking in the views, enjoying a stellar activation and then meeting new friends? It doesn’t get any better than this.
I’ll say that I do love the Elecraft KX2 and CHA MPAS Lite combo. It makes for a compact and effective SOTA pairing that can be deployed so quickly.
A couple months ago, I ordered a SOTAbeams Tactical Mini fiberglass telescoping pole. I plan to pair it with my QRPguys tri-bander kit antenna.
If I’m being honest, though, I find that the CHA MPAS Lite is so quick to deploy–like 2-3 minutes tops–I’ve yet to take the Tactical Mini and Tri-Bander to a summit. No worries, though, as I will eventually deploy this pair on a summit. Admittedly, I need to work on my mast guying skills in advance–let’s just say that I’m still in that awkward stage of struggling to manage each guy line as I try to keep the Tacmini vertical during deployment. I welcome any tips!
I’ve been receiving a lot of comments lately from readers and viewers asking to see more Hazel in my reports and videos.
Hazel, if you’re not familiar, is my brown, white, and freckled canine shadow.
Hazel requires absolutely no prep time to go on a hike and summit/park activation. She’ll go from a deep, dreamy sleep where she’s chasing squirrels and her paws are twitching, to wide awake, tail wagging and nose pointed at the door in 2 seconds flat.
All it takes is the sound of me putting on my hiking boots (which must be louder that I imagined).
On Monday (May, 24, 2021) the weather was beautiful and I decided to finally add Bearwallow Mountain to my list of SOTA activations. Hazel was ready for a short hike!
Bearwallow Mountain (W4C/CM-068)
Bearwallow is one of the most popular summits to activate in the Asheville/Hendersonville area of western North Carolina. Any semi-seasoned local SOTA activator probably has Bearwallow in the logs. Why?
The Bearwallow antenna farm is extensive!
For one thing, Bearwallow is a ham-friendly site. A number of local repeaters are on this mountain and some of our local clubs have access to the summit. Once–I can’t remember the year–I even spent time with a club (I believe it was the Roadshow ARC) on Bearwallow for the ARRL Field Day. It was a blast!
Bearwallow is also a very accessible summit.
The trailhead to the summit (Google Map) is tucked away in the Upper Hickory Nut Gorge area–and there’s ample paved parking unless you happen to pick a very busy day (basically, any weekend with good weather will be busy!). Hazel and I were hiking on a Monday morning, thus there was very little activity and loads of parking spaces.
Some years ago, Conserving Carolina acquired the summit and much of the land on Bearwallow Mountain. Their conservation easement protects this area from future development and opens it for the public to enjoy.
Conserving Carolina maintains the trail system to the summit and all of the hiker information and blazing.They do a brilliant job!
There are two options for hiking to the summit: a proper foot trail, or you can take the Fire Tower Road which is the best choice for hikers who need a more gentle incline and flat gravel hiking surface.
Hazel and I found a nice spot to set up the station well within the activation zone. On summits like Bearwallow where there are clusters of communications towers, I prefer not to set up next to them. This is where that 25 meter SOTA activation zone (AZ) comes in handy.
I had actually planned to use my Elecraft KX3 on this activation, but after setting it up, I realized quickly that my power cord had developed a fault.
Fortunately, I packed a spare radio.
Knowing in advance that this would be a short hike–before leaving the QTH–I also packed the KX2 kit in my backpack as a backup. I don’t always have the luxury of packing a second radio, but wow! Am I glad I did that Monday!
Setting up the Chameleon CHA MPAS Lite vertical, of course, was super easy.
On the Air
I started the activation on 20 meters and spotted myself to the SOTA network via the SOTA Goat app. Of course, before leaving home, I had also set up an alert on SOTAwatch so that the spots page would auto-spot me via the Reverse Beacon Network (RBN) if I didn’t have mobile phone coverage.
In short? The contacts started rolling in. I was very surprised to have this sort of response on a Monday morning.
In 22 minutes, I worked a total of 19 stations including one summit to summit (S2S)–thanks for that, Eric (VA2EO)!
I was very pleased with the number of contacts logged in such short order because I only had a max of 25-30 minutes to be on the air before I needed to pack up and head back to the QTH.
Here’s the full log:
Activations like this one remind me of what one can do with QRP power and a modest antenna.
Sure, at one point–after I had worked at least my first four to achieve a valid QRP SOTA activation–I increased the power from 5 watts to a cloud-scorching 10 watts! 🙂
I must apologize for the audio in this one–it’s a little weak due to how the camera was set up.
Hazel at it again
So I brought along a retractable leash/lead for Hazel for this particular outing.
This leash allows her to roam more freely during our actual hike. On the summit, I locked the leash and attached it to my pack so it would keep her within 4 feet or so of where I was sitting which was cow patty-free.
At one point, near the end of the activation, when I was trying to manage a few calls, off-camera Hazel discovered that the leash unlocked, allowing her more flexibility to roam.
I looked up to discover that she found a semi-moist cow patty I somehow missed and was preparing to “enjoy” it. While sending CW and trying to keep from knocking down the camera, I used my left foot to put the brakes on her leash. She knew I was struggling, though, and tugged more.
I managed to stop her before even one paw plopped in the patty. Somehow. It was a very close call, though.
If you’ve watched my activation videos before, you’ve no doubt gathered that I’m not a multitasker. This little event really tested my ability to hold it all together on and off camera! 🙂
After packing up the station, Hazel and I took the Fire Tower Road back to the car. It was a very pleasant stroll and cow patty free.
Thank you for coming along with me on this SOTA activation and making it to the end of the report. You deserve an award! Please treat yourself to a local summit or park soon!
I’ve also been asked which radio is “better” and which one I’d purchase if I could only buy one.
To address these questions, I decided to make a YouTube video where I outline some of the pros and cons of both radios, and compare them in terms of features especially with regard to field use.
Last Wednesday (April 7, 2021), I managed to block out most of the day to play a little radio in the field. When I have opportunities like this, I usually take one of two approaches: either make a multi-park and/or summit run, or go further afield and activate a site or two on my bucket list.
I chose the latter.
Two of the very few sites from my 2020 Park Bucket List that I hadn’t managed to activate were Rendezvous Mountain Educational State Forest and Rendevous Mountain State Game Land. When I created my bucket list, both of these parks were very rare: one was an all-time new one, the other had only been activated once. In 2021, they were still rare but both had activations logged.
When two park entities are this close together, I will do my at-home research in advance and search for a spot where the boundaries of the two parks might overlap opening an opportunity for a one activation two-fer. Although there are exceptions (like Elk Knob) when a park and a game land share a common name, there’s a decent chance their boundaries overlap, possibly even in an accessible area.
Fortunately, I discovered last spring that Rendezvous Mountain did indeed have an accessible spot where both the game land and state educational forest meet. I pinpointed it on Google Maps and embedded the URL in my park bucket list spreadsheet:
I can’t overstate how important one of these lists is to an activator who loves exploring different sites. When the weather outside is horrible and activating isn’t a good option, spend your time indoors doing research for a day when you can hit the field!
Tuesday evening, I decided to finally hit this Rendezvous Mountain two-fer. Since the weather was forecast to be beautiful, I also wanted to fit in a proper hike, so I started searching for a nearby summit as well.
Click to enlarge
Turns out, there was a SOTA summit called “2543” (named after its height above sea level in feet) that was accessible from a Rendezvous Mountain Educational State Forest parking area. An easy four mile round-trip hike. Score!
Next, I found the 2543 summit on a topo map and compared it with the location I’d already plotted for my two-fer. Turns out, they were very close to each other–likely within 100 meters. I was able to confirm with confidence that the summit and game land could be activated at the same time. The state forest map was a little too vague to confirm its exact boundary.
I originally found this site using the NCWRC maps and topo/trail maps.
Here’s the interesting part: the game land parking area I planned to use was within 50-100 meters of the SOTA summit. If I wanted to, I could easily turn this summit into a drive-up activation. But again, I wanted to hike, so I plotted a trip to the parking area of Rendezvous Mountain Educational State Forest.
My plan was to hike to the summit, activate it and the game land as at the same time, then hike back to the Rendezvous Mountain Educational Forest’s parking area, grab a picnic table and activate the state forest separately.
I arrived on site around 11:30 and spent a few minutes confirming that I was hitting the correct trail (as there are multiple trails in this forest).
The trail head is at the last parking area, simply keep following the paved road which quickly turns into a gravel/logging road.
Turns out, it couldn’t be easier to find the summit trail (should you decide to make this same activation): simply drive to the last parking area in Rendezvous Mountain Educational State Forest, and continue walking up the road past the metal gate. This road will take you past the visitor’s center, turn into a gravel road, then pass the fire tower road on your right.
Simply continue following the main road for two miles. There are a few branches on this road and I did take one thinking I was sticking to the main road, but quickly discovered it was a dead end and had to back-track. In general, follow the most traveled road and you’ll be fine.
The summit is fairly nondescript since it’s lower in altitude and covered in trees. Look for a short spur road, two miles in, near the game land gate (where you could park if you wanted to do a drive-up activation).
As I hiked to the site, I realized that the logging/access road is actually the boundary between the game land and the state forest. A promising sign!
When I arrived at the short spur road that ended on the summit of 2543, I was very pleased to discover that the game land/forest boundary followed the spur road and was all well within the SOTA activation zone! Brilliant!
Rendezvous Mountain State Game Land (K-6941), Educational State Forest (K-4859), and
SOTA Summit 2543 (W4C/EM-082)
The game land, state forest, and summit all met on an old road bed that was flanked by tall trees.
This meant that I could activate all three sites in one go and–since there’d be no need to activate the state forest separately–still have enough time to perhaps activate Kerr Scott Game Land later in the afternoon on my way home.
You can see the state forest sign on the left, the game land sign on the right–both within the SOTA activation zone.
Point of clarification about park boundaries and “two-fers”
POTA is fairly clear about where park boundaries are in terms of counting a park in an activation, “The activator and all the equipment you use must be within the perimeters of the park, and on public property. […] If the park is part of a trail system or river, you need to be within 100 feet of the trail or river.”
In order to claim a two-fer, there needs to be park overlap. Technically, you can’t straddle a map line between two (non-river/trail) park sites and activate them as a two-fer because you and your equipment can’t be in both places at the same time if there’s no property overlap. In POTA, there is no buffer area around a park unless it’s a trail or river.
SOTA is specific and gives you a 25 vertical meter activation zone which forms a contour line around the true summit (not a secondary, nearly as high area). Little room for interpretation here.
For Rendezvous Mountain, I decided it was a POTA two-fer because I activated on a road that is also a marked and blazed trail used for recreation/access for both the game land and forest–and both of these areas are a part of the over-arching Rendezvous Mountain State Forest.
Had this been a boundary defined by an imaginary (surveyed) line without a common trail or road, there would have been no point of overlap, thus no two-fer.
This was actually the first time I had been in this particular situation. All of the other multiples I’d activated in the past had vast areas of geographic overlap.
Again, no one but the POTA activator actually knows the truth, and it would be incredibly rare that anyone would ever question you after your logs have been submitted. There is no POTA Police and it’s not even a contest–it’s a group activity. It’s all about following the rules to the best of your ability, exercising due diligence, and being honest with yourself.
At the site, I used my new compact arborist throw line bag.
It worked even better than I had expected.
I was concerned that the line wouldn’t deploy as smoothly as the line does from my larger arborist storage cube, but it deployed perfectly!
On the air
I deployed my Vibroplex EFT-MTR end-fed antenna across the road bed and connected it to my Elecraft KX2 with attached KXPD2 paddles.
This made for a very compact and simple setup: in situations like this, I love the compact size of the KX2 since it can easily fit on my clipboard where I also log on paper.
Propagation was very unstable, but I hoped that this site would be rare enough to attract SOTA, POTA, and WWFF chasers thus helping me log my needed 4 for SOTA and 10 for POTA/WWFF.
I first hopped on 20 meters CW where I quickly worked seven stations in eight minutes–from Utah and Arizona, to France, Spain and Germany. An excellent start!
I then hopped on 30 meters (using the KX2’s ATU instead of removing the SMA cap on the EFT-MTR), and worked one station in Missouri.
Next, on 40 meters CW, I logged another six stations in six minutes.
I then connected the microphone and worked a Summit-To-Summit contact on 20 meters SSB. I was very pleased to put K4AAE/P in the logs because I had difficultly working other stations on 20M SSB.
Finally, I moved to 40 meters SSB and worked a total of four stations in five minutes.
All-in-all, a total of 19 contacts logged in a total of 45 minutes on the air. Not bad for QRP on a poor propagation day!
QSO Map
Video
I made one of my real-time, real life videos of the entire activation. Check it out below or via my YouTube channel:
Photos
As I hiked back to the car, I took my time and enjoyed the weather, the hike, and the solitude. Here are a few extra photos from the camera roll:
Thank you for reading this field report!
If you ever pass by North Wilkesboro, North Carolina, I highly recommend this site. It’s very rare that you find a site that is a SOTA, POTA, and WWFF entity and that can be activated by a pleasant 4 mile RT hike, or as a drive-up.
I’ll plan to hit Rendezvous Mountain again next year!
Without a doubt, the most popular type of question I receive from readers here on QPRer.com and over at the SWLing Post has to do with making equipment purchase decisions.
In the past two months, I’ve had numerous questions from QRPer readers asking my opinion about choosing between the new Icom IC-705, or the Elecraft KX2. In fact, as I started putting this post together this morning, I received yet another email from a reader asking my opinion about these two iconic QRP transceivers!
I love both of these radios for different reasons, so the answer is not an easy one.
Let’s discuss this in some detail…
I decided to make a video talking about the pros and cons of each transceiver and note the reasons why one might pick one over the other. My hope is that this will help inform a purchase decision:
QRP radios, product announcements, reviews, news and more. Low power amateur radio fun!
Please support QRPer by adding us to your whitelist in your ad blocker. Ads are what helps us stay online. All of our ads are ham radio related--no junk, we promise! Thank you!
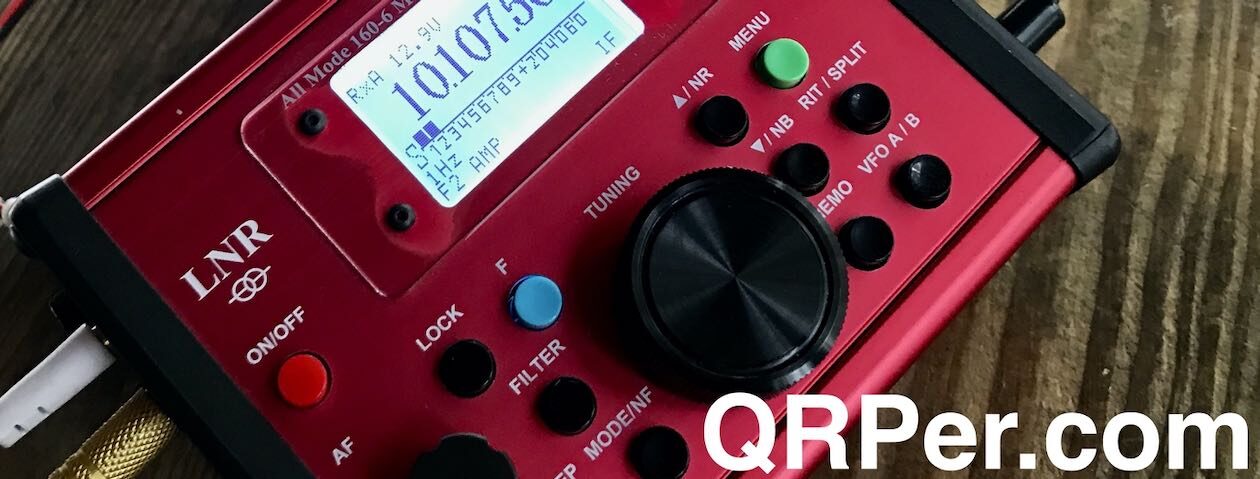
 Those of you who subscribe to the Elecraft newsletter, no doubt, took note of this particular news item:


