Tag Archives: Elecraft T1

POTA Field Report: Pairing the Icom IC-705 with the Elecraft AX1 pocket antenna

I think I’ve said before that I don’t like doing things the easy way. At least, I’m coming to that conclusion.

This Saturday (Jan 30, 2021), I had a small window of opportunity to perform a Parks On The Air (POTA) activation.  My park options were limited because I needed to stay near my home and a store where I was scheduled to do a curbside pickup.

The only viable option–since time was a factor–was my reliable quick hit park.

The Blue Ridge Parkway (K-3378)

I plotted a quick trip to the Blue Ridge Parkway Folk Art Center which is centrally-located and, this time of year, there are few visitors.

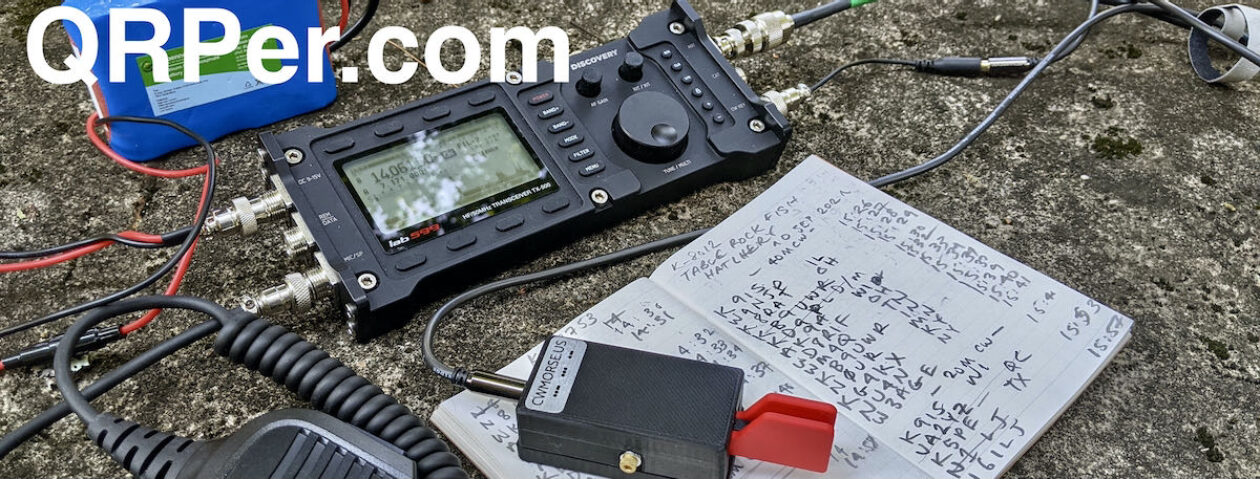
But what radio take? It had been a couple of weeks since I used the IC-705 in the field, so I decided to take it and rely only on its supplied BP-272 battery pack.

My buddy Mike (K8RAT) had warned me only a few minutes before my departure that propagation was pretty much in the dumps. I’d also read numerous posts from QRPers trying to participate in the Winter Field Day event and finding conditions quite challenging.

Saturday was the sort of day that I should’ve deployed a resonant wire antenna and made the most of my meager five watts thus collect my required 10 contacts in short order.

And that’s exactly what I didn’t do.

You see, a really bad idea popped into my head that morning: I had a hankering to pair the IC-705 with my Elecraft AX1 super compact vertical antenna.

This made absolutely no sense.

I tried to get the idea out of my head, but the idea won. I suppose, at the end of the day, I’m not about taking the easy path (and I’m obviously a glutton for punishment).

I was also very curious if the mAT-705 Plus external ATU could tune the AX1 on 40 meters. More on that later…

Gear:

I arrived on site a few minutes before noon. Setup was fast–that’s the big positive about using the AX1.

Normally, I deploy the AX1 antenna with my KX2 or KX3 and simply attach it to the BNC connector on the side of the transceiver. The AX1 Bipod gives the antenna acceptable stability during operation.

The IC-705 also has a side-mounted BNC connector, but it’s much higher than that of the KX3 or KX2. I’m not entirely sure I could manipulate the Bipod legs to support the antenna without modification.

That and the AX1 needs an ATU to match 40 meters (where I planned to spend most of the activation). Since the IC-705 doesn’t have an internal ATU, mounting it to the side of the transceiver really wasn’t an option.

I employed my AX1 tripod mount for the first time. On the way out the door, I grabbed an old (heavy) tripod my father-in-law gave me some time ago and knew it would easily accommodate the super lightweight AX1.

On The Air

I first tried using the Mat-Tuner mAT-705 Plus ATU to tune the AX1 on 40 meters.

No go.

I tried both the phone and CW portions of the 40 meter band, but the mAT-705 Plus simply couldn’t find a match. SWR was north of 7:1 – 9:1.

Instead of grabbing the Chameleon MPAS Lite or 2.0 from the car, I decided instead to see if the Elecraft T1 ATU could tune 40 meters.

It did.

In short, I logged my ten contacts to have a valid activation, but it was slow-going. All but two of my contacts were on 40 meters CW. The last two logged were on 20 meters CW.

It was a challenge, but I really enjoyed it! And, frankly, considering the propagation, 5 watts of power only using the IC-705 battery pack, and the inherent inefficiencies using a loaded compact vertical antenna and ATU? I was impressed.

Here’s a QSOmap of my 10 contacts:

I bet my effective radiated power was closer to 2-3 watts.

Typically, the AX1 antenna acts almost like an NVIS antenna on 40 meters, but Saturday it favored Mid-Atlantic and the states of IN, OH, and PA. Normally, I would expect more of a showing from the states surrounding North Carolina.

My last two contacts on 20 meters were with KE5XV in Texas and KB0VXN in Minnesota. Not a bad hop!

It took longer to collect my ten contacts than I had hoped and I ran nearly 25 minutes late to my curbside appointment. I’m a punctual guy, but there was no way I was leaving without my ten! 🙂

Here’s a video of the entire activation. Hint: it’s the perfect remedy for insomnia:

Next time I try to pair the IC-705 with the AX1 antenna, I think I’ll try adding a couple more ground radials and see if the mAT-705 Plus can more easily find a match.

One thing I know for sure: the T1 is a brilliant little ATU. While the mAT-705 Plus was never designed to do this sort of match, it’s comforting to know the T1 can.

I’m very curious if anyone else has paired the Elecraft AX1 with the Icom IC-705 or other QRP transceivers. If so, what was your experience? Please comment!

Choosing the best Icom IC-705 portable external antenna (ATU)

I’ve received no less than three inquiries this weekend from readers who are seeking advice about purchasing a portable external ATU to pair with their Icom IC-705 transceiver.

Fortunately, there are few options on the market and I believe there is no “right” one because choices are really based on operator preferences.

I’ll do my best to sum up my thoughts below based on the three ATUs I regularly employ and what we know so far about the AH-705 ATU from Icom.

Keep in mind this list will not include some excellent options from LDG, MFJ, and other companies simply because I haven’t used them in the field. Please feel free to add your comments if you have experience with other good options.

Mat-Tuner mAT-705 Plus

The Mat-Tuner mAT-705 Plus is the first external ATU on the market that directly pairs with the Icom IC-705 via a control cable.

Note that I had issues with the first iteration of the mAT-705 and could not recommend it.

The latest iteration–the mAT-705 Plus–is the ATU I can recommend.

Be careful if purchasing an mAT-705 used as you’ll want to make sure you’re getting the Plus version. The Plus version has a USB-C charging port on the front panel (seen in the photo above)–the original mAT-705 does not (it uses replaceable 9V cells).

Pros:

  • Perfectly pairs with the IC-705 for full CAT control
  • Wide tuning range
  • Tuning is fast and relatively quiet
  • Numerous memories making repeat matching rapid
  • Internal rechargeable battery
  • Rugged chassis

Cons:

  • Cannot be paired with other radios without modification (not recommended by the manufacturer)
  • At $220 US, it’s not the cheapest option
  • Because the IC-705 relies on CAT control for operation, if you leave the control cable at home or on a park bench, you will not be able to operate the ATU. (Pro)Fortunately, the CAT cable is a simple 3 conductor 1/8″ stereo patch cable.
  • Not weather-proof

Click here to see the AH-705 Plus in action and read a deeper review.

Summary: If you’re looking for an ATU to take full advantage of IC-705 CAT control, the mAT-705 Plus is a great option. The only significant disadvantage of this ATU is the fact that it only pairs with the IC-705 (or possibly other Icom transceivers with similar CAT control). In other words, you can’t pair it with other QRP transceivers you might own.

Click here to check out the mAT-705 Plus at Vibroplex, DX Engineering, Wimo, and Mat-Tuner.

Elecraft T1

The Elecraft T1 has been on the market for at least 16 years and is one of the most popular portable antenna tuners on the market.

Elecraft offers the T1 in kit form ($159.95) and factory assembled/tested ($189.95).

The Elecraft T1 has a CAT control port that has been used with the FT-817 in the past. Elecraft recently announced that they will also produce an IC-705 CAT cable that will allow full pairing with the IC-705 transceiver (much like the mAT-705 Plus above). 

To be clear, though, the T1 doesn’t need a control cable to function: simply press the TUNEe button for one second, then key your transceiver.

Pros:

  • Very wide tuning range
  • Soon it will have an IC-705 CAT connection cable option
  • Uses common 9V battery that is easy to replace in the field. (Con) Not internally-rechargeable like the mAT-705 Plus.
  • One of the most compact automatic ATUs on the market
  • Pairs with any 0.5-W to 20-W transceiver covering the 160-6 meter bands
  • FT-817 Remote-Control Option

Cons:

  • Front panel buttons need protection while in your pack to prevent accidental pressing that will deplete the battery. I 3D-printed this simple cover that works brilliantly.
  • Not weather-proof

Summary: The Elecraft T1 is my personal favorite. Since the T1 pairs with any QRP transceiver, I love the flexibility. The T1 has also been on the market for ages and is a solid, safe choice–we know longevity is benchmark. I’ve never been in a situation where the T1 couldn’t find a reasonable match.

I will certainly test the new IC-705 control cable option when it is released in the near future–stay tuned.

Click here to check out the T1 at Elecraft.

Icom AH-705

Photo by Icom Japan

Disclosure: I have not tested the AH-705 yet, but Icom plans to send me one on loan for review once available in North America.

We do know a bit about the AH-705  because Icom has published details/specifications and some users in Japan have already received units from the first production run.

The AH-705 is Icom’s custom ATU designed to perfectly pair with the Icom IC-705 via control cable. If you want an all-Icom setup, this is it.

Pricing in US dollars is TBD at time of posting, but the announced retail price is $350 .

Pros:

  • Perfectly pairs with the IC-705
  • Wide tuning range
  • 2-way power sources using alkaline batteries (2 x AA cells) or external 13.8 V DC
  • IP54 dust-protection and water resistance construction
  • Could (potentially–?) be permanently mounted outdoors at the antenna feed point as a dedicated remote tuner

Cons:

  • In terms of overall size, the AH-705 appears to be the largest of the portable ATUs mentioned here
  • It doesn’t appear AA batteries can be recharged internally
  • The AH-705 may (we don’t know yet) only work with the IC-705 and possibly similar Icom models
  • The maximum power handling of the AH-705 is 10 watts–if you use other transceivers (if that is even possible) you would have to be extremely careful with power settings.
  • The AH-705 is pricey if the actual retail price ends up being near the projected $350 mark. Hopefully, it’ll be much less than this.
  • Like the mAT-705 Plus, the AH-705 will require a control cable for operation. (Pro) Of course this means it pairs perfectly with the IC-705 and can follow frequency changes without RF sensing.

Summary: Keep in mind, I have not tested the AH-705 yet, so this is only based on announced specifications.

The strongest selling point for the AH-705? Since the AH-705 is designed to be dust and weather resistant, it could be mounted at the antenna feed point. At home, perhaps it could act like an externally-mounted, remotely-controlled antenna tuner. I’m not sure what the maximum length of the control cable could be, but Icom Japan even lists a 16 foot control cable as an accessory. Of course, you would still need to follow Icom’s guidance about protecting the antenna, transmitter and control cable connection points.

The biggest negative to me is the size. Just check out how large it is compared to the IC-705 in this video. It’s still very portable, but the other ATU options above are much smaller.

Still: if the AH-705 is great at matching antennas and the price ends up falling below the $300 point, I’m sure it’ll be a very popular ATU.

For more information about the AH-705, check out the product page on Icom Japan’s website. I will test a loaner AH-705 in the field this year.

Emtech ZM-2

Another option often overlooked are portable manual antenna tuners. I’m a big fan of the Emtech ZM-2 which is offered both in kit ($62.50) and factory assembled/tested form ($87.50).

It is a manual tuner, so requires manual input to find a match. While it’s not as easy as push-button tuning, it isn’t complicated either.

Here’s my routine:

  1. I set the top right switch to “GROUND” if using coax feed line and “LINK” if using a balanced line.
  2. Set the added capacitance switch “ADD” to “0”
  3. Set the TUNE/OPERATE switch to OPERATE
  4. I set both capacitors to middle positions (6 on the scale)
  5. Tune to AM or SSB and listen to the noise floor as I tune the variable capacitors to maximize the noise level. I typically start with the left capacitor, maximize it, then maximize the right capacitor
  6. If the antenna is particularly challenging, I might add 250 or 500PF via the ADD switch
  7. Set the TUNE/OPERATE switch to TUNE
  8. In CW mode, I key down and make fine tuning adjustments with the variable capacitors to make the red tuning LED turn off (high SWR makes the red LED illuminate)
  9. Set the TUNE/OPERATE switch to OPERATE and hop on the air! (Often, I’ll double-check the SWR on my transceiver).

This sounds complicated, but once you’ve done it even two or three times, it becomes routine. I’ve yet to find a wire antenna the ZM-2 can’t match–it’s a very capable tuner.

Pros:

  • The most affordable option listed here
  • Very wide matching range
  • Portable and very lightweight
  • Requires no batteries for operation
  • Mechanically simple
  • Reliable

Cons:

  • Although not complicated, there is a small learning curve involved
  • Each time you change bands, you will need to manually re-tune the ZM-2
  • Not as fast and hassle-free as an automatic ATU
  • Not weather-proof

Summary: I carry the ZM-2 with me even if I plan to use an automatic portable antenna tuner. If my auto ATU loses power for some reason, the ZM-2 will always rescue me. Plus, it’s just as capable of making tough matches as the ATUs above.

I also love using the ZM-2 to match antennas for shortwave broadcast listening outside the ham bands.

Even if you buy an automatic ATU, I would still encourage you to buy a ZM-2 as a backup.  It’s affordable, reliable, and very handy.

Click here to check out the Emtech ZM-2.

What are your favorite portable ATUs?

As I mentioned above, these choices are just a small selection of what’s actually available on the market. Please share your favorite portable ATUs and experience by leaving a comment!

POTA Field Report: Lake Norman State Park (K-2740) December 14, 2020

Monday afternoon (December 14, 2020), after completing a long to-do list of errands, I found myself with a chunk of free time in the late afternoon. Of course, I like to fill free time with radio time, so I packed the car and headed to one of my favorite spots: Lake Norman State Park (K-2740).

I love Lake Norman because it’s only a 35 minute drive from my parents’ house (where I was that Monday) and it’s nearly ideal for POTA because they’ve a number of picnic tables widely spaced, and lots of tall trees–a perfect spot for wire antennas. It’s also a quiet location and has good “POTA Mojo”–meaning, I’ve never had difficulty racking up contacts there.

Gear:

I was the only person at the picnic area of Lake Norman that afternoon. No surprise as it was after 3:00 PM local and temps were on a fast downward trend after a front moved through earlier in the day.

You may be able to see the Emcomm III hanging in the tree.

I used my arborist throw line and deployed the Emcomm III Portable antenna with ease.

On the Air

I hopped on the air around 21:30 UTC and started calling CQ POTA. The Reverse Beacon Network (RBN) spotted me and the POTA website auto-spotted me under a minute. Within ten minutes, I logged 8 contacts on 40M.

I then moved to 20 meters and worked an additional 5 contacts within 15 minutes.

Since I had worked a total of 13 stations, I had three more than needed for a valid POTA activation.

Since I was using the amazing Emcomm III Portable random wire antenna, I decided to move to 160M just to see if anyone work work me on the “top band.”

To be clear, 160 is one of the least active bands in POTA for obvious reasons: few ops care to deploy an antenna that can tune up on 160M, and few POTA hunters have an antenna at home to work the Top Band. Although it’s not as efficient as a resonant 160M antenna, the Elecraft T1 and mAT-705 easily tune it and get a great match.

I called CQ for a few minutes on 1810 kHz in CW and N4EX replied. Woo hoo! My first 160M POTA contact as an activator.

I then moved up to the phone QRP calling frequency of 1910 kHz and called CQ for about 10 minutes. No dice. Since I spotted myself, about two stations attempted to make contact, but unfortunately, my five watts just couldn’t be heard.

I checked the time at this point and it was 22:30 UTC. The sun was setting over Lake Norman, so I started packing up.

It was then received a text from my buddy Mike (K8RAT). The message read, “80M?”

I thought it might be fun to work Mike on 80M, so I re-connected the antenna and tuned up on 3538 kHz.

I think I called CQ once, and Mike replied with a strong signal. We had a nice exchange and when we sent our 73s, I heard a few stations calling me. Of course…the RBN picked up my CQ for Mike and the POTA site spotted me.

To be clear: it’s next to impossible for me to cut an activation short when I have hunters actively calling me, so I started replying.

Getting late…

Turns out, 80 meters was on fire. In 15 minutes, I logged 17 more stations–from Florida to Ontario–with 5 watts.

Next thing I know, it’s dark. Like, pitch dark…

My iPhone struggled to make this photo look brighter without the flash engaged.

Side note: someday, remind me to write a post about how one of my earliest National Parks On The Air (NPOTA) activations carried on until it was pitch dark outside and how that one activation forever changed how I pack my gear. In short: if you’re in the field and you aren’t intimately familiar with your gear and how its packed–even if you have a headlamp–there’s a good likelihood you’ll leave something behind.

It then hit me that Lake Norman State Park closes at sunset in the winter.  Doh!

Friendly park rangers

I finished my last exchange (with W3KC) and sent QRT despite a few others still calling me.


As I quickly powered down the IC-705, I noticed a truck pass by slowly on the road behind me. He drove to the end of the road then turned around and stopped behind me. I knew it was a park ranger doing final rounds.

He walked down to my table with flashlight in hand and I greeted him with an apology as I quickly packed up my gear. He was incredibly kind and encouraged me to take my time. He also saved me a trip to the car to grab my headlamp by illuminating the area with his Maglite flashlight/torch.

The park ranger asked a number of questions about ham radio, POTA, and the equipment I was using as I packed up. He told me he’s always found it fascinating and had met other radio amateurs at the park doing activations. I gave him my contact info and I hope he considers checking out the world of radio.

Because I’m meticulous about how I pack (again, lessons learned from the past) I had no issues in low light and left nothing behind.

I drove out of the park at exactly 6:00PM which is the park’s closing time. I was happy, at least, that I hadn’t delayed their closing!

All-in-all, it was a very fun activation–so much fun, I lost track of time. I logged 30 stations all over North America on four bands with 5 watts.

Have you ever found yourself operating and packing up in the dark? Any stories to share or advice? Please comment!

Curt builds an Icom IC-705 control interface for his Elecraft T1 ATU

Many thanks to Curt (WU3U) who recently contacted me and mentioned he had built an IC-705 control interface for his Elecraft T1 ATU. This is a homebrew project based on others’ work and uses the FT-817 control port on the side of the T1 tuner.

I asked Curt if he could share a little more about his tuner to post here on QRPer:

Hi Thomas, I can’t take credit for the interface, as a guy in Japan designed it. When I built mine the entire instructions and notes for code for the PIC controller were in Japanese. I used Google translate to translate all of the information and I was able to successfully program the PIC chip and build the circuit. He has since released the details and code in English.

There are two designs: one with an on/off switch, and a newer version without an on/off switch that has auto power save. Both circuits are the same but the software for the PIC chip is different. If you build the one without the on/off switch there is a very specific sequence of connecting and disconnecting the device and it’s my opinion that the one with the on/off switch is the version that makes more sense to build. It shouldn’t matter which order you connect everything up and you simply throw the on/off switch to turn the device on and off.

Building the interface takes an understanding of a fairly simple electronic schematic and acquiring the parts. You also have to have a PIC programmer and the software to write his .hex file into the PIC controller chip.

The parts for the interface are all very common parts. The resistors are standard values. My build cost me about $30 in parts but I had to buy many of them in bulk from Amazon like the enclosures, switches and 3.5mm jacks and circuit boards to name a few. Individually the parts were $30 but my bulk order cost me much more. I also had to buy a PIC programmer for $25 and figure out what software I needed to download to program the PIC chip with the author’s code. It takes an experienced builder about two hours to build the device but it’s not out of the realm of a semi-novice as long as they can get the PIC chip programmed.

Here is the original code using the on/off switch. Everything is now in English:
https://amateur-radio.cocolog-nifty.com/blog/2020/11/post-1eb3cf.html

Here is his newer version with the same circuit design eliminating the on/off switch by using a different PIC program allowing the interface to have auto power shutdown (low power standby) but there is a specific order for connecting and disconnecting the interface. With this version there is still drain on the battery but the designer thinks that drain is less than the normal self discharge of the battery. I feel that any discharge combined with the self discharge of the battery will be more discharge than using the design with the on/off switch.
https://amateur-radio.cocolog-nifty.com/blog/2020/11/post-591d17.html

Video

I think this is a brilliant project and certainly one worth considering for those of us who already own an Elecraft T1 ATU and would like full control from the IC-705.

Thank you for sharing these details, Curt!


POTA Field Report: One antenna and two transceivers at South Mountains State Park (K-2753)

On Tuesday (Nov 17, 2020), I decided to activate South Mountains State Park (K-2753) for the Parks On The Air (POTA) program. As with my activation at Lake James the day before, it was impromptu. Basically, the weather was beautiful, so I couldn’t resist.

In fact, the weather was so nice, on my way to South Mountains I passed by Bakers Mountain County Park and hiked their full trail including the summit. While on that hike, I ran into Kenneth (W4KAC) who had just activated Bakers Mountain for Summits On The Air (SOTA). This was a bit of serendipity because I, too, plan to activate Baker’s Mountain for SOTA and Kenneth provided some great details for finding the summit (which is not actually on the park grounds).  It was great running into a fellow QRPer and talking shop, too!  I hope to meet Kenneth again in the field.

I arrived at South Mountains State Park mid-afternoon and set up near one of their large covered picnic shelters.

Although I’ve activated South Mountains State Game Land numerous times in the past, I’ve never activated the actual park. The last time I popped by the park, there was already another ham there in the middle of an activation, so I moved to the adjoining game land that day.

South Mountains State Park is a very popular park–indeed, it’s currently the second most activated park in North Carolina.  Although I didn’t realize it at the time because I had no internet access, there was actually another operator somewhere at the park on the air at the same time I was.

Gear:

On the Air

Once again, I set up the Chameleon CHA MPAS Lite vertical antenna for this quick activation.

Besides being such a quick and easy antenna to deploy, I love how stealthy it is, essentially disappearing against a background of trees.

As you might imagine, activating a park while someone else is also activating it is not ideal. At the time, I couldn’t figure out why contacts were coming in so slowly, but no doubt many hunters probably thought they’d already worked me because they worked the other activator.

In the end, though, my biggest problem at South Mountains was the fact my battery died in the Elecraft T1 ATU after finding a match on the 20 meter band. A 9 volt battery should last months in the T1, but the battery I put in it several weeks ago had already been used in another device for a few months. I had meant to replace it with a fresh cell. I actually packed a new 9V battery in my main radio pack, but I didn’t have it with me on this trip because both South Mountains and Lake James were unplanned activations.

I spent a good half an hour on the 20 and 30 meter bands where I had a decent match, but only logged three or four hunters. Conditions were not ideal on the higher bands.

I really needed to move down to the 40 meter band knowing it would be more productive, but I had no way to find a match for the IC-705. (Lesson learned: I’ll never again leave home without my Emtech ZM-2 as a backup!).

Fortunately, I remembered I had the Elecraft KX1 field kit. The KX1 now permanently lives in my car so I know I always have a complete radio kit for impromptu field activations.

The KX1 has a built in ATU, but it’s not as robust and versatile as the T1 or the internal ATUs in the KX2 or KX3.

I tried loading 40 meters and got a 2.5:1 match. I’m sure the KX1 would have plugged along, but I don’t like pushing much over 2:1 when I don’t have to.

After tinkering with the CHA MPAS Lite counterpoise for ten minutes, I finally found a length that, if half suspended, allowed the KX1’s internal tuner to achieve a 1.9:1 match. Good enough!

I started calling CQ on 40 meters and within a few minutes, I logged a total of 12 contacts.

The KX1 saved my bacon that Tuesday!

All in all, I really enjoyed the time at South Mountains State Park. It was beautiful weather and I had an idea spot to set up and operate. I’ll certainly come back here in the future.

I’ve also decided that I’m going to start packing a resonant antenna option in the car with my KX1 field kit. It’s only this year that I started using multi-band and random wire antennas that require an ATU; they are mighty convenient indeed, but it’s always nice to have a resonant option on hand as well.

Parks On The Air 101: Some real-time, real-life videos of a typical POTA activation using the Icom IC-705

On Monday (October 19, 2020) I received an inquiry from Dale (KI5ARH) only an hour or so before packing up my radio gear to activate Lake Norman State Park (K-2740).

Dale is interested in using his recently acquired Icom IC-705 to get involved with Parks On The Air (POTA) and play radio in the field.

What’s in my field kit

Dale was curious about all of the components of the field kit I use with the IC-705, so I made this video:

Equipment links:

Since I had already set up my phone to record the video above, I decided to make a couple more.

I thought there might be some value in making real-time videos showing what it’s like operating CW and SSB during a POTA activation.  The videos have no edits and haven’t been trimmed.  It’s as if the viewer were there at the activation sitting next to me at the picnic table.

Operating CW with the IC-705

After setting up my station, I first started on the 40M band in CW. I meant to start the camera rolling during tune-up, but forgot to hit record. The video begins after I’d made a few CW contacts, but shows what it’s like changing bands and relying on the Reverse Beacon Network (RBN) to pick me up then the POTA website to auto spot me.

Note: to be automatically spotted by the RBN, you must schedule your activation via the POTA website in advance, or have been already spotted by yourself or someone else, so the system will know to look for you.

My video cut off abruptly due to a low battery message. I had to give my iPhone a quick power charge to make the next video.

Operating SSB with the IC-705

After operating CW for a while, I plugged in the hand mic that ships with the IC-705 for a little SSB action. My main goal with this video was to show how I call CQ and use the voice keyer memories in order to manage the field “work flow” process.  I also speak to how important it is to either self-spot or have a friend spot you to the POTA network while operating phone.

I spent so much time setting up and running the camera, I wasn’t actually on the air for very long, but I easily managed to achieve a valid activation and had a lot of fun in the process.

I’m not a pro “YouTuber” as I say in one of my videos. I much prefer blogging my experiences rather than “vlogging,” I suppose.

Still, I think I’ll do a few more “real-time” videos of POTA activations and speak to the various techniques I use to activate parks. Since these videos aren’t edited for time, they may not appeal to the seasoned POTA activator or QRPer–that’s okay, though. My goal is primarily to assist first-time POTA activators.

Have you been activating Parks or Summits lately?  Do you have any advice or suggestions I failed to mention? Or do you have suggestions for future topics? Please comment!

POTA Field Report: Pairing the Icom IC-705 with the Elecraft T1 and CW Morse Pocket Paddles

The new CW Morse “Pocket Paddle.”

On Wednesday, October, 14 2020, the weather was gorgeous so I decided to make an impromptu POTA activation of Pisgah National Forest and the Pisgah Game Land (K-4510 and K-6937). These sites are the closest to my QTH and only a 15 minute drive (in fact, I can even hike up to the same trail network from my back yard).

My canine companion, Hazel, jumped into the car before I could even invite her to come along.

We drove to the trailhead, parked, and hiked a short distance into one of my favorite spots where it’s relatively flat, with lots of tall trees and almost no foot traffic from other hikers.

This activation gave me an opportunity to use the Icom IC-705 in more of a “backpack” setting since I hiked in with only my pack, Hazel, and my folding three-leg stool. Up to this point, I’d only used the IC-705 on picnic tables and flat surfaces since it can’t easily fit on my clip board like my MTR-3B, KX2, and KX1 can.

The activation also gave me a chance to evaluate a new product sent to me by the CW Morse company: their “Pocket Paddle” designed specifically for portable operations.

After reaching the site, I easily deployed the EFT-MTR antenna using my arborist throw line.

I decided to set up the Icom IC-705 much like I did the lab599 Discover TX-500 when I took it on hikes: mount the radio above the front pocket of my Red Oxx C-Ruck backpack.

The arrangement works quite well–I simply sit on the stool in front of the pack and hold my simple logging notepad and paddles on a clipboard.

While this particular site is great because it’s so accessible to me, the negative is it’s deep down in a valley surrounded by high ridge lines. I feel like this does have some impact on how well my signal travels.

Wednesday, it took nearly 50 minutes to rack up a total of 12 contacts in CW mode.  I never bothered with SSB/phone because this site had no cell phone service and, thus, there was no way to spot myself on the POTA network.

That’s okay, I felt pretty chuffed about racking up 12 contacts with 5 watts and a wire! This is what field radio is all about, in my opinion.

Loving the Elecraft T1

The Elecraft T1 ATU pairs beautifully with the Icom IC-705.

After a little falling out with the mAT-705, I decided I wanted to try other ATUs with the IC-705. I used to own an Elecraft T1 ATU and loved it, but I eventually sold it for a song to a friend since all of my field rigs at that point had internal ATUs.

I reached out to Elecraft and they sent me a T1 on loan to give it a go.  I’d forgotten how much I love this simple, effective ATU.

Even though the EFT-MTR is resonant on 40, 30, and 20 meters, moving to the 30 meter band requires lowering the antenna, pulling off an SMA cap on the coil, then re-hanging it.  Not a big deal at all, really, but it’s so much easier to simply press the tune button on the T1 and have it match 30 meters without going through the normal process.

CW Morse Pocket Paddle

I also thoroughly enjoyed using the CW Morse “Pocket Paddles.” I’m not sure when they’ll be available to purchase (perhaps they are already?) but I can highly recommend them.

The paddle action is field-adjustable and even though there’s an Allen wrench built into the paddle base, the machined screws are easy to twist by hand.

They feel very sturdy, too, much like the other CW Morse paddles and keys I’ve used.

I believe the Pocket Paddles are going to permanently pack with my IC-705!