I think every portable operator thinks about their coax cables and how to use more light and flexible types. During the last few activations, I have switched from my rigid Aircell 5 to the lightweight and flexible RG316. I have bought a couple of different lengths, mainly from Chinese online sellers at AliExpress.
However, I had some hard to define issues like the vague feeling that I am not getting out as good as I should, or a changing SWR during an activation. So I thought I should check my cables before looking at other parts of my equipment.
My professional and educational background does not have anything to do with electronics, and I don’t have the equipment to measure the cable loss directly. But my goal was to check if the cables were faulty, not to measure the exact attenuation.
I have an SWR and Power meter from DJ9PK as per image below. It can measure PEP and has, according to the seller, an accuracy of +/-4 percent. You can find more details about it here in German or here in English (Google / auto translated).
My KX3 with a CW paddle served as signal source. As large differences are easier to spot than smaller, I switched to the 10-meter band as the HF band with the highest attenuation.
I then measured a short cable with a very low loss, a 1 m / 3.3 ft RG213, which should have an attenuation of less than 0.1dB (excluding plugs).
I simply checked how much power came out at the other end of the cable. That value I have used as reference. This cable (and all others) was plugged directly between the KX3 and the power meter, no ATU involved anywhere. The power meter was set to measure PEP. Continue reading Coax cables I used for SOTA/POTA – A horror story→
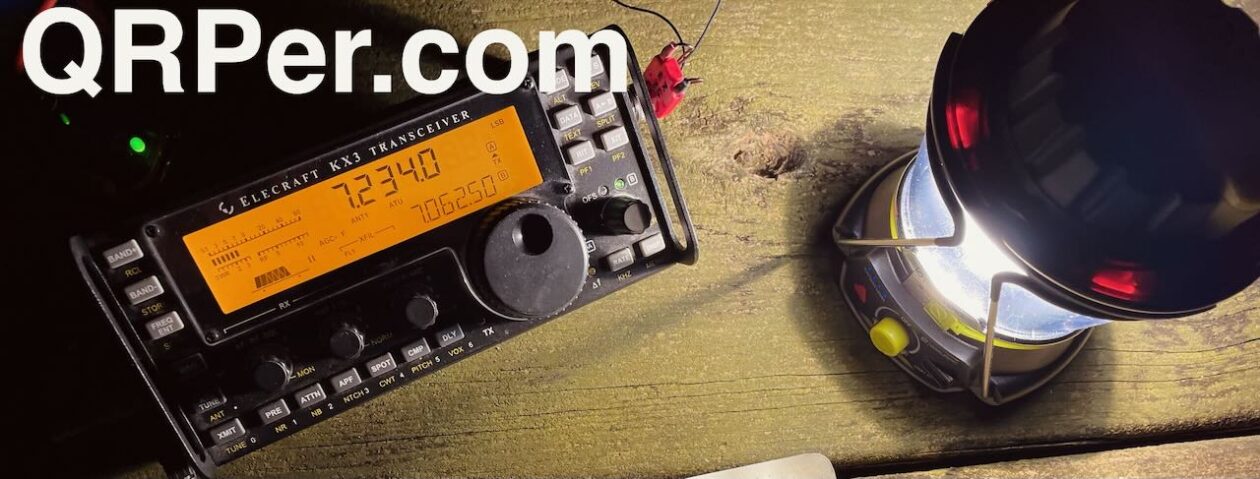
On Tuesday, March 28, 2023, I packed my Elecraft KX3 and took it to the Zebulon Vance Historic Birthplace (K-6856) for a nice, relaxing, early afternoon POTA activation!
It had been a few months since I’d taken the KX3 to the field and it really does deserve some outdoor time because…well…I still think it’s one of the best HF field radios on the market.
I’m spoiled, though, because I also own a KX2 and it does 80% of what the KX3 does, is much smaller, and sports a very long-lasting internal battery. Because of this, my KX2 gets way more field time and the KX3–hooked up to a KXPA100–is my main radio in the shack.
When I make an activation video in the field, I like using a speaker rather than recording from the line out of the radio. Besides the extra post-processing, sometimes the line-out audio from left and right channels are out of phase from each other and end up cancelling each other out in YouTube videos if listening in mono. I recently learned how to fix this, but I find the whole process just adds *that* much more time to post-processing and I’m always pressed for time.
The Elecraft KX3 has a built-in speaker, but it’s pretty anemic. I almost always pair the KX3 with an external speaker to amplify the otherwise excellent KX3 audio for my activation videos.
On this particular day, I had a new speaker to try as well: an Anker Soundcore Mini. I purchased this speaker on the same day I posted Mike’s speaker search and review of the Soundcore Mini. Although I have a Sony SRS-XB12 portable speaker and love it, they’re no longer produced and the battery life isn’t quite as good as the Soundcore Mini (Anker states up to 15 hours per full charge).
This activation would give me an opportunity to really test the Anker Soundcore Mini in the field. In the end, it did a brilliant job.
I should note that I also brought my Blue Ridge Overland Gadget Bag (see above) to the field that day, so I include a little tour and overview of this pack in my activation video.
As I mention in my activation videos, Vance is a small park and, unless you plan to operate from your car, there’s really only one good site to set up: in the picnic shelter. Thing is, if a school, club, or civic group is scheduled to meet that day, the picnic shelter will almost certainly be reserved for them.
Each time I activate Vance, I ask the park staff in advance if the picnic shelter is reserved and if it’s okay if I perform the activation. Fortunately, the shelter is reserved only about 20% of the time. On days when it’s reserved, I simply activate elsewhere.
In early February, Jeff (KD4VMI) sent the following message to me:
Good evening. Love your YouTube videos and QRPer posts and, from them, I know you appreciate rugged packs and gear.
I enjoy POTA, although I don’t get out as often as I’d like, but I’ve found Blue Ridge Overland Gear’s various bags and modular systems to be very handy for bundling my radios, batteries, cables, and antennas.
It’s been on my mind for some time to let you know about them (if you don’t know about them already) and I finally decided to take the time to write you. I’m not associated with them in any way, and I didn’t approach them about passing this on to you, or anything like that. I just really appreciate their gear and I think you might, too.
The BROG materials are high quality and stout, the zippers are beefy and smooth, everything is double or triple stitched and everything is modular so it can be used for just about anything, and in pretty much endless combinations with their various bags and gear.
Their products are not overly cheap, but are guaranteed for life. They’re located in Bedford, Virginia and all their things are made in the USA (I think mostly in Bedford).
I often use their tire puncture repair kit bag, for instance, to carry my FT-891, Bioenno battery, cables and mic, and PackTenna, and then strap the coax to the Molle system on the front of the bag.
They posted a YouTube video showing their gadget bag with accessory pouches for HTs, etc.
Anyway, I appreciate all you do for our great hobby and just wanted to share this info.
Take care and all the best to you and yours…
Thank you so much for the kind words, Jeff, and for the tip about Blue Ridge Overland Gear (BROG). You’re obviously a skilled pack enabler because you had my attention by the second paragraph–!
Shortly after my exchange with Jeff, I checked out the BROG website and was really impressed with their line-up of packs and gear–all with a focus on modular organization, especially in-vehicle since it’s for Overlanding. It’s just the icing on the cake that their gear is made in the USA.
I was very curious if their Gadget Bag, in particular, would lend itself to being a modular flied radio kit pack.
Thing is, there are so many options and configurations for the Gadget Bag, I wasn’t entirely sure what to order.
Being a fellow who expects to pay a premium for rugged products, made in the USA–especially ones that carry a lifetime warranty–I was prepared for some sticker shock. Turns out, BROG pricing is pretty reasonable in comparison with other cottage industry pack manufactures.
Still, I wasn’t quite sure how easily some of my radios and gear might fit in their zippered pouches, so I reached out to BROG–mentioning QRPer and my constant search for field radio packs–and asked if I could order some packs and pouches, test them with my radio gear, then pay for what I decided to keep. I didn’t want free gear, I just couldn’t tell based on the product images and posted dimensions what pouches and packs might fit my various radios and accessories. Also, I knew readers might ask if certain pouches and packs might fit certain radios.
The good folks at BROG kindly obliged, so I asked for the following list of items:
– QTY 1 Gadget Bag (shell) in black
– QTY 3 Large Velcro Pouches
– QTY 6 Medium Velcro Pouches
– QTY 1 Velcro Cord Keeper
– QTY 1 Medium GP Pouch
– QTY 1 Velcro Headrest
– QTY 1 Headrest Pouch Kit
Some of these items weren’t in stock, so it was a week or so later when I received notification that the package had shipped. It arrived a couple days later.
Many thanks to Conrad (N2YCH) who shares the following field report:
QRP-Labs QDX Field Report
K-1716, Silver Sands State Park, Milford, Connecticut
January 13, 2023
By: Conrad Trautmann, N2YCH
A digital mode multiband transceiver for $69? Yes! QRP Labs has the QDX kit available for $69 US. Add $20 if you would like a very nice black anodized aluminum case to mount it in and if you want it assembled and tested add another $45. Visit the QRP Labs web site for all of the details (QDX 4-band 5W Digi transceiver (qrp-labs.com)
How well can a $69 digital transceiver work? Read on…
I ordered my QDX kit back in May 2022. It arrived in June, I assembled it and ran some tests at home. It worked well on FT8 into my home antennas. It interfaces nicely with WSJT-X and I liked the idea of using a low power transceiver to band hop on WSPR. My QDX is an early four band version, which does 20, 30, 40 & 80 meters. I set it to band hop on all four bands not remembering that my multiband offset center fed dipole is not resonant on 30 meters. Since the QDX does not have a tuner, it didn’t like the higher reflected power of a two minute long WSPR transmission into a bad load and smoke resulted. I was fortunate that the failure was isolated to the RF power amplifier transistors and replacing those got me running again. This was my own fault, not the transceiver. Now, it band hops on 20, 40 and 80 meters with no issues, I eliminated 30 meters from the hop schedule.
I share this important story at the beginning of my field report as a warning to anyone considering using a QDX to be very careful when connecting an antenna to it. Since the QDX does not have an internal antenna tuner, you either need a resonant antenna or must use an external tuner to provide a 50 ohm load with low SWR to the QDX. The QRP Labs groups.io site has a number of posts from users with different tuner suggestions.
Now comes the fun part. I visited Silver Sands State Park, K-1716, located on Long Island sound in Milford, CT on January 13, 2023 in the afternoon. While it was Friday the 13th, I had nothing but good luck. Knowing I would be running QRP power, I decided to use what I consider to be my best 20 meter antenna. It’s a modified version of a Buddipole, which I call my “no coil” Buddipole dipole. I use a Buddipole VersaTee mounted to a WILL-BURT Hurry Up mast, which is a push up mast that extends to about 25’ high. The dipole consists of two Buddipole 32” accessory arms, one for each side of the VersaTee and two MFJ 17’ telescoping whips, extended to just about 17.5’. This provides a very broad bandwidth and low SWR on 20 meters. See the screen shot of my antenna sweep from the RigExpert analyzer below.
Here’s a photo of the antenna in the air.
The temperature on this January day was a mild 55 degrees so I was able to set up my equipment in the back of my Jeep. Here’s everything I needed to do the activation. Since the antenna is resonant, I did not use a tuner.
My iPhone gives you an idea of just how big the QDX is, which is sitting just to the right of it. There are only three connections needed, the antenna cable, a 12V power cable and the USB cable. I was using my Bioenno 9ah battery for power. I brought the Bird Model 43 with a 25 watt element in it to monitor the output power and also to measure the reflected power, which barely even nudged the meter. It was effectively zero watts reflected. In the photo above, I was in a transmit cycle and you can see the power meter just a touch above 5 watts. On the computer, you can see a mini pile-up of six hunters in the queue. One thing to note about the QDX is that you can’t adjust the power by lowering the PWR slider in WSJT-X. It’s recommended to leave that at maximum. The way to adjust output power is to adjust the power supply voltage. In this case, the Bioenno had a full charge, so the radio was running full power.
I began the activation without spotting myself, just to see who’d hear me. Here’s a map of the pskreporter showing my spots.
I eventually spotted myself so hunters would know what park I was at. I was amazed that during my activation, I never ran dry or had to call CQ POTA, there was a steady stream of hunters the entire time. The QDX does a fine job receiving, here’s a screenshot of WSJT-X including the waterfall to show what it was receiving.
So, how did the $69 radio do? In a one hour and 17 minute activation, I completed 46 FT8 QSO’s. Here’s my coverage map.
I managed to complete three park to park QSO’s, too. One park called me and I called the other two who heard me and answered. I use JTAlert which helps me keep track of the order of who called. I always try to answer the hunters in the order they called me. I’ve set up a Directed CQ alert in JTAlert for anyone calling “CQ POTA” which helps me to see who else is at a park while I’m activating. If I’m able to contact them, I use the POTA spot list to include their park number in the SIG_INFO field of my log, which is N3FJP. N3FJP is handy to use since I start a new log for each activation and I’ve configured it to upload to LOTW and QRZ when I’m done for the day.
Another thing worth noting is that there is no speaker on the QDX. I’m one of those digital operators who actually listens to the cycles while I’m on the air. It provides a certain cadence to hear each cycle go by so you know what to be looking at or clicking on and when. With no sound coming out of the QDX, it forces you to find that cadence by looking at the computer screen. For me, it means watching the receive audio levels and the progress bar to see if I’m transmitting or receiving. The QDX does have a single red LED on the front panel that will flash during transmit cycles, which is also a helpful indicator.
I’d say the results shown here speak for themselves. I had a steady stream of hunters, I had just one or two QSO’s that needed a second RR73 to confirm and the coverage was as good as most activations I’ve done with more expensive radios and more power. Despite the self-inflicted hiccup I experienced at the beginning, I’d say that If you’re looking to try activating digital for Parks On The Air or even for your home, the QDX certainly works very well and provides a lot of value for the money.
I try to start each year by doing a POTA or SOTA activation on New Year’s Day.
POTA actually issues a certificate for completing an activation on New Year’s Day so there are typically loads of activators and hunters working the bands. It’s an ideal time to play radio.
This year, we had a number of family activities on New Year’s Day, but I made a little time to fit in an activation during the late afternoon at my most accessible spot on the Blue Ridge Parkway: the Southern Highland Folk Art Center.
As with my last activation, I suspected I would be operating in the dark, so I brought my LED lantern along for the ride.
Although not intentional, this New Year activation had a lot of new-to-me stuff involved!
New VK3IL Pressure Paddle
The prior evening–on New Year’s Eve–while my wife and daughters were watching a classic movie movie marathon, I used the time to heat up the soldering iron and work through a few kits and projects that had been sitting on my desk.
Michael (G0POT) sent me the Pressure Paddle circuit board and heat shrink via Andy (G7UHN) several months prior. [Thank you so much, fellas!]
To my knowledge, the VK3IL Pressure Paddle isn’t available in complete kit package, but it’s quite easy to source everything yourself.
On his website, David provides the Gerber files you’ll need in order to purchase the circuit boards from your favorite manufacturer (I’m a huge fan of OshPark here in the States).
Next, you simply need to order the components. Here’s the list assuming you’re using DigiKey:
Quantity of 2: 732-7579-1-ND (CAP CER 10000PF 10V C0G/NP0 0805)
Quantity of 2: 1738-SEN0294-ND (RP-C18.3-ST THIN FILM PRESSURE S)
Quanity of 1: Three conductor wire with a (typically) 3.5mm plug (note that I had one of these in my junk drawer)
Keep in mind: the components are surface-mount. If you’re not used to working with SMD components (ahem…that would be me) I suggest buying a few spares of each in case you lose or damage one or more during the build.
It also helps to cover the finished board in heat shrink not only to protect the board and make it easier to grip, but most importantly (if you’re me) hide your electrically-sound yet unsightly surface mount soldering job.
The build might have taken me 20 minutes.
New FT-817ND Narrow CW Filter
Some time ago, I purchased a second FT-817ND with the idea of doing full-duplex satellite work. I later realized I could be taking the second FT-817ND out to the field more often if I simply had another narrow CW filter installed, so I built one.
This New Year’s Day activation was actually the first time I’d taken this particular FT-817ND and its new narrow filter out to the field!
New Armoloq TPA-817 Pack Frame
Earlier this year, I also decided that I wanted to outfit my 2nd Yaesu FT-817ND with an Armoloq TPA-817 pack frame. The idea was to experiment with building a rapid-deployment field kit around it.
Because I receive so many tips from readers here on QRPer, I wanted way to share them in a concise newsletter format. To that end, welcome to QRPer Notes, a collection of links to interesting stories and tips making waves in the world of radio!
Check out this short article by John (AE5X) where he uses a CW Flea transmitter and Belka-DX receiver for a QRPp POTA activation. I love what John’s done here and I think I may have to give the CW Flea a go too someday.
We addicts often justify purchases knowing that, in the world of amateur radio, we can always sell gear we’ve purchased without losing too much money each time.
At least, in theory!
In November, last year, I was in touch with a friend who I recently purchased my second KX1 from; turns out, he had an Elecraft K2 he was willing to part with, as well. This is a radio he built (thus, the workmanship is top-shelf) and had updated over the years to be fully loaded the way I would want it myself: all firmware upgrades, all important upgrades for CW and SSB operation, and an internal ATU.
His was also a 10 watt (QRP) version of the K2; Elecraft owners call these “K2/10s.”
My first K2/10 next to the TEN-TEC Argonaut VI I was Beta testing at the time.
I owned a K2/10 between about 2008 and 2016. I sold the K2/10 to purchase another radio. The week after selling my K2/10, a local ham offered me an insane deal on a used K2/100 (a version with a 100W amp) from a club estate sale. No one in our local club wanted it and he really wanted to unload it. I purchased it and for a good three years it was my only 100 watt radio.
My K2/100
Then, in 2019, I sold the K2/100 for $800 and purchased an Elecraft KXPA100 amplifier with ATU for $800 to pair with my KX2 and KX3.
Using my KXPA100 during Field Day in 2020.
I’ve never regretted that decision because I do love the KXPA100 amplifier, although I seldom use it (so much so, I’ve even considered selling it). To date, it is the only device I own that outputs 100 watts.
I did miss the K2. It’s a fantastic radio to take outdoors and has superb receiver chops for the most demanding, RF-dense conditions.
When my buddy offered up his K2, I couldn’t resist. I made myself a goal, though: I had to sell enough stuff to fund the purchase. My friend was good with this. Even though I could have paid him immediately, I asked if he could wait for payment and shipping until I had gathered the funds from sales. I needed that dangling carrot because, frankly, I dislike selling things; I’d rather give away or donate stuff, but I did need to raise funds for this purchase. Continue reading Breaking in my new-to-me Elecraft K2 and CW Morse SP4 paddles during a POTA activation→
Because I receive so many tips from readers here on QRPer, I wanted way to share them in a concise newsletter format. To that end, welcome to QRPer Notes, a collection of links/videos to interesting stories and tips making waves in the world of radio!
Just before Thanksgiving, I received an email from Cara Chen at Retevis. She wrote,
I am responsible for the radio review cooperation. We have a SDR radio HS2 for review cooperation. Are you willing to test and write a blog about it?
When I asked her what that meant, she said that she would send me an Ailunce HS2 SDR Radio, if I would review it here on my blog. When I told her that I would be brutally honest in my review, she seemed OK with that and sent me the radio.
What follows is an honest review. It’s not a QST-style review. I don’t have the test equipment that they do, nor did I have the time to put the radio through all its paces. Even so, I did operate the radio on HF and VHF, phone and CW, enough to make the review worth reading, I think.
If you don’t want to read the rest of this review, I can sum it up as follows: The Ailunce HS2 is a fun, little radio, with lots of potential. It’s not perfect, though. The buttons are too small, the display is too small, and the manual needs work. More about all those below.
What’s in the box?
As you can see below, the radio came with a handheld microphone, a DC power cord, and a USB cable.
First impressions:
It’s really small. It’s 45 mm H x 120 mm W x 190 mm D (1.77 in H x 4.72 in W x 7.5 in D)
The carrying case is kind of nifty. If you’re going to operate portable, it’s nice to have.
The extruded metal case include a nice heat sink.
There are a lot of connectors on the rear panel, including the power connector, an SO-239 for HF and VHF antennas, an SMA for a GPS antenna, two USB connectors, an Ethernet connector, and four 3 mm phone jacks.
Many thanks to Charles (KW6G) who shares the following guest post:
Product Review: Chelegance MC-750 Portable Ground Plane Antenna, Part 1
by Charles Ahlgren, KW6G
I recently purchased a Chelegance MC-750 portable ground plane antenna from DX Engineering. Essentially, the antenna system provides a ¼ wave portable vertical antenna with 4 counterpoise wires that operates on 20 through 10 meters. The antenna will also operate on 40 meters with the provided loading coil. The manual states the antenna will support 6 meter operation, but no instructions are provided on how to do so. 30 meter operation is not supported. It appears from our initial testing that no ATU is required.
Here are some of my thoughts on the antenna.
Product Description
The MC-750 comes with the following components:
GROUND ROD / ANT BASE
50 CM ANT ARM
5.2 M WHIP
7 MHZ COIL
4 COUNTERPOISE WIRES (radials)
COUNTERPOISE WIRE COLLECTOR BOARD
CARRY BAG
As provided, it is designed to operate on the 40, 20, 17, 15, 12, and 10 meter bands without any modifications. Six meters is also supported per the manufacturers manual, but no guidance on how to do that is offered in that document. However, finding the proper length of radiator for 6 meters should be straightforward using a tape measure to set the proper whip length.
[Update: Chelegance notes that to operate 6 meters, simply extend the last segment only of the whip (see photo) and for 30 meters extend the last four segments of the whip and 15cm on the 5th segment (see photo).]
I checked the ground rod / antenna base with a magnet and confirmed it is made from stainless steel as both components are not magnetic; a characteristic of stainless. Both the ground rod/ antenna base and the 50 cm antenna arm (which was also non-magnetic) had a hefty feel (together, they weigh about 2 pounds), therefore I think it safe to assume that these components are made of stainless steel. Since most ops will undoubtedly use the antenna arm as an aid to inserting / extracting the ground rod into / from the ground, it seems a prudent decision by the manufacturer to have this piece fabricated from a strong, stiff material such as steel. The machine work used to fabricate these parts appears to be quite good – the fit and feel were excellent, with no sharp or ragged edges to cause problems in the field.
I measured the whip while set at the various position marks for 20 through 10 meters. The band markings on the whip were accurate – giving a 1/4 wavelength radiator when combined with the 50 CM ant arm length…On 40 meters, the whip and rod measured about 1/8 wavelength. The required the loading coil needs to be inserted between the whip and the rod (at approximately 1/10 the total 40 meter whip height above the base). If you want to operate this antenna on 30 meters, it appears that you need to provide an extra 1.4 meter of additional rod as a quarter wavelength ground plane at 10.1 MHz requires a 7.1 meter radiator. Six meter operation would require a whip of around 4.7 feet. With the whip fully collapsed, the length of the rod and antenna arm measures 40-1/4”. Therefore, if 6 meter operation is contemplated, extending the whip about 16 inches from fully collapsed should suffice. However, I don’t think that an antenna configuration such as that would be a very good performer unless it were elevated from ground level; or maybe it would be good for a SOTA activation? Continue reading Guest Post: Reviewing the Chelegance MC-750 (Part 1)→
In early November, I happened up a new waterproof case called the Evergreen 56. As with Pelican cases, it’s waterproof and also made in the USA. Like Nanuk cases (that are also waterproof and made in Canada) Evergreen cases have a built-in locking mechanism to keep the latch from accidentally opening during transport.
I thought the price for the Evergreen 56 at $28 US was fair and in-line with the Pelican 1060 and Nanuk 903 which are similar in size. I grabbed one made of a clear material with one radio in mind: my QCX-Mini!
There are a number of color options available for this Evergreen case, but I like the clear polycarbonate one because it makes it so much easier to see what’s inside (for a quick gear check) but also to confirm that no one part of the kit is being pressed too hard inside the case after the lid is sealed.
After receiving the Evergreen 56, I was very pleased with the quality–again, on par with what I would expect from Pelican or Nanuk. It is incredibly solid and the seal is watertight. The Twist Lock Latch (see above) is easy to operate and the case comes with two “keys” for adjusting the inner lock.
The Evergreen case has a soft egg crate-like rubber boot interior as opposed to the pick foam material you’d typically find in a water tight case. The case also has a hammock-like rubbery webbing on the inside of the lid that can be used to organize smaller contents (I knew instantly I’d use this to hold the antenna!).
The QCX-Mini fits in the Evergreen case perfectly–this was no surprise–but I was eager to see if my other station components could also fit. Note that I didn’t buy anything specifically to be used in this case; I used components I already owned. I could minimize the contents even further if I used a smaller battery, antenna, and key. Here are the components of the first version of the QCX-Mini Field Kit: Continue reading Testing a new QCX-Mini Field Kit built in an Evergreen 56 Watertight case→
QRP radios, product announcements, reviews, news and more. Low power amateur radio fun!
Please support QRPer by adding us to your whitelist in your ad blocker. Ads are what helps us stay online. All of our ads are ham radio related--no junk, we promise! Thank you!