Category Archives: QRP

W6CSN Activates Fort Baker in the Golden Gate National Recreation Area

Many thanks to Matt (W6CSN) who shares the following post  from his blog at W6CSN.Blog:


Fort Baker On The Air

by Matt (W6CSN)

Fort Baker is a former U.S. Army post situated at the north of side of the Golden Gate, opposite Fort Point and adjacent the town of Sausalito, California. The post is now part of the sprawling Golden Gate National Recreation Area (GGNRA) which is also known as K-0647 for POTA.

Many of the good POTA spots in the GGNRA are heavily used for recreation and sightseeing on weekend days such as this, but Cavallo Point is out of the way enough that there was still ample, free parking today. This location offers spectacular views of the Golden Gate Bridge, the city of San Francisco, and Alcatraz and Angel Islands at anchor in San Francisco Bay.

Today the “pull of POTA” was strong as I wanted to get another activation done before the arrival of an anticipated solar storm as well as rains predicted for the coming week.

During the week leading up to this activation the Bay Area has experienced fine weather with mild daytime temperatures and light winds, but driving in, the sound of rigging slapping loudly against the aluminum masts of the sailboats docked in the Presidio Yacht Club marina told me that it was windy down here.

A short series of wooden staircases lead up from the parking area to Battery Yates, named for Captain George Yates of the U.S. Cavalry who fell in the Battle of Little Big Horn in 1876.

The gun battery is a reinforced concrete structure which once sported six rifles that fired a three inch caliber cartridge to provide for naval defense inside of San Francisco Bay. The guns were manned through the middle of World War Two when, by 1943, they had been moved to more strategic locations.

Today I had hoped to use the same steel pipe which supported a fiberglass mast and EFHW in an earlier activation from this spot, but unfortunately the pipe was too thick to get the jaw mount securely attached.

I went with plan B which was to use the pipe railing at the back edge of the gun pit. Being unsure whether or not the galvanized steel railing made any electrical connection to what surely must be rebar embedded in the concrete, I deployed the 17 foot vertical whip with three radials just in case.

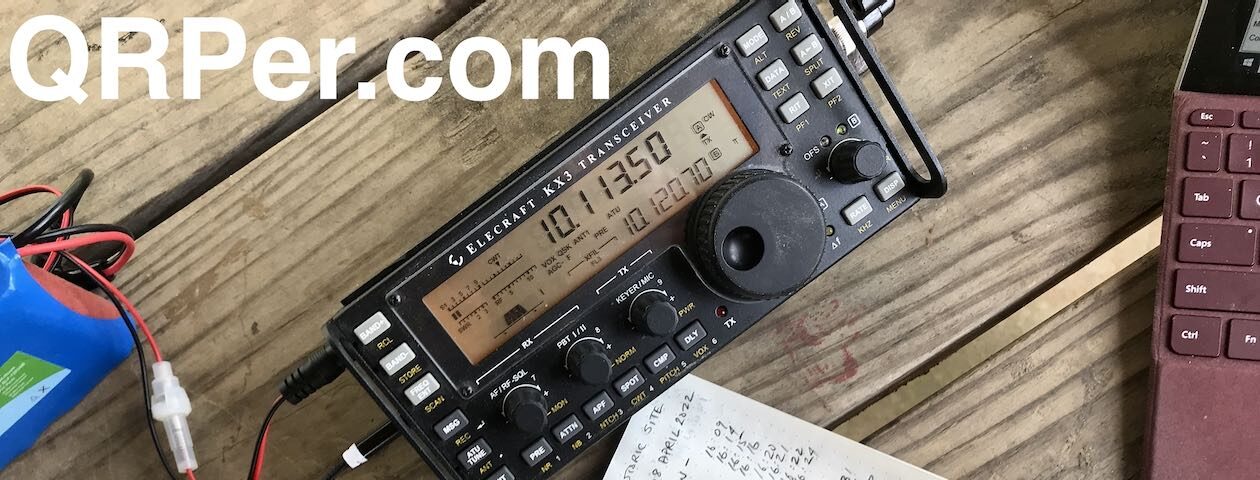
Whatever was serving as a counterpoise, it was doing a great job, providing an SWR reading of 1.0 to 1 on the Mountaintopper MTR-4B. This was probably the third activation on this Lithium-Ion battery pack, so the power was down to 3.7 watts, still plenty for a CW activation with a resonant antenna.

The activation was scheduled ahead of time on the POTA web application so all I had to do was just start calling CQ POTA and let the RBN do the spotting. I soon heard from KG6HM from right across the Bay, followed by stations from Washington, Idaho, Utah, Arizona, and New Mexico.

I was starting to think it would be only western states calling in, but the band opened up a bit, bringing N3RT from Delaware. Now we had a proper coast-to-coast activation, and, I bagged a hard-to-get state needed for an informal CW “Worked-All-States” achievement.

By this time, the wind really started to pick up and with the sun so low in the western sky, it was becoming chilly. Satisfied with the 14 QSOs in the log, we packed up, made our way back down the pathway to the car, and then to a fancy coffee house in Sausalito for a nice warm cup.

Equipment Used

73 de W6CSN

Field Report with N5FY: Checking out the new N6ARA MiniSWR (and a sweet 9V battery) at Don Carter State Park!

I am catching up with field reports and videos from last month and, I must admit, it’s fun reliving these activations.

October was such a busy month, it’s all been a bit of a blur.

Because I have a second Thanksgiving meal to prepare this morning for my wife’s family, I need to keep this report short–which won’t be easy because there’s a lot to unpack here– so we’re going to attempt do another Postcard Field Report!

Postcard Report from Don Carter State Park (K-2171)

I mentioned in a previous post that I participated in the W4 SOTA campout last month. .

Part of the fun  of the campout was hanging with my good friend Joshua (N5FY) whom many of you know from his amazing Tufteln antennas and accessories.

On the morning of Friday, October 13, 2023, Joshua and I activated Rocky Mountain (W4G/NG-011), a beautiful 10 point summit along the Appalachian Trail.

That afternoon, we met with Joshua’s family briefly, then planned to head to a pub in Clayton, Georgia, where a number of the W4 SOTA campers were gathering.

Joshua determined we had just enough time to pop by Don Carter State Park (K-2171) for a quick POTA activation and still make it to Clayton in time. As a bonus, Don Carter SP has a number of covered picnic shelters, making set up in the dry quite easy (it was raining at the time).

For this activation, I used my Mountain Topper MTR-3B field kit that I had used during my SOTA activation on Rocky Mountain. In fact, it was the only radio kit I brought with me for activations that day.

Joshua lent me his Tufteln 40/20 meter linked EFHW antenna (we only used the 20 meter portion of it) and I also got to use a few other accessories that were still very new to me:

N6ARA MiniSWR Meter

One was my friend Ara’s latest creation, the MiniSWR meter. Ara (N6ARA) kindly sent me this production unit to test (at no cost to me) earlier in October.

I was very excited about this particular product because a few of my QRP radios lack a built-in SWR meter (my MTR-3B, MTR-5B, TR-35, and SW-3B to name a few). Ara’s MiniSWR meter is so tiny, it’s easy to carry even in my MTR-3B SOTA kit that’s built into a Pelican 1060 waterproof case. (If you’d like more details, I’ll be adding this MTR-3B kit to the Radio Field Kit Gallery soon).

The MiniSWR in action earlier that day on Rocky Mountain.

As with all of Ara’s products, the MiniSWR works brilliantly, is very affordable, and is available as a kit or pre-assembled. Check it out at N6ARA.com!

Rechargeable 9V Batteries

Another new-to-me product was this USB-C rechargeable 9V battery originally recommended by Adam (K6ARK).

Being honest here: this battery sort of blows my mind!

When paired with super efficient QRP radios like my MTR-3B (which uses something like 18mA in receive), one charge will take me through as many as two or three full SOTA/POTA activations!

These batteries are insanely affordable too. You can buy two for $15 and change at Amazon.

When I purchased these, I also bought two 3S packs in a Prime Day deal. These 9V batteries work so well, though, I’ve yet to add PowerPoles to the new 3S packs. I prefer the size and ease of use of these 9V cells.

Set up

Joshua helped me set up in short order. We deployed the 20M EFHW next to the picnic shelter and Joshua kindly lent me his OSMO 2 Action Camera and Anker SoundCore Mini speaker so I could make a video of this impromptu activation. Continue reading Field Report with N5FY: Checking out the new N6ARA MiniSWR (and a sweet 9V battery) at Don Carter State Park!

Field Radio Kit Gallery: IW2EPE Pairs the (tr)uSDX with QRPguys Antennas

Many thanks to Luca (IW2EPE) who shares the following article about his portable field radio kit which will be featured on our Field Kit Gallery page. If you would like to share your field kit with the QRPer community, read this post.


My (tr)uSDX Field Radio Kit

by Luca (IW2EPE)

My POTA kit is assembled around the (tr)uSDX radio. I am a hunter and I have only been a fox this last summer but with poor results. However, I would like to try again with this kit because I think it can do it.


The weight of the kit is approximately 1kg.

The kit consists of:

  • Radio (tr)uSDX cw ssb capable of working on 20/17/15/12/10 m. I only use the 20m with 3w of power.
  • EFHW mini tuner antenna by QRPguys. This is a nice simple and efficient product.
  • QRPguys dummy load.
    3-cell 2200 maH lipo battery, type used in model aircraft.
  • 5v power bank to test the connection in wspr.
  • Sony headphones.
  • Homemade condenser microphone.
  • Homemade RF choke.
  • Smarthpone with some apps like FT8CN and wspr.
  • About 15m of 4mm nylon rope.

Lastly I also added the home-made DS1 antenna from QRPguys. This is my version and is not an original kit.

Field Radio Kit Gallery: M0KVI’s Mountain Topper MTR-3B SOTA Kit

Many thanks to Owen (M0KVI) who shares the following article about his portable field radio kit which will be featured on our Field Kit Gallery page. If you would like to share your field kit with the QRPer community, read this post


M0KVI’s Mountain Topper MTR-3B SOTA Kit

by Owen (M0KVI)

A little about me:

My name is Owen, I live in Sussex in England. I’m a keen hiker and experienced general outdoor type and have dreams of becoming a SOTA Mountain Goat. Unfortunately, I don’t live near any mountains.

There are a few local hills which I activate from time to time. I set out to learn CW around 1.5 years ago starting one December. I spent around one hour every day practicing. Around eight months later, I was activating summits at around 15wpm. I’m still not great at longer QSOs, so some way to go, but pushing on with trying to get head copy there.

My method:

Having a young family I need to be strategic about trips. My nearest mountainous region is Wales. As I drive for work, I’m not afraid of driving the distance. Many in this country rarely leave their county!

I converted my work vehicle into a micro-camper type affair. Think flat space to sleep rather than any camp comforts. A simple camp stove to cook on and that’s it.

I plan trips lasting 48hrs at a time; drive to the area on day one, activate 1 or 2 summits, sleep stealthily close to target summits by roadside or in car parks, then typically get up at around 4:00 am to hike in the dark to activate at sunrise. I typically activate 1 or 2 more summits before driving the 4-7 hours home. Logistically, it’s fairly intense and I’m not sure it’s the calmest method. I think is a fairly unique if not un-hinged method of getting my SOTA fix.

I use Winlink to check in with Family and keep them up to date with any changes to plans which are communicated before I leave.

Radio is an MTR-3B kindly offered for private sale from Colin, (M1BUU). I’ve had the rig for a year or so. Nothing ground-breaking here; all of the kit is largely mirroring what a lot of others are doing for years now.  I’m excellent at shortcutting by learning from others.

Having been licenced for a while, I already knew what an ultralight setup would look like. I could still slim this down by a few grams but really carrying water and food now is more of a burden. I’m not fully convinced the MTR-3B is the radio for all occasions as there are a number of connections, cables and fuss. (I think I have wanted the new Elecraft KH1 offering since before it was conceived).

As can be seen from one of my pics, I use a small micro sun-bathers tent for protecting gear in cloud/rain/wind. This allows me to use HAMRS to log even when its very cold.

List of contents:

  • Mountain Topper MTR-3B (early model lighter blue colour with x – screw not hex)
  • Homemade 3ah 18650 3s battery (BMS controlled with fused lead). Made from recovered cells.
  • Palm Mini key (with home made rugged braided cable).
  • Mini SWR from N6ARA
  • LowePro Viewpoint CS40 case

Antenna system pictured is my regular. I have tried other setups recently but this is the stalwart EFHW composed of a SOTABeams Wire winder 20m lightweight wire and a 64:1 matching unit.

The matching unit is a 64:1 obtained from Colin Summers (MM0OPX) following his youtube series on research into the optimum performing toroid material/core. He offered units for sale at cost. It is very small and light and I like to buy stuff off makers what can I say. Guilty of spending money rather than making.

I use a 3m feed line–never bother to ensure the ends of antenna are over 1m off ground. Do not use a counterpoise and only use a single guy rope on my fibreglass pole, (SOTAbeams Tactical Mini). This way I have minimum gear and maximum speed to set up. On my most recent trip, my antenna fell down twice and I didn’t notice but continued to make contacts. Bit of a train wreck.

Set up and pack down times in the AZ (Activation Zone) is typically 10-15 minutes depending on terrain and conditions. In a sunny field, I could pitch in 5 minutes.

73 Owen

M0KVI

Readers: Check out Owen’s social feeds on X: @M0KVI and Instagram: @M0KVI.

Lunch break? Time for a rapid SOTA/POTA activation!

by Vince (VE6LK)

As always there are lots of links within the article. Click one! Click them all! Learn all the things! ? Also, it’s with thanks to the management at QRPer.com who give me this outlet for creative writing.

While on business travel in Northern Alberta recently, I found myself with a slow workday and a few hours owed from lunches not taken that week. A quick plan was hatched and out the door I went after ensuring that all at work was going to be fine without me for 2-3 hours. But before I get to that story…

While travelling to and from this site, I’ve made it a mission to activate as many ATNO [All-Time-New-Ones, ie. never-activated parks] as possible within POTA. I plan these 500km trips with some small side journeys to these parks or natural areas and to break up the otherwise long drive along the foothills of the Canadian Rockies up and down the Highway 22 (aka. Cowboy Trail) corridor. It’s truly a lovely drive and I don’t mind it in the least.

Now back to my late-day lunch break adventure…

With the nearest park to me (VE-3162, Whitecourt Mountain) already activated but only on phone, I figured I’d activate it on CW and do more QSOs than the other activator just for good measure. I can’t believe that a park this close to a townsite had only one activation before I got there to activate it.

If that isn’t enough, it’s also a SOTA entity [VE6/ST-102] with a broad and not-steep slope making the activation zone quite wide. On top of that I can do this two-fer as a drive-up! This worked in my favour as I parked my truck within the activation zone! This SOTA entity had been done a couple of times already so I knew that electrical noise would be my nemesis.

For those of you that may have disremembered, I’m in shape -round- and that shape doesn’t easily climb summits, so a drive-up is totally my kind of summit. But I had to get a move on as there were only two hours left on the Zulu timeclock.  At my hotel room I had more gear, but being nervous nelly that I am at times, I do not leave my KX3 in the room unless there’s a safe. Given that the KX3 gets lonely without companions, I ensure that it always has a battery, antenna and key along for the ride so they keep each other happy as can be 🙂 I had just enough of my portable kit with me to make this happen.

Continue reading Lunch break? Time for a rapid SOTA/POTA activation!

Field Radio Kit Gallery: N5FY’S Elecraft KX1 Minimal CW Kit

Many thanks to Joshua (N5FY) who shares the following article about his KX1 portable field radio kit which will be featured on our Field Kit Gallery page. If you would like to share your field kit with the QRPer community, read this post


N5FY’S Elecraft KX1 Minimal CW Kit

by Joshua (N5FY)

I started operating CW this past August and am having a blast! One great thing, or maybe its a bit of a problem for the budget, is that when you can work CW, there is a whole new world of HF radios to collect…I mean operate!

Not to mention the ability to pack out a small portable kit that can be thrown in a bag at the last minute when headed out the door. I have a few such kits but lacked a throw line for each. So, I picked up some more Arborist Throw Line from Atwood Rope Manufacture so I could finish out the first kit.

I just snagged a used, inoperable, KXPD1 paddle to complete my KX1 radio. I had to rebuild the jack on the key but did so in quick order and decided to make it out to my local park for a POTA activation. My plan was to finish up the kit with the throw line and then test out the new complete kit. Suffice to say, all went well!

N5FY Beautiful Morning View with the KX1

The KX1, now out of production, has been a pleasure to operate CW with. This unit has the internal ATU option, 6xAA battery pack, and I updated the internals to add 80 and 30m. So this rig will run 20/30/40/80m.

There are 2 message memories, built in keyer, and even includes RF, AF, and bandwidth knobs for quick adjustment while operating. I’m no experienced CW operator, but this rig is hard to beat in my opinion. Then again, my KH1 hasn’t show up yet!

N5FY KX1 Complete Compact Kit

The antenna of choice here is my Tufteln 2 Wire No Transformer with a 41ft radiator and 17ft counterpoise. The internal ATU makes working 20, 30, and 40m simple and with no coax needed. I would use a much longer wire if I needed to work 80m. This antenna packs away very nice and not needing the Coax is a space saver. I have one version or another of my QRP antennas in each of my radio kits! 

N5FY KX1 Complete Compact Kit Packed

Packing a kit with no room to spare is almost like playing Tetris. I have a good bit of gear from Go Ruck, its all fantastic. For this kit, the 3L would leave a bit more space for some additional gear. If you are looking for some pockets as well, I like the GR2 Field Pocket. For this KX1 though, with the cover installed, I happed to forgo the bit of extra protection for the lightweight small size.

N5FY KX1 Complete Compact Kit Closed Up with Pencil for Size Reference

Next Kit to finish up is the KX2 and TX-500. Both just lack the throw line.

Joshua N5FY, 72

Elecraft KH1: A Quickie Pedestrian Mobile POTA Activation!

Thursday, November 9, 2023 was a typical “dad taxi” day for me.

By the time I got around to doing a POTA activation that afternoon (which was always on the docket) it was within 30 minutes of when I needed to pick up my daughters.

Fortunately, the Blue Ridge Parkway Folk Art Center was en route to town.

I had planned that day to pair up my Elecraft KH1 with a random wire antenna, but looking at the time, I realized that was being a little ambitious–the few minutes to deploy and pack up the antenna would cut into the activation.

Instead (since I had just received my KH1 logging tray/cover) I decided to put it to the test with a real pedestrian mobile activation using the KH1, its  whip antenna, the logging sheets I printed/cut, and the teeny space pen included with the logging tray. In theory, this all looked doable, but in practice I didn’t know if I would actually be able to log on a tray attached to the side of my radio!

I had planned to use my Zoom H1n recorder for the KH1 audio since I would be making an activation video (see below), but frankly, I simply didn’t have time to set it up. I had to make do with the KH1 wee speaker.

Speaking of the speaker…

After playing with the speaker for a few weeks now, I’ve found that it sounds much better when I run the KH1 with a wide CW filter.

I’d always assumed being a low-fidelity 1″ speaker that narrow audio would be best, but I was wrong about that. In the field, I tinker with the filter and attenuation settings for the best audio balance.

Still, it’s not perfect (the speaker is really a “bonus” feature) but it’s much improved over my initial POTA activation.

Of course, I would have been using earphones had I not been recording the activation on camera. Via earphones, the KH1 audio is excellent!

Gear:

Note: All Amazon links are affiliate links that support QRPer.com at no cost to you.

On The Air

I hopped on the air, started calling CQ POTA, and the stations started rolling in. Continue reading Elecraft KH1: A Quickie Pedestrian Mobile POTA Activation!

Seal the Deal: Exploring the Best Watertight Cases for the Elecraft KH1

Well before I actually had a KH1 in hand, I noted the dimensions of the radio from the preliminary spec sheet and started exploring the world of compact, watertight cases.

Why a watertight case?

This Pelican 1060 case houses a complete Mountain Topper MTR-3B field kit including a throw line and throw weight.

I like to have a watertight case option for pretty much any QRP radio I take on SOTA (Summits On The Air) activations.

It’s reassuring to know that if I stumble and fall on my pack, the case will prevent me from crushing the radio. In addition, a good case keeps my radio dry if I get caught in heavy rains or (even more likely) slip on a rock and fall in a river/creek. In fact, many of these watertight cases will float with the KH1 inside so if it goes overboard while kayak mobile, it’ll be easy to retrieve. (For the record: I don’t want to test this theory.)

With one exception, all of the cases I explore here cost somewhere between $25-$40. I consider this cheap insurance for a $500-1100 radio.

My requirements

I searched a few manufacturer’s websites and tried to find interior dimensions that would accommodate the KH1 and all protrusions: 1.4”H x 2.4”W x 5.6”L (3.5×6.1x14cm).

I primarily searched two watertight case manufactures: Pelican and Nanuk. I trust products from both of these companies and both offer compact watertight cases. There are more manufacturers out there, but but both of these companies offer quality products. Pelican cases are even made here in the USA. Many Nanuk models are made in Canada, but not their Nano series included here.

In the end, I was searching for two case sizes:

  1. A compact case to only hold the KH1 “Edgewood” package: the KH1 with paddle attached, Cover/Logging Tray, Whip Antenna, and 13′ Counterpoise. There also needed to be enough room for a pair of earphones.
  2. A slightly larger case that would accommodate the KH1 “Edgewood” package along with earphones, a throw line, throw weight (or rock sack), and a simple random wire antenna.

The idea with the second, slightly larger, case is that it would give me the option to use a wire antenna during an activation and would be fully self-contained (meaning, everything needed for the activation included).

The contenders

I took a total of eight cases to a local park and spread them out on a picnic table for this test. This made the process of comparing the cases quite easy. I actually made a video of this whole process–you’ll find the video further below in this post.

Here are the cases I tested in the order you find them in the video (any Amazon links here are affiliate and support QRPer.com):

Hint: many of these cases are available in multiple colors–prices can vary greatly based on the color. A red case might cost as must as 30% less than a black case, for example.  Always check the pricing of color options, but make sure you don’t accidentally select a different size case in the process (this is easy to do).

Again, you’ll see a lot of detail in the video below, but let’s look at each of these cases with my notes: Continue reading Seal the Deal: Exploring the Best Watertight Cases for the Elecraft KH1

Field Radio Kit Gallery: K8ZT’s Elecraft KX3 Rapid Deployment Kit

Many thanks to Anthony (K8ZT) who shares the following article about his portable field radio kit which will be featured on our Field Kit Gallery page. If you would like to share your field kit with the QRPer community, read this post


K8ZT Elecraft KX3 Rapid Deployment, Expedition Go-Box

I have been active in portable Field Operations, portable contest operations and POTA for many years. I also like always to have the option of both multiple modes (CW, SSB & DIGI) and multiple bands for my portable operations. I am not a SOTA operator, and although weight is still an issue, this is definitely not a minimalist setup. My preferred method for go-boxes is the rapid deployment model. In this model, almost all interconnections of elements in the kit are already made, and the opening of the case and attachment of the antenna get me on the air in seconds. This model is not designed for airplane baggage handling or other rough transportation but works well in a backpack or carry-on.

Here is a photo (above) of operating FD from Delaware

The design I have used can work with other radios with similar footprints, including Elecraft KX2, Icom 705, Xeigu 5105 or 6100, etc. You could also substitute other similar tackle or tool boxes. I like working with plastic cases because they are lightweight and easily modified. I have put together a slideshow on my go-box with instructions and suggestions at tiny.cc/rapidkx3.

I used the Plano 135402 4-BY™ 3500 Stowaway® Rack System tacklebox.

A very similar box is the Harbor Freight- STOREHOUSE Toolbox Organizer with 4 Drawers.

Securing the KX3 to the box was easily accomplished by substituting two longer nylon thumbscrews for the two shorter manufacturer-supplied ones. These screws extend through the case and screw into KX3. Nylon was chosen to allow easy customized lengths. The BNC antenna extends out of the case.

In addition to using the tackle box for my go-box, I also got the four insertable clear plastic containers. With the radio installed, I still have room for one container in its original position.

I can load a lot of extra supplies in these containers. You can even set up each of the four for different types of operations.

The top of the tackle box is storage space for my LiFEPO4 battery and other items. The contents can change depending on the planned operation. Here, you can see the Mic for phone operations and a DigiRig Mobile External Sound Card Interface for FT8. If doing a contest-type operation, I usually use a headset with a mic, and you can see the push-to-talk foot switch in the box ( a source of cheap light foot switches is eBay Tattooing foot switches).

I have also run cabling from the radio’s connections (Mic, Key, Headphone & Serial port) into the top area to make connections easier. To facilitate multiple connections, each uses a 3.5 mm plug 90° (connection to radio) and a splitter with two 3.5mm sockets to connect accessories. I used a label maker to label each connector’s socket ends.

Note the quick reference diagram of the KX3 mounted in the lid of the go-box. This is something I do with all of the go-boxes I build. I use tiny bungee cords on larger go boxes to securely store manuals in lid space.

I like computer logging, especially for more extended contests or Field Day operations. I use the computer to interface with the radio for this operation. This also provides me with a computer to do digital modes. I have found laptops that work with 12-volt DC to extend the usable time when AC is unavailable. I have also found PC Power Banks with 20 V DC output that can run most laptops for 24+ hours in conjunction with the laptop’s internal battery. One accessory I find essential is a simple USB storage drive with the following:

  • Installation file for any computer programs I will be using (Logging software, WSJT-X, JT-Alert, etc.)
  • Elecraft KX3 Control Utility (to program macros, make setting changes, etc.)
  • Rig computer software Drivers for all of my radios
  • Firmware for all of my radios (just in case)
  • PDFs of all user manuals for any equipment I am using. Although paper manuals do not require a computer, they are heavy, easily damaged and especially not computer-searchable for the exact item I need to diagnose my issue.

The other thing the USB drive can facilitate is the emergency use of a loaner computer, which would have none of the software I would need installed.

I use a variety of antennas with my kit, but my default is a random-length Endfed connected directly to KX3’s antenna jack with a BNC splitter. My support is a 7-meter fiberglass collapsible fishing pole. Here is a table with alternative random antenna lengths to try- link#1 and  link #2

For additional information on this and other portable operations packing ideas, see my Portable Operations presentation slideshow tiny.cc/portop and video https://youtu.be/It3wlq7RoUo.

Equipment:

Jan’s Unun and Balun antenna PCBs

Over on Mastodon, Jan (DG1JAN) posted a few images of a PCB-based antenna project he made available on github. At my request, Jan kindly shared the following information so you can order your own PCBs with design files he has made available.

Jan writes:

Hello Thomas,

I mostly do portable operation (SOTA, COTA, WWFF,…) and I
like playing around with different antennas (EFHW, Linked Dipoles, OCFD…).

So I came up with a little PCB some time ago that you can use as an UnUn (1:49, 1:9) or BalUn (1:1, 1:4) in different configurations.

I’ve put this under CC License so everybody can reuse or modify the Design (PCB Files in Kicad-Format) or order PCB from any Manufacture (e.g. like JLCPCB) by using the Gerber-Zip-File in the repository.

Please have a look to the Project Page on github for details and source-files: https://github.com/DG1JAN/UniBalun

In addition I’ve done some variations of the PCB, e.g. as a
“UnUn only” variant:
https://github.com/DG1JAN/AntennaPlayground/tree/main/UnUn_BNC_1.2

Or a “micro” variant of a UnUn:
https://github.com/DG1JAN/AntennaPlayground/tree/main/microUnUn

There are some videos from (mostly) German OMs on YT about the build and usage.

vy 73 de Jan, DG1JAN

Thank you so much for sharing this, Jan! Readers, it’s pretty affordable to use a service like OshPark to order a few of these PCBs. Simply upload the provided Gerber files and they’ll make them for you.