Many thanks to Geoff (VK6HD) who writes with the following question:
Hi Thomas
Love your site, the HRWB podcast and your enthusiasm.
I recently won an IC-705 in a raffle – woohoo – which is a quantum leap from my first txcvr which was an Atlas 210x which first saw the light of day in the early 70s.
Anyway, as I come to grips with the complexities of the 705, I wondered if anyone had any ideas on a field radio kit based on it. I know it is an expensive radio, and one many people may not be keen on dragging through the outback, but who knows?
Keep up the great work
73
Geoff (VK6HD)
Thanks for your question, Geoff. And congratulations on winning the IC-705! WOO HOO indeed!
I thought I might post your question here on QRPer so folks might comment with IC-705 kit ideas. Oddly enough, at time of publishing this post, I have no examples in our Field Radio Kit Gallery!
I can fix this now, though, because I recall a few ‘705 field kits from our archives:
I’m sure there are more IC-705-based field kits in the archives--feel free to jog my memory, readers.
Out of all of the radios I own, the IC-705 is the only one that is primarily stored and transported in a larger watertight case–a Pelican 1400 to be exact, you can read about that here.
When I want to tuck the IC-705 in a backpack, for a little POTA/SOTA action, I protect it in a $18 Ape Case Camera insert (affliliate link). It’s not perfect, but fits it well. I know some others have used Maxpedition padded water bottle pouches as well. Perhaps someone can comment with size, etc?
A couple weeks ago, I posted a video where I compared the Elecraft KH1 and KX2;I mentioned that it was the most requested comparison I’d received after I started taking the Elecraft KH1 to the field.
The second most requested KH1 comparison focused on various Mountain Topper series models: the MTR-3B, MTR-4B and MTR-5B.
That’s what we’ll take a look at in the comparison video below!
Basic KH1 ($550)
So when folks have asked me how the KH1 compares with a Mountain Topper, I think of the basic KH1 ($550 US) package, not the ($1100 US) “Edgewood” package like I have.
Why?
Without the Edgewood package, the KH1 lacks the internal ATU, coils for the whip antenna, internal battery, internal battery charger, logging tray, whip antenna, counterpoise, case, and attachable paddles.
In short, the basic KH1 is a 5 band CW-only radio, much like Mountain Topper series radios–in fact, a lot like my 5 band Mountain Topper!
This is why, in my video below, I base the comparison on the basic KH1 package which includes the KH1, power cord, USB cable, and manual only.
Video
I should note that this video primarily focuses on making a purchase decision–it’s not a receiver comparison or in-depth reviews:
The video above contains a lot more detail, but at the end of the day, you can’t make a “bad” choice here. All of these are fantastic radios for someone who enjoys ultra-light operating.
The Elecraft KH1 is more a more feature-rich transceiver; it has adjustable filters, attenuation, CW encode/decode, mini pan/scan, general coverage, SWR/power meter, more message memories, internal logging options (soon), user upgradable firmware, an internal speaker, and much, much more. On top of that, the KH1 can be upgraded to become a complete shack-in-a-box radio with internal battery, charger, ATU, attachable whip antenna, and attachable paddles.
That said, even thought the Mountain Topper radios are spartan in terms of features compared with the Elecraft KH1, they get the job done effectively. Their feature set is laser-focused on providing a SOTA activator everything they need in order to complete an activation and not a lot else. They will also operate effectively on the smallest of batteries and consume a mere 20-17 mA in receive–proper battery misers! For more of my thoughts of the Mountain Topper, check out my MTR-4B review and my “Getting To Know You” report on the MTR-3B.
Again, you can’t go wrong with a Mountain Topper or a KH1: they’re both made by fantastic companies and have a loyal customer base for good reasons.
Price
The Elecraft KH1 base model (40, 30, 20, 17, and 15 Meters) is $550, the complete, fully-loaded, “Edgewood” package is $1,100. They are currently on backorder, but Elecraft does note that they intend to start shipping again mid-January 2024. Click here for the latest news about lead times.
The Mountain Topper MTR-4B V2.
The LnR Precision MTR-4B (80, 40, 30, and 20 Meters) is the latest Mountain Topper radio and the current model at time of publishing. You can purchase these new for $369 US. LnR Precision builds roughy 25 per month when they have the parts. You will need to follow LnR closely in order to be updated when a production run is shipping. Each time units are offered, they’re snatched up in a matter of hours. You can find used Mountain Toppers out there, but pricing tends to be within 10-20% of the new price.
Thank you
I hope you enjoyed this little comparison video and that it might help you make a purchase decision.
Of course, I’d also like to send a special thanks to those of you who have been supporting the site and channel through Patreon and the Coffee Fund. While certainly not a requirement as my content will always be free, I really appreciate the support.
As I mentioned before, the Patreon platform connected to Vimeo make it possible for me to share videos that are not only 100% ad-free, but also downloadable for offline viewing. The Vimeo account also serves as a third backup for my video files.
I’m very fortunate in that in the past few years I’ve acquired a number of QRP radios that I use in rotation when I do park and summit activations.
I’m often asked for advice on choosing radios, and as I’ve mentioned in the past, I feel like the decision is a very personal one–everything is based on an operator’s own particular preferences.
I’ve written formal reviews about most of the field radios in my collection. In those reviews, I try to take a wide angle view of a radio–to see how it might appeal to a number of types of operators. I highlight the pros and cons, but I don’t focus on my own particular take because, again, my style of operating might not match that of readers. I try to present the full picture as clearly as I can and let the reader decide.
The Getting To Know You series gives me an opportunity to highlight one radio at a time and showcase what I love about it and why it’s a part of my permanent radio collection. After we spend a bit of time talking about the radio, we’ll do a park or summit activation with it!
The Yaesu FT-817 and FT-818 Series
As I mention in my “Getting To Know You” video below, my very first dedicated QRP field radio was the original Yaesu FT-817 (non-ND version), so it has a special place in my heart.
At the time, I was living in the UK and travelling extensively throughout Europe with my UK call (M0CYI).
The FT-817 hit the market and it blew my mind. Up to that point, there were no general coverage QRP radios on the market that small, that comprehensive, and that even sported VHF/UHF multi-mode coverage. It even had a small internal battery pack! What?!
I was an early adopter of this radio and travelled with it extensively–indeed, in all of the years I lived in the UK and Europe, the FT-817 was my only amateur radio transceiver.
Fast-forward to 2023–some 23 years later–and I still have an 817. Actually, I have two 817ND’s and one 818ND (although, I plan to sell one of my 817NDs soon–I don’t need three!).
I find the 817/818 to be an incredibly robust and capable field radio. It’s also a brilliant value–few radios offer you the capabilities of the FT-817/818 for under $700.
My FT-817ND in an Armoloq TPA-817 Frame.
Yaesu discontinued the FT-818ND almost exactly one year ago. Retailers no longer have new stock, but there are loads of them on the used market. Keep in mind that the FT-817/818 was a cash cow for Yaesu for over two decades–the used price remains fair because there’s just so much supply out there. I routinely see 817ND and 818ND models selling for between $375-700 depending on how they’re configured and what’s included.
Even before I started taking my Elecraft KH1 to the field and generating reports and activation videos, I started receiving questions from readers and subscribers about how the KH1 might compare with other field-portable radios.
At least 70% of all of these questions asked specifically about the venerable Elecraft KX2.
Making a purchase decision
I’m not surprised so many are trying to make a purchase decision between the KH1 and KX2.
For one thing, the KH1 and KX2 represent some of the smallest, most compact and lightweight shack-in-a-box HF field radios on the market. We’ve a lot of QRP field radios to chose from these days, but few have options for both internal ATUs, internal batteries, and attachable paddles. Very few are as light and compact as either of these two radios.
Another reason for the comparison is that many are in the long queue to purchase a new Elecraft KX2. At time of posting this article, if you place an order for the KX2, you are going to wait a few months for delivery. The KH1 also has a lead time, but it’s likely shorter than that of the KX2 (check out the Elecraft Shipping Status page for more info).
Comparing models
While the KH1 and KX2 have a lot in common, they’re also quite different in many respects.
We radio ops like to compare features and specifications and Elecraft knew the KX2 and KH1 would be compared frequently, so they created a handy chart:
At the end of the day, though, I would argue that one’s enjoyment of a radio has more to do with how well it fits the operating style of the owner.
The KX2 is one of the best portable QRP field radios ever made, in my humble opinion. It’s a little high-performance machine that can handle any mode you care to use between 80-10 meters.
The KH1, on the other hand (pun intended), is designed to be an exceptional handheld radio for pedestrian mobile use and as a super lightweight, low-impact, field portable station. It’s essentially CW-only and operates on 5 bands (40-15 meters).
If you can be honest with yourself about how you plan to use the radio, it’ll help you make this purchase decision.
For example, if you never see yourself operating pedestrian mobile–you’re more of a sit down at a table sort of op–there’s a good argument to go for the KX2. If, however, you’re an avid SOTA/POTA portable activator who is primarily a CW op and you like the idea of a super quick deployment and handheld operating from anytime, anywhere, you should consider the KH1.
Video
To dig into this comparison a little deeper, I decided to make a video where I discuss the differences between the two radios and also speak to different styles of operating and which radio might suit that style best:
I would be curious which radio you prefer and why. Please consider commenting!
Thank you!
I hope you found this post and video useful.
As always, I’d also like to send a special thanks to those of you who have been supporting the site and channel through Patreon and the Coffee Fund. While certainly not a requirement as my content will always be free, I really appreciate the support.
Patreon supporters have access to 100% ad-free, and downloadable videos for off-line viewing via Vimeo. The Vimeo account also serves as a third backup for my video files. This is how your support truly helps this site and channel!
Many thanks to Jesse (VE6JTW) who shares the following article about his portable field radio kit which will be featured on our Field Kit Gallery page. If you would like to share your field kit with the QRPer community, read this post.
VE6JTW’s lightweight SOTA kit
Good Day Thomas & all readers of QRPer.com,
I was Licensed Late in 2020 and I have been actively doing Summits on the Air since early 2021 here in Alberta, Canada. I started out using a Xiegu G90 but realised very quickly that CW operations where much more efficient especially in VE6 land where our 4 point summits sometimes have 1000+ meters of gain (3280 feet), your knees get tired fast on those big descents with a pack that can easily start weighing in the 30lb range.
So I started teaching myself CW a few months into activating and also started looking into the QRP world. How awesome is it to make worldwide contacts with 5 watts and a wire from a mountain top, am I right?
VE6VID EFHW
I started activating CW that fall and I have gone through a couple of different radio setups. My first QRP rig was a QRP Labs QCX-mini for 20m which I did not use for long. Then my wife bought me a Venus SW-3B for Christmas and that little rig is excellent in my books; it is very basic but effective. I used that for quite a long time with a trapped EFHW Malen (VE6VID) made for me. It covers 40, 30 and 20m, along with the very last N0SA SOTA paddle ever made by Larry.
Venus SW-3B in a custom enclosure
Fast Forward to 2023 and My SOTA kit contains the LNR Precision MTR-4B. This radio is amazing as the receiver is strong and I can pull callsigns out from the noise very well. My antenna is still the trapped EFHW, and I now use the Bamakey TP-III paddle. For audio I have a set of JBL headphones for when it is super windy out and I also use an Amazon speaker as seen in the photo. Everything that fits in the bag weighs just 2 pounds and 4 ounces. The bag that holds all the gear is from Colonel Mustard.ca.
The whole kit in use on a summit
My mast is a fiberglass telescoping fishing pole from Amazon with a fishing eyelet at the peak to run the wire through. I lashed some line to the base of the mast with three loops then epoxied them to the fiberglas so they won’t move when guying the mast.
I carry two 1100 MAH 3s 11.1v LIPO batteries and get about 2 really good 30 min activations per battery, they are both from Amazon.
Many thanks to Scott (K4VOR) who shares the following article about his portable field radio kit which will be featured on our Field Kit Gallery page. If you would like to share your field kit with the QRPer community, check out this post.
My KX1 Go Box
by Scott (K4VOR)
I’ve been a ham since college but was out of the hobby for over 20 years, that is until 2020 and COVID. Suddenly I had a lot of free time (like all of us) being stuck at home and somehow the YouTube/Google machine took me down the rabbit hole that is CW.
I got my amateur radio license just after the CW requirement was lifted, so I hardly knew dit from dah. Granted, as an aviator, I had some experience “copying” morse code when tuning navaids such as VORs & DMEs. A whopping 3 letters sent at a blistering 7 wpm! But other than that, I was as green as it gets. To make a long (3+ year) story short, I dove head-long into that rabbit hole and today I am sending around 25wpm and can head-copy around 20wpm, something I once thought impossible. Anyway, that’s my story, now on to the field kit!
Over the years I acquired several of the more popular QRP radios, such as an IC-705, QCX mini, (tr)uSDX, and the AMAZING Elecraft KX2.
I knew about the KX1 but I never gave it a second thought. I mean, it’s just a piddly little 3W CW only kit-built rig, right? Well, then one day I stumbled upon one of Thomas K4SWL’s activation videos in which he was using his KX1 – Ruby. There was something about the simplicity of it all. A unique specimen of simplicity and elegance – potentiometers for AF gain, RF gain, and filter width, three momentary push buttons and a VFO. Heck, the thing barely has a display – only a 3-digit 7 segment! That basic “stick and rudder” aspect had me intrigued, but the hook for me was the sound!
Thomas describes it as an analog sound, something you might get from an old tube radio. It’s a buttery-smooth, warm resonance – something that is rare these days with modern SDRs and DSPs.
After hearing that sound, the KX1 became my unicorn radio. After over a year of searching, I finally found mine – a meticulously built 3-bander (40/30/20) with the internal ATU. I am happy to share my go-kit built for this rig, some of which was inspired by “Ruby” herself.
The kit contains everything I need to get on the air, all in one Pelican 1060 case.
I will start with the antenna. Nothing fancy. Just a BNC binding post adapter coupled with a 27’ radiator and a 16’ counterpoise. It tunes up nicely using the KX1 internal tuner. 1.0 on 20 and 30 meters and 1.4 or better on 40 meters. The antenna winder is a 3D printer one I designed to easily fit in the Pelican 1060.
The key is a Palm Radio Pico Paddle (no longer in production), although a K6ARK tiny paddle will rotate in and out from time to time. One day I would like to find a KXPD1 which sadly was not included with my KX1 when I bought it.
For antenna deployment, I have 65’ of “throw line”, a.k.a. masonry/construction twine, and a rip-stop nylon draw-string pouch that I to use as a throw weight by tossing a couple of rocks inside. The throwline stows away inside the nylon pouch along with a dollar store set of earbuds.
Photos: In the field
And that’s it! This has become my go-to kit that I grab whenever I think I might have the chance to play radio when I am out and about. Thanks for reading and I hope to see you on the air!
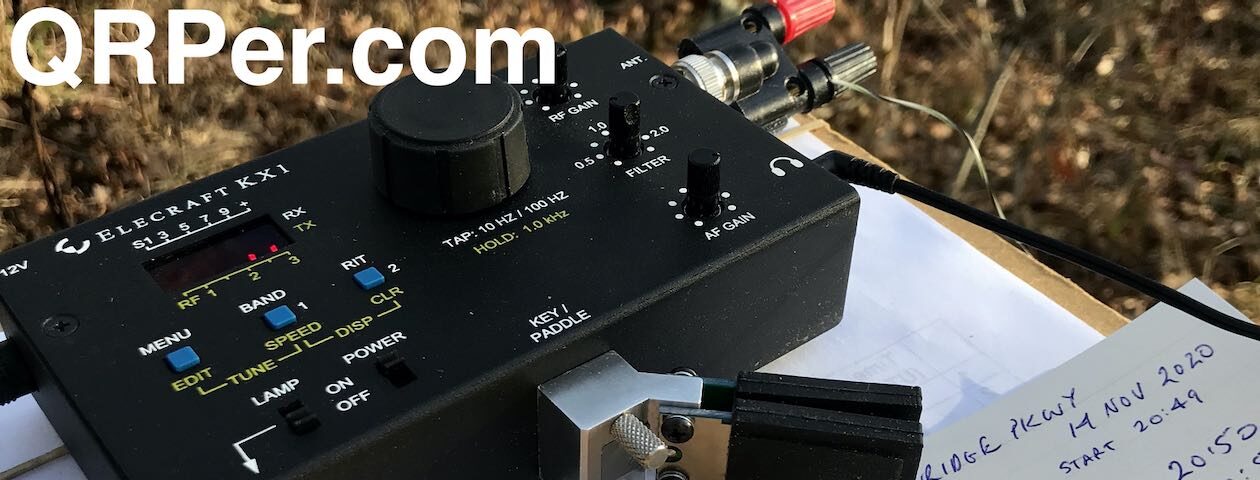
On Friday, November 3, 2023, I had planned to activate Mount Mitchell–the highest summit in eastern North America. I need to activate Mitchell soon because I’ve yet to activate it for SOTA in 2023 and when winter weather sets in (quite early at that altitude) the park is inaccessible.
Unfortunately, last week, the National Park Service closed an 8 mile portion of the Blue Ridge Parkway due to (no kidding) park visitors feeding and trying to hold bears at the Lane Pinnacle Overlook.
I won’t get on my soapbox about how people are so out of touch with nature that they feel human interaction with bears is a good thing. It breaks my heart because as we natives of WNC say, “a fed bear is a dead bear.” Bears that become comfortable with humans become (at best) a nuisance and (at worst) aggressive. This is bad for people and it’s bad for our bears who are otherwise shy and avoid humans.
Okay, I said I wouldn’t soapbox about this…
That 8 mile section being closed meant that what would have been a 50 minute drive to the summit of Mitchell turned into a 90 minute drive. Round trip, I simply couldn’t fit that in my day, so I made alternate plans.
Another summit on my list to activate before year’s end was Richland Balsam.
Richland Balsam is actually the highest summit on the Blue Ridge Parkway and is, in fact, at one of my favorite points along the parkway.
That Friday morning, I dropped my daughters off at their classes and drove an hour or so to the Haywood-Jackson Overlook.
In the valley, as I started my drive to the parkway, past the Cradle of Forestry, it was 30F/-1C. I was concerned that on the summit–nearly 4,000′ higher in elevation–that the temp would be closer to 20F. Fortunately for me, as I gained elevation, the temperature climbed too. We were having inversion that day so the higher altitudes were actually warmer than lower altitudes. This is not uncommon in the fall and was very welcome that particular Friday morning!
Richland Balsam (W4C/WM-003)
Only three weeks earlier, there would have been no free parking spots at the Haywood-Jackson Overlook overlook–it would have been packed.
Fortunately for me, all of the leaf-lookers had gone and I literally had the place to myself. What a luxury!
And the temperature? A balmy 43F/6C.
The hike to Richland Balsam is one of the easiest along the parkway.
At the north side of the parking area, you’ll see a trailhead for the Richland Balsam Nature Loop Trail.
I wish my iPhone camera could haver truly captured how the moon looked in the sky.
The trail isn’t long; I believe the entire loop is just shy of 1.5 miles.
Although I didn’t set out to do this, I ended up making a video of the entire loop trail hike along with the activation (of course, you can skip over those parts in my activation video below).
Sadly, one thing you won’t be able to enjoy in my video? The smell. The air is filled with the fragrance of balsam trees along the entire trail–it’s just amazing!
The summit of Richland Balsam is at 6,410 feet ASL (1,954 meters).
The summit is covered in trees which is brilliant for SOTA activators. Another luxury is that there are two benches within the activation zone. I did pack my Helinox Zero chair as a backup, but didn’t need it.
Photo from morning SOTA activation on Richland Balsam.
Yesterday morning, I took my Elecraft KH1 to the summit of Richland Balsam and performed a SOTA activation using only the KH1’s whip antenna on 20 meters (I ran out of time to hit 17 and 15M).
It was insane fun. Without really intending to, I actually filmed the entire hike to the summit, entire activation, and the hike back to the car. I’m not sure I’ve ever done that before. I plan to post the video by Monday (Nov 6) if at all possible (again, trying to push my KH1 videos to the front of the line for a little while).
Parking Lot Pedestrian Mobile
After the SOTA activation, I drove back to town to pick my daughters up at their acting class. I arrived about 20 minutes before the class ended and thought, “why not pull out the KH1 and see if I can hunt some POTA activators–?”
I opened the trunk of the car, grabbed the KH1 from my SOTA pack and then decided to even film this short, impromptu hunting session.
As you’ll see in the video below, it took no time at all to deploy the KH1, hop on the air and work a couple of stations.
I could have also chased some SOTA activators, some DX, or just looked for a random ragchew with someone calling CQ.
I like hunting/chasing POTA and SOTA activators, though, because the time commitment is manageable. For example, by the time I ended this video, my daughters and one of their friends were already hopping in the car to hit the road. I didn’t have to apologize to anyone for ending a QSO early. 🙂
November is KH1 month
I decided that I’m only going to use the KH1 both in the field and in the shack during the month of November. The only exceptions will be other radios I need to test or if I need to make contacts outside of the 40-15 meter KH1 window.
One of the big reasons for this level of commitment is that I am in the testing group of the KH1. This is how we flesh-out any minor issues that may have gone unnoticed.
Another reason is I do plan to post a comprehensive review of the KH1 eventually and I only feel comfortable doing this after I’ve spent dozens of hours with a radio.
If I’m being honest, another reason is that I absolutely love this anytime, anywhere radio. It’s so insanely portable, I take it with me everywhere. The KH1 and I have been inseparable since last Monday when I took delivery. And, yes, I’m still contemplating what her name will be.
Yesterday, I posted some initial notes about the Elecraft KH1 and mentioned that I hoped to perform a POTA activation later in the day.
I’m pleased to report that I was able to fit in that activation!
I’m pushing this report and video to the front of the line because so many readers are eager to see how the KH1 performs during a field activation. Instead of focusing on the park, in this field report we’ll be taking a closer look at the KH1 and my initial impressions after performing a pedestrian mobile POTA activation with it.
Packing the KH1
I had a very hectic schedule yesterday and was on the road in/around Asheville from 8:00AM to 2:00PM before an opportunity opened to fit in an activation.
After a quick trip back to the QTH for lunch, I packed the Elecraft KH1 field kit in my EDC pack (a travel laptop bag).
Herein lies my first impression of the KH1: even though I knew I had packed the entire kit, I felt like I must have been leaving something behind.
Sounds funny, but even though I pride myself on making fully self-contained field radio kits, I felt like there must have be something else I needed. The KH1 field kit just seemed too small, too lightweight, and too compact to have included everything I needed for an activation.
Intellectually, I knew that it included everything needed, but I still did a mental inventory:
Radio? Check.
Antenna? Check.
ATU? Check.
Paddles? Check.
Battery? Check.
Counterpoise? Check.
Log book and pencil? Check.
Hard to believe, but it was all there.
Trust me: the first time you take your KH1 to the field, I bet you’ll feel the same way I did.
Blue Ridge Parkway (K-3378)
Because I was so short on time, I decided to activate the Blue Ridge Parkway which is the most convenient POTA entity when I travel into Asheville from Swannanoa.
It was cold and blustery afternoon the afternoon of November 1, 2023. At my QTH, I checked the temperature and it was about 34F. I knew it would be a bit warmer in town which is a good 1,000 feet lower in elevation, but I still grabbed my gloves on the way out the door. Glad I did!
As I mention in the activation video below, I wasn’t exactly on my “A Game.” I had received a couple of vaccines the previous day and my body was a bit achy as if I was starting to get the flu. But, of course, I wasn’t. Still… I didn’t feel 100%.
I arrived on site and set up couldn’t have been easier:
Open the KH1 pack
Remove the KH1
Attach the counterpoise and string out on ground
Remove whip from clips and attach to top of KH1
Extend whip
Turn on radio
Find a clear frequency
Hit the ATU button for a 1:1 match!
We’re talking a 30 second process even for someone who moves slowly.
Important notes about my KH1
Keep in mind the following notes that are relevant at time of posting this field report (November 2, 2023):
I am waiting on a firmware update to add:
CW Message Memories
CW Decoding
Internal Logging
I purchased the full “Edgewood” package but I don’t yet have my logging tray/cover yet. Elecraft plans to ship this within the next few days.
My KH1 is a very early serial number because I’m in the volunteer testing group.
The KH1 Speaker
The KH1 internal speaker is located on the bottom of the radio between the AF Gain and Encoder knobs.
I consider the Elecraft KH1 speaker to be a “bonus” feature. The speaker is small (1.1 x 0.65”) and limited in fidelity.
QRP radios, product announcements, reviews, news and more. Low power amateur radio fun!
Please support QRPer by adding us to your whitelist in your ad blocker. Ads are what helps us stay online. All of our ads are ham radio related--no junk, we promise! Thank you!

 Many thanks to Geoff (VK6HD) who writes with the following question:


